my 80 series head gasket saga

cruisertoy

Explorer
So after my 93 went 280k+ miles before i sold it without any head gasket issues, my 97 developed the early signs of a #6 gasket leak two weeks ago. Basically running like crap for the first few minutes each time I started it. There was no noticeable white smoke or water in the oil.... I pulled the #6 plug and stuck my camera snake down the whole to find Lake Powell on the piston. You can see the water ripple when I plung the "QTIP" up and down in the cylinder.

[ame="http://www.youtube.com/watch?v=vFVXpIh2QSg&feature=player_embedded"]YouTube - DSC 5073[/ame]

I've order my parts from Menlove Toyota, our local club sponsoring dealership, and Friday through Saturday I was able to tear everything apart and get it all cleaned up. Here's a few fun photos.

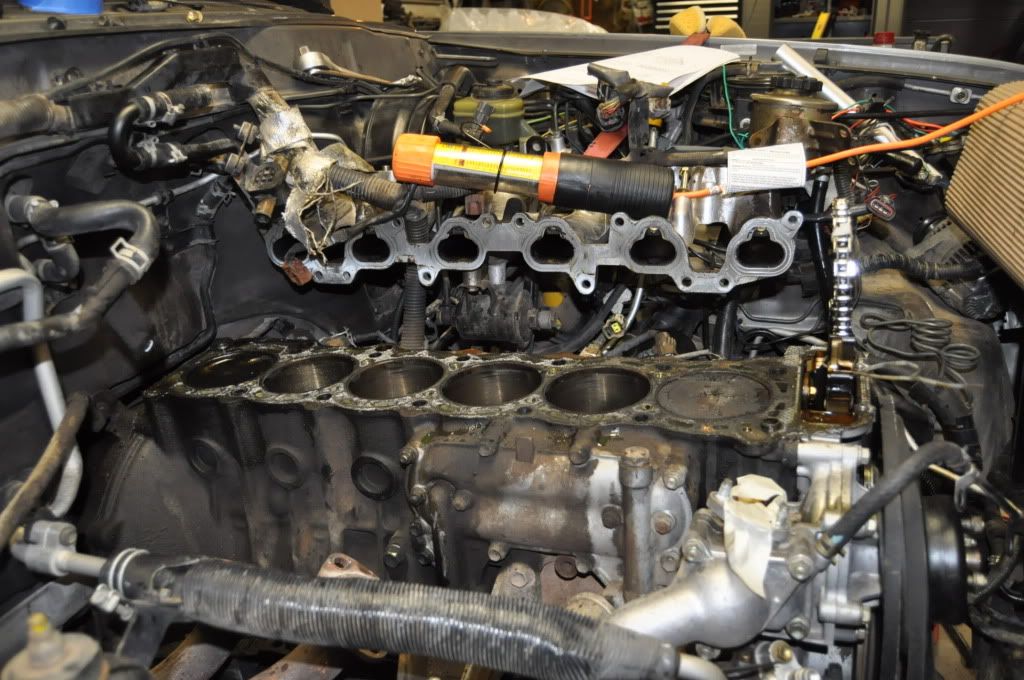
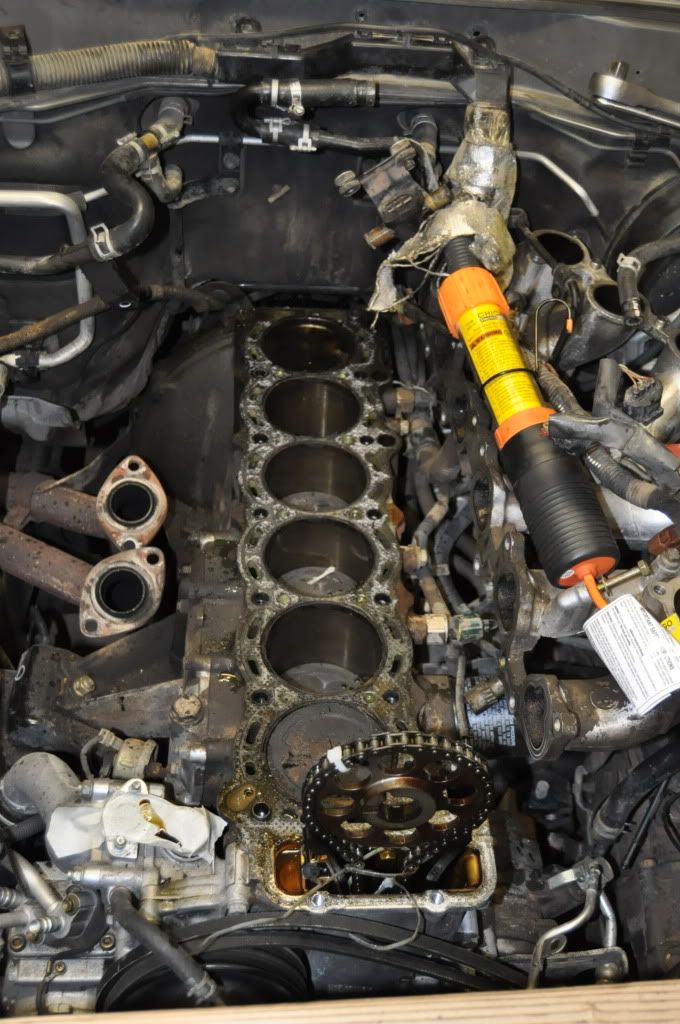
Heres the Engine compartment sans the head.
DSC_5128.jpg

DSC_5129.jpg


The head and gasket on the floor.
DSC_5130.jpg


Why is the oil stain so much darker in the timing chain area of the head?

DSC_5131.jpg


You can see the area where they gasket was mis shappened. Looks like I was blowing coolant in there.

DSC_5132.jpg


I will drop the head off at the machine shop and have it cleaned and surfaced. I am also going to drop the injectors off if I can find a place here in Salt Lake City. I figure I have 190k on the cruiser and they probably need a little tune up. I haven't decided to do the timing chain yet. It looks good. I'm basically replacing every coolant hose and Vac line. I had a couple hoses break in half when removing them. The valve cover gasket had turned to stone. It took me 20 minutes to remove it from the cover, 1/4" chunk at a time. I've got brushes for the Altenator and a new front main seal. Anything else I should look at while I'm in there?
 

Hedge

Adventurer
Wrap the main wiring harness with a couple layers of heat-reflecting tape where it passes by the EGR pipe.
Replace the fuel filter while it's easily accessible.
 

MoGas

Central Scrutinizer
Pull your oil cooler off and clean it while it is easy to get to. They are usually quite sludged up by now.

How does the cross hatching in the cylinders look?

Dave
 

cruisertoy

Explorer
I'll pull the cooler off and clean it, thanks. The cylinder walls look pretty good. I think she's wearing fine for the miles.

Definitely planning on some extra heat tape around that harness. I actually was thinking that melted wires were my initial problem, but hey looked good.
 

MoGas

Central Scrutinizer
I'll pull the cooler off and clean it, thanks. The cylinder walls look pretty good. I think she's wearing fine for the miles.

Definitely planning on some extra heat tape around that harness. I actually was thinking that melted wires were my initial problem, but hey looked good.

Take pics. I'm sure it's pretty gross.
 

Wheelingnoob

Adventurer
I'm at the same stage with my HG job, mine was leaking under the last two exhaust ports external. No sign of it leaking into the combustion chambers.

Glad I'm getting it out of the way now so I will not need to worry about again.

I ended up leaving my intake manifold in one piece to speed up the removal. Worked really well, save me a bunch of time.

My head also had the very dark burnt looking oil stain in the front area as well as the back (very poorly maintained truck before I got it). My distributor drive gear looked almost dry when I was taking mine apart.

p.s. mine is at 150k miles
 

cruisertoy

Explorer
Wheelingnoob, same deal on the distributor gear. Very dry. I seriously thought about trying to leave the intake in one piece, but after a couple hoses cracked I decided I was replacing everything anyway.

It's never the taking apart that makes me nervous. It's putting it back together right that always fouls me up. I picked up the parts today and dropped the head and injectors off. I should hopefully be back up and running Saturday when I have time to work on it again.

Then I really need to finish throwing the head on my 76 2f and put it back in my 40. It was pulled 5 years ago.
 

Wheelingnoob

Adventurer
Yeah when I saw how dry mine was I thought I had a real problem. When I removed the Distributor I found the bowl that the gear rides in full of oil so I do not know what the deal is there. Its not a part that gets any load or anything but it was still a concern. I have a few areas further back on the head that looked a bit dry too but the cams and more importantly the journals are clean and not damaged from any lack of oil.

My head looks much more burnt than yours tho from a lack of maintenance I'm sure. I plan on doing a full 3-4 oil flushes on it with ATF and seafoam or a dealer hot oil flush. I then plan on running a Shell Rotella T oil for its high diesel engine detergents.

I was concerned that I was in for a lot more than a head gasket job when I first saw it.

Sounds like we are doing the same, my injectors go out tomorrow for service and I hope to have the head back on Saturday and running Sunday (fingers crossed).

The only hose that broke on me were ones that are getting replaced anyways (PCV and the coolant hoses at the back).

Good Luck


Jeremy
 

Buckru

Observer
Go buy a bunch of vacum line and replace it while apart, especially the egr formed hoses and lines around the vsv. Also check the vsv to make sure it's good to go. It would also be the best time to replace the firewall heater hoses and do a phh ectomie.

Buck
 

coax

Adventurer
Anything else I should look at while I'm in there?

Its worth doing the oil cooler gasket while you are in there. Most of the coolers are filled with sludge by this age and its good to clean them out. And it should be a quick job while everything's apart. FWIW
 

Wheelingnoob

Adventurer
Its worth doing the oil cooler gasket while you are in there. Most of the coolers are filled with sludge by this age and its good to clean them out. And it should be a quick job while everything's apart. FWIW

hmm interesting suggestion, it is really easy to get to with the head off. I'm going to take mine off and see I think.
 

cruisertoy

Explorer
So I'm an idiot. I dropped the head off yesterday for a dipping and surface job. I also picked up the gasket kit from Menlove. I didn't even think about the gasket kit coming with new Valve seals! I should have dropped them off so they could be installed while they had the valves out for surfacing. I guess I will go rent a valve spring compressor.


DSC_5134-1.jpg


DSC_5133.jpg


Here the pile of Vac. hoses that I removed. I left the longer ones on and will replace them as I do the install.

DSC_5136.jpg


I replaced the brushes in the Alt. while I had it out. Not too much wear for the mileage.

DSC_5135.jpg
 

Wheelingnoob

Adventurer
So I'm an idiot. I dropped the head off yesterday for a dipping and surface job. I also picked up the gasket kit from Menlove. I didn't even think about the gasket kit coming with new Valve seals! I should have dropped them off so they could be installed while they had the valves out for surfacing. I guess I will go rent a valve spring compressor.


DSC_5134-1.jpg


DSC_5133.jpg


Here the pile of Vac. hoses that I removed. I left the longer ones on and will replace them as I do the install.

WOW your head looks like its new! I'm dropping mine off this afternoon with the new Valve seals :sombrero: How much did that run you? I was quoted $200 for tank, deck and Valve seal install.

Another good think to do when you have the head off is get the injectors cleaned. Not sure if you are already doing this or not though but worth it wile you are in there. Mine are getting cleaned now and should be ready Friday.
 

freshspecbluegt

Adventurer
Why not do a full valve job while the head is off? I would give them the cams as well and let them set the valve clearances if you do have a full valve job done. Working with the shims is tiresome and can get expensive. Just went through all this on a 3vz rebuild
 

Forum statistics

Threads
186,079
Messages
2,881,728
Members
225,874
Latest member
Mitch Bears
Top