You are using an out of date browser. It may not display this or other websites correctly.
You should upgrade or use an alternative browser.
You should upgrade or use an alternative browser.
My Boomerang 1st Gen 4runner build
- Thread starter dorton
- Start date
corax
Explorer
Take a look over at pirates, but there is someone who is now making a kit that lets you put a manual cable on the elocker setup and remove the weak link (the motor)
I almost got excited about a new cable option until I saw the price :Wow1:
Here's the pirate thread for anyone who's interested
dorton
#rockcreekoverland
I almost got excited about a new cable option until I saw the price :Wow1:
Here's the pirate thread for anyone who's interested
Ouch. That is as much as I have in the complete elocker. It looks very nice, but would be hard for me to bite at almost $600.
If the motor goes out you can pull the motor and move the actuator using a screw driver or somthing similar. I like the cable actuator but that is too much $$. As long as you keep everything sealed up and protected your motor should give you good service. The e-locker will really make a difference in where you can go...and hopefully get out of.
dorton
#rockcreekoverland
hahaha. Ouch.Yea I agree it needs to come down in price, but...consider the alterntive. If the motor goes out (and they do) your screwed, and a new motor ain't cheep at all.
Or...you could just wait for Trail Gear to copy it and produce it in china for cheep.did I go there?
Right now, I'm trying to decide if I want to wait until I can put an ARB in the front housing I have. I'd rather do it just once, instead of regretting it later.
If the motor goes out you can pull the motor and move the actuator using a screw driver or somthing similar. I like the cable actuator but that is too much $$. As long as you keep everything sealed up and protected your motor should give you good service. The e-locker will really make a difference in where you can go...and hopefully get out of.
Keep in mind you can't just move it with a screwdriver, it won't stay locked. It requires positive presure to stay in place.
Anywho, I run ARB up front and a truetrac out back so I am set already.
corax
Explorer
hahaha. Ouch.
Right now, I'm trying to decide if I want to wait until I can put an ARB in the front housing I have. I'd rather do it just once, instead of regretting it later.
If you're not dead set on the ARB, you might be able to find a 7.5" LSD relatively cheap in a salvage yard. Here's some info.
Keep in mind you can't just move it with a screwdriver, it won't stay locked. It requires positive presure to stay in place.
Anywho, I run ARB up front and a truetrac out back so I am set already.
You can move it with a screw driver and hold it in place and put the motor back in to hold it locked or unlocked. You pull the motor, pull the end cap of the actuator gear thingy, move the actuator, hold it in the locked position while you reinstal the motor to hold it in place, and reinstal the cap. This is far from ideal but it can be done. I actually never had any problem just moving the actuator with the motor removed but it wasnt under load. I assume that under load you are saying it will disengage, but with the motor put back in it should stay locked.
I found the e-locker to be very user friendly, it locked when needed and unlocked when desired. There are limitations to any locker but the e-locker is strong.
dorton
#rockcreekoverland
Thanks for the info on that. I have even been thinking about running a lunchbox locker up front. Then use that in conjunction with the twin stick t-case shifter I have been thinking about. With that, i could lock my hubs at trail arrival, and have use of 2wd high/low range, but only send power to the front when needed with the push of a lever.If you're not dead set on the ARB, you might be able to find a 7.5" LSD relatively cheap in a salvage yard. Here's some info.
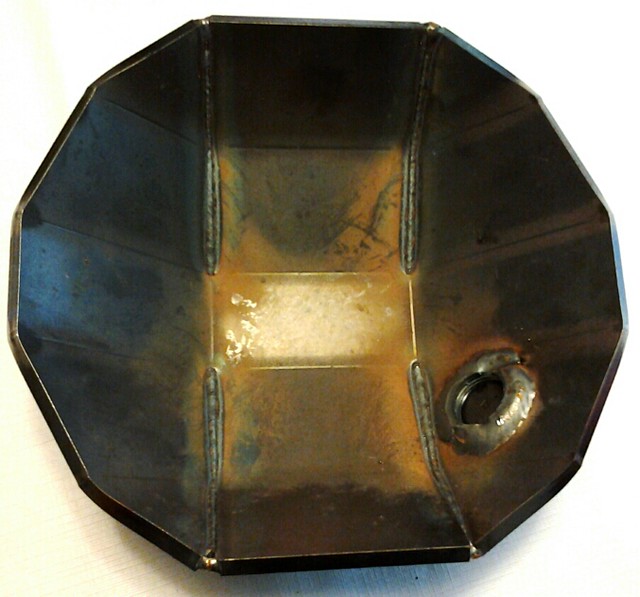
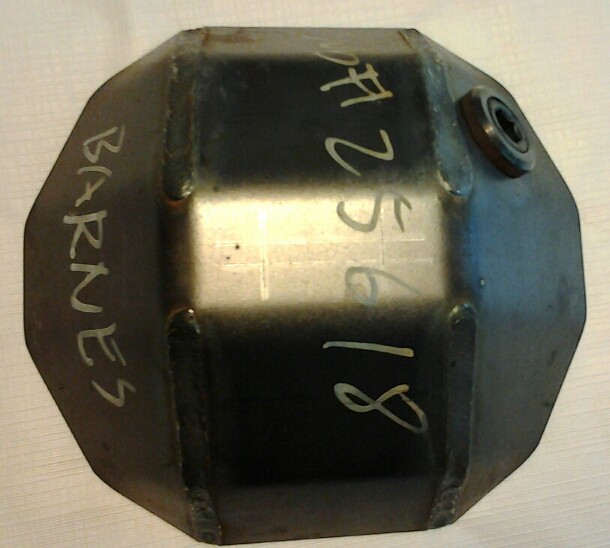
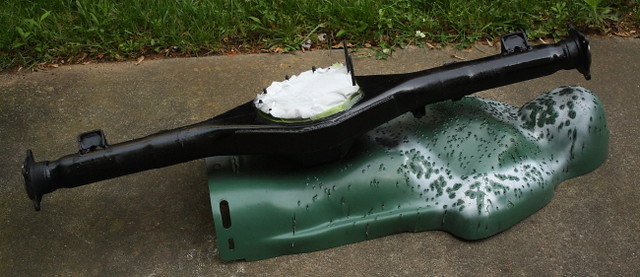
And......i decided to not run the trailgear diff armor i had. Instead, i purchased this cover that is welded on your housing, after using a cutoff wheel to remove the original cover. Hopefully have some completed pics of the rear axle by the end of next week with the elocker installed, the new rear cover put on, drain bolt/ring shaved, and hole filled, u-bolts flipped, and shocks relocated.
Here is the barnes 4wd cover for the rear housing
Last edited:
dorton
#rockcreekoverland
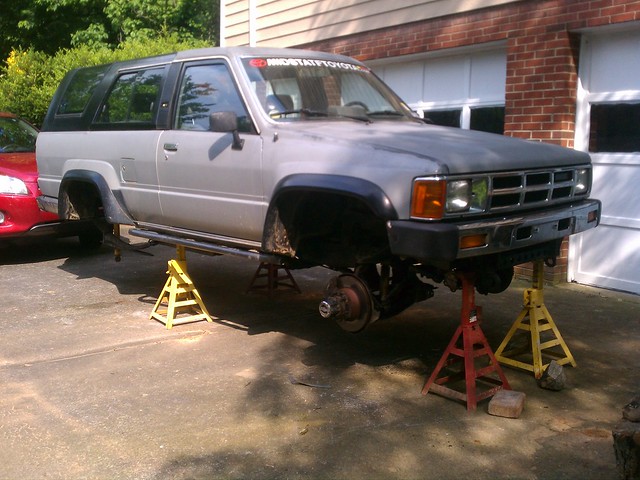
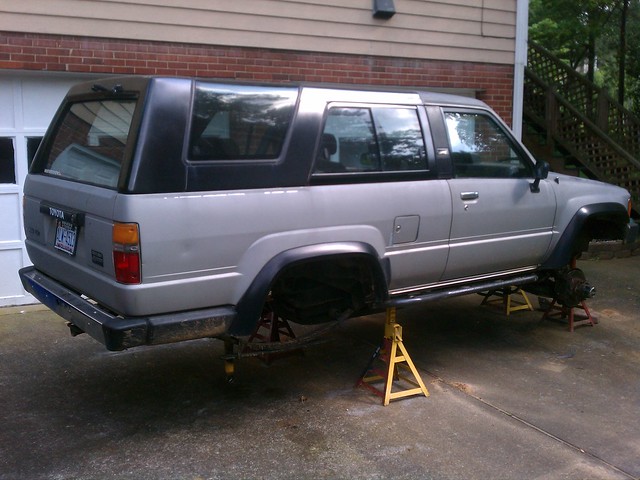
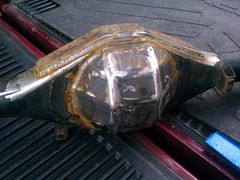
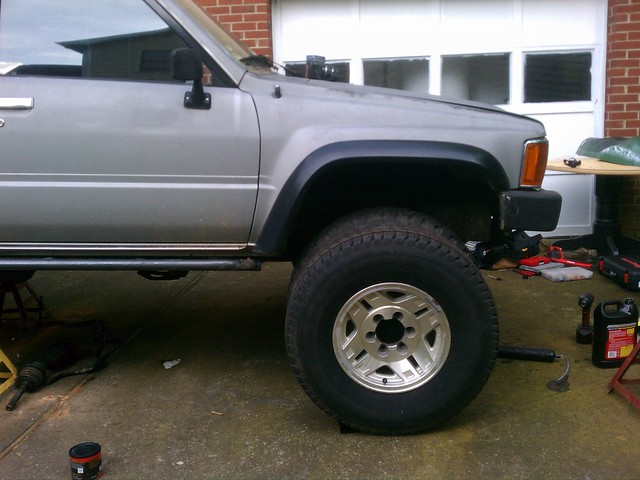
So,the other day I put my runner up on stands, and went to work removing the front and rear axle assemblies.
I dropped the rear housing off at my friend Michael's house to have the Barnes Diff cover installed, drain plug
shaved, armor added to the bottom of the housing, and the opening modified for the 4.88 ELocker third member.

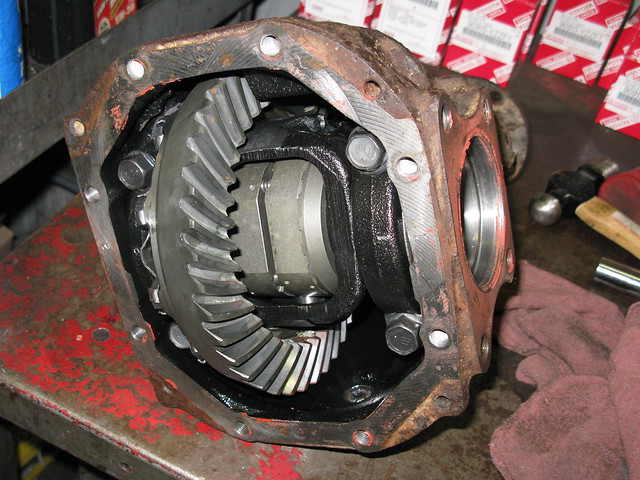
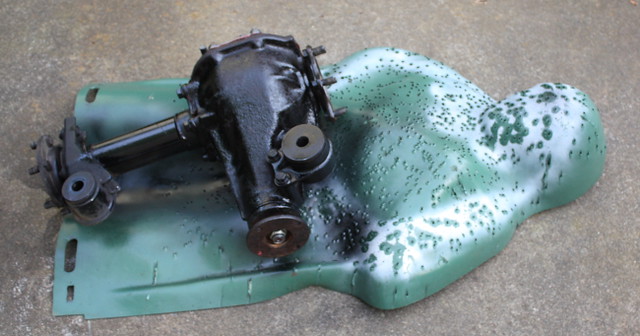
While he was doing this, I took the front diff assembly(factory 4.88s I bought used with low miles)to work and installed a Spartan locker

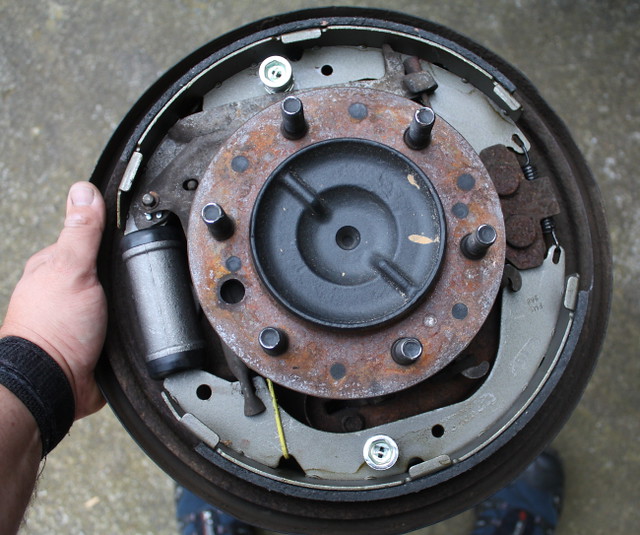
At 300k the rear end was in need of drivers side wheel bearings, and the right side wheel cylinder was leaking.
So I decided to replace everything on both sides while it was apart. Bearings, seals, shoes, wheel cylinders,
one e-brake lever boot. and all mounting hardware.

I then had my friend Ivan come give me a hand painting
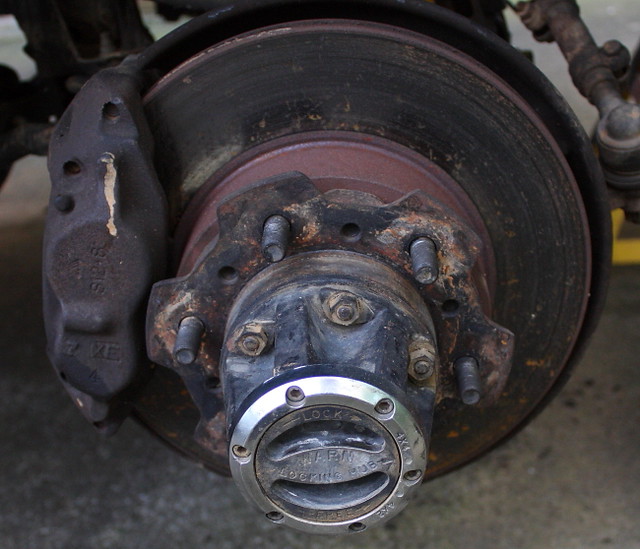
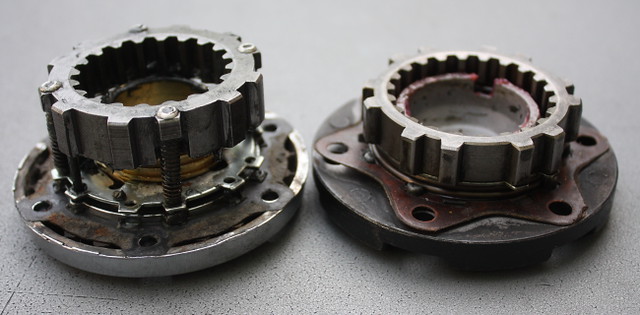
While that was drying, I decided to yank the Warn hubs off to install my new to me Aisin's.
During the install, I replaced the star gasket, and the locking knob o-rings.
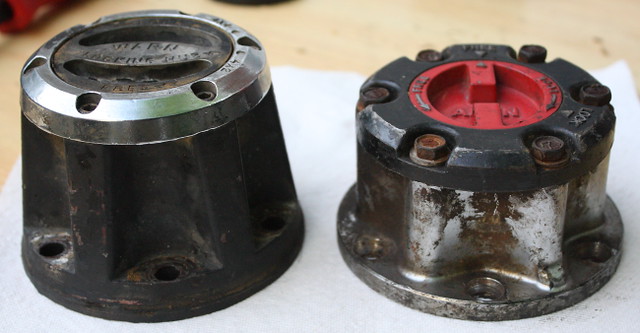
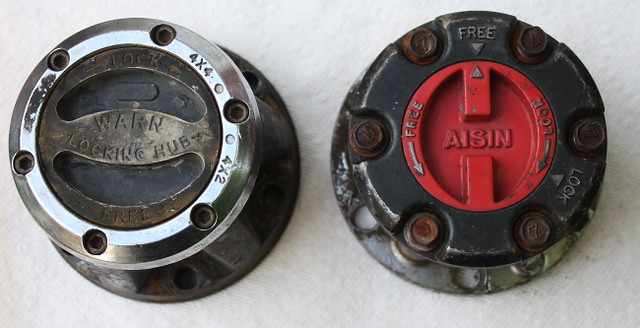
Here are the hubs in "locked position" Warn on left, and Aisin on right
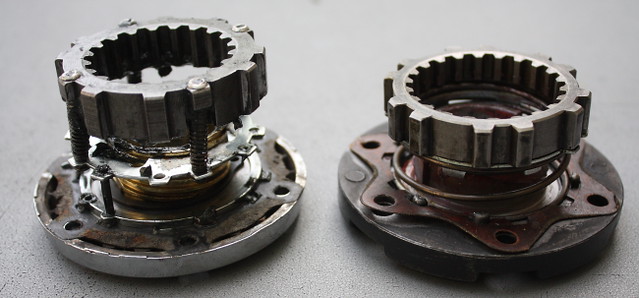
"unlocked" same orientation
Final product

Ivan giving the thumbs up!

Puting a little bling on the front diff assembly getting ready to go back in.
I dropped the rear housing off at my friend Michael's house to have the Barnes Diff cover installed, drain plug
shaved, armor added to the bottom of the housing, and the opening modified for the 4.88 ELocker third member.
While he was doing this, I took the front diff assembly(factory 4.88s I bought used with low miles)to work and installed a Spartan locker
At 300k the rear end was in need of drivers side wheel bearings, and the right side wheel cylinder was leaking.
So I decided to replace everything on both sides while it was apart. Bearings, seals, shoes, wheel cylinders,
one e-brake lever boot. and all mounting hardware.
I then had my friend Ivan come give me a hand painting
While that was drying, I decided to yank the Warn hubs off to install my new to me Aisin's.
During the install, I replaced the star gasket, and the locking knob o-rings.
Here are the hubs in "locked position" Warn on left, and Aisin on right
"unlocked" same orientation
Final product
Ivan giving the thumbs up!
Puting a little bling on the front diff assembly getting ready to go back in.
dorton
#rockcreekoverland
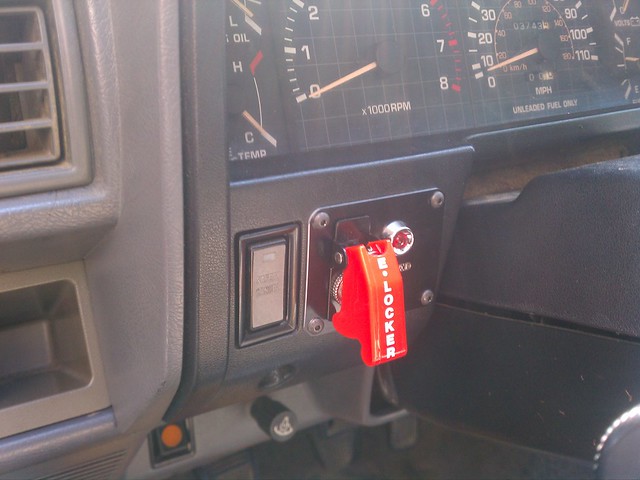
Since the front was done(for now), Decided to go ahead, and install the 12voltguy's Elocker wiring harness, and switch assembly.
Very nice product, very easy install. I did however decide not to mount it where it was intended. Instead, I mounted the switch on the
dash, just left of the steering column.
With that done, I moved back to the rear axle assembly.
Once again, luckily Ivan was able to give me a hand. "here, hold these while I paint"

Installed my u-bolt flip kit

Then, I just finished up the little stuff so I could move on to removing the hitch,
buper, and little side plastic things. First thing before I could get rolling with that was
remove the bushwacker flares........
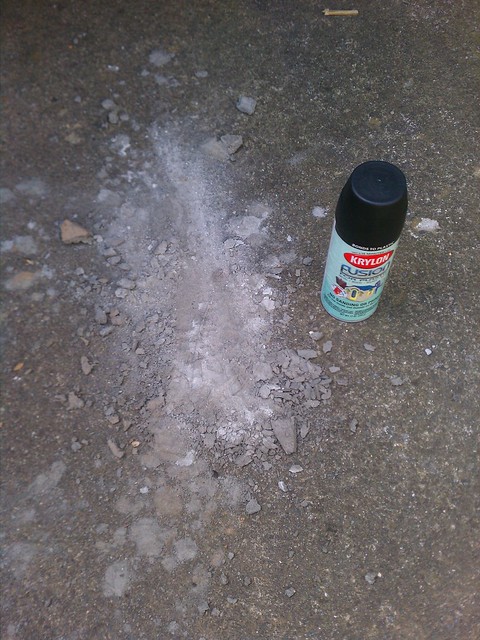
Ouch.

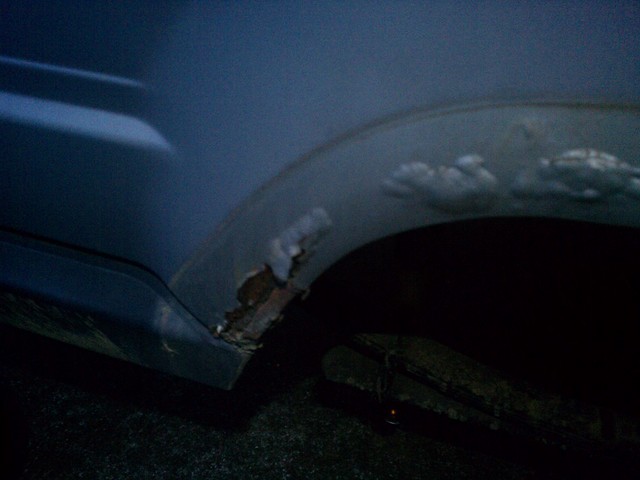
That may have something to do with it living in Boone NC for the time I sold it, the reason I
say that is, the spray paint can is pictured here for size reference to show the pile of
road salt that fell out of the flare when removed. This will be a project for a later date.
At some point during the process, I found some extra wheels that I had stashed away. One just
happened to roll up beside my rig, and I liked the look.
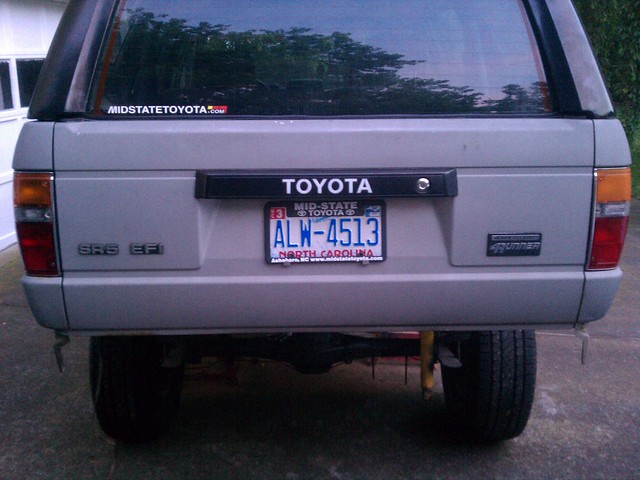
Ok, back to removing stuff. With the bumper, and hitch, and side plastic things, I had to remove the
brackets that held said plastic things by cutting them off. You can see the ones toward the rear corners here
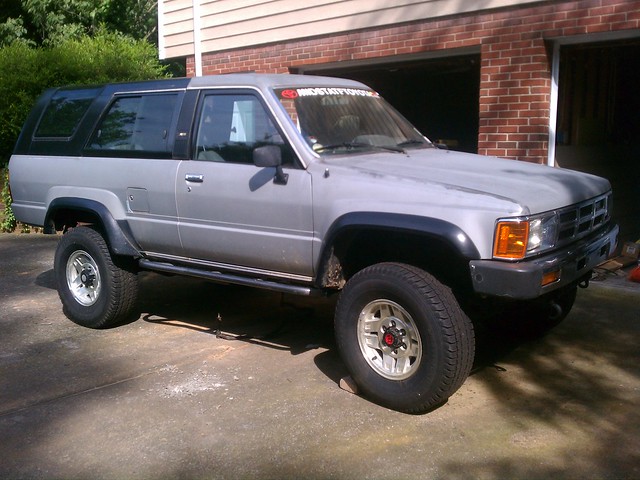
With them removed, I had to get back to covering up the canker sores over the wheel wells. My plan is to section the flares
so they are flush with the body at the bottom.


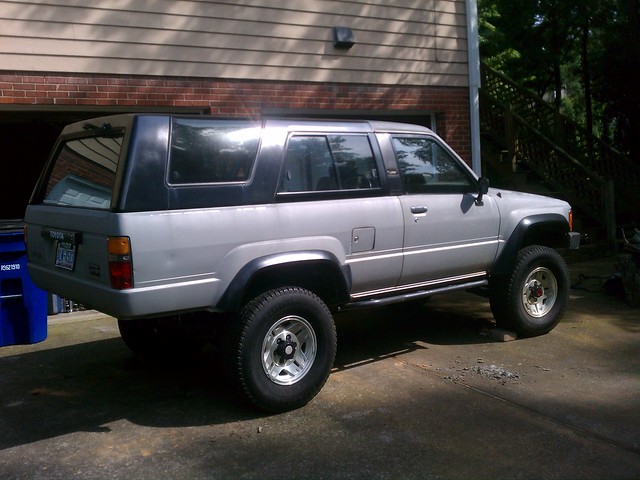
This is how it sits right now. The tires that are mounted on the alluminum wheels are 31x10.50 15s, I am working on getting some 33x10.50 15
BFG All Terrains soon I hope.
Later this week, it will be getting dropped at my friend Michael's house for a swing out rear bumper incorporating side protection, and a few other
goodies. Soon, he will also be installing chevy 63's to help add a little lift, and support for the added weight of auxilary tanks for fuel, and water.
Very nice product, very easy install. I did however decide not to mount it where it was intended. Instead, I mounted the switch on the
dash, just left of the steering column.
With that done, I moved back to the rear axle assembly.
Once again, luckily Ivan was able to give me a hand. "here, hold these while I paint"
Installed my u-bolt flip kit
Then, I just finished up the little stuff so I could move on to removing the hitch,
buper, and little side plastic things. First thing before I could get rolling with that was
remove the bushwacker flares........
Ouch.
That may have something to do with it living in Boone NC for the time I sold it, the reason I
say that is, the spray paint can is pictured here for size reference to show the pile of
road salt that fell out of the flare when removed. This will be a project for a later date.
At some point during the process, I found some extra wheels that I had stashed away. One just
happened to roll up beside my rig, and I liked the look.
Ok, back to removing stuff. With the bumper, and hitch, and side plastic things, I had to remove the
brackets that held said plastic things by cutting them off. You can see the ones toward the rear corners here
With them removed, I had to get back to covering up the canker sores over the wheel wells. My plan is to section the flares
so they are flush with the body at the bottom.
This is how it sits right now. The tires that are mounted on the alluminum wheels are 31x10.50 15s, I am working on getting some 33x10.50 15
BFG All Terrains soon I hope.
Later this week, it will be getting dropped at my friend Michael's house for a swing out rear bumper incorporating side protection, and a few other
goodies. Soon, he will also be installing chevy 63's to help add a little lift, and support for the added weight of auxilary tanks for fuel, and water.
Last edited:
JasonRedwood
Explorer
Looking great man!