The conversion is posted as a separate thread. Enjoy!:
http://www.expeditionportal.com/forum/showthread.php?p=764533#post764533
http://www.expeditionportal.com/forum/showthread.php?p=764533#post764533
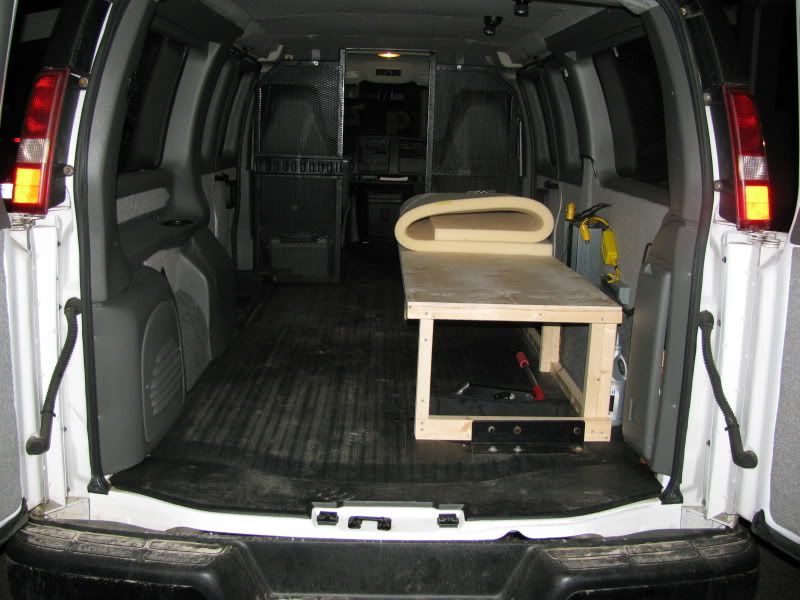
Keeping it "light" will be a key element, since the AWD is only a 1/2 ton van.
:lurk::lurk:
This is my second DIY van project so i'm speaking from my own experience, as the first one used corregated cardboard fiberglassed for walls/cupboard faces and spruce for framework. super light. Got the idea from "Composite Construction For Homebuilt Aircraft".
me neither so you all kick me out whenever you wish ; )I don't want to threadjack, but Accrete, do you have a writeup of that process...
Molt did not sell plans for any other designs, but he certainly enjoyed exploring new ways to make efficient aircraft. In order to reduce building costs he conceived of the idea of TPG (Taylor Paper Glass), a system in which polyester resin was used to coat and seal a laminated solid fiber card board after the individual parts had been cut out with a knife or hand shears. Once the paper parts were sealed, they were covered on both sides with a very dense fiberglass cloth to produce a 3-layer laminate. These parts were then assembled into the basic aircraft structure by stapling them to wood battens followed by bonding with resin and fiberglass cloth to form strong joints that could easily be sanded smooth. Molt and his associate, Jerry Holcomb, wrote a booklet about TPG, because it was relatively inexpensive, safe to work with, easily drilled, sawed, sheared, stapled, laminated and shaped in one plane of curvature.
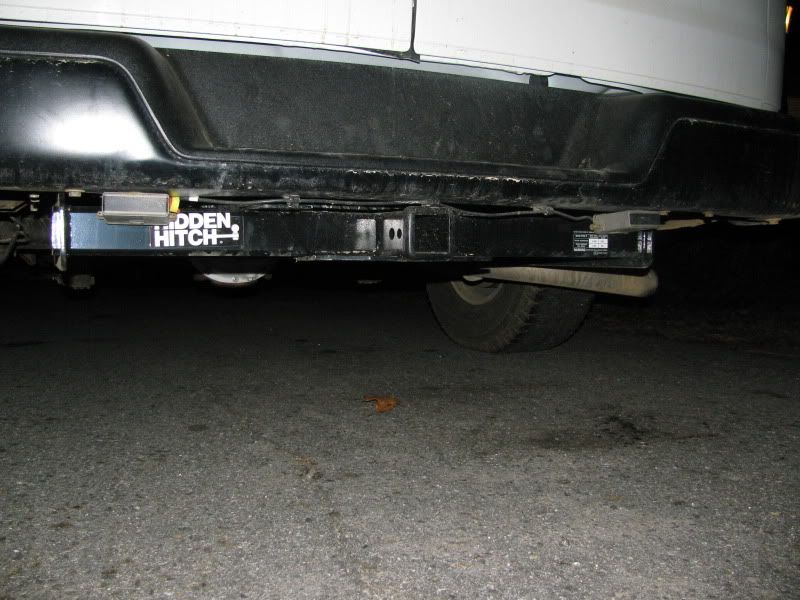
Zuren, it's comin along! What are the 2 grey boxes under your rear bumper?
i am in the process of buying a 2003 cargo 2500 (8 bolt) awd express with a 5.3. I cant believe there is no-one who has cranked the torsion bars and posted about it, are you going to be the first?:chef: so far your build is cookin!
News to me......
Don't think they make a 2500 AWD???????????????
i am in the process of buying a 2003 cargo 2500 (8 bolt) awd express with a 5.3. I cant believe there is no-one who has cranked the torsion bars and posted about it, are you going to be the first?:chef: so far your build is cookin!
") and was able to achieve some lift. I think we are all still looking into this as time allows.
and was able to achieve some lift. I think we are all still looking into this as time allows.dwalt has cranked torsion bars but there has been some discussion and noted differences between these vans. GMC/Chevy color code their torsion bars and it appears that some bars respond to being cranked while others see no change, even with new keys. I'm in the "no change" boat - I cranked mine and saw nothing with orange coded bars. I believe dwalt has blue bars (don't confuse that with another phrase :bike_rider
.:rockon::roost::xxrotflma:jump::yikes::sunny: