Pajero Mk1 Tourer build-up

Cruisn

Adventurer
Was an excellent week for new parts arriving!!

Started with my maps showing up: canning stock route, anne beadell highway and wa's top 50 treks.

watop50.jpg


canning.jpg


beadell.jpg


Then my led light up switches arrived:
switch.jpg


Iron man recovery kit:
recoverykit2.jpg


recoverkit.jpg


Repair manual, pdf version. everythign I need for the diesel at least.

repairmanual.jpg


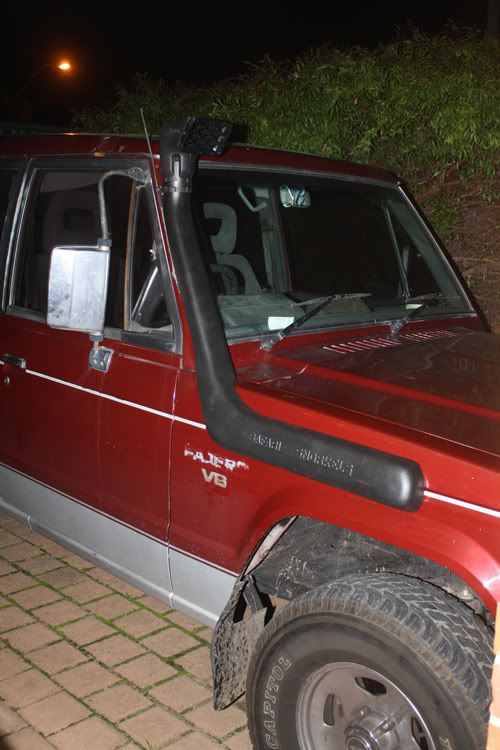
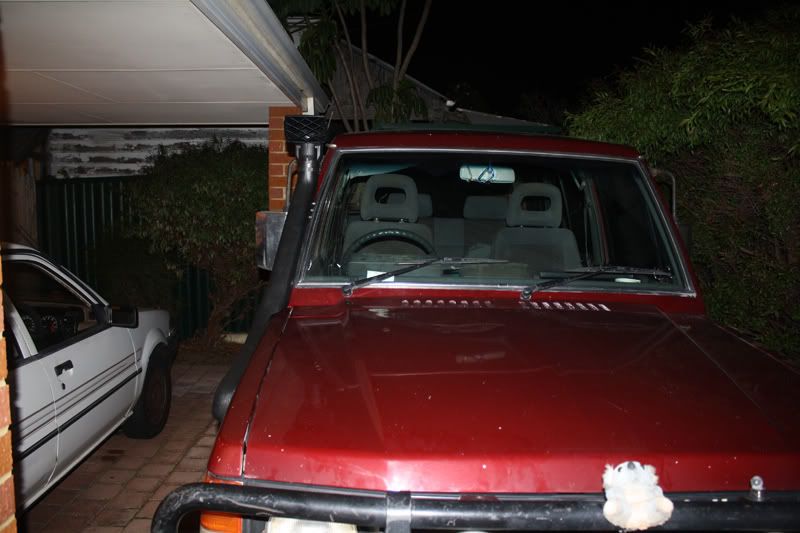
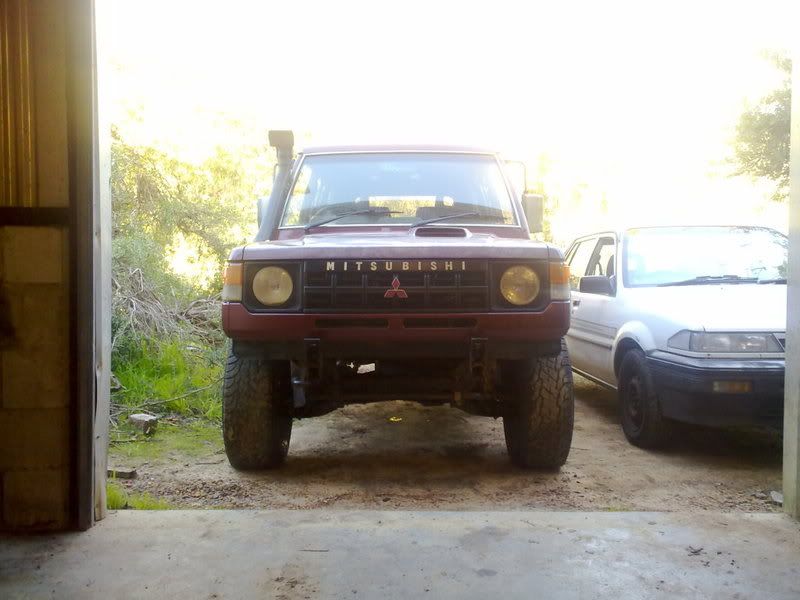
The best for last, My safari snorkel, been waiting a few weeks for this to arrive. cant wait to install it.
safari3.jpg


Its legit: no fake stuff here
safari2.jpg


safari.jpg
 

Cruisn

Adventurer
Well, washing parts then working soaked for a few hours last night maybe was not the best idea. I am sick as today. oh well. lesson learnt. Mainly jsut showed up to clean the tranny/transfer case up. looked okay. I will let it stay this way till it is installed then will hit it with a proper pressure washer at the car wash one day, will have more power.

The oil pan, tranny brace, fan, and fly wheel are in the pajero for cleaning in the robo wash.

All cleaned up:
tranny8.jpg


tranny7.jpg


tranny6.jpg


This is the only bit of damage is this torn boot, still looking for a new one.
tranny5.jpg


tranny4.jpg
 

Cruisn

Adventurer
Got a few new parts today, woohoo

Roo lights, 220's with 100 watt bulbs

complete with harness:
harness.jpg


roo3.jpg


Body lift: 25mm, needed so that I dont loose any clearance with sliders installed.

bodylift2.jpg
 

Cruisn

Adventurer
More new parts, I really have my work cut out for me.

Drawer sliders arrived:
2 sets at 125kg by 810mm for the drawers.
and 225kg slide for the fridge since it has a longer distance to slide out.

sliders3.jpg


sliders.jpg


opened up:
sliders2.jpg


Sway bar bushings
swaybar.jpg


And for my dual rear tire carrier setup i received spring locks and locks.
for when they are open to stop them from swinging more:
springlock.jpg


And for when they are closed:
locks.jpg


Flywheel was machined to!! can reassemble now:
flywheel.jpg
 

Cruisn

Adventurer
Well, Second last package arrived today.

My dual spare tire carrier mounts. bearing pivots. I will build the rest. they will hang off the rear bumper. will look good.
dualcarrier2.jpg


dualcarrier.jpg


Also got my new motor mounts, and a 1/2 torque wrench

motormounts.jpg


torque.jpg
 

Cruisn

Adventurer
Well, this weekend was a bit of a downer.. Got the engine about 60% back together only to finally find the casting numbers.... 4d55... oh noes!! its a 2.3L with a 2.5L top end.. what gives here? I quick phone call and about 4.5 hours of driving later (huge thanks to ron for lending me his Mu with the trailer.) I roll back into the shop with a complete 2.5 along with intercooler, enough parts to build a second motor and a turbo version hood. complete with hood scope.

At least I got my snorkel installed. I like it!!
snorkelon.jpg


snorkelon2.jpg


What the hood looks like: generic photo
1403099039_d871e489e9_z.jpg
 

Cruisn

Adventurer
Alrighty.. where to start:

I guess with the removal of some more old parts off the donor pajero.

It had 90L of diesel in it. so that was a great excuse to buy myself some steel jerry cans, which I needed anyways... but now there is no guilt behind the purchase.
newjerrycans.jpg


And the pedals are out:
pedals.jpg


Friday night rolled around and I arrived at about 6pm and started working on the diesel, piecing it together a little more. then Paul arrived at about 9pm, it was a long night of ripping all the electrical out of the 90, along with engine and tranny removal. lots of work. we finished at 4am with an extra set of hands as Ron stayed up to help with removal. A huge thanks to those guys.

Engine assembled enough for install:
assembly.jpg


assembly2.jpg


cleanedrear.jpg


rearhousing.jpg


Let the removal begin!!
electricalout.jpg


removal4.jpg


stripping.jpg


stripping2.jpg


It was sure nice to remove the computer and all that extra harness. which was great. hook up the hoist and away we go!

removal3.jpg


removal2.jpg


removal.jpg


It may be 4am.. but at least one of us has a smile!! LOL
4am.jpg


Time to clean the engine bay:
stripped.jpg


I hate water spraying back at me... solution: wear my welding helmet... LOL
cleaning.jpg


Paint the engine bay, And install the clutch mastercylinder and lines

cleaned.jpg


cleaned2.jpg


cleaned3.jpg


Put that awesome clutch on:
clutchon.jpg


instal3.jpg


install.jpg


install2.jpg


And it is in!! Finished saturday at 2am
enginein.jpg


enginein2.jpg


I was out today to do more work, got most of the fuel lines completed, transfer case all bolted up but then started to hit snags...

The drive shafts..
The v6 flanges are a lot bigger then the diesel flanges on the pinion gear shaft. I am going to rotate the shaft 45 degrees and redrill the holes. as for the front shaft, it is about 15-20mm to long, so tomorrow at work I will cut out a bit and reweld.

Then there was a power outage so I was not able to get the shifter sticks installed. so that will be tomorrow.

Both pedals are installed. clutch installed and bled. feels a little odd, soft and the arm that pushes the throwout bearing maybe moved 20mm at full push, and since I never tried the factory diesel clutch I am not sure if that is enough. as the clutch disengages.. or feels that way very clsoe to the bottom of the pedal stroke. normal or no

I feel by wednesday night I will have it running. I need to strip a few parts from the v6 harness for the alternator and starter connectors.

I was going to drop in a diesel tach, but I hate the older model look, so I found a converter to change the signal for the petrol tach. its 65 bucks.

That is all for now... lots of hours were put in.
 

Cruisn

Adventurer
Today was an over all good day.. which is odd...

I started by cutting and shortening the fornt drive shaft, easy to do, took out 15mm should of done 20 but it doesn't foul so it should be okay. you can sorta see my new weld in the photo.

frontshaft.jpg


As you can see with the rear drive shaft, if rotated 45 degrees you can redrill the holes and make the 4cyl version work as the centering pin iss the same size.

rearshaft.jpg


The fuel tank required some new lines, no leaks, also the electrical for the sending unit is all plug and play.

fuellines.jpg


One last issue underneath is that I will need to fabricate my own snubber as the factory does not fit anymore.
snubber.jpg


Moving to the interior:
Shifter sticks installed and sealed up.
shifter.jpg


And I now have 3 pedals, how cool is that, seeing the clutch pedal reminds me to make a comment that I dont think I bled the clutch properly, I jus noticed the bleeder screw today... oops.

pedalsin.jpg


I started playing with the electrical, which meant I had to tear into the v6 harness to get a few goodies I need for plug and play operation. but that is the nice way to go about it, so far the alternator, starter and all lights/sensors are hooked up. I have no wires going to the fuel pump, all I am going to do for that is jsut wire a kill switch to it for a temp solution.

as for the starter, it will not turn over when the key is turned... so I have some digging to do. not sure if it has to send power via the computer then into the harness.. as I have ripped the computer side of the harness out. did the 89/90 diesels have computers?

wiring.jpg


wiring2.jpg


Tearing the harness apart!!
wiring3.jpg


wiring4.jpg


A lot of goodies atached to the engine tonight, alternator/ working on power steering, fan, most belts, rad, oil cooler, oil filter..
I am slowly getting there.
motor.jpg


oilcooler.jpg


And for fun I set my intercooler on to find out how to mount it.

intercooler1.jpg


intercooler.jpg
 

Cruisn

Adventurer
A bit more work the last few days, nothing to much, as I am lacking a lot of sleep lately.
*note to self - 12am bedtimes dont always work when working 10 hour days...*

So basically, I found out that the power steering lines form the 86 pump dont fit a 90 pump, which is not a huge issue as I have driven without power steering before and its a slight struggle but not to bad. I will have to get 1 custom line made.

but all oil and steering cooling lines are run:
lines.jpg


I have finished bolting all the intake pieces on, less the intercooler. as you can see the wiring is a bit of a mess, some are to short between petrol and diesel since the alternator is lower on the diesel. but I have jsut bought a wire kit, with crimps and heat shrink so I will get all that sorted after it is running. as that will be a nice final touch to clean it all up.

intake.jpg


Moving onto the fuel filter, I have mounted it to where the charcoal canister sits on the petrol model, not needed anymore so why not? and also the petrol doesnt have the tabs in the proper spot regardless, I am not sure if that is a year difference or jsut a dropped item since its petrol. anyone have a photo of a 89/90 turbo diesel?

fuelfilter.jpg


grill is back in:
grill.jpg


better shot of the drive shaft:
reweld.jpg


Best part, i figure was jsut test fitting the hood, I like the look with the scoop.
hood.jpg
 

Cruisn

Adventurer
Sorry for the lack of updates, I needed a week off jsut to catch up on sleep. LOL.

Well here is a photo of her all back together.. well almost.
I still have a list of items to sort out

Rear driveshaft - is at the shop getting a new flange put on along with balancing and new universals. dropped it off today actually. so hopefully done for the weekend. I thought I moved past the whole FWD stage... LOL
Wiring: I have all required tools to cut wires and solder them into the factory location.
*I am on the hunt for a 89/90 Pajero wiring harness diagram , let me know if you have one.*
Tuning - it is still not running correct, I have included a start up video so you can hear what is going on. idles like ****, rough. missing. have double checked the timing. could it still be off?
I have also bled the lines and #3 is always putting out a misty foam and the engine rpm doesnt change, bad injector? 1,2 and 4 when the lines are cracked the engine damn near dies.

any help would be greatly appreciated as I am in a bit of a rut. diesels are new to me and I am on one hell of a learning curve.

Moving under its own power: and looking rather ************ I may add...
06082011235.jpg


Start up video:
http://www.youtube.com/watch?v=vdcnxyhFl3w

And a few more goodies arrived:
my gps receiver. getting a netbook, with 10" screen and ozi explorer for mapping software. and will make a bracket for it to sit off the dash.
gps.jpg


receiver.jpg


Thermostat finally arrived:
thermo.jpg


And the big ticket item, long range fuel tank #1
132L vs factory 92L with no lost clearance.

A few flaws though, some welds have porosity and pinholes, along with some cold lap. its hold pressure according to the manufacturer, but honestly, I am not impressed. as it may hold pressure sitting still but after 1000km's of corrugations I am sure that those fail points will fail, leaving me stranded with no fuel. I have tried to contact the company who keeps telling me they will call back but never do... I am not impressed, tank is covered in weld spatter too. I am going to get them to give me a ro for getting it repaired and will reweld the main seals myself. then I can at least trust the welds. Not impressed at all with the customer service after dropping 950 bucks..and yet most companies here wonder why people order from china and the states.. "but what about customer service?" well... I am not getting it here, so what does it matter where I order my parts from..

tank.jpg


tank2.jpg
 

off-roader

Expedition Leader
...will make a bracket for it to sit off the dash.

A couple of the simplest bracket solutions I've found is this...
002.jpg


or a variation of this but for the Gen I's guage pod cluster (add a 1/4" plate as a spacer/riser so it's the same height as the dash)...
2309803150104986527S600x600Q85.jpg


(without the netbook)
2449143270104986527S600x600Q85.jpg
 

Forum statistics

Threads
185,896
Messages
2,879,549
Members
225,583
Latest member
vertical.dan
Top