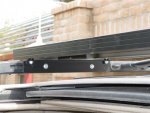
This should cover the basics of what you need to know...it should translate directly to vehicle use just on a small scale.
Posted with permission from Home Power Magazine, Issue #25 , 1990
First Year PV Basics
Richard Perez
The transition from grid power, generator power, or no power at all to
solar power
can be confusing. The user becomes his own power company and in the process
inherits the responsibilities along with the Watt-hours. Fortunately, PV systems
are ultrareliable, simple to size, install, and operate. The user only
needs to know a few
basics to get started on PV power. So, country folks and city dwellers,
here's a guide to
the basic concepts involved in a simple starter PV system.
The Need is for Electric Power
The size and success of your new PV system rests on
you. What do you want to power with the system? What
kinds of appliances will you power? How long will you
power them? All of these considerations affect the design
and size of the system. If you are considering putting your
entire home on PV power, then you have two choices.
One, learn to do the job right yourself. Two, hire a pro with
the knowledge to do the job for you. The cost and
complexity of a PV system increases with the amount of
energy required from it.
If, however, you wish to replace the kerosene lights, or
take a circuit in your home off of the grid, then this article,
about simple and inexpensive systems, is for you.
Four Major Components
Every PV system has the same major components. The
only difference is the quantity of hardware. This means
you can get started with a small system, learn first-hand
from that system, and expand it later.
The four major components in a PV system are: energy
source (the PV modules), energy storage (battery),
energy processing (inverters, controls, instruments, and
such), and loads (appliances).
Every system has these components; the only differences
are in size and quantity. For our purposes here, consider
a small system as one that uses between one and four
PV modules. Such a system will use between two and
four small lead-acid batteries like the Trojan T-105 (220
Ampere-hours at 6 VDC). Energy processing may or may
not include an inverter (like the small Trace 612 or
PowerStar models), a simple charge controller (like the
Trace C30A), and a voltmeter. Typical loads appropriate
to the small starter system are: lights (high-efficiency
fluorescents), electronics (TV, stereo, VCR, computer,
etc.), kitchen appliances (blenders, juicers, & mixers), and
smaller workshop tools (like drills & saws).
A Starter System
I have written many articles detailing the mathematical
approach to system sizing and design. This article is
different. Here we are going to size and design the
system with a nontechnical approach. We are going to
design the system by the person. Sort of a "one person,
one panel" approach to solar energy. This will work. It is
based on my experiences in over one hundred small PV
systems.
The starter system will use a 12 Volt battery. This keeps
the system affordable to those now
using kerosene lights. It also makes the
system inexpensive enough that folks
downtown can use it to gain experience
in RE use. The system is designed to
be expandable. It can grow about three
times in capacity without requiring major
component replacement.
PVs
Allow one 50 Watt PV module for each
person in the household. This means
that each person can use, each day, the
energy produced by a single module‹ about
250 Watt-hours. While 250 Watt-hours may not
sound like much electricity, it is more than
enough for lighting, electronics, and
conservative use of kitchen appliances and
shop tools. Cost is about $370 per installed
module.
Battery
Provide about 220 Ampere-hours of battery
storage for each two people in the household.
For example, this means two Trojan T105s (or
equivalent) for a family of two and four T105s
for a household of four. The resulting system is
properly proportioned and will supply power for
about four sunless days in a row. Battery cost
will be about $170 for two batteries to $340 for
four batteries. These "golf cart" batteries will
last about five years and can then be replaced
with higher quality storage.
Inverter
The use of an inverter is optional. In small
systems, it is often much less expensive and
less difficult to use the power exclusively as 12
VDC. Efficient low voltage DC lighting is readily
available as are many varieties of low voltage
electronics (stereos, TVs, and radios). The
starter system is capable of supporting a small
inverter. The Trace 612 and PowerStar
UPG400 and 700 will function well and supply
120 vac for appliances like VCR, TV, and even
compact fluorescent lighting. Using an inverter
will add about $600 to the system's overall cost.
Controls
A control is not necessary if the system is
continually occupied. If you go on vacation
simply disconnect half of all of the PV modules.
If you do wish to add a control, then keep it
simple and inexpensive, like the Trace C30A for
about $85.
Instruments
For economy and flexibility, buy a digital
multimeter (DMM). The DMM can make most
essential voltage and current measurements.
An instrument provides you with the information
required to operate and learn from your system.
If bucks are tight, go to Radio Shack and spend
about $60. If you can afford it, either a Fluke 77
($130) or a Fluke 87 ($280) will accurately
serve you for a lifetime.
Installing the Starter System
Mount the PV modules on metal racks or even wooden ones. The
racking is not as important as the location. Make sure that the PVs
are mounted where they will receive the most sunshine. Mount the
PVs at about a 45° angle to horizontal and facing due south. Wire
the modules with 10 gauge wire. Wire the modules in
parallel, which means all the modules have their positive
terminal wired together, and all their negative terminals
wired together.
Bring the PV power to the battery with 10 gauge wire for
less than 25 feet (one way between the modules and the
battery), 8 gauge for about 50 feet, 6 gauge for 75 feet,
and 4 gauge for 100 feet. All distances are one way, i.e.
the physical distance between the battery & modules. Use
UF type insulation for wire exposed to sunlight and USE
type insulation for wire that is buried.
Locate the batteries where they are warm, dry, and not in
human living spaces. Build a battery box (or buy and
modify a plastic/foam ice chest), either inside or outside
the house. A box keeps the battery clean and protects
humans from the acid and fumes involved. I have lived
within five feet of a working lead-acid battery for the last
twenty years with no incidents. We are now building a
power house so that the batteries are out of our living
space. 'Nuff said.
(Don's note - Shortly after this Richard blew up a battery
and his opinions changed. Exclude batteries from your
living space. I heartily suggest you use a charge controller
and have a DC rated fuse and disconnect switch in the
circuit as well. Please keep in mind. this is meant as a n
example of asuper simple starter system, you can definitly
do better)
The rest of the wiring is straightforward. Keep track of
positive and negative wires by color coding. Twelve volt
convention is red is positive and black is negative. 120
vac convention is black is hot, white is neutral and green
(or bare) is the redundant, vestigial ground.
Operating the Starter System
Keep an eye on your battery's voltage. If the voltage dips
below 12.2 Volts, then it is time to ease up on power
consumption. If the battery voltage is below 11.9 Volts,
then it is time to STOP consuming power until the PVs
refill the battery. A full battery will show a voltage around
14.5 to 15 VDC while under charge by the PVs. That's
about all there is to it.
This regime is not designed to give maximum life from
what is a short-term battery. This first battery is a learning
experience for you. It is inexpensive and suitable for
making mistakes. Through this first battery you will learn
the advanced lessons of PV life.
Getting Started
The important thing is to get started. Don't wait until you
can afford a megasystem or to take your whole home off
of the grid. Do it now. Replace those kerosene lamps.
Take your house off the grid a circuit at a time. Only
through actually living with solar energy can you learn the
lessons you need to know.
Access:
Author: Richard Perez, Home Power Magazine, POB 520,
Ashland OR, 97520 € 916-475-3179


