Seth's 97XJ

96XJ11C

Observer
Fender flares and Slider paint.

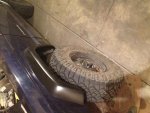
Got all the flares painted with Krylon Satin Black. Used 2 coats. Will update on how it holds up. Excuse the filthiness of the jeep still have not cleaned it up from the trail run on Saturday!
photo (66).jpg
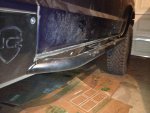
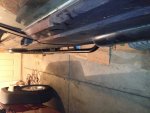
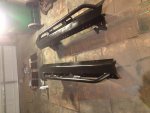
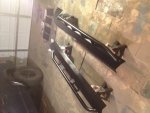
JCR Sliders got 2 coats of primer and 2 coats of Satin Black. Will start bolting them up tommorow!
photo (67).jpgphoto (68).jpg

Also have nutserts and new rear bumpstops in the mail.
THANKS FOR READING
 

88Xj

Banned
Hey Seth can you snap a pic of your shackle angle in the rear? And have you loaded it down in the rear yet? To see how much weight the leafs will hold before they sag?

Still trying to decide between OME 3.5" HD's or going to Deaver or National and getting a custom leaf setup thats military & rebound wrapped..those run like 750+ though:(
 

bzauche

Observer
What springs (actual numbers) did you use, what size tires are you running, and what are your current measurements?
 

88Xj

Banned
me? Use OME 1" Hds with a RE 2.5 full length aal. Shock shackle. Fronts OME 933's & 2" spacers. Trimmed fenders & 31's. My driver side leafs sagged out much more than the passenger side..about 1" difference now so I've gotta upgrade & replace. I'm at 3 1/4" lift all around.
 

96XJ11C

Observer
Hey Seth can you snap a pic of your shackle angle in the rear? And have you loaded it down in the rear yet? To see how much weight the leafs will hold before they sag?
Still trying to decide between OME 3.5" HD's or going to Deaver or National and getting a custom leaf setup thats military & rebound wrapped..those run like 750+ though:(
The shackle angle is vertical when i have nothing in the cargo area. I have put about 200lb of gear in it and it only sits about a 1/2" lower. I could easy see throwing 300lb more and having no issues
I have no complaints on the OME thus far

What springs (actual numbers) did you use, what size tires are you running, and what are your current measurements?
The front coils are 930 with a spacer that measures a true 1 5/8". The numbers on the leafs are covered by the top plates so i cant read it, i can see the number 0331 on the leaf though, not sure if thats the full number though. It is the 3.5 HD pack. The front sits at 4" and the rear now sits 4 1/4" empty. Note that i am running a 8.8 with 3/4" perches too so the rear is taller than it would be with a 8.25 or D35.
 

96XJ11C

Observer
Sliders, Swaybar Cables, Rear Bumpstops

I had the sliders done over the weekend and i am pretty unimpressed. The end result is a solid slider that will serve its purpose as a slider. The installation is a pure nightmare! The JCR instructions are very vague as to exact placement of the sliders so you are left to your own judgement. The unibody tie ins are secured to the unibody with self tapers (not impressed). Attempting to align all the holes perfectly after having to remove and install the sliders 3+ times per the instructions leaves you with misaligned holes and a generally horrible time trying to get everything together. The nutserts in the rocker serve no structural purpose as while installing them the torque of the wrench when crushing the insert will fold the sheet metal with no problem leaving crooked nutserts. I also noted some improperly spaced holes on the mounting brackets during install (the holes JCR makes).

The end product will serve its purpose as a slider and the welds are good. But i DO NOT RECOMMEND these sliders due to the horrible installation procedure.
Now im sure someone will ask if i was just cutting corners, nope i folwed the directions to the letter and still had issues. The removing and re installing of the sliders really gets it all out of whack. Im no professional but this is not my first slider install and this slider is far to complicated.

I had my buddy bounce on the slider and you can feel the slider wiggle just a tiny bit against the rocker, thus i believe a vertical pressure (sliding on a rock) will move them slightly but i foresee no failure of any kind. (i would no use these to bash hard or smash onto rocks though).
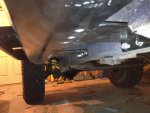
photo (70).jpgphoto (69).jpgphoto (73).jpg
I will post more pics tommorow.


Sway Bar Cables. Too easy. Drill a hole in the bottom of the battery tray and attach, use one of the factory airbox holes and attach through into the airbox,(requires opening the airbox). They work great to hold those disconnects up!
photo (71).jpg

Rear bumpstops. I got 4.1" bumpstops off of the quadratec website and ordered some nutserts from amazon as all of my bumpstop bolts snapped upon removal of the rotted bumpstops. Use a air hammer to break off the weld nuts inside the unibody and drill the remaing hole to fit the nutsert and crush the nutsert inside. Too easy. I can post a full writeup on this if anyone is interested!
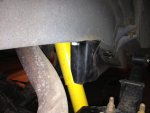
photo (72).jpg
 

88Xj

Banned
4 1/2" - 3/4" perches = 3.5"
Can't wait to see your measurements boss. I'm trying to decide myself..probably should call Dirk @ DPG and find out how much just the leafs will run me.
 

96XJ11C

Observer
No More Idiot Lights

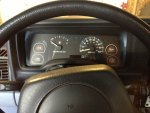
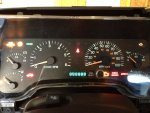
Jeep was out of their mind when it was decided that idiot lights were acceptable in the XJ. I could no longer stand not having the vital information from the jeep. Lucky for 97+ XJ owners the gauge clusters are a direct swap and all of the sensors are already in place to support the full gauge cluster.

Terrible idiot lights!
photo (74).jpg
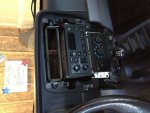
Pull from the lower corners of the center trim and then from just below the vents and the center trim will pop off. Remove 4 screws holding the dash trim on.
photo (75).jpg

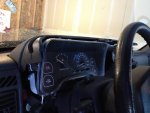
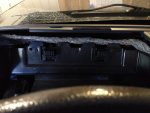
Unknown to me there is a rubber loop that wraps under the steering column. It must be unhooked from itself by pulling it apart. When pulling off the dash pannel it will get snagged on the headlight selector switch. to get it around hold the switch in with your thumb and give the pannel a strong pull over the switch.photo (76).jpg

Gauge cluster with dash removed.photo (77).jpg

Gauge cluster removed. You can see where the cluster plugs in.photo (78).jpg

FULL GAUGES IN! Before buttoning everything up do a gauge check by holding down the odometer button on the gauge cluster and turning the key to the "ON" position then let go of the odometer button. This will show you if you have any burnt out lights.photo (79).jpg

Re assembly of the dash is the same as dis assembly. Getting the dash back over the headlight selector switch is impossible so take a piece of sand paper or emery cloth and open up the hole that the switch has to pass through. It doesnt take much sanding to get the hole to size. photo (80).jpg

The whole job should not take more than 30min. I am very happy with the results.
 

96XJ11C

Observer
Motor mounts

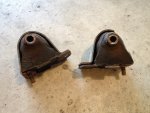
My motor mounts were still in good shape but i found a poly set for $30 used at FN jeep so i jumped on it. Pulling out the motor mount bolts is a little tricky, balancing the motor by the oil pan on a jack and using a pry bar to wiggle the motor to slide the bolts out is a hassle. I didnt like the feel of the factory motor mounts soaking up torque when engaging a gear, so these should eliminate almost all of that motor lean and give me crisper easier shifts!

Here is the old mounts out.
photo (84).jpg
Passenger side in.
photo (83).jpg
Drivers.
photo (82).jpg

For $30 i cant complain. I just took it for a test drive and i can definitely feel the shift firmness has increased and the jeep breaks traction much easier. I also notice the motor does not hesitate or bog down when hitting into the throttle hard. I recomend poly mounts for sure if yours are shot. I will give an update again after a few weeks of use.
Thanks for reading!
 

96XJ11C

Observer
E fan switch

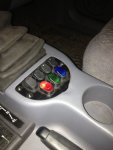
On the trail i like to use the E fan on hot days to keep the temps under control so i wired up my E fan to a switch. Its too easy to do. Just splice into the Blue wire with pink stripe that runs into the pcm. (on the grey plug nearest the driver) Run the wire you spliced in into the cab to a switch and run the switch to a ground. The fan will still engage automatically when the computer tells it to and i can over ride it and run the fan with a flip of a switch. I was exited to also wire up a switch as an extended idle switch but was disappointed when i learned it does not work on Xjs with a manual trans.

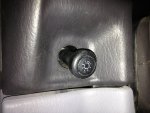
Fancy switch.
photo (86).jpg

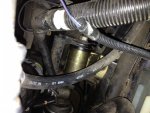
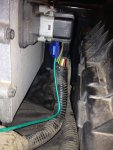
Splice beside the air box.
photo (85).jpg
 

88Xj

Banned
Really disappoints when I I found out the old renix xjs can't have an extended idle switch:( I use a hand throttle, similar t a quad throttle for wheeling/highway or extended idle. Nice on trails so I don't have to 3 pedal it.
 

96XJ11C

Observer
Really disappoints when I I found out the old renix xjs can't have an extended idle switch:( I use a hand throttle, similar t a quad throttle for wheeling/highway or extended idle. Nice on trails so I don't have to 3 pedal it.

I plan on doing one aswell. I can nly imagine how much it helps on the rocks.
 

88Xj

Banned
I love it in general everywhere lol. Ad for 40 bucks its hard to beat..damn cruise never worked before now its about perfect.
Any chance on those measurements yet boss?
 

96XJ11C

Observer
I love it in general everywhere lol. Ad for 40 bucks its hard to beat..damn cruise never worked before now its about perfect.
Any chance on those measurements yet boss?
you want the measurement from the axle tube to the frame?
 

Forum statistics

Threads
189,782
Messages
2,920,835
Members
232,931
Latest member
Northandfree
Top