JeepinBear
Explorer
Hey All,
I've been building up a "Comm Kit" for some time and finally had the opportunity to get it all into the Jeep.
The kit consists of:
The install turned out cleaner than I had hoped. My research led me to believe I could fit both the CB and 2M / 70cm in the Tuffy console...IF we were creative!
Pictures of the install with some supporting information start here:
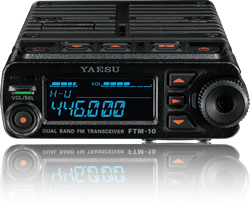
Yaesu and Uniden's pics:

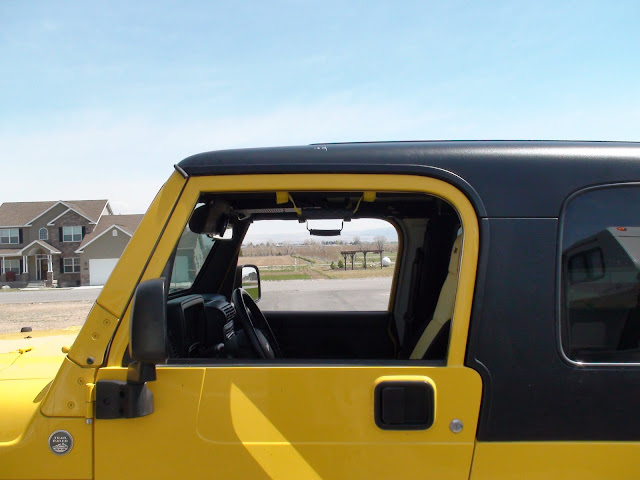
Main pic of the compartment. Note the control panel is mounted to the left side of the Tuffy Console and is in clear view of the driver. However, it is mounted high enough not to be an obstruction to the driver's view or the function of the visor. The Multi-Angle Bracket was used to mount the control panel.
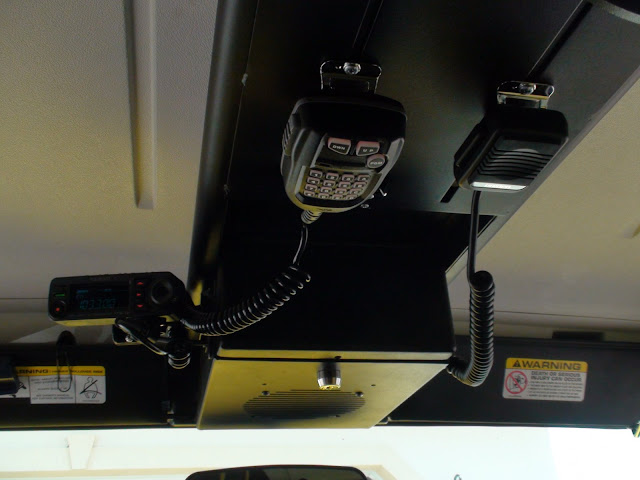
This is a close up of the multi-angle bracket mount. The control head can be removed. In fact, the control head on this system can actually be used as the mic. I chose to purchase the Mic Jack and DTMF Mic as an option.

This next pic shows a close up of the control head with the Mic Jack and DTMF Mic installed. Note the unit is currently set to an FM radio station. This model really is perfect for an ATV or open top vehicle. It also sports an iPod jack, etc. So it is a complete comm / radio system for an ATV.

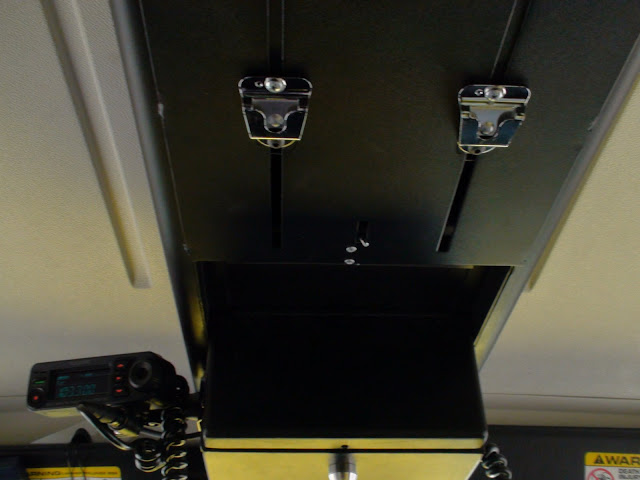
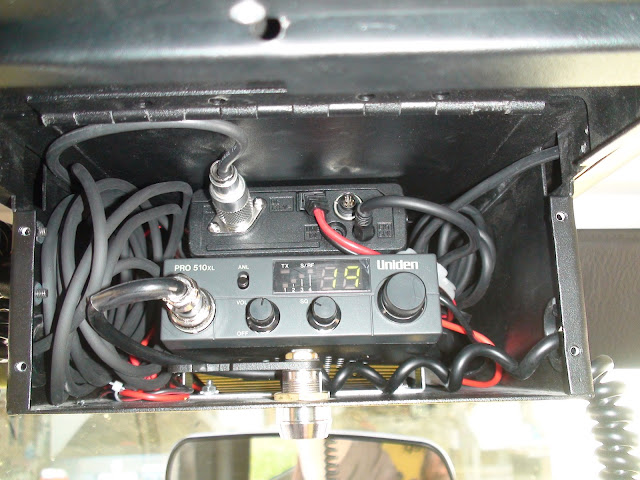
This next pic shows the inside of the Console. The Yaesu is mounted to the top of the console in an upside down and backward configuration. This facilitates access to the rear panel for service. The Uniden is mounted normally to grant access to the front panel and to align the speaker on the bottom with the speaker grill on the console. The "excess" cable on the left is the 10' extension from the control head to the main radio body. More on that later. The "excess" cable on the right is the speaker cable; you can see it starting it's run through a channel on the right. More on that next. This mounting configuration helps also to dissipate heat and allows for FULL functionality of the lock on the console.
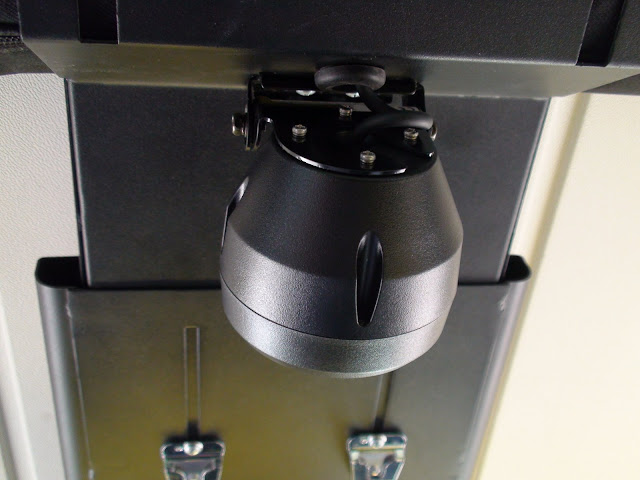
This next pic shows the VERY clean mounting of the external speaker. It's location is perfect for an open top Jeep at highway speeds. Again, it does not interfere with vision (rear view) or head room for the driver.

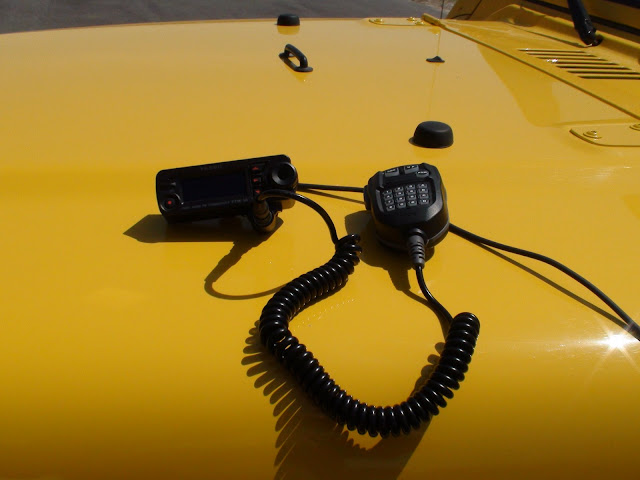
The 10' extension cable allows the radio control head to be removed from the cab and placed on the hood (complete with Mic). Again, the entire unit is waterproof and dustproof. I can see this function being used when reading large maps on the hood of the vehicle, etc.
The wiring for power and coax come through the main firewall passthrough and follow an existing loom to the battery and antennas.

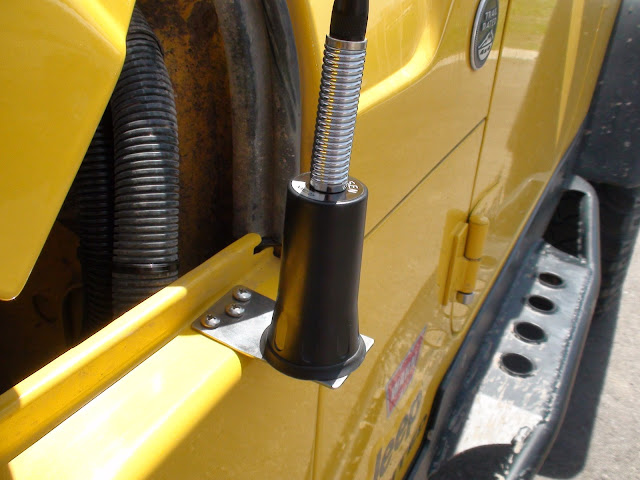
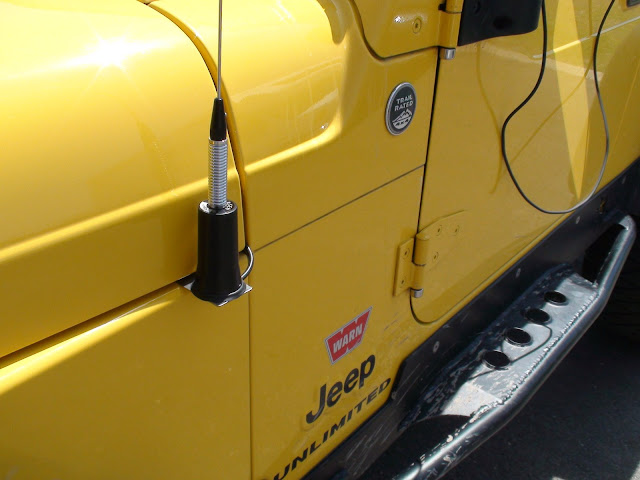
The antennas are each mounted (symmetrically) to the fenders using SS mounting brackets, the Larsen mounts, and Springs (to help alleviate trail damage). The 2M is on the passenger side, and the CB is on the Driver side.
I am VERY pleased with the outcome and we proved that ALL the system components can indeed me mounted to the overhead console in an UBER-CLEAN fashion.
I hope this helps others on ExPo!
I've been building up a "Comm Kit" for some time and finally had the opportunity to get it all into the Jeep.
The kit consists of:
- Tuffy Security Products Overhead Console (only the single compartment is available for 06 LJ)
- Yaesu FTM-10R Dual Band; Removable water and dust proof faceplate (designed for ATV / Motorcyle use) PERFECT for a Jeep with the top down on a rainy day!
- Yaesu MH-68ACJ Waterproof DTMF Mic
- Yaesu MEK-M10 Mic Jack
- Yaesu MMB-M10; Multi-Angle Stand Bracket for front panel
- Yaesu MLS-200-M10; Waterproof External Speaker
- Uniden Pro510XL
- Motorola Style Mic Clips
- Larsen NMO 27 Mounts and Springs
- STD Whip Antennas
The install turned out cleaner than I had hoped. My research led me to believe I could fit both the CB and 2M / 70cm in the Tuffy console...IF we were creative!
Pictures of the install with some supporting information start here:
Yaesu and Uniden's pics:
Main pic of the compartment. Note the control panel is mounted to the left side of the Tuffy Console and is in clear view of the driver. However, it is mounted high enough not to be an obstruction to the driver's view or the function of the visor. The Multi-Angle Bracket was used to mount the control panel.
This is a close up of the multi-angle bracket mount. The control head can be removed. In fact, the control head on this system can actually be used as the mic. I chose to purchase the Mic Jack and DTMF Mic as an option.
This next pic shows a close up of the control head with the Mic Jack and DTMF Mic installed. Note the unit is currently set to an FM radio station. This model really is perfect for an ATV or open top vehicle. It also sports an iPod jack, etc. So it is a complete comm / radio system for an ATV.
This next pic shows the inside of the Console. The Yaesu is mounted to the top of the console in an upside down and backward configuration. This facilitates access to the rear panel for service. The Uniden is mounted normally to grant access to the front panel and to align the speaker on the bottom with the speaker grill on the console. The "excess" cable on the left is the 10' extension from the control head to the main radio body. More on that later. The "excess" cable on the right is the speaker cable; you can see it starting it's run through a channel on the right. More on that next. This mounting configuration helps also to dissipate heat and allows for FULL functionality of the lock on the console.
This next pic shows the VERY clean mounting of the external speaker. It's location is perfect for an open top Jeep at highway speeds. Again, it does not interfere with vision (rear view) or head room for the driver.
The 10' extension cable allows the radio control head to be removed from the cab and placed on the hood (complete with Mic). Again, the entire unit is waterproof and dustproof. I can see this function being used when reading large maps on the hood of the vehicle, etc.
The wiring for power and coax come through the main firewall passthrough and follow an existing loom to the battery and antennas.
The antennas are each mounted (symmetrically) to the fenders using SS mounting brackets, the Larsen mounts, and Springs (to help alleviate trail damage). The 2M is on the passenger side, and the CB is on the Driver side.
I am VERY pleased with the outcome and we proved that ALL the system components can indeed me mounted to the overhead console in an UBER-CLEAN fashion.
I hope this helps others on ExPo!
Last edited: