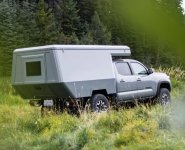
Carbon Fiber Tacoma Bed Replacement Camper - Build Thread

Leighsjor

Active member
With the first plug fully prepped for mold making we prepared ourselves for a big, nasty fiberglass job. Up to this point I had only experimented with smaller fiberglass molds so this size of mold was definitely a daunting project to take on.

IMG_2329.JPGIMG_2334.JPG
In the first photo you see the plug after getting sprayed with black tooling gelcoat and in the second you see the progress of adding layers of chop strand mat wet with resin. This was a very meticulous process as you have to roll any little air bubbles out of the wet fiberglass and then wait for specific cure times between layers. I recruited the help of my good friend Isaac for the process of mixing resin and wetting out the glass. It was definitely at least a two person job for this big of a part.

IMG_2345.JPG
Under some of the final layers I decided to add some ribbing to ensure the larger flat surfaces of the mold don't deflect as I use the mold.

Here's a short video walk around after finishing the last layers of fiberglass. At this point Isaac and I had worked until after 3 am, but we woke up early the next morning eager to demold and see the results!


And here's a video of the results! Can you feel our excitement after pulling the plug from the mold?

After pulling the plug we cleaned up the mold and trimmed the edges.

IMG_2416.JPG
And there you have it, one camper mold ready to use! ...Now for the other side... ;)
 

ITTOG

Well-known member
With the first plug fully prepped for mold making we prepared ourselves for a big, nasty fiberglass job. Up to this point I had only experimented with smaller fiberglass molds so this size of mold was definitely a daunting project to take on.

In the first photo you see the plug after getting sprayed with black tooling gelcoat and in the second you see the progress of adding layers of chop strand mat wet with resin. This was a very meticulous process as you have to roll any little air bubbles out of the wet fiberglass and then wait for specific cure times between layers. I recruited the help of my good friend Isaac for the process of mixing resin and wetting out the glass. It was definitely at least a two person job for this big of a part.

Under some of the final layers I decided to add some ribbing to ensure the larger flat surfaces of the mold don't deflect as I use the mold.

Here's a short video walk around after finishing the last layers of fiberglass. At this point Isaac and I had worked until after 3 am, but we woke up early the next morning eager to demold and see the results!


And here's a video of the results! Can you feel our excitement after pulling the plug from the mold?

After pulling the plug we cleaned up the mold and trimmed the edges.

And there you have it, one camper mold ready to use! ...Now for the other side... ;)
Love it but show us the part. That is better than the mold. ;)
 

Old Stout

New member
That is an amazing bit of work in a home garage, that resin smell must have been terrible when laying up the mold. Are going to continue and now make the parts at home or now to a commercial company?
 

Leighsjor

Active member
That is an amazing bit of work in a home garage, that resin smell must have been terrible when laying up the mold. Are going to continue and now make the parts at home or now to a commercial company?

Yes you’re right, the fumes from the resin are intense to say the least. Definitely need respirators and LOTS of ventilation.

I have actually already nearly completed the first camper. Planning to produce them in house in small quantities for now. If you’re interested in seeing the finished product you can hit up my instagram as there’s some photos of it there.


Sent from my iPhone using Tapatalk
 

Leighsjor

Active member
I can't deal with that stuff...

Some epoxies smell fine to me, however.

Luckily I only have to deal with it for making molds. The resin I use for making the camper is epoxy based and being vacuum infused there's little to no fumes.
 

Old Stout

New member
epoxy based and being vacuum infused there's little to no fumes.
Using vinylester then? If you are doing this in non commercial space at home, even infusion is going to release fumes in the mixing pot, etc. Styrene, MEKP, cobalt, carbon dust etc getting that in a home with toddlers/dogs around to be avoided. little project easy to blow off, but small commercial production gets significant fast.

@Gravelette There are a time honored traditions on expo: 1) being a non-sponsor on Expo but dancing around adding sponsor content, and 2) posting a just a regular guy everyman basement build that's functionally a commercial project for a business.

Which is not to shade the outcome, which on instagram is a quite nice very clean camper, price TBD.
 

Attachments

  • havenoverland.jpg
    havenoverland.jpg
    106 KB · Views: 32

rruff

Explorer
Using vinylester then? If you are doing this in non commercial space at home, even infusion is going to release fumes in the mixing pot, etc.
He said epoxy...?

I tried a few different cheap epoxies, and like the basic EBond the best. The smell never bothered me at all, while some of the others did... but none were close to polyester resin or 2x PU paint for toxic odor. :sick:
 

Leighsjor

Active member
He said epoxy...?

Yes epoxy. Old stout is right there’s some fumes still but nothing like polyester resins.

As for the dust it’s nasty stuff as well which is why when I’m cutting I always use vacuum dust collection or do it outside with a respirator and other proper ppe.

Everyone has to start somewhere and for me I’m blessed with a rather large private shop. My need for a more commercial space may get more realistic quickly if folks really want this thing.
 
Last edited:

Leighsjor

Active member
After finishing the molds for the sides of the camper I made a layup table for infusing all of the flat panels necessary to build the camper. This table needed to be long enough to lay up the roof panel and wide enough to do the floor pan so the dimensions ended up being 7'x11.5'. There was several different ways I could do this but I ended up deciding to go the route that would allow for a little more durability over time.

IMG_3018.JPG
The table is made of three 5 inch thick mdf torsion boxes joined together and leveled on a hefty frame which are then covered with a sheet of 1/8 aluminum. This makes an extremely flat and durable surface for me to lay up all the flat panels without worry that they'll damage the surface during de-molding.

IMG_3050.JPG
You can see here one of my first flat panels in the process of infusion. Pulling vacuum on the table made the edges of the aluminum want to lift a little so I used some quick grips to mitigate the problem. Since then I trimmed the entire top corner of the table with aluminum angle to avoid needing the quick grips.

IMG_3117.JPG
And here's my stack of completed flat panels ready to be cut to size to assemble the base of the camper.

For those interested here's a Timelapse video of what it looks like when infusing these panels.


Leighsjor

Active member
It was finally time to put our giant molds to use! Each camper side is made up of a strategically layered carbon fiber and foam core sandwich. We also use another type of flexible infusion core for the contoured parts of the panel.

IMG_3135.JPG
Here you see the first camper side in the layup process. Each layer added is carefully tacked in with spray tack to keep it in place before being vacuum bagged.

Here's a time-lapse video of the first camper side being infused with resin. As you can see the part is large enough that it takes a couple resin injection ports in order to fully permeate the part with resin.

And finally a video of the first cured and de-molded camper side. You can just hear the excitement in our voices after pulling the first side from the mold and feeling just exactly how lightweight and strong these parts are!

Speaking of strong here's a screenshot of an instagram story that my friend posted about this moment. I couldn't help but illustrate just exactly how strong these parts are. As you can see the side panel of the camper supports my full body weight without even showing any sign of deflection.

IMG_3900.jpg
Next step - the other side!
 

Leighsjor

Active member
After a "quick" lather rinse repeat I now had two camper sides. Here's a video showing the detail of the carbon fiber in the camper side:

After some trimming you can get a better idea of the flange thickness. This flange will then be used to bond the midsection flat panels to the sides.

IMG_3230.JPG
IMG_3232.JPG
I've probably said this before, but HERE is where it really got exciting. I built a simple jig to set the exact camper width desired. I don't think I can tell you how many times I hopped up on that rolling jig and pretended I was standing in the finished camper. :p
 

Forum statistics

Threads
189,445
Messages
2,917,038
Members
232,261
Latest member
ilciclista
Top