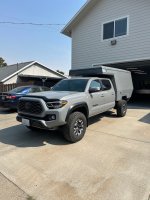
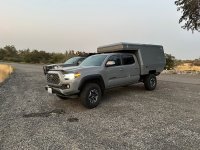
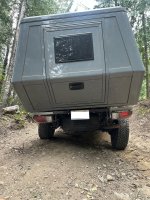
Carbon Fiber Tacoma Bed Replacement Camper - Build Thread

Antwon412

Well-known member
I know you’re a long way from done, but what do you think you would sell these for if you made them?

I do like it a lot. Although my current camper has the tilted inside as well and I’m actually looking more for the four-wheel camper type, it’s a purely vertical wall for more interior room.


But this is amazingly nice!
 

Leighsjor

Active member
I know you’re a long way from done, but what do you think you would sell these for if you made them?

I do like it a lot. Although my current camper has the tilted inside as well and I’m actually looking more for the four-wheel camper type, it’s a purely vertical wall for more interior room.


But this is amazingly nice!

As a rough estimate the shell only without interior will likely be in the $35-40k range.


Sent from my iPhone using Tapatalk
 

Leighsjor

Active member
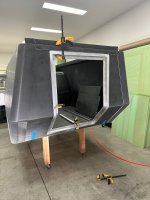
I had debated a lot about the placement of the door for this camper. I really liked the idea of a side entry door, but there's a few negatives about it that I just couldn't get past including head clearance when you enter due to the slanting walls, as well as inhibiting natural flow of the interior layout. I really like that the rear door, in combination with the departure angle, make it so you don't have to duck at all when entering the camper. It also makes it more possible to layout a nice symmetrical and functional interior.

One of the primary reasons to go with a slide in camper or a bed delete camper such as this is that it's much easier to seal the elements out of the habitat compared to working around a tailgate and bed tubs that leak like a sieve.

IMG_3423.JPG
I designed the door frame to have a large flange that works in conjunction with a bulb seal to seal out the elements.

IMG_3501.JPG
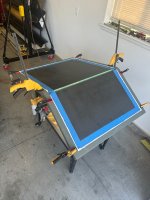
The door itself is built using two 45 degree support brackets and custom welded inner and outer frame.

IMG_3504.JPG

IMG_3502.JPG
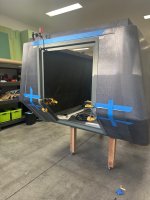
In the first picture here you see the outer frame getting bonded to the two panel cutouts after getting sprayed with primer, and in the second main frame is getting bonded to the body of the camper.

Here's a video of the door functioning after getting everything mocked up for the first time.

As you might see in the video I decided on a type of full width waterproof hinge and I'm super happy with it so far as I'll be able to leave the rear door open in the rain without water pooling and dripping through the hinge itself.


Antwon412

Well-known member
Any thought of making it hinge the other way and have steps built into it? Flip it down and be able to walk right inside the camper.
 

Leighsjor

Active member
Any thought of making it hinge the other way and have steps built into it? Flip it down and be able to walk right inside the camper.

I did consider the concept, but ultimately decided against it. I try to keep my designs as simple as possible with as few moving parts as possible and I didn’t see enough benefit in it. It’s easy enough to add a step in another way. I’ll likely be adding a step to the receiver hitch.


Sent from my iPhone using Tapatalk
 

jackoftheforest

New member
I did consider the concept, but ultimately decided against it. I try to keep my designs as simple as possible with as few moving parts as possible and I didn’t see enough benefit in it. It’s easy enough to add a step in another way. I’ll likely be adding a step to the receiver hitch.


Sent from my iPhone using Tapatalk
This. Is. Awesome.
Great build, I'm impressed by the level of precision.
Did you always plan to make it a business venture, or did that evolve en process?
 

Leighsjor

Active member
This. Is. Awesome.
Great build, I'm impressed by the level of precision.
Did you always plan to make it a business venture, or did that evolve en process?

As with most things I’ve built it usually starts with wanting xy or z thing for myself. Then at some point I inevitably realize the project will cost to much to make sense just for myself and that’s when I justify selling a few of whatever I’m building. But to answer your question, yes, that point was pretty early on in this process.


Sent from my iPhone using Tapatalk
 

Leighsjor

Active member
Anyone going to Overland Expo PNW this weekend? We’ll be there on Sunday with the truck! If you see us come say hi!

5bff129ed380aedf3739091a79b16c5b.jpg


Sent from my iPhone using Tapatalk
 

Leighsjor

Active member
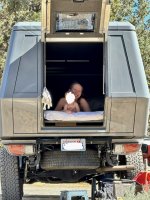
Just had a great weekend in Redmond, OR attending the Overland Expo! We camped in the camper with our 7 month old for the first time and she absolutely loved it. Currently the camper has no tent canvas, so we camped with our air mattress down on the floor of the camper and it worked quite well! I have to say I'm very impressed with the thermal resistance on a hot, sunny day.
IMG_5818.jpg

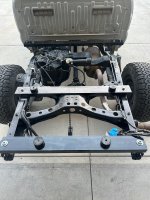
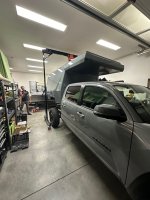
Getting back to the build. We left off after finishing the fabrication of the rear entry door. After that it was time for a quick test fit to determine placement of the wheel well cut outs.
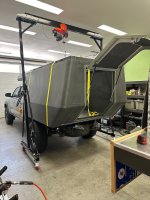
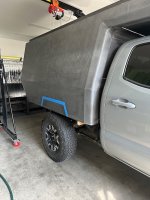
IMG_3550.JPGIMG_3554.JPG
After that was sorted I built a mold for the desired wheel arch size. This mold was simply built out of stacked mdf which was then coated in epoxy resin, faired, and finished with duratec primer.
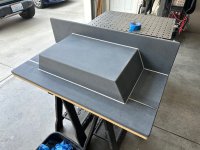
IMG_3620.JPG
When it came time to cut out the wheel wells from he main body of the camper I definitely chose the measure twice, three times, four times method! Here's a short video of one of the wheel arches getting punched out - no going back now!


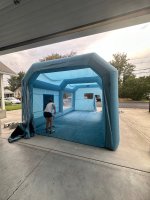
Once two freshly infused wheel arches were bonded into the camper our next step was prepping for paint!
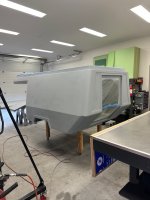
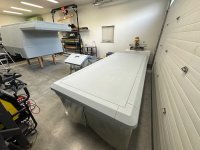
IMG_3734.JPGIMG_3735.JPG
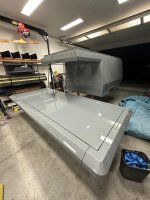
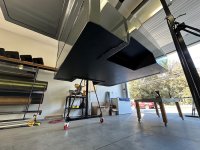
The necessary body work was completed on the main body of the camper, the door, as well as the lid. I've deliberately skipped past showing my method for building this lid because I will likely be changing how I do it in the future. Here you see the camper, rear door, and lid ready for paint! So exciting to see everything come together!

Stay tuned for the next post about painting and final installation on the truck!
 

Forum statistics

Threads
189,656
Messages
2,919,372
Members
232,632
Latest member
Timboruski
Top