1 Bored Clerk's DIY Camper

1 Bored Clerk

Explorer
This thread is great, I appreciate all of the boat building techniques that you're using to keep water out of the plywood. Keep up the good work!

Thanks! I'm sure I'm not doing it exactly right but it's all above the waterline so I'm hoping it'll be okay for a few years.


Sent from my iPhone using Tapatalk
 

1 Bored Clerk

Explorer
Lots of sanding on the camper today. There are a few areas that could use some touch up with epoxy. I might be a little OCD but maybe I'm not? Anyway, I'll probably touch up those areas.

7531b7f4f31ca8181172ac38db388a6b.jpg

Lots of hand sanding too. I tape my fingers to keep them happy. There's probably a pro way to do this but this works for me. Still gives me some feel and dexterity.


Sent from my iPhone using Tapatalk
 

1 Bored Clerk

Explorer
Did some epoxy touch up this morning. There were a few areas that I didn't care for so I made them nice and smooth again.

I also measured for the bed side of my camper mounts! Getting the camper mounts done will put my brain in a really good place. Been sweating these.

8d6f91ebced1e303ae97dfcf76b48182.jpg


Here are the notes I made. I'll go straight to CAD and get these out for laser cut/bend this week. Should see them back in a week or two depending on how busy my preferred shop is.

Included in that photo are the notes for the aluminum plate that the drawer seals will mount to. Another big thing to get done at this phase.


Sent from my iPhone using Tapatalk
 

CoyoteThistle

Adventurer
Great progress!

I sympathize with you on the sanding . I'm probably not as OCD as you, but even getting things looking "good enough" takes lots of time. Kudos for doing it right!

Looking forward to more details on the mounts. I'm going back and forth on ideas and sweating it too. What is that doohickey in the photo above the middle note?
 

1 Bored Clerk

Explorer
Great progress!

I sympathize with you on the sanding . I'm probably not as OCD as you, but even getting things looking "good enough" takes lots of time. Kudos for doing it right!

Looking forward to more details on the mounts. I'm going back and forth on ideas and sweating it too. What is that doohickey in the photo above the middle note?

That doohickey is one of my camper mounts. I'm using one in each corner. They are body mounts...the same ones used to mount the cab of my Tacoma to the frame. I figure it's similar weight (with cab full of people) and it's serving a similar purpose. We'll see how good or bad of an idea this turns out to be! I hope I don't break my camper on the first off road trip. I plan to work it out thoroughly.


Sent from my iPhone using Tapatalk
 

Gunner207

Observer
Best sandpaper ever for sanding epoxy is made by festool and is called granat. Last at least five times longer than anything I have ever found.
 

1 Bored Clerk

Explorer
Best sandpaper ever for sanding epoxy is made by festool and is called granat. Last at least five times longer than anything I have ever found.

Nice! Thanks for the tip. I have a local shop that sells festoon...they probably have that paper on the shelf. Epoxy does eat paper, that's for sure.


Sent from my iPhone using Tapatalk
 

IdaSHO

IDACAMPER
much like sheetrock mud when taping and filling screw holes, less mud you use the better.

For laying the seal coat(s) of epoxy I always use a squeegee, and spread it very thin. Very little sanding needed.
Same goes for final coats after filling the fiberglass weave.

For 95% of sanding I use a random orbital air sander.
Remainder is done by hand.


Looks good BTW. Project will certainly be bomb proof when done. :ylsmoke:
 

1 Bored Clerk

Explorer
much like sheetrock mud when taping and filling screw holes, less mud you use the better.

For laying the seal coat(s) of epoxy I always use a squeegee, and spread it very thin. Very little sanding needed.
Same goes for final coats after filling the fiberglass weave.

For 95% of sanding I use a random orbital air sander.
Remainder is done by hand.


Looks good BTW. Project will certainly be bomb proof when done. :ylsmoke:

Thanks for the tips and the reminder about 'mud'. I'm really terrible at drywall so this should go well. Haha! I have noticed that all of my sanding effort has been put into the areas I started with. I got much better with my technique as I went.

And, roger on using the squeegee.

I'm considering just taping the seams on the inside (and other areas I deem important) rather than full fiberglass inside. I'm glassing the entire exterior so I think I'll still be plenty strong.


Sent from my iPhone using Tapatalk
 

IdaSHO

IDACAMPER
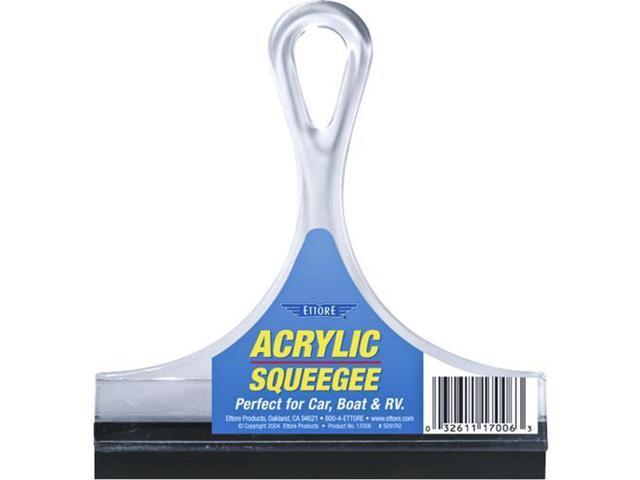
Squeegee is hands down the best tool Ive found for laying epoxy.

Saves labor in sanding, and doesnt waste epoxy. If your not using one now, you will be amazed at how far you can stretch the epoxy in each coat.

Just dont spend a fortune on squeegees. Get the cheapest ones you can find. Even if cleaning them well, they do not last as the leading edge on the rubber wears fast.

I run a 6" plastic handled one I found at the local grocery store, cost about $1.50 each.

V08E_1_20150228276164704.jpg
 

1 Bored Clerk

Explorer
Squeegee is hands down the best tool Ive found for laying epoxy.

Saves labor in sanding, and doesnt waste epoxy. If your not using one now, you will be amazed at how far you can stretch the epoxy in each coat.

Just dont spend a fortune on squeegees. Get the cheapest ones you can find. Even if cleaning them well, they do not last as the leading edge on the rubber wears fast.

I run a 6" plastic handled one I found at the local grocery store, cost about $1.50 each.

V08E_1_20150228276164704.jpg

Thanks, again! I could never repay the good people of ExPo for all the help I've been given.


Sent from my iPhone using Tapatalk
 

1 Bored Clerk

Explorer
No camper update. Still working on camper mount files to be cut and bent.

But, I HAD to work on the garage. My workspace had become so oppressively cluttered, it required attention. So, I attended to it...and I will continue to tonight. Hopefully be back on track tomorrow.


Sent from my iPhone using Tapatalk
 

1 Bored Clerk

Explorer
Got back on the camper today!

cb70fe7cf017eec25ce9b6d4cf861213.jpg

e3ac972ba4948ad304f79f1fd788ea86.jpg

Routed around the drawer openings and some other edges that needed rounding.

ddc4c74f64fb87f6656eddb079f999ef.jpg

Made a design change here. The edge you see here is where the piano hinge for the interior drawer access hatches was to be mounted. The more I thought about it, the more I realized that a hinge was completely unnecessary. Plus, it would be another cost, more time to install, and more screw holes in my wood to let in moisture. So, I canned the whole idea.

22b6c236864305460f4e4e49c4022c60.jpg

I epoxied in two more little shelves for the access panels to sit on so they will be supported all around the perimeter.

I've been moving toward simple. I've taken out of the design a lot of features and complication because they weren't going to get me to my goal: to camp comfortably year round, at a moments notice with all the necessary provisions to handle any reasonable circumstance that may come up. So, simple wins.


Sent from my iPhone using Tapatalk
 

IdaSHO

IDACAMPER
Lookin' good :ylsmoke:


Another slick tip for you, with regards to router work that i figure you'd appreciate.

I keep plenty of 1/4" shank bits around for the trim router which is super handy and lightweight.
Mega side benefit is that they drop right into the cheapo die grinder for tough spots.
I've made a handful of jigs over the years specifically for the die grinder to be used as a router.


Latest one was to use a flush trim bit on long 45 degree sections of a project i have in the shop right now.
A standard adjustable router base just didn't cut it.

16998991_330275264036216_8287031256694835373_n.jpg


Just be sure to check the RPM max on the bits you are using, and drop the air pressure as needed. :)
 

Forum statistics

Threads
188,029
Messages
2,901,361
Members
229,411
Latest member
IvaBru
Top