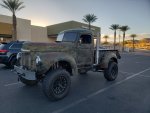
1949 International/Jeep Wrangler Rock Crawling & Overland Build

GoldiesGarage

Well-known member
Made a video of my wiring job. Engine to LED headlights & taillights. Every time I wire a vehicle, I try to step up my game. I want the cleanest install possible. I started buying grommets from the junk yard to make things cleaner/easier. Installed a GM key to start the truck. Took awhile to get it all functioning and it is still not 100% done. 100% LED vehicle is new to me.
 
Last edited:

GoldiesGarage

Well-known member
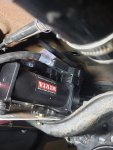
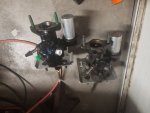
I needed a break from working on the essentials, so I bought an onboard air kit from Viair. I used them before on my brothers 1950 Dodge, everything worked out for his kit. I bought the Viair Dual 485C kit. It says it can support 200psi at 100% duty cycle (1 hour). I figured it should be able to inflate oversize tires at a decent pace. This kit cost about $900, I was thinking spend the extra money for a nice and easy install. Off I went.

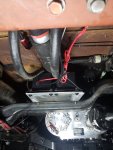
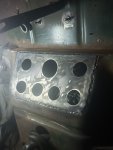
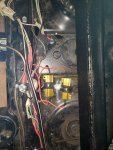
I needed to make a mount for the compressors and all I had was an aluminum tunnel plate from a 2006 Z06 Corvette. Never Tig welding aluminum before and I was not comfortable but I figured I would never learn if I didn't just jump in and try. I was planning to put the mount near the battery and did some measurements and cut it out. Got it to stick together and when I went under the car, I noticed a better spot under the cab on top of a crossmember. This new spot could be used with a simpler design and only required a heat shield for the muffler. So mid build I changed it up. In the second image you can see the change in direction. Some weld sections look better than others but it should do the job.

I drilled some holes in the my awesome mount and bolted the compressors on. Drilled the holes in the crossmember and bolted the mount on. Once the compressors where mounted I started wiring the compressors. The kit came with a 80 amp relay to run them. I wired it up and some power from my power probe and nothing. I did some testing and the 80 amp relay is does not work out of the box. I sent them an email and they some time later I received a functioning 80 amp relay.

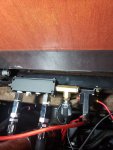
Now that the compressors work, I need to control the air portion. The kit came with a 6-way air manifold. I hooked up the supplied fittings (had red sealant on them) and the all leaked. I spent over 3 hours trying to seal this manifold with Teflon tape and Permatex thread sealant. I managed to get the leak to be small enough that I could continue. I choose not to use the 2.5 gallon air tank for space reason. I want to get potable water or a second fuel tank before I have an air tank taking valuable space. So from the manifold an air line runs straight to the regulator with an female coupler. I currently have the regulator bolted to the outside of the bed in front of the fender. I did buy some 90° and 45° fittings since I want to change the way the line connected to the regulator. I plan on creating a box the will be welded in to make a little cubby where the regulator will live and be protected. But I have to go buy some steel for that.

I went to to test the entire system and when I went to insert the supplied air hose and for some reason it has two female ends. I figured out this hose is for the portable air compressors they sell. I attempted to remove one of the female ends but that connection is so tight. It was rotating in the vise. That's not good. So I just used a different hose to test it. Air came out like it should.

Over all thoughts...
It is a nice kit but for all the headaches I had, it wasn't worth $900. I emailed the company again they are sending me the correct male/female hose and a another 6-way manifold (currently in the mail). Also, in their email they said they pressured tested it and were able to get it the manifold seal. My guess is that when they tapped the threads it was done poorly and that is why is wouldn't seal. I guess I'll find out when it arrives. Viair has good customer service but is surely lacking in quality control.

Maybe I should of just bought and ARB Dual Compressor instead...


Air compressors.JPG
OBA bracket.JPG
20210921_200148.jpg
20210921_200202.jpg
20210921_200442.jpg
20210921_200109.jpg
 

Buddha.

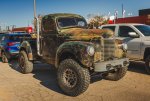
Finally in expo white.
That’s a lot of money for the kit. Should be plenty for airing up tires though.
I went with a much cheaper viair and it barely airs a tire from 50-80psi.
 
Soooo... I just gave myself a deadline of September 23. I volunteered help at Overland Expo West and I want to drive this truck there. A little bit over 30 days to get this truck roadworthy.

-Check List-
Finish wiring - Headlights - Taillights - Turn Signals
Seal the front diff
Get the truck some Insurance
Wait at the DMV for HOURSSSSS & Register the truck
Install new to me (A.K.A. used) rims & 35 inch tires
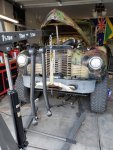
Install Teraflex 6in front springs. Front suspension is sitting on bump stops... V8 and Winch bumper is HEAVY
Install and wire up the other gauges
Install Metal Cloak Skid plates
Install rear window maybe side windows
install driver side mirror
Install Oil Cooler
Install Transmission Cooler
Adjust transfer case shifters so it shifts into 4 low
Wheel Alignment
Buy camping gear
Drive to Overland Expo West
Have fun and meet new people

It is crunch time.

Well, I need a way to shift the transmission. The aftermarket world sucks in this department. They are all super modern looking and way to expensive like $400 and up.

Since I can't put the shifter back on the column and it can not go in the traditional floor location. I need an original solution to this problem. I noticed the OEM shifter linkage/cable was SUPER long. I have a decent amount of space behind the seats. Why not put the shifter behind the seat never seen it done before but in theory it should work. So I went to the junkyard and only one truck matched my donor truck steering column. I think I paid like $40, %10 of what a aftermarket one would cost. Not to bad so far. I took it home and started stripping it down. Since I took apart one already, I knew what I needed to do and it went fast.

How it started
View attachment 676651
Drilled a hole for the shift cable
View attachment 676652
Test fit, would not shift with both seats in so....
View attachment 676653
Made this shifter handle. Checks all the right boxes except for aesthetics.?
View attachment 676654
All in all, it shifts like it should. It is really awkward to shift it. Since you have to reach behind you. I plan to make some sort of cover for it to keep things off of it and to cover up the ugly.
I guess Im not understanding this. Cant you fab the lever to come forward btwn the seats. Obviously not but Im missing why.
 

GoldiesGarage

Well-known member
That’s a lot of money for the kit. Should be plenty for airing up tires though.
I went with a much cheaper viair and it barely airs a tire from 50-80psi.
Yeah, it was expensive and I will not buy the kit again. If I choose Viair again I will just buy the dual compressors, they are around $500 or I'll go ARB.
I hate inflating tires to 80psi. I gone through 2 portable compressors and now I do not deflate my tires on my Dmax. Once this International is street legal, no more 80 psi tires to deal with.

I guess Im not understanding this. Cant you fab the lever to come forward btwn the seats. Obviously not but I'm missing why.
The longer you make the lever, the more "throw" it has. As it is right now, it is pretty much as long as it can be to still shift/function between the seats.
 

GoldiesGarage

Well-known member
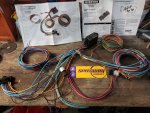
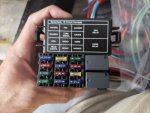
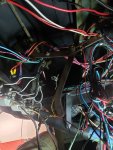
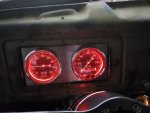
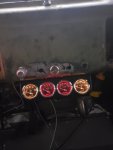
Well Life is rough. I thought I fixed the taillights but I was wrong. The problem came back (turn signals would only work with the headlights on, but hazards worked fine). So I ordered a new wiring harness from Speedway. The directions are fantastic (Color coded and numbered), but it is pretty much the universal standard of wiring harnesses. So even my old instructions can wire this kit. It is a 12 circuit universal harness. I also change the grommets in the firewall. I went from the 3 inch main grommet from a GMT800 to 5 wiper grommets. I think it looks way better. I moved the engine harness up to be with the other grommets. Still need to weld the hole up. I started to make most of the wires the correct length and properly terminated. Under the dash is coming out even better than I thought. While I was under there, I cleansed some of the surface rust and brushed some POR-15 on the inside of the dash. I bought this wire loom off of Amazon. I will never buy the cheap plastic stuff again. Easy and clean to work with, just have to burn the ends to prevent fraying. I also found where I put my Autometer gauge lights, so I wired those in. I choose to put the red covers on for night vision ?. I am missing two red covers. Still have to wire in the front locker & air compressor. I need to prep for, reverse lights, rear locker and other 12v items. I need to finish the engine wiring harness because now it no start.
Right now I have the Tail lights working, brakes, park lights turn signals and hazards functioning. Front lights High/low beams, front turn signals and park light work as well.

This was days worth of work. Hopefully I have it done soon.

I solved my turn signal problem. There are two solutions.
1. Switch the LED front turn signals regular bulbs. How my brother's 1950 Dodge is wired.
2. Add a two LED resistor. One for left and one for right.
So I guess there was nothing wrong with the first harness. I just suck at wiring. But this install is WAY cleaner. I chose option 2 and added two resistor to the tail light harness and so far everything that is wired up is functioning properly.

20210921_110757.jpg
20211005_075620.jpg
Tig welding this panel in SUCKED and was very uncomfortable.
20211005_163808.jpg
20211009_103414.jpg
20211017_172501.jpg
20211009_093217.jpg
20211009_094259.jpg
20211017_183403.jpg
20211017_183359.jpg
20211018_204212.jpg
Still have more work to do...
 

GoldiesGarage

Well-known member
Got some more items taken care of today.
Most of my side window parts came in, enough to install them. I got the driver side installed. The window sucks going down and up. I plan to switch them to electric in the future. For now I will just leave it, I'm not expecting much from these 72 year old window regulators. I will try to install the passenger side tomorrow. My hydroboost was leaking inside my cab. So, I replaced that and it took way longer than expected.
20211106_104650.jpg
20211106_105333.jpg
20211106_192955.jpg
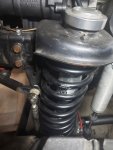
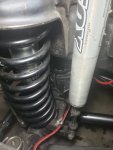
My biggest problem is my Teraflex springs are hitting the end of my (Factory Rubicon) sway bar. The driver side spring is "S"ing. I think the V8 and winch bumper might be to much weight??? The passenger side spring is fine and has over an inch of room. I took my lower control arms off to adjust them back and see if moving my axle back would add some space but it didn't do anything. While I had them off, I painted them their final color Black Stainless Steel Metallic. I notice my pinon angle was off so, when I re-installed the control arms I corrected that too.

20211106_093113.jpg
20211106_231817.jpg
20211106_232004.jpg

Any ideas on how I can fix this spring issue, please let me know. I moved the axle back about 1.5 inches. These are 6 inch lift springs. Maybe I need to find a heavier spring rate?? I'll probably call Teraflex on Monday, see if they can help.
 

zgfiredude

Active member
Are the upper and lower spring seats parallel? I am thinking that the weight on uneven surfaces could influence springs shape...?
 

GoldiesGarage

Well-known member
Are the upper and lower spring seats parallel? I am thinking that the weight on uneven surfaces could influence springs shape...?
The top rubber spring bucket doesn't have an orientation. They said OEM replacements on the website when I bought them. Did I buy the wrong ones?

Also just got off the phone with Teraflex, they said everything looks right and it could be a "tired" spring. I did buy them used. They also said, buying their Outback spring could help. Maybe I'll look at other companies for new HD springs. Open to suggestions.
 
Last edited:

GoldiesGarage

Well-known member
I am dealing with a power steering pump whine. The power steering doesn't work while idling. The hydroboost makes noise when I push the brakes. But with all those problems I still went to the mountains, so I can and make a short. I have some parts on order from PSC to hopefully fix the problems and maybe get hydro assist in the future.

DSC03308 70.jpg
DSC03307 70.jpg
DSC03310 70.jpg
 
Last edited:

GoldiesGarage

Well-known member
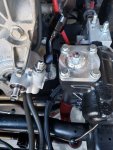
I've been dealing with this whining noise from my power steering pump not sure why. Well, I figured it out. I was starving my pump and creating cavitation. My pump feed line was to small 3/8 barb fitting. The fix was to get a modified power steering pump from PSE. The PSE pump has tapped threads to screw in a 12 AN fitting for the feed side. The straight PSE 12 AN fitting was hitting my steering box. So I went to the hose store and they came up with the solution to cut two fittings and weld them together to get the clearances I required. Got it all together and it was quite as it should be. 12 AN feed line 6 AN pressure side. I also ordered and installed the PSE cooler, Steering box with ports for hydro assist and the remote reservoir. I wanted to make sure the power steering system will work well together. So far nothing to complain about.
20211113_100819.jpg
20211114_084821 50.jpg
20211114_083239.jpg
20211114_083231.jpg
 

GoldiesGarage

Well-known member
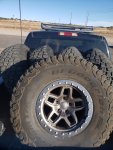
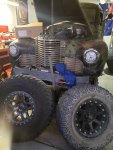
Did a 8 hour round trip drive to pick up some fancy new to me wheels and tires. The 35 inch tires were from 2014 and I didn't like driving on such an old tire. Also, I didn't have a spare. These tires are from 2019 which is way better. Stepped down from 18 inch rim to 17. These are AEV Borah Dualsport with beadlock ring and 37 inch BFGoodrich KM3 tires. I did have to trim the rear part of the front fender, no big deal.
20211201_153434.jpg
20211202_164746.jpg
This picture was taken by Jimmy Suggs from six-speed.com
1C7A2328.jpg
 

Forum statistics

Threads
188,394
Messages
2,906,698
Members
230,176
Latest member
Arcadia1415
Top