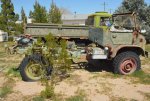
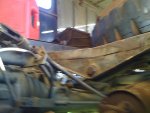
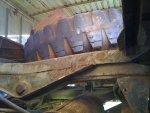
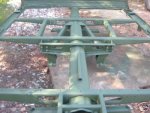
1958 Unimog 404 with cabover flex

joeblack5

Active member
Hi , newby here.

We have been using 4x4 conversion from Econoline, extended van, ambulance and schoolbus so far but thought it fun to graft a school bus body on a 404 soft top.
I want to hard connect the cab and the bus for a full body style. Below mockup picture is reasonable to scale, unimog part is not mine and came from www.
My 404 is missing the canvas and the plan is to extend the "cab over" from the bus and connect it to the front windshield. Sleeping will be above the cab. The rear wall in the original cab will be removed and swivel chairs installed for the driver and passenger.
This bus body is from a SRW girardin bus that used aluminum, some windows will be removed and sheeted over as to keep the weight as low as possible.
unimog with bus.jpg

I am looking for information of the full van body fire truck and the specific mounting of the cab they used. I read the pivoting frames and mounting thread and a bunch of other touching these subjects but there is not much specific information besides MB used a 4 point mounting system.

To get the least amount of binding in the 4 point these points have to be on specific locations in the chassis and should be in one plane.

The original rear cab mount will be removed and the cab frame extended / reinforced and connected to the bus.

I assume MB used a pivot /sliding plate combination in the rear but have not been able to find good picture.

Please help,
Regards
Johan
 

joeblack5

Active member
Just for full disclosure, the picture of the Mog above was gleaned of the web. The pic of the bus body from the Giradin website..Our daughter put them together. The Mog I am using has been sitting in the desert around Ridgecrest California and was begging me to get rescued. The canvas is gone and there was no bed anymore. We had the truck, and a second Mog shipped from California to Pennsylvania. After sitting in dry hot weather for the last 15+ years I feel bad for exposing them to the wet climate of Pennsylvania but I hope I can get new life into them. The second will get duties as a daily pickup truck.
Sofar i got the original low compression 2.2liter gas engines running and am now working on the brakes.
In the mean time I have bought the actual bus I am going to use and that is shipped also over here since the engine is not running and traveling during Corona time is not on our favorites list.

I have been studying the frame of the Mog and it seem that most of the chassis mount are more or less in one line. I think I am going to try to use an angle beam 5X5X3/8"...12.3 LBS/ foot or slightly larger and mount with rubber body mount/ donuts to the original chassis mounts. The leg of the angle would go down on the outside of the frame. I hope to apply some pre-tension with spacers at each end to evenly distribute the point load over the full chassis length between the axles.

The Girardin bus body has a galvanized steel cage and is sheathed with aluminum. I choose that for that reason in combination with weight and $$. It is already gutted by the PO. The steel parts are welded and riveted, will see what the corrosion situation is when it arrives here. Interior height is 6 ft 4 so some space is left for insulation. 2" in the roof and 3" under the floor in between the square tube cross beams under the bus body. Unfortunately not optimal and some thermal bridging will occur. In my previous bus conversions I have used floor heating and with an aluminum floor as heat spreader I might try that again.

The original cab mount of the Mog is ,ehhh, a very simple 3 point. The cab has square tube profile running all the way around it. Under the doors it needs a step to go down 3 to 4 " , square tube spacer again , and then square tube in a triangle to close to or behind the rear axle where the rear pivot point is going the be.

Planning on rubber body mounts / donuts from that tubing to angle iron ,
As sofar the plan, still hoping to hear more about what height, relative to chassis, Moggers have choosen there pivot points and why.

Johan6pcKxNEj8LIxFu7GL9q9J_jXwLLC5zpI3zLRxStNnkosDItB1b7SMXcdF6knp0in1XeWs82iYM8yQtALP4cWN5ltkAUgfu...jpggiradin bus.jpg
 

Sitec

Adventurer
You have quite a project there!! Looking at that Mog chassis, I'd be bolting direct to it.. Being fairly short, I'm guessing there wont be a huge amount of flex. Hwo wide is the bus body in relation to the Mog width?
 

joeblack5

Active member
Hi Sitec, yes that is why I was getting beer in the fridge for you, haha. These 404 flex 20 degree. My approach is that there is a full connection between cab and bus. The bus overhang will need to be extended and become the bed. The front seat are going to be on swivel so that we will end up with a lot more living floor space. I looked before in converting a Fuso 4x4 or LMTV but the cab to cabin part as part of the living space is not often discussed. The way this 404 came to me was just what I needed to explore if it is possible.
Just got " overland camper" from Steve Wiggles . Nice book . Found his location of pivot point dilemma explained reasonably well (p62) Also found some pics on the web of the swivel construction in 404 radio box trucks. So things are taking better form. The pic seem to indicate that the swivel  (2).jpg.jpg
is vertically halfway in the frame rails.
I am hunting now and see if someone has a these pivots laying around in a junkyard.

Johan
 

Jostt

Adventurer
nice projet, congrats , looking the pics, looks like the bus is massive long for the wheel base of the mog, is this just a optic effect? or do you plan to cut it? good luck in your project
 

joeblack5

Active member
Hi Jostt, Thank you, Not sure, I agree that is how it looks to me as well. I am working on the Mog to get it running. had some run-ins with black widows spiders hiding in the rim, all is good. Tomorrow the bus should arrive so that I have a better feel for it. If anything it would be better to move it further to the front so that I do not need to extend the front section to make it over the windshield. If so then that would mean that I have to change the wheel arches.
I will try to get the box as low on the frame as possible so. I need to lower the fuel tank and battery box a couple of inches.

Sitec, I am sorry , yes the bus body is 2" wider then the mog body. The bus body has curved walls so it depends where you measure. I like round curves, the old 404 help with also.

Johan
 

joeblack5

Active member
Yes, Sitec, just what I thought. I got 12.5-20. people say they are to large for a 404 with the 82 HP gasoline motor. I probably will put a very small turbo on it or modify to a OM617 turbo diesel as what many people have done. If I can get a little more HP then that would help with the RPM on the highway.. Haha , probably dreaming.... It looks like brick from the front end.

Our daughter made another rendering now with a picture of the actual bus. The PO send her a nice pic taken perpendicular to the bus. The bus has a double door for a handicap entrance in the back. She shortened it to one door.
I think the proportion is slightly of since the windows are 31" tall. unimog safari bus.jpg
So it is not going to be this tall. My guess 6" less.. Anyhow the bus should show up this afternoon . the I can do some more accurate measurements.. Repairing brakes now, replacing tires and then see how much HP is left in this 58 404.

Johan
 

krick3tt

Adventurer
I think you need an adapter for the tranny if you put in a diesel. I thought about it when I had my 404 but then sold it after a lot of work.
 

Sitec

Adventurer
If there's room in there, a Cummins 6Bt and ZF5-42 would work well. I designed a conversion plate to mate the ZF5-42 to a Land Rover LT230 full time 4x4 transfercase (which was then copied and marketed by a Reece Myers in the UK), which i fitted into my Land Rover 101. It was a perfect engine, with good road manners, plenty of power and sensible speed. By making the plate, I was able to keep the transfer case close as the wheelbase of the 101 was short (101")!
 

joeblack5

Active member
Krick3tt, yes adapter with 13 degree offset to have the IP clear the cab.
Wow interesting, an adapter to LT230..Hmm .. i have a landrover S2 pickup long wheel base with a 2.5 diesel.... project vehicle...and .. there are more. Think the 6BT would be a a bit hard on the front axle of the 404. Something else....Thinking about electric power assist steering.
Bus came in so spent some time assessing the rust and taking measurements. Wife likes it so that is a plus. Kids are less enthusiastic since I did not plan for a bed for them. haha
 

joeblack5

Active member
With the bus here there is more need for data on the original pivot system that the 404 used. At least to glean the amount of articulation of the sub frame. Not so easy to come by but fortunately Ferretboy at SteelSoldier took some measurements or me.
the pivot is 3/4" below the top lip of the chassis and the distance between the subframe and chassis is 4" . That comes out to a max pivot angle of the subframe of14 degree. With my potential larger tires and OM617 I think it is good to raise the cab 1.5". The added benefit here is that front seat will be raised relative to the floor in the bus. That will be nice when I install a swivel under the seat.

unimog 404 box frame mounts truktor 176b_1.JPG
picture center hard mount MB 404 ..gleaned from truktor@ benzworld


Even with the MB original 4 point pivot under the 404 they still added a construction to the hard mounts allowing it to flex forward and backward essential pivoting around the vertical axis and then added braces so that the bed could move forward or backward along the axis of the truck.
Since the bed is locked in by the two pivots that means that MB still expected some movement at the hard point.

So my plan is now to copy parts of the MB design, raise the front cab 1.5" of the pivot point and connect the rear of the driver cab to the sub frame. Then do an experiment with max wheel lift / twist angle while the subframe is loaded with 1000kg. Planning on using wooden 4x4" ( USA) as subframe cross members and a double 2x6" as frame pivot point wedged in between the C channel of the chassis. That is relatively easy , quick and cheap to do before I venture to a more permanent steel construction.
 

joeblack5

Active member
Today I worked on the bus demolition. Lot of the wall and ceiling were already removed by the previous owner. I removed the front panels above the driver.. There are rivets there that attach the shell to the windshield frame.IMG_20200517_184824_385.jpg
The insulation was in decent shape but I plan on sprayfoam.IMG_20200517_184808_250.jpg
Tomorrow I will see how the floor is connected. Probably use the grinder.
 

Sitec

Adventurer
Getting into it then! Just a few points re spray on insulation... If there's a leak you don't know about, its hard to find with spray insulation... If you want to run any new wires, or replace broken ones, they have to be on top of the insulation... and if you damage any external panels, it makes it hard to replace them... If your original insulation is good, I'd re use it.
 

joeblack5

Active member
Some progress with help from my oldest daughter. Removed remainder of the floor and cut one wall..scalped the front.....

Had some pics to share but EP does not seem to allow them...parsing error.. Wants me to use Facebook...twitter..YouTube...??

Let's see if it clears up tomorrow.
Hmm it did
IMG_20200521_172134_402.jpgIMG_20200521_163058_735.jpg
 

Forum statistics

Threads
188,197
Messages
2,903,685
Members
229,665
Latest member
SANelson
Top