poormansearthroamer
Member
Hey all! First off, I've never written a build thread before, so bear with me as I struggle through the trials of technical writing and forum formatting. This is going to serve as an example of how I tackled particular problems for interested parties and also as a way for me to get help on solving problems yet to come. As of now, I have the truck restored to a good, blank-slate canvas for me to start the actual build out. I'm real bad about updating ancillary stuff like this, but I do try to update my Instagram story as I'm working on stuff; my account is the same over there. Finally, some of my phrasing as I write is instructional/confident, as opposed to suggestive. To be clear, I'm not a tradesman or a mechanic and am completely self taught on all of this; if you notice me messing something up, please let me know so others don't make the same mistake!
Before we get started, I want to give a few shoutouts to build threads that have served as my Bibles throughout this process. Here's the links:

 expeditionportal.com
Here goes:
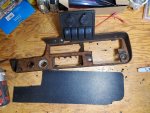
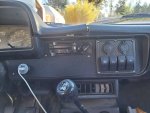
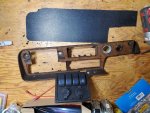
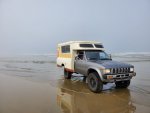
This is a 1983 Toyota Pickup 4x4 SR5 Longbed with a 1970s Toyota Chinook camper shell put on the back that I purchased from a guy in Bozeman and drove back to LA. The previous owner completed the conversion, but I ended up removing the shell to redo some stuff; exactly what I was trying to avoid by buying a preconverted example. Hindsight being 20/20, I should have done the conversion myself for a variety of reasons, but oh well. Here's some more photos of what it looked like when I bought it.
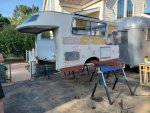
From the photos, it *looked* pretty decent, especially for the price. The PO had resprayed the cab, had proof of a rebuilt engine, and seemed to have a decent idea of what he was doing. I already knew that I would have to rebuild the roof, as it was sagging badly, but I really thought that would be all that would be required before I could begin building out the interior... Boy, was I wrong. After driving it back to LA, I quickly discovered it would need a fair bit of work to even begin the build out proper. At this point, my jobs and college picked up, my motivation dropped, and the camper project got shelved for 4 or 5 months. When I finally got remotivated, the first thing was to remove the shell from the pickup. I did this with my uncle, a 4"x6"x10' beam, 4 saw horses, and a floor jack that I put a 2x4 on to allow it to reach the 1" square steel frame under the camper. If at this point you're shaking your head, rest assured I was right there with you. We nearly nearly dropped the shell while getting it off; terrible idea, 10/10 do not recommend. I did not get any photos while we did this as it was dark and I flat out didn't have the ability to take my hands off it and snap some photos. So, here's some photos of when we put it back on, doing the process in reverse because I like to learn lessons the hard way (just not this time, thankfully).
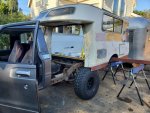
The process is as you'd imagine it: first, unbolt and disconnect everything between the truck and camper. Throw a couple saw horses under the rear end of the shell. Next, stick the floor jack under the front of the shell, put the 2"x4" between said jack and camper shell and start jacking. The front will lift up and the rear will begin to rest its weight on the saw horses. Once you have the clearance, slide the beam through the wheel wells and prop each end on a saw horse. For me, because the truck is on 33"s, i needed an extra lift to clear the beam over my frame rails; this came in the form of a 4"x4" between the beam, each side sawhorse, and on top of each sawhorse in the rear. I'm lucky that the front bottom corners of my shell (where my rear tires are in the following photo) were already damaged, so I cut out the trashed fiberglass, about two inches, and my tires *just* barely cleared. I then removed the beam and extra 4"x4"s and set it down on directly on top of the 4 saw horses. Putting the shell back on was much easier, but I hope to never do this again.
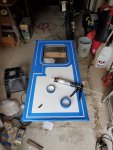
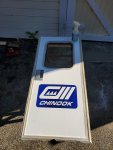
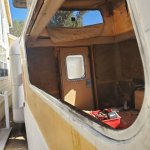
At this point, all the spray-in foam, the door, all windows, and the roof were removed. A lot of this stuff was done concurrently as different parts arrived and various problems were solved, but we'll start with the biggest repair of them all: the roof.
To remove the roof, you first need to remove the top of the poptop canvas, which is simply stapled into the wood frame of your roof. Remove the staples and unbolt your roof from the scissor lift assemblies. Either remove the lift springs before or restrain them somehow. When I removed mine, the springs blew up a couple of my lineal slides because I didn't restrain them. Also, I was working alone on all of this, so no photos were taken; I'm sure you guys can figure this one out without 'em. Next, strip the inside of your roof.
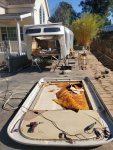
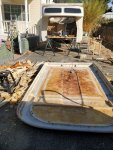
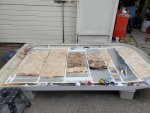
This step was made immeasurably easier by an oscillating tool (pictured in the center of the roof in the photo below) with a wood bit on it. It zips through fiberglass, wood, nails, etc., and only requires light pressure to travel in the direction you need it to. I got mine at harbor freight for $30 ish and, trust me, it's worth its weight in gold for this part of the project. 2 hours later, you're left with this:
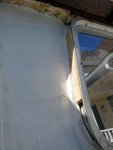
I opted to leave the part of the inner frame closest to me here in the photo above; it was still in great shape (I.e. not straight up missing like half the rest of it...) and mimicking the curvature would have been annoying. I forgot one bolt and ended up tearing out a chunk of fiberglass in the bottom left area when I pulled the wood off, but whatever, repairing that was nothing compared to the fiberglass work to come.
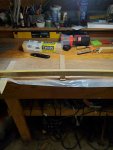
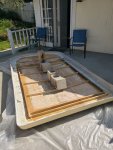
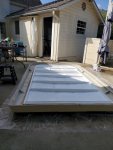
Sorry for the incoming IG photos; it's all I have of the next couple steps, which are sand (40 grit is what I used) and wire wheel everything you're planning on fiberglassing. This was highly unfun and took forever. I'd recommend wearing a paint suit, gloves, and a breather as the dust is pretty nasty and unsafe.
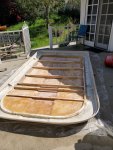
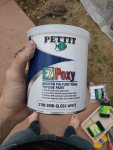
After I finished with the prep work, I cut out some mat and got ready to fiberglass. If anyone needs me to elaborate on how I fiberglassed, just ask. I didn't do anything much different than anyone else. I used West Systems Epoxy resin for everything in the build that required any degree of structural integrity. Regular body work was done with a polyester resin. Simple reason for this: epoxy is ridiculously expensive compared to polyester resin. Looks like I've hit my 10 photo max here, so more to come.
Before we get started, I want to give a few shoutouts to build threads that have served as my Bibles throughout this process. Here's the links:

1988 Toyota 4x4 + 1977 Chinook Build
Greetings fellow Overlanders! So last year I posted my ultra-light expedition trailer build (http://www.expeditionportal.com/forum/threads/152895-Ultra-light-Expedition-Trailer). The trailer was a great learning experience and has served us well for the last couple years. However, over the...
 expeditionportal.com

ABOUT US
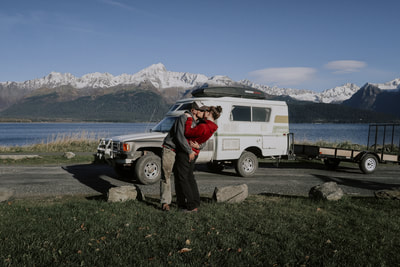
Newlyweds (Ken and Kally DiMarzio) overlanding with their two dogs their 4x4 Toyota Chinook camper.
www.chinookhoneymooners.com
Here goes:
This is a 1983 Toyota Pickup 4x4 SR5 Longbed with a 1970s Toyota Chinook camper shell put on the back that I purchased from a guy in Bozeman and drove back to LA. The previous owner completed the conversion, but I ended up removing the shell to redo some stuff; exactly what I was trying to avoid by buying a preconverted example. Hindsight being 20/20, I should have done the conversion myself for a variety of reasons, but oh well. Here's some more photos of what it looked like when I bought it.
From the photos, it *looked* pretty decent, especially for the price. The PO had resprayed the cab, had proof of a rebuilt engine, and seemed to have a decent idea of what he was doing. I already knew that I would have to rebuild the roof, as it was sagging badly, but I really thought that would be all that would be required before I could begin building out the interior... Boy, was I wrong. After driving it back to LA, I quickly discovered it would need a fair bit of work to even begin the build out proper. At this point, my jobs and college picked up, my motivation dropped, and the camper project got shelved for 4 or 5 months. When I finally got remotivated, the first thing was to remove the shell from the pickup. I did this with my uncle, a 4"x6"x10' beam, 4 saw horses, and a floor jack that I put a 2x4 on to allow it to reach the 1" square steel frame under the camper. If at this point you're shaking your head, rest assured I was right there with you. We nearly nearly dropped the shell while getting it off; terrible idea, 10/10 do not recommend. I did not get any photos while we did this as it was dark and I flat out didn't have the ability to take my hands off it and snap some photos. So, here's some photos of when we put it back on, doing the process in reverse because I like to learn lessons the hard way (just not this time, thankfully).
The process is as you'd imagine it: first, unbolt and disconnect everything between the truck and camper. Throw a couple saw horses under the rear end of the shell. Next, stick the floor jack under the front of the shell, put the 2"x4" between said jack and camper shell and start jacking. The front will lift up and the rear will begin to rest its weight on the saw horses. Once you have the clearance, slide the beam through the wheel wells and prop each end on a saw horse. For me, because the truck is on 33"s, i needed an extra lift to clear the beam over my frame rails; this came in the form of a 4"x4" between the beam, each side sawhorse, and on top of each sawhorse in the rear. I'm lucky that the front bottom corners of my shell (where my rear tires are in the following photo) were already damaged, so I cut out the trashed fiberglass, about two inches, and my tires *just* barely cleared. I then removed the beam and extra 4"x4"s and set it down on directly on top of the 4 saw horses. Putting the shell back on was much easier, but I hope to never do this again.
At this point, all the spray-in foam, the door, all windows, and the roof were removed. A lot of this stuff was done concurrently as different parts arrived and various problems were solved, but we'll start with the biggest repair of them all: the roof.
To remove the roof, you first need to remove the top of the poptop canvas, which is simply stapled into the wood frame of your roof. Remove the staples and unbolt your roof from the scissor lift assemblies. Either remove the lift springs before or restrain them somehow. When I removed mine, the springs blew up a couple of my lineal slides because I didn't restrain them. Also, I was working alone on all of this, so no photos were taken; I'm sure you guys can figure this one out without 'em. Next, strip the inside of your roof.
This step was made immeasurably easier by an oscillating tool (pictured in the center of the roof in the photo below) with a wood bit on it. It zips through fiberglass, wood, nails, etc., and only requires light pressure to travel in the direction you need it to. I got mine at harbor freight for $30 ish and, trust me, it's worth its weight in gold for this part of the project. 2 hours later, you're left with this:
I opted to leave the part of the inner frame closest to me here in the photo above; it was still in great shape (I.e. not straight up missing like half the rest of it...) and mimicking the curvature would have been annoying. I forgot one bolt and ended up tearing out a chunk of fiberglass in the bottom left area when I pulled the wood off, but whatever, repairing that was nothing compared to the fiberglass work to come.
Sorry for the incoming IG photos; it's all I have of the next couple steps, which are sand (40 grit is what I used) and wire wheel everything you're planning on fiberglassing. This was highly unfun and took forever. I'd recommend wearing a paint suit, gloves, and a breather as the dust is pretty nasty and unsafe.
After I finished with the prep work, I cut out some mat and got ready to fiberglass. If anyone needs me to elaborate on how I fiberglassed, just ask. I didn't do anything much different than anyone else. I used West Systems Epoxy resin for everything in the build that required any degree of structural integrity. Regular body work was done with a polyester resin. Simple reason for this: epoxy is ridiculously expensive compared to polyester resin. Looks like I've hit my 10 photo max here, so more to come.
Last edited:
![00h0h_5gAAk4oN2VD_600x450[1].jpg 00h0h_5gAAk4oN2VD_600x450[1].jpg](https://forum.expeditionportal.com/data/attachments/480/480390-0b640149342f4f7be0e7133e80c7f351.jpg?hash=C2QBSTQvT3)
![20190618_121453[1].jpg 20190618_121453[1].jpg](https://forum.expeditionportal.com/data/attachments/480/480391-00e247245442ae2e89fdb5a8be2bce81.jpg?hash=AOJHJFRCri)
![IMG_7555[1].JPG IMG_7555[1].JPG](https://forum.expeditionportal.com/data/attachments/480/480392-1d39100cc05211632fcdf3e1b0c5195e.jpg?hash=HTkQDMBSEW)
![00P0P_d9JdAKouBWx_600x450[1].jpg 00P0P_d9JdAKouBWx_600x450[1].jpg](https://forum.expeditionportal.com/data/attachments/480/480394-040967bba2f9bcfbf658ff977bb6c008.jpg?hash=BAlnu6L5vP)




![Screenshot_20200411-102825_Instagram[1].jpg Screenshot_20200411-102825_Instagram[1].jpg](https://forum.expeditionportal.com/data/attachments/481/481685-b6e4039309cc944ca78c5f09a2e56149.jpg?hash=tuQDkwnMlE)
![20200411_103058[1].jpg 20200411_103058[1].jpg](https://forum.expeditionportal.com/data/attachments/481/481689-cc480041aca76597c13a19b8ab857d9d.jpg?hash=zEgAQaynZZ)










![20200418_091129[1].jpg 20200418_091129[1].jpg](https://forum.expeditionportal.com/data/attachments/483/483118-9db5de42e88daa775e75cbf7adc12ba5.jpg?hash=nbXeQuiNqn)
