2003 Montero Limited - Lawrence of Arizona

SONICMASD

Adventurer
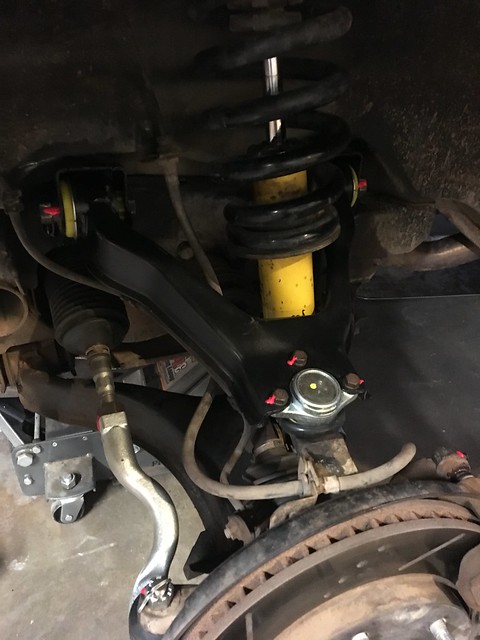
10/7/18: Front Suspension Update - One of the things that was apparent this vehicle needed during my test drive was an alignment since the steering wheel was about 20 degrees off center. So I took it in for an alignment but the shop said there was no point in aligning it because the front suspension had worn out parts - Upper Control Arm Bushings, Outer Tie Rod Ends, and Inner Tie Rod Ends.

Ernest had just replaced the Driver Side ITRE and both boots so I really only needed one ITRE.

Shopping List:

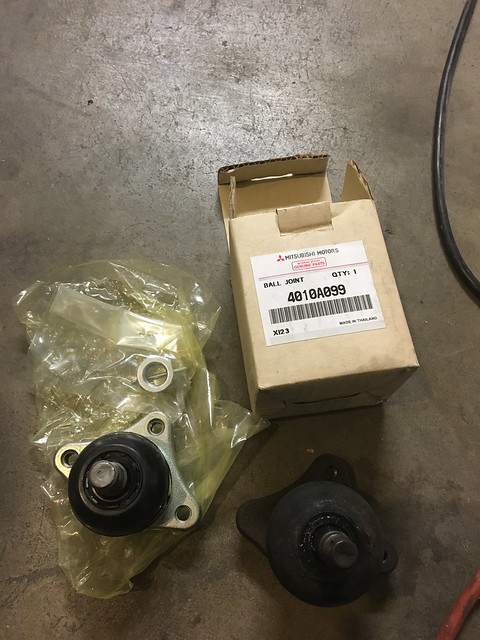
Mitsubishi Upper Ball Joint x 2
Mitsubishi Inner Tie Rod End
Mitsubishi Inner Tie Rod End Boot Band Clamp
Mitsubishi Outer Tie Rod End x 2
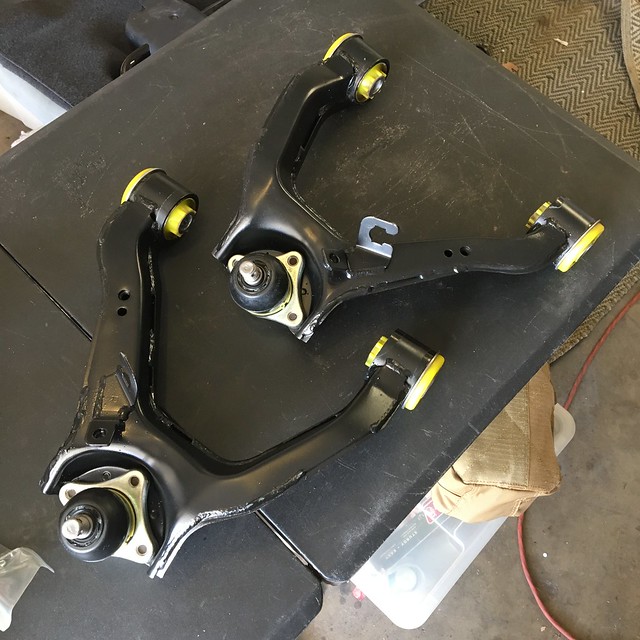
Siberian Front Upper Control Arm Bushing Set x 2


Now, you might be wondering - why not just order the pre-built Mitsu UCAs with ball joints and bushings already installed? This is definitely the way to go because pressing out bushings is a huge PITA and worth avoiding whenever possible. BUT, speaking with Toasty, he tells me that he recently bought new complete Mitsu UCAs for his 98 and within a few months the bushings tore. He suspects that although they were indeed New, they were probably old stock that was manufactured many many years ago and had been sitting in a hot warehouse somewhere. So not wanting to risk that, I went with Siberians.


You also might be wondering why not use Moog or any other aftermarket brand that is much cheaper than OEM - Because I've seen Moog's quality go way down over the years and I only want to do this job once. I know the Mitsu parts are expensive but Suspension/Steering is on a fully independent suspension vehicle that I use to fly down corrugations is not something I wanted to skimp on.


Removing the components is very easy and straightforward on the Gen3. I used a 3# sledge to break the OTREs and UBJs free from the knuckle but if you live in a rusty environment you may want to invest in Harbor Freights ball joint tool which would make short work of it as well.

You'll also want to borrow an ITRE tool from your local autoparts store for this
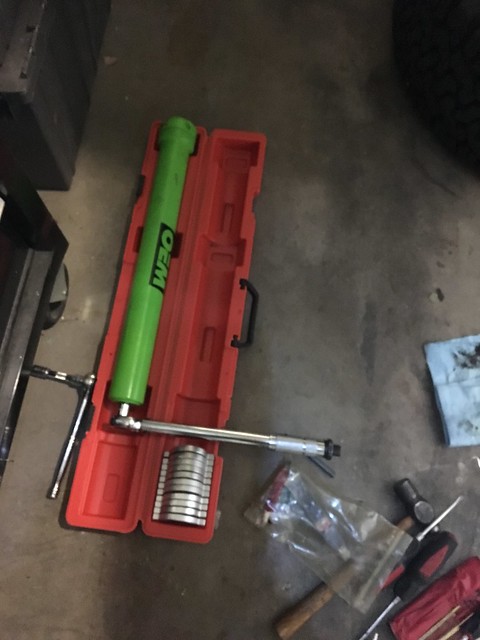
IMG_2245

The hardest part about removing the UCAs is getting a socket onto the 22mm nut and bolt since there is not a lot of room to work with because of the coil springs. I used a crescent wrench on one end and a deep wall socket with 26" breaker bar on the other end and soaked the bolts in homemade penetrating fluid (acetone + atf) the day before.


Here is everything apart:
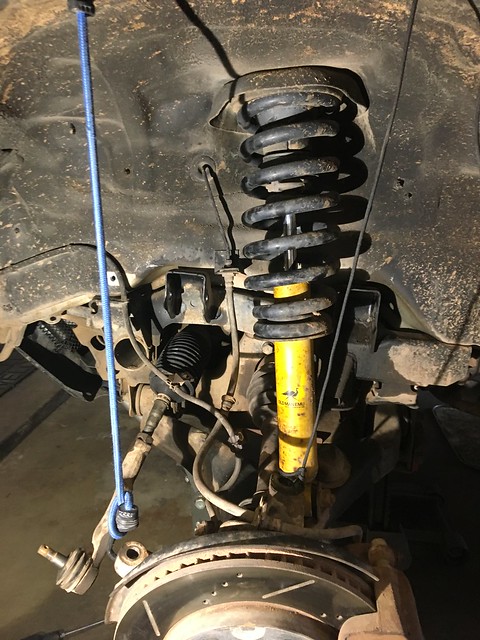
IMG_2217

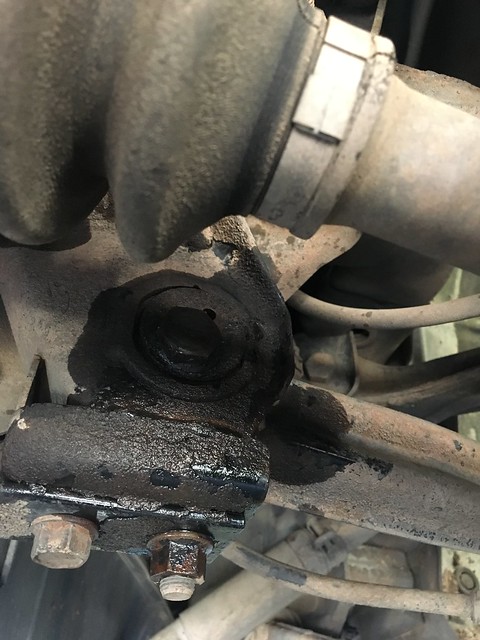
Inside the passenger side ITRE hole there was some debris from the old unit. I cleaned it up before installing the new one.
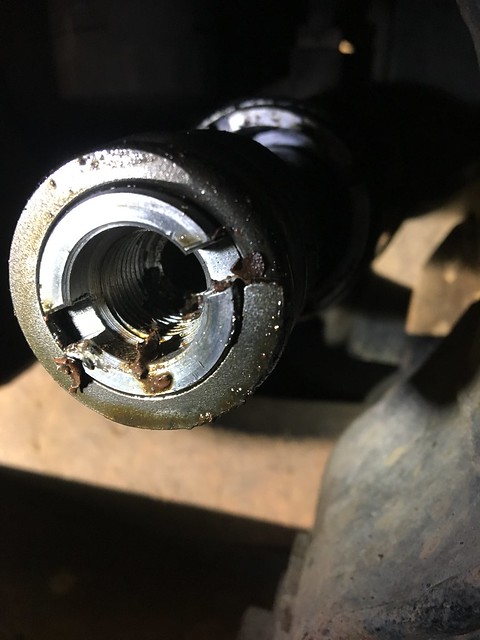
IMG_2244


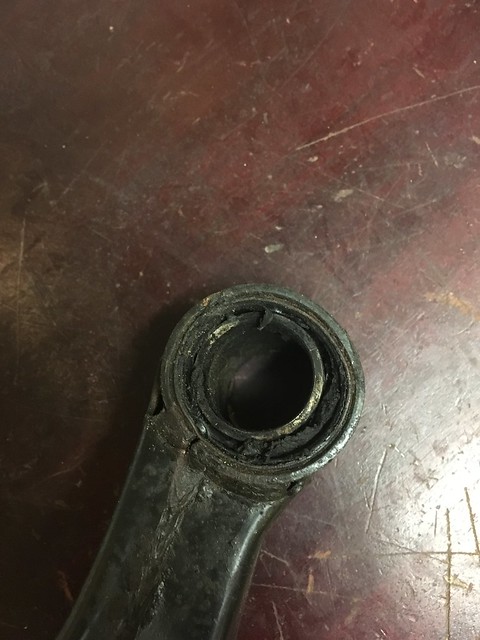
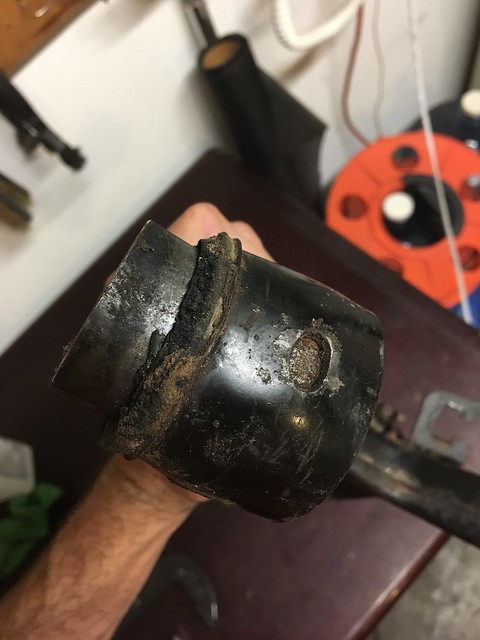
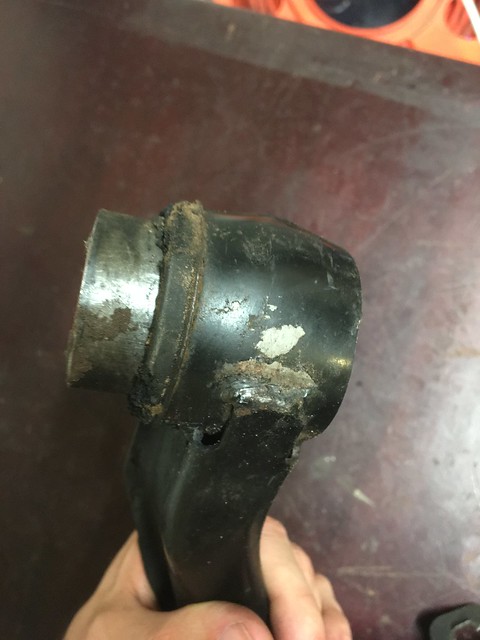
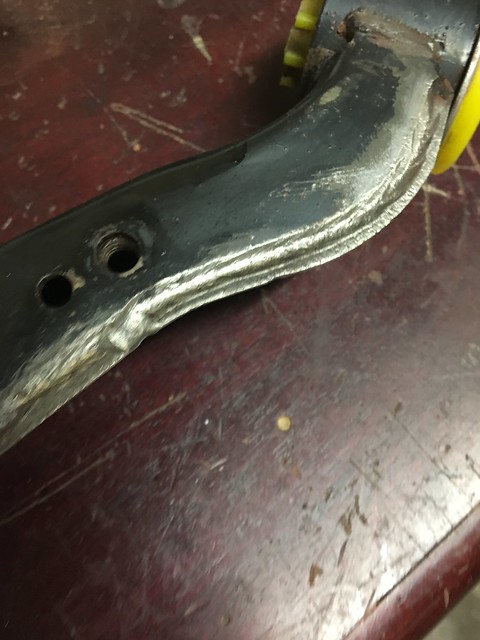
The UBJs just unbolt from the UCA so the only hard part of the disassembly process is getting the bushings out. Ernest and I made an attempt at pressing them out with a 20ton press but didn't choose a good socket size and ruined the passenger side UCA. Word of advice, don't push on the rubber part of the bushing hoping it will remove the metal case, it won't. It will just deform the entire control arm. That silver cylinder you see sticking out of the arm is the socket, it's in there good and not going anywhere now.
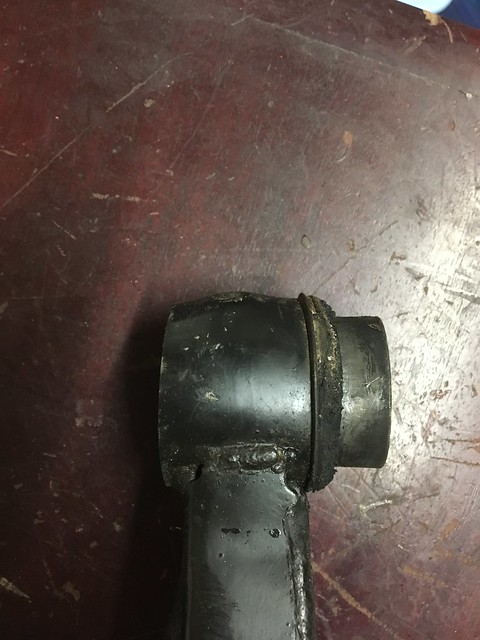
IMG_2524
IMG_2523
IMG_2528
IMG_2527

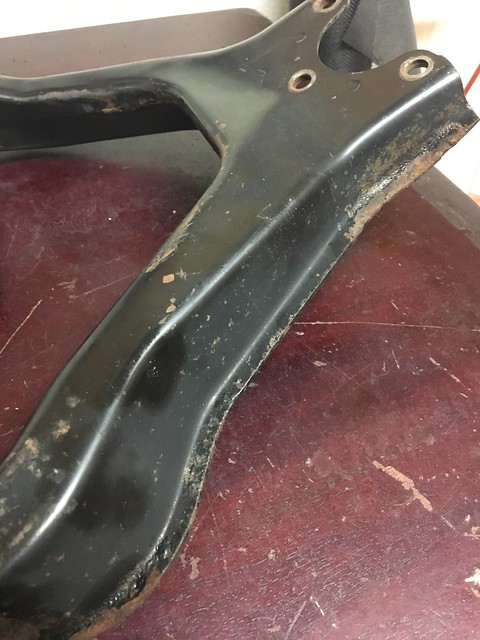
So lucky for me I knew of a guy parting out a 2001 so I went over there and removed another UCA. But the good news is this one came off an AZ truck with 25,000 less miles and has zero rust. The original UCAs have a little light rust on them from their time in UT and WA.

Ok, so not wanting to attempt the bushing removal again I dropped the UCAs and Siberian Bushings off at a local auto repair shop. The owner said he would get them done in a day or two.

In the meantime, just for fun and research, I doused the messed up UCA in gasoline and made a half-assed attempt at burning out the bushings.
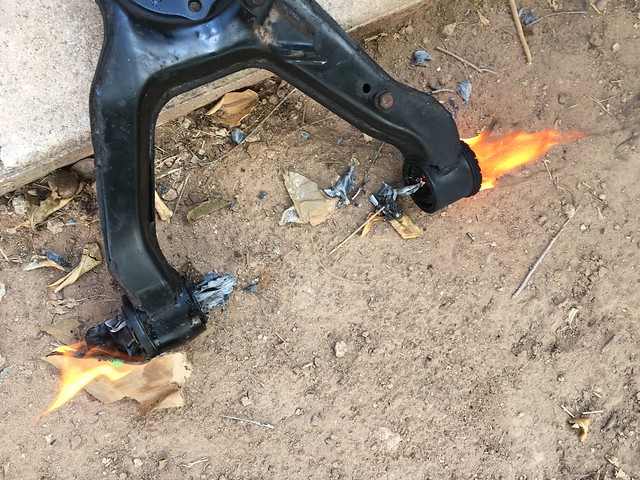
IMG_2231


Conclusion - a torch is necessary and you don't want to breathe this stuff in so my recommendation is don't do it. You would still need to punch out the metal bushing case and it will be covered in gooey gross rubber ashy stuff so it's not worth it.
 

SONICMASD

Adventurer
10/9/18: The shop took forever to do the bushings. He kept stringing me along saying "they'll be done today", then I wouldn't hear from him, then the next day "Sorry, I'll get to them today." This went on for 12 days before he finally attempted it, realized it was no picnic and decided to take them to a machine shop to do instead. $80 and 12 days later I had my Siberian equipped UCAs :)


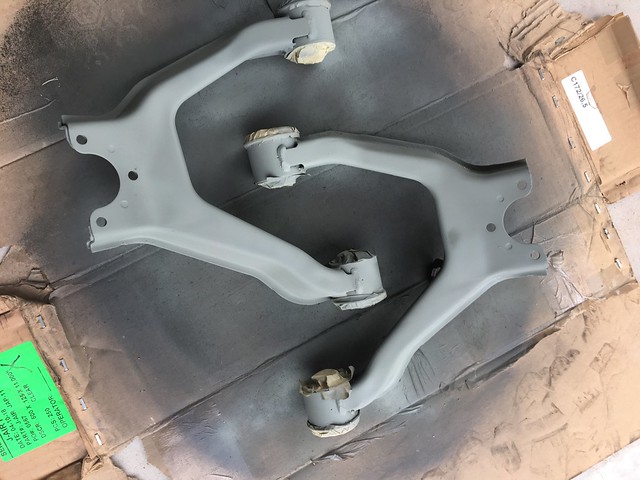
First thing I did was grind off the rust areas then prime and paint them. I figure if I'm doing all this work, might as well protect the UCAs as much as possible especially because I plan on moving to Flagstaff next year which sees snow and a lot more moisture than Phoenix.

IMG_2494
IMG_2499
IMG_2500


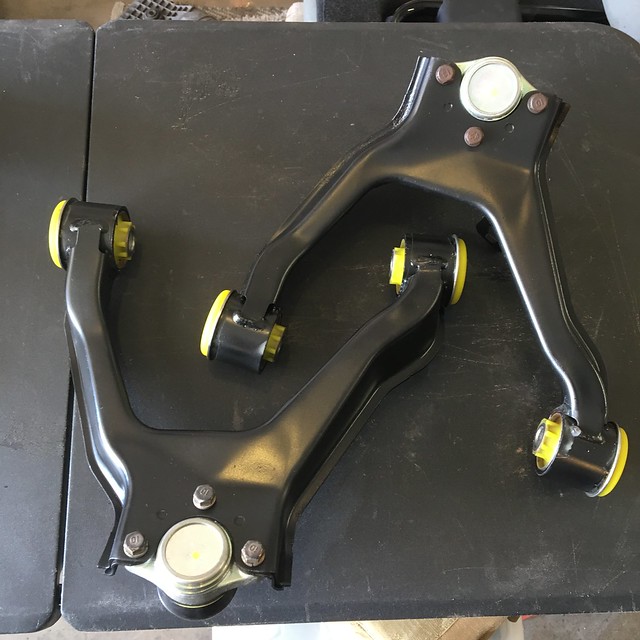
Ready to Install:

IMG_2522
IMG_2530
IMG_2531


Some notes on installation:

1. You'll want to have all the torque specs on hand for this job. Everything is easy to torque down except the UCAs because of clearance issues so it's not really easy to get a torque wrench in there. I just put what felt like 109 ft lbs of torque on there and then had the tech at the alignment shop tweak it a little more to what he thought was good.

2. In addition to the boot bands, you'll want to also purchase new tab washers when replacing the ITREs.

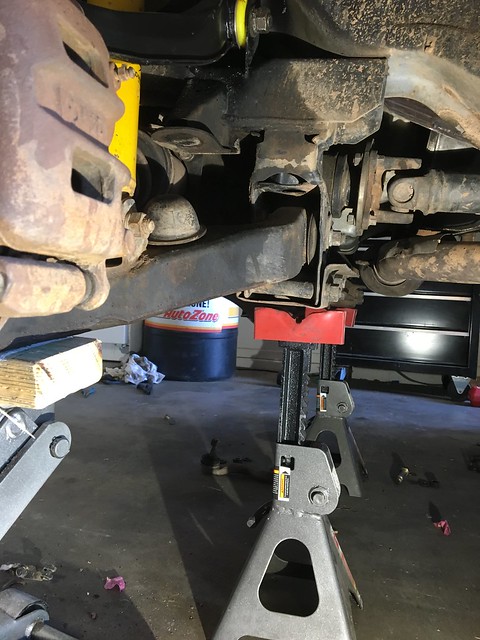
3. Be sure to preload your suspension before torquing down the UCAs. I put a floor jack under the LCA and lifted it up until the vehicle came off the jack stands a little bit. The other way to do this is to torque the bolts down with the vehicle on the ground but I don't see how you could get wrenches in there with a tire in the way.

IMG_2532

4. I used a little blue threadlocker on the ITREs but didn't use it on anything else since everything else has either a lock washer or cotter pin. I guess except the UBJs and I didn't use it there because well there wasn't any before and I think the upward force of the ball joint on from the bottom of the arm will act almost like a lock washer, keeping pressure on the bolt.

So having finished the install and putting everything back together I made an appointment for an alignment. I decided to go with PepBoys and their Lifetime Alignment package for $150 since IFS vehicles get out of alignment sometimes after hard wheeling and because I plan on replacing more suspension components if I decide to keep this rig. I know, I know - PepBoys is like a step above Walmart but another Gen3 owner recommended them after having trouble finding a good alignment shop. And really, what matters is the tech who does the alignment, not where it is done. I asked a bunch of questions and found a good store. The tech was super helpful and knew his stuff. He totally understood how the Montero's alignment system worked and didn't try to argue with me that only Toe was adjustable like so many guys run into. He personally drives a FJ cruiser lifted 6" 'with 35s so he understood the struggle.

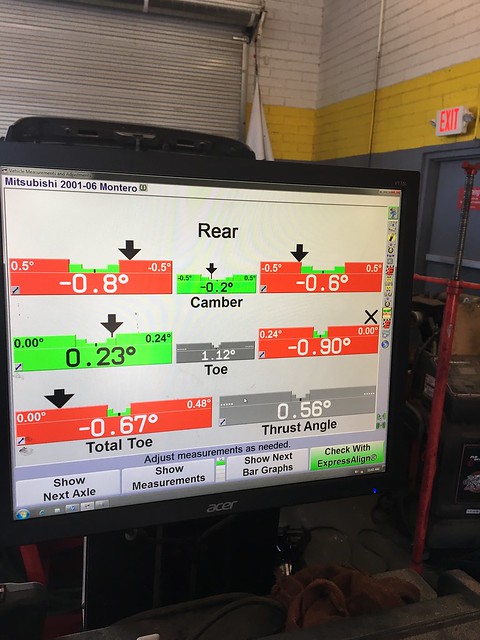
Unfortunately, it looks like Lawrence has not been aligned very often in his life because several of the rear Camber and Toe bolts were seized up (a common Gen3 issue). He brought me back and showed me the problem and asked if I wanted him to give it everything he has but risk breaking the bolts or tearing the bushings. I decided to just have him align the rear as best as he could without worrying about the seized bolts and that I would soak them for a few weeks in penetrating fluid and then bring them back to try again since I'm not ready to do a rear suspension rebuild.

IMG_2540

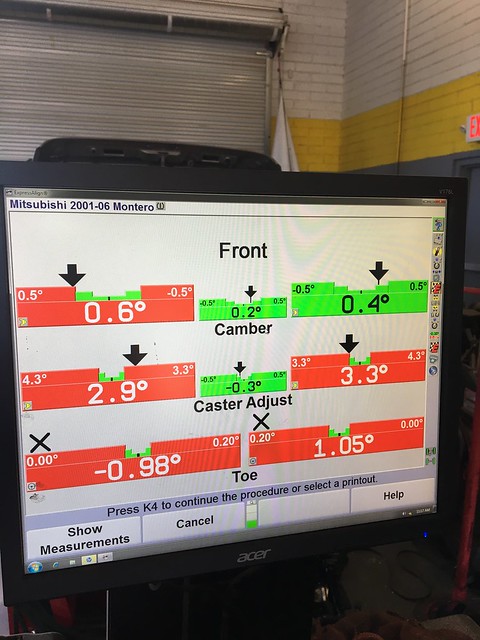
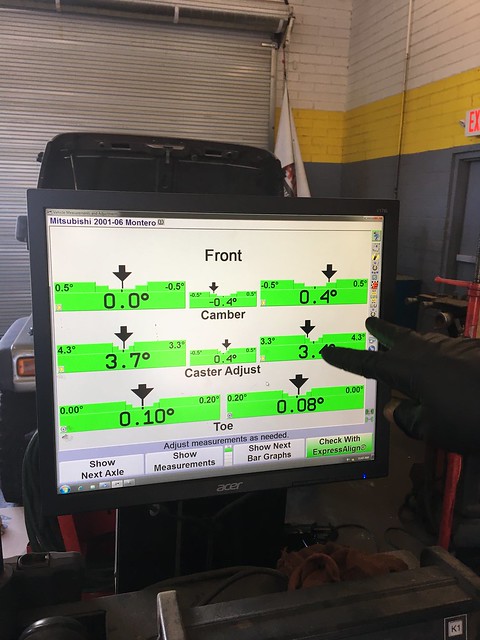
The front aligned easily as to be expected and the rear isn't really that bad:


Front Before:
IMG_2541


Front and Rear After (sorry, I didn't get a photo of the Rear Before and their printer was broken):
IMG_2543
IMG_2544


While up on the lift, I had the tech also confirm my UCAs were torqued down enough since I wasn't able to get my torque wrench in there. Overall, a great experience at PepBoys. The truck's steering wheel is now straight and drives well. It pulls slightly to the right because of the rear passenger side toe bolt being seized but it's certainly good enough for now and he doesn't think it will do much to wear my tires unevenly if I get regular rotations. Also, I asked him if I needed to go with bushings that allow for a greater range of camber adjustment because of the OME lift and bigger tires. He said that there is still plenty of room and regular bushings will be fine. But for those of you that need more travel, check these out: http://www.whiteline.com.au/product_detail4.php?part_number=W63429

10/10/18:

I had a metallic rubbing sound coming from the front driver side tire when going to and from PepBoys yesterday so today I jacked the truck back up and took the wheels off. Turns out that one of the brake pad hardware pieces was rubbing on the rotor. I must have knocked it out a little when taking the tire off / putting it back on the day before. I learned that the front rotors are totally free from the hub in the Gen3. The only thing keeping them from sliding off the hub is the caliper bracket and then pressure from the wheel.

I took this "opportunity" to do a little brake refresh. I hit the components with brake cleaner, cleaned the caliper bolts and the tubes they go into, cleaned the caliper pistons, regreased pins and pistons with Superlube Silicone Grease, put antiseize on the brake pad hardware contact spots and reassembled.

Lastly, I marked everything with Cross Check Torque Marker per Toasty's great tip.

IMG_2547


Almost done, all that is left is to crimp the ITRE band clamp which is currently just sitting around the steering rack loosely. I don't have the special CV boot clamp crimper/pliers but the plan is go borrow someone's tomorrow to finish this up.
 
Last edited:

SONICMASD

Adventurer
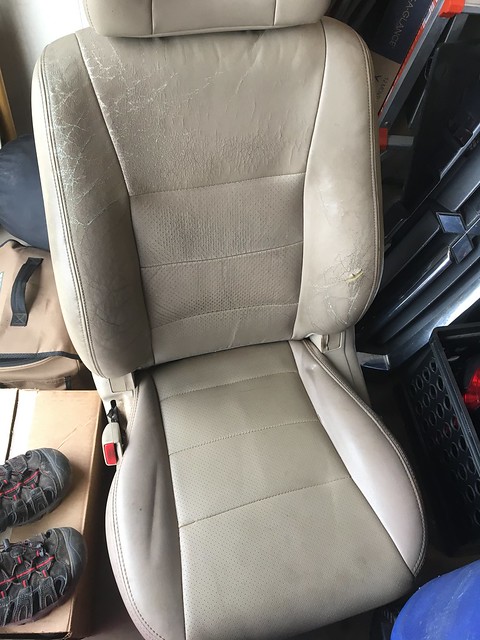
Go the the JY and get a matching leather seat bottom cover and foam from a PASSENGER side seat in the color that matches your interior. Remove the cover and install the passenger side seat bottom cover and foam on the driver's side. At most you might have to have an upholstery shop swap the side seat panels from the driver's side cover to the passenger side seat bottom to match the seat controls that may be present on the side of the seats. I do this all the time and everyone still wonders how I find all those NICE drivers seats that nobody else can ever find.

On some vehicle more modern models like 3rd Gen Dodge trucks the driver's and passenger seat bottoms are a direct swap bolt in with just 4 10mm bolts. This swap just might be this simple on a Montero. I personally do not know you will have to find out.

My latest seat bottom swap was on my daughters 2001 Mercedes ML320. Driver's seat bottom once again looks new. $12.00 for the passenger side seat cover and the seat bottom foam at the local Pull A Part.

Now ya know the "Cheap" way to fix your TRASHED driver's seat bottom/seat back to look like new as the passenger side seat covers are almost always nice and the passenger side seat foam is also still nice, firm and not broken down like the driver's side!

If you need additional seat cover material to make repairs just cut the material you need from the rear seats and take it with to your local upholstery shop. It's a hell of a lot cheaper at PAP than the upholstery shop!

You can also have your local interior "Recon" guy who services all the major car lot's re-dye your seats if perfection is your ultimate goal.


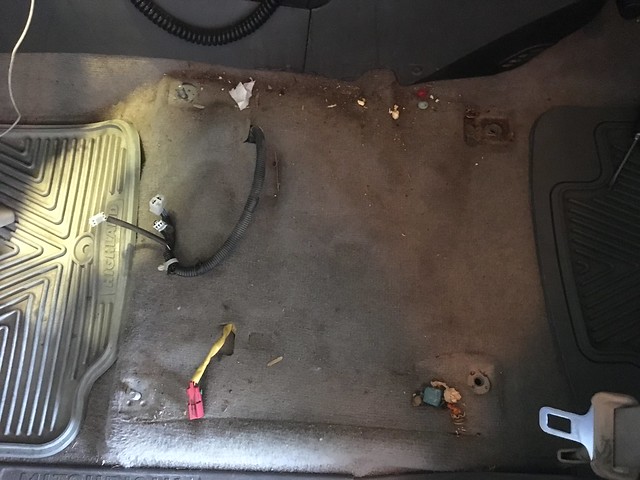
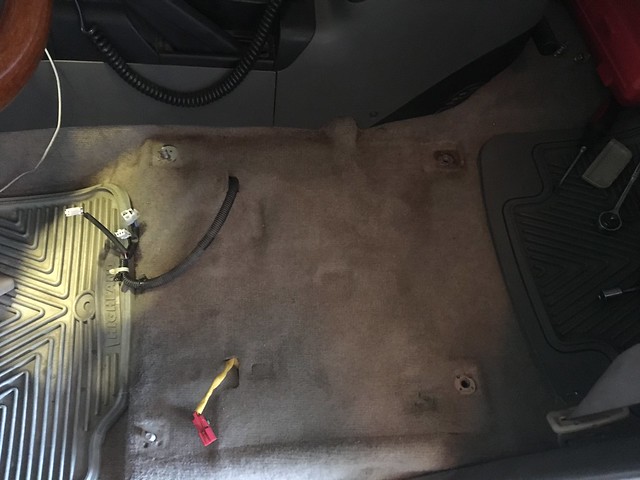
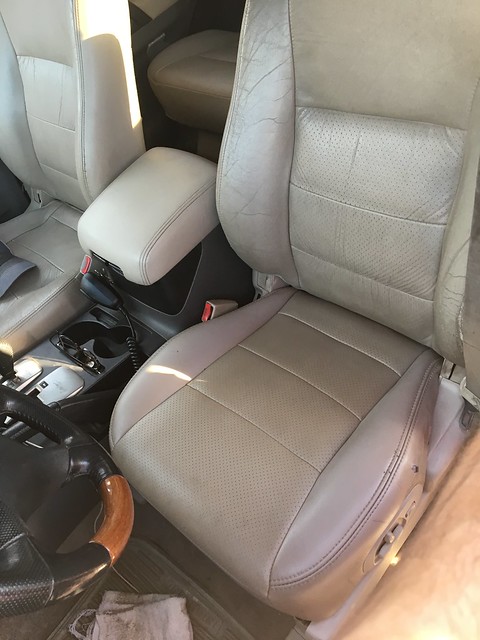
10/13/18: Actually, it turns out that I came across a 2001 Limited in the junkyard a few months ago and decided to take its driver's seat. It wasn't a slam dunk decision because of 2 things:

1. The back was dried out, ripped, and in much worse shape than my existing seat.
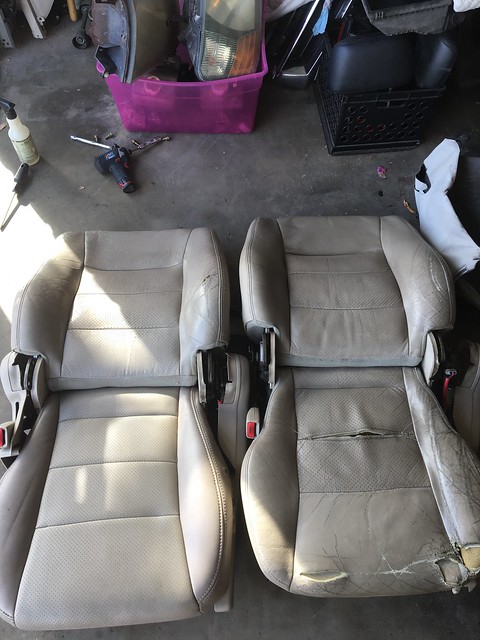
2. The Beige color in 2001-2002 Monteros is different than in 2003-2006. It has more of a pink hue and the newer NP model had a more yellow hue.

But the bottom cushion and leather were in much better shape than mine so I decided a Frankenstein swap was in order.

IMG_2582


Now that Phoenix has cooled down and the front suspension work completed, I decided to do this less pressing fix.

Step 1 - Undo negative battery terminal - I dunno what the rule on disconnecting power to your vehicle is but I fried some fuses on my first montero when changing out a power mirror switch or something like that and since then have disconnected power anytime anything is unplugged.
Step 2 - Remove existing Driver seat
Step 3 - Good opportunity to clean under seat.

IMG_2583
IMG_2584

Step 4 - Put donor seat in place, no bolts, just plugged in - reconnect battery, turn on car, and verify power seat buttons and heating elements work

Step 5 - Now the real work.

Donor Seat on left, existing seat on right. The plan is to take the back from the existing seat and put it on the bottom of the new seat.

IMG_2587

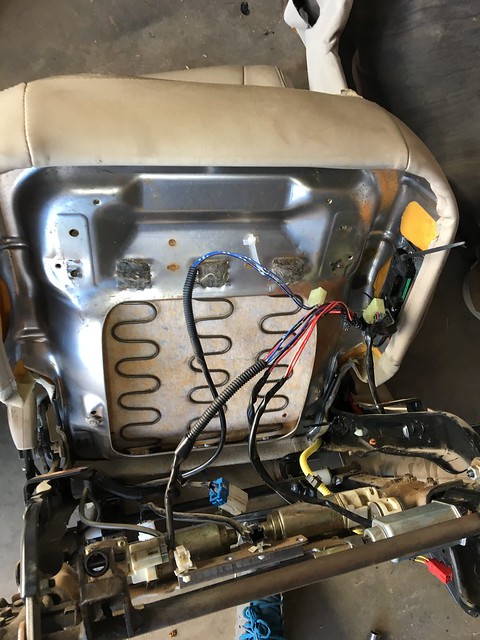
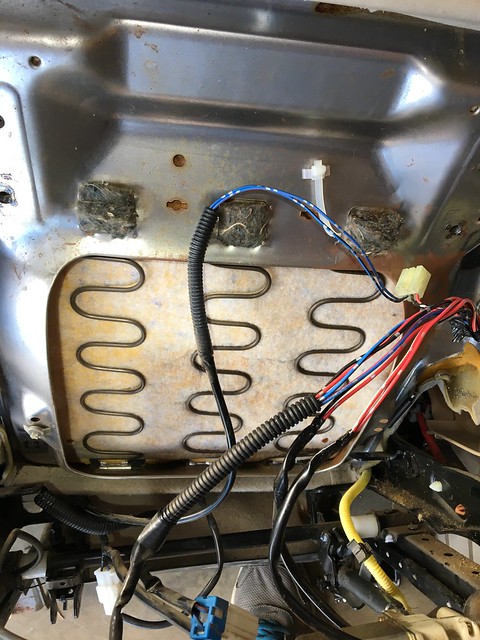
Turns out, Gen3 seats are more complicated than Gen2 seats. To separate the back from the bottom involves turning the seat into 3 pieces: Back, Bottom Cushion, Bottom Metal Base. You can't simply unbolt the back from the bottom because there is a wire for the lumbar support I think that instead of terminating in its own wire harness feeds into an existing wire loom and harness shared by some stuff for the bottom cushion and controls. You need to unclip the two blue wires on the end out of their wire loom to be able to remove the back portion of the seat.

That's pretty much the only challenge that took some unexpected extra time to figure out.

Bottom cushion separated from frame by 4 12mm bolts:

IMG_2589
These are the 2 blue wires that need to be unplugged from their harness, be sure to note their color and position. One is Blue/Black and the other is Blue/Red.

IMG_2591

Finished product, if I hadn't mentioned that the Beige was different between NM and NP you wouldn't have noticed but now you can't ever unsee it :) The color differences are really pronounced in this photo, it's not as noticeable in real life.

IMG_2629


And before someone says - why not just put seat covers on it? Because I'm a fan of side impact airbags and it's pretty hard and expensive to find good seat covers that are side airbag compatible.

I'm not sure if this will be a permanent fix for me but it's definitely way better than what was there. Muuuuuuch more comfortable and the small rips on the side of the cushion can easily and cheaply be repaired and maybe the entire seat can be dyed to match the NP beige color better, we'll see.
 

SONICMASD

Adventurer
10/13/18 contd:

1. I also investigated the check engine light - trying to see if I could find a vacuum leak. With the engine idling, I sprayed MAF cleaner all around (cuz I just happened to have a nearly full can and it's not usable on Monteros anyway) but couldn't find anywhere that spraying the cleaner affected the idle. One time after turning off the engine there was a high squeal/whistle noise coming from the throttle body so I turned the vehicle back on and sprayed all around there but still nothing. If I can't find the leak I might replace the TB gasket as a long shot.

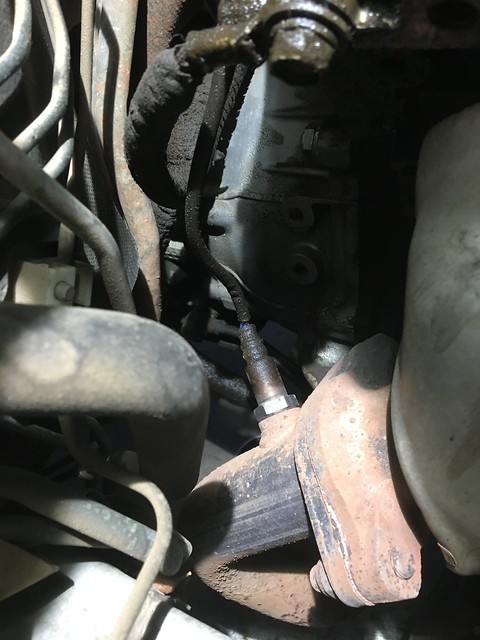
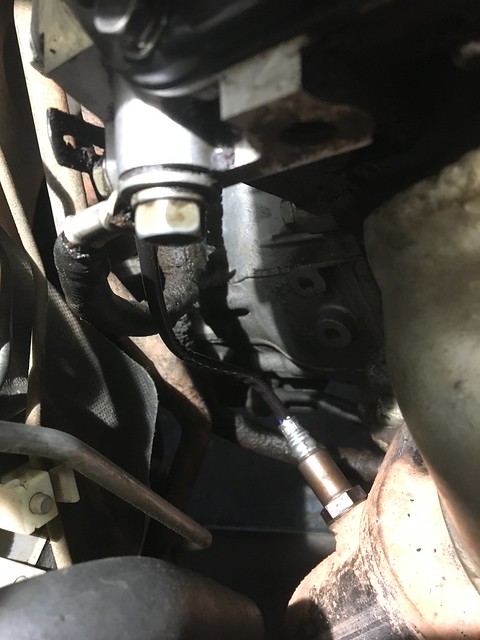
So after not being able to find a vaccuum leak the old fashioned way I decided to check out the O2 sensor in question - Upstream Bank 1 (passenger side). It is right below the valve cover's rear corner and since my passenger side valve cover is leaking it is getting the O2 sensor and wire dirty. I've read that oily O2 wires can affect their signal so I cleaned it off. All 4 O2 sensors were just replaced about 2 years ago by Marutuk when he owned the vehicle and they are all Denso units so I am doubtful that it needs replacing.

Before:
IMG_2574

After:
IMG_2578

I fire up the vehicle and for the first time in like 10 key cycles the CEL is off! I was happy and surprised that the light was off but I didn't really believe it. The next day, I went wheeling with a friend and told him - I bet you there is a 70% chance my CEL comes back on and sure enough, 3 miles from my house it popped back on.

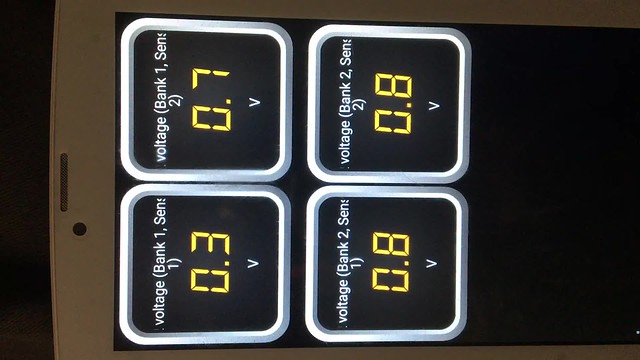
I filmed some O2 data on my tablet but I have no idea what these numbers mean?

IMG_2570


I'm going to try spraying some carb cleaner at the notorious butterfly o-ring area again just to double check that is not the issue and if that doesn't work I'm going to take it in to a shop for a smoke test of the vacuum and exhaust system.

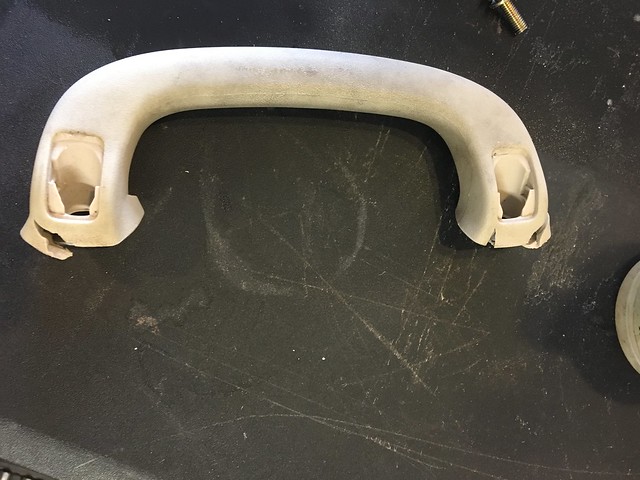
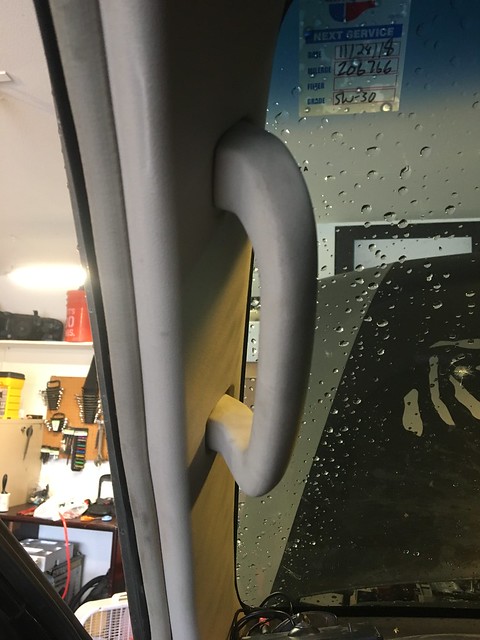
2. The driver's OS handle had cracking plastic near the screw bases so I had grabbed a replacement at the junk yard a while back and finally got around to switching that out. Little by little, this truck is getting touched up.

IMG_2580
IMG_2581

3. This vehicle has always smelled a little musty since I got it and I'm not sure if it's just the leather or something else. We had just gotten a bunch of rain so I inspected all of the sun roof drain tubes and could clearly see that 3 of them had recently drained out water. I also shoved a weed eater cable up them as far as it would go in case there was a semi-blockage but I didn't hit anything. But because of the snorkel, I'm not able to visually inspect the front pass sunroof drain tube. So in the near future I'm going to pour water up on the roof and watch to see if that drain lets anything out.

Not that finding out the answer will help me much because the sunroof doesn't currently open but at at least I'll know that I need to pull the vehicle into the garage when it rains. Then one day, I'll drop the headliner and fix the sunroof totally - but it would be nice to couple that project with a roof rack installation because of the annoyance of dropping the headliner.
 

offthepath

Adventurer
Check the fuel trims for each sensor, but I think I'd just take a chance and replace that o2 sensor. The fact the down stream sensor seems to be reading in line with the other bank points to the up stream sensor being faulty.

Not an expert opinion, but If it were my car I'd take a gamble on the new sensor.
 
Last edited:

SONICMASD

Adventurer
Check the fuel trims for each sensor, but I think I'd just take a chance and replace that o2 sensor. The fact the down stream sensor seems to be reading in line with the other bank points to the up stream sensor being faulty.

Not an expert opinion, but If it were my car I'd take a gamble on the new sensor.


Good point, I didn't think of that. So if it was a vac leak i'd probably be getting more than one O2 code?
 

offthepath

Adventurer
Good point, I didn't think of that. So if it was a vac leak i'd probably be getting more than one O2 code?

Maybe not a code, but it seems a lean condition should show some kind of variance across both 02 sensors on that bank. Fuel trims would be interesting to watch, but your problem sensor is reading considerably lower than the other 3 sensors. I'd also try pulling the O2 connector and cleaning it out really well. Oil could have gotten in the plug. You don't have any exhaust leaks correct?
 

Imnosaint

Gone Microcamping
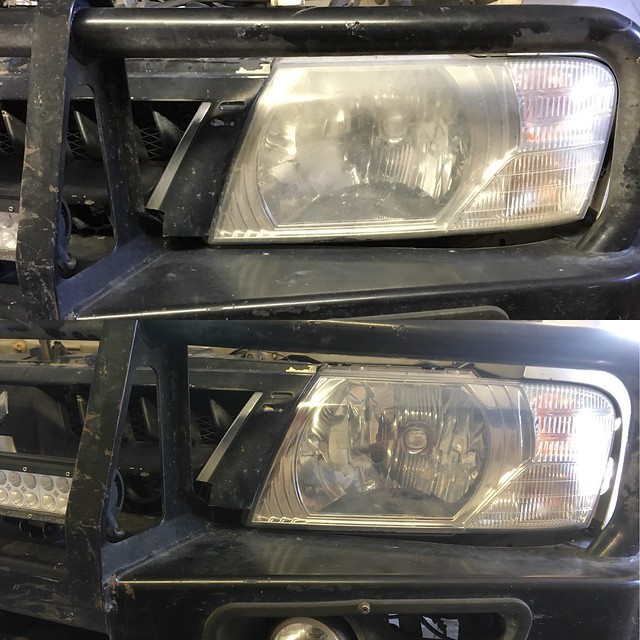
6/3/18: I used the 3M headlight restoration kit and polished up the headlights. Here's some before and after comparison pics:

GYUT1138
ROEM5340


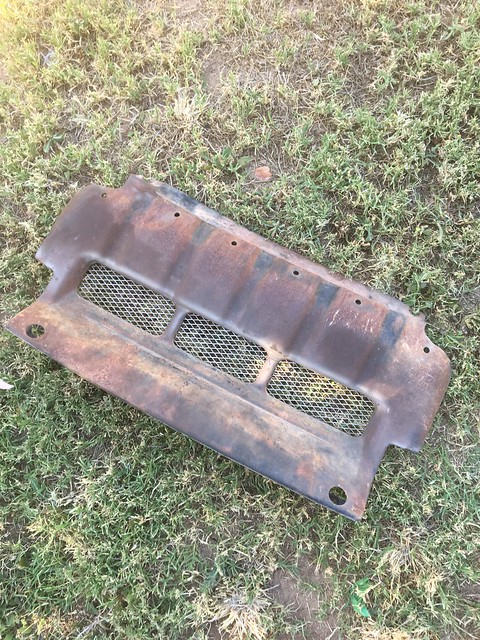
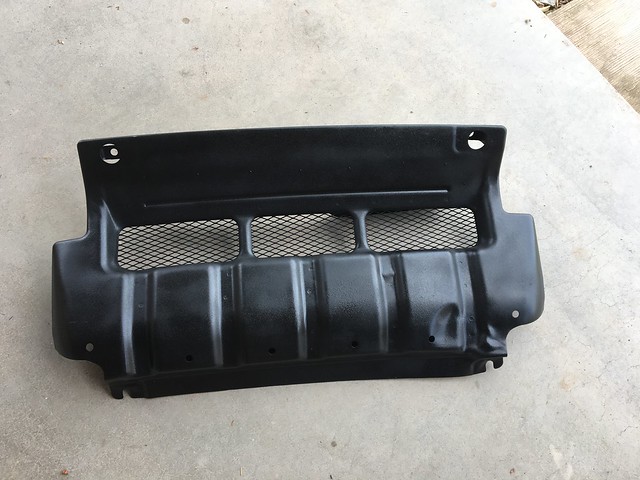
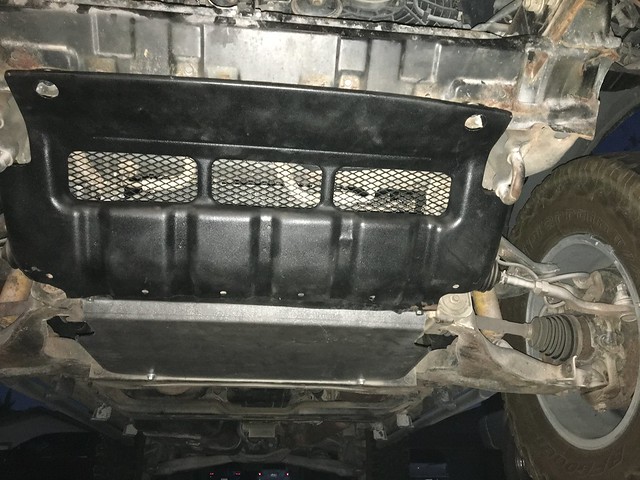
6/7/18: The front skid plate was looking mighty tired so I refreshed it with some bedliner paint left over from the wheel refinishing:

IMG_0858
IMG_0869

Then I bashed the skid plate about hundred times with a sledge hammer and chipped off a good amount of the paint job trying to reinstall it. It was bent previously from an impact near one of the mounting tabs so that was a pain but now it's a lot easier to get on and off :)

IMG_0875

6/11/18: Over the weekend, I gave Lawrence his first wash and was really impressed by how much he cleaned up - this is a good looking vehicle! The Gen3 look is really growing on me. I hit all the exterior rubber bits with Armorall to bring back the black and protect them from the sun so while I was at it I tested it on the faded hood paint and the faded bedliner paint job.

A few days later, the bedliner is still significantly darker where I tested the Armorall. Jury is still out on the hood paint though.

Check it out:
IMG_0916
Hit that hood with a matte clear coat, something I failed to do when I did the graphic.
 

Imnosaint

Gone Microcamping
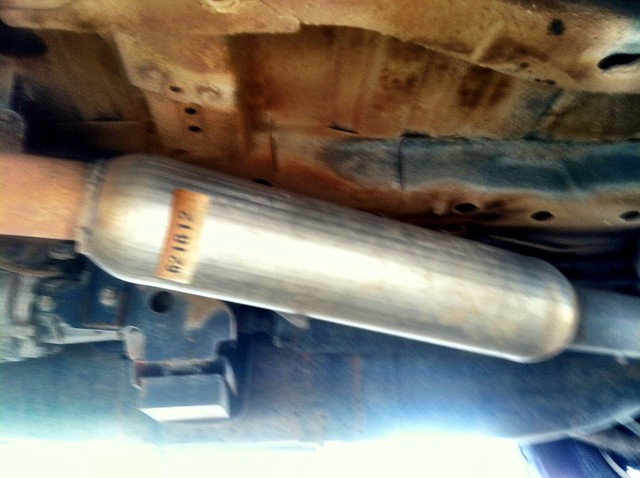
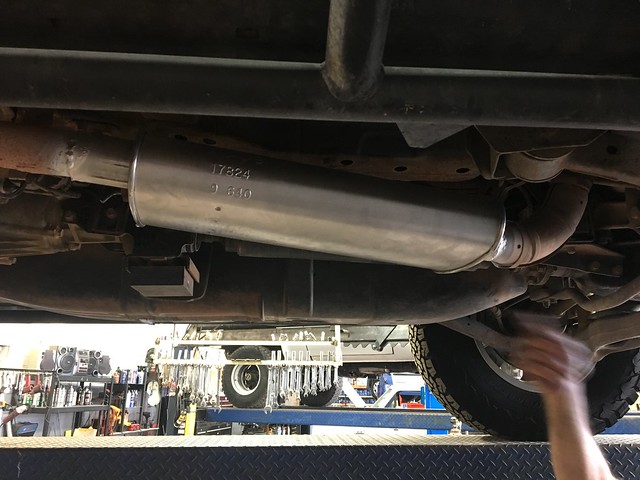
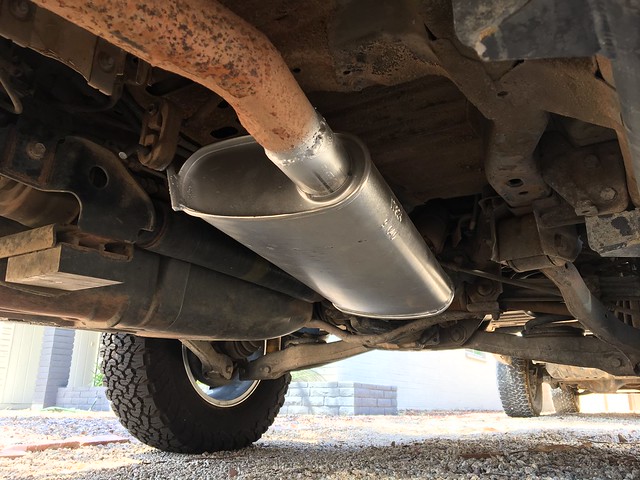
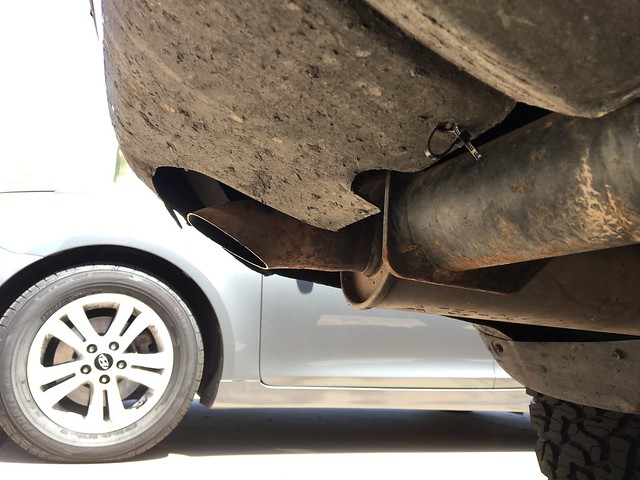
7/25/18: Another update - last week I got around to getting the most annoying thing on this vehicle fixed: The Muffler. Years ago, Imnosaint wanted a smaller muffler to help out with ground clearance since the factory one is pretty low. He went with a cherry bomb / glasspack type of muffler which helped with ground clearance but significantly increased the noise as you would expect:

glasspack

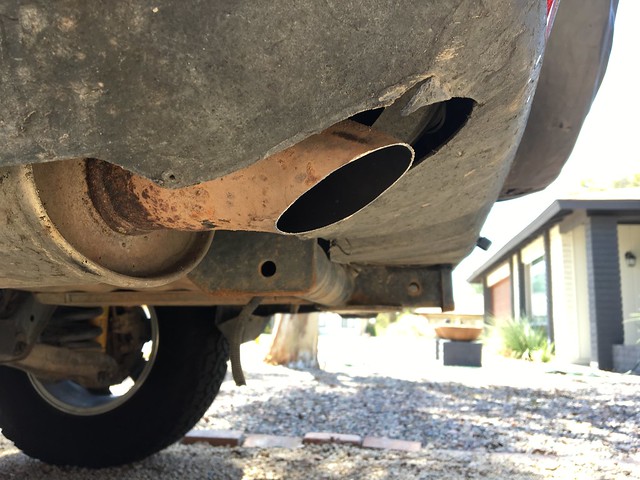
I'm not sure what it sounded like when it was installed years ago, I'm sure it was a lot deeper of a tone, but now it basically sounded like Ninjas on Kawasakis were always chasing you or like a high schooler's riced out Honda Civic. I took it to Scottsdale Muffler and can see why that place has like 100 5 star reviews on Yelp and has been in business for 21 years. They were great to work with and affordable. I told the owner, Chris, that I wanted to keep the ground clearance of the cherry bomb but wanted the vehicle as quiet as possible like OEM. He put in a 24" long muffler that is oval in shape and only 4" tall. There was also a piece of heat shield that was rattling like crazy at idle and he spot welded that to stop the rattle. Lastly, the exhaust pipe was pretty mangled from a lifetime of offroading so I had him lop off about 1/4 of an inch of the end and make it flush with the beat up bumper.

One of my favorite things about my other Montero, Betty. is how quiet she is. When I'm in the forest I see soooo many animals because you simply cannot hear the Montero from even a few feet away. So many times when I'm driving slowly on a dirt road, I get like 15 feet behind people before they realize there is a car behind them and being quiet to me fits in a lot better with nature and the great outdoors than a loud muffler. Also, you can't hear the engine (or yourself think) which I think is very important when driving. Now, I once had a car with a 6.6L V8 that sounded awesome but that's a whole different animal.

They found that the glass inside the old muffler was totally burned out when they removed it. Now, the rig is back to OEM sound and as I continue to add noise insulation this vehicle should soon have a very comfortable cabin. The new muffler sits as high as it can without totally redoing a large section of exhaust piping and the hangers. It's higher up than the fuel tank on the other side so it should be fine. I plan on adding a skid plate one day that covers the fuel tank and carbon fiber drive shaft so that should contact the ground well before this new muffler.

IMG_1359
IMG_1382

IMG_1379
IMG_1377
It always sounded terrible. I regretted it from day one of install.
 

SONICMASD

Adventurer
Hit that hood with a matte clear coat, something I failed to do when I did the graphic.

Yes, the hood is on the back burner for sure. Your paint job still looks good except for where the washer fluid sprayers are, around there the paint has oxidized / faded / turned white a lot. I haven't fooled with it yet but will post a pic up here soon for suggestions on how to fix it.

Does me good to see you take this 3 to the next level. Great work.

Thank you! I'm having a good time comparing these two generations and still kind of pinch myself every time I go outside and see the bumper from Eurosonics's Gen 2.5 (whose build thread is the reason I got my first Montero) sitting on your Gen3 (which was the build thread that got me interested in the Gen3 to begin with).
 

SONICMASD

Adventurer
Maybe not a code, but it seems a lean condition should show some kind of variance across both 02 sensors on that bank. Fuel trims would be interesting to watch, but your problem sensor is reading considerably lower than the other 3 sensors. I'd also try pulling the O2 connector and cleaning it out really well. Oil could have gotten in the plug. You don't have any exhaust leaks correct?

I'm not sure if I have any exhaust leaks so this week I'm going to start by having a smoke test done to find out if there are any vac or exhaust leaks. If the truck passes that, I'll replace the O2 sensor next.
 

SONICMASD

Adventurer
10/14/18:

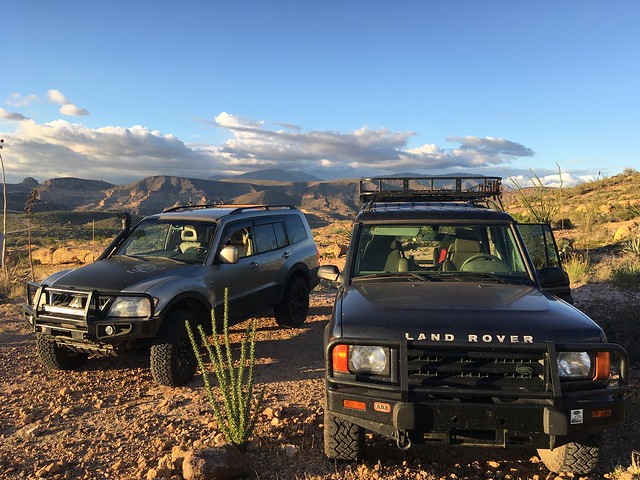
Testing Day 3 - Loaded up the wives and kids and my buddy and I drove out to the Tortilla Trail. There are some good rock steps at the very beginning of the trail that I wanted to see how this rig would do on and it did it without breaking a sweat. My buddy has a 2001 LR Disco II and was really impressed by the Gen3s traction control system. The wheel slip is much less on the Gen3 than on his LR before the TC kicks in. The Disco II is more of an older generation truck and on his daily driver, a LR3, the TC is more refined like the Gen3 Montero. I remember reading on some forum post that LR and Mitsubishi actually collaborated on their TC systems but don't know more than that.

You can see the entire trail in this video taken by a fellow AZ Montero lover. The rock steps are at 6mins in.

<iframe width="560" height="315" src="" frameborder="0" allow="autoplay; encrypted-media" allowfullscreen></iframe>

IMG_1314

Since my CELs came back on 3 miles after leaving my house, I reset the codes at the trail head because when a CEL comes on in a Gen3 it takes out your traction control with it (big design flaw).

Main takeaway from this test builds off of Testing Day #1 - The Gen 3 is more capable than it looks and the TC system is really good (except for in deep sand).


10/21/18:

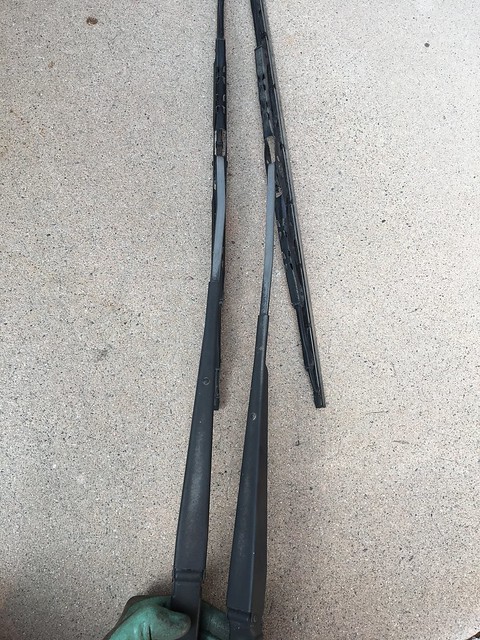
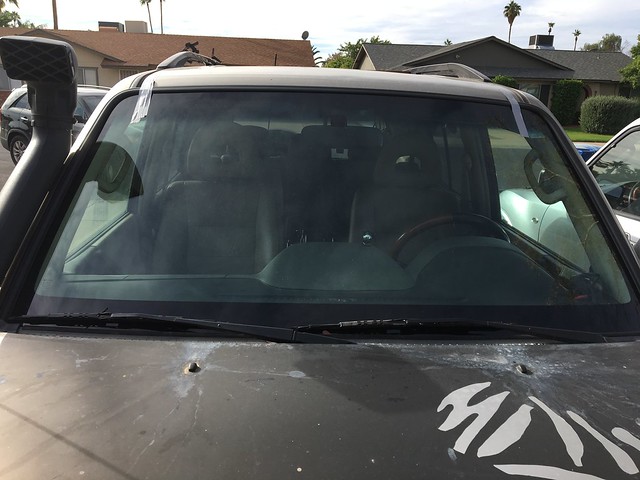
The front wiper arms were all sun faded so I repainted them and had a new windshield installed.

IMG_2681

IMG_2833


10/27/18:

Time to dig back in and try and figure out why I'm getting CEL codes P0134 and P0171.

Last week I tried:

Step 1: Visual check for vacuum leaks - nothing.
Step 2: Spray carb cleaner, wd40, maf cleaner, water, or pretty much anything around the intake system looking for leaks at idle - nothing
Step 3: Inspect O2 sensor - Found that the one that is throwing the code is located underneath the passenger side valve cover leak and was covered in oil. Cleaned up the outside of the sensor but the problem persists.

Which brings us to today:

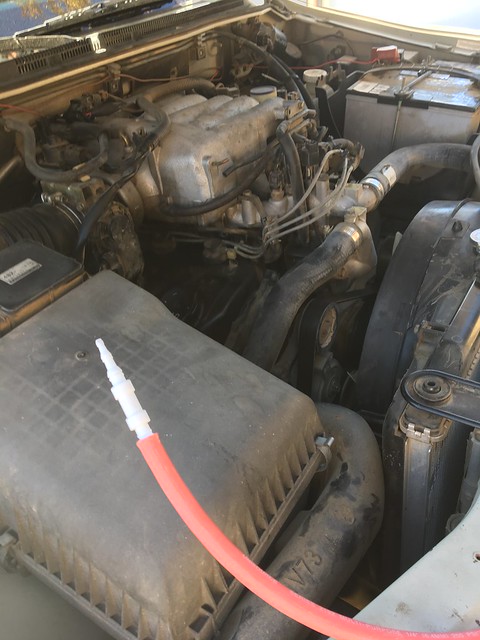
Step 4: Smoke test Intake system. Shops wanted around $80 to do a smoke test on the intake and exhaust so I just bought my own smoke machine. I love it when buying a tool is a no-brainer :)

I got the smoke machine going and plugged it into several vacuum lines around the intake manifold but there are no leaks.

IMG_2801
IMG_2803

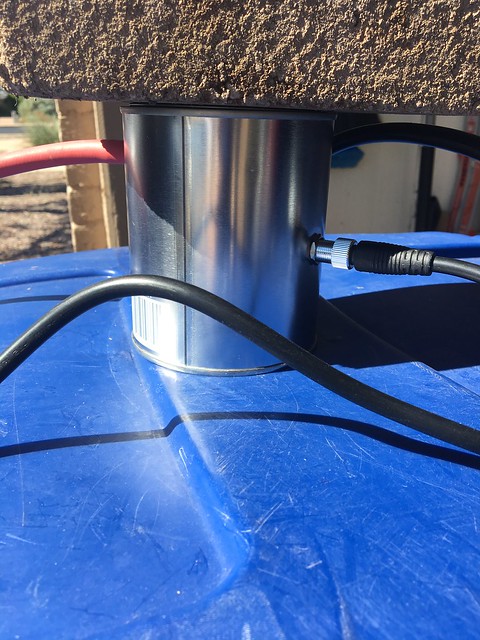
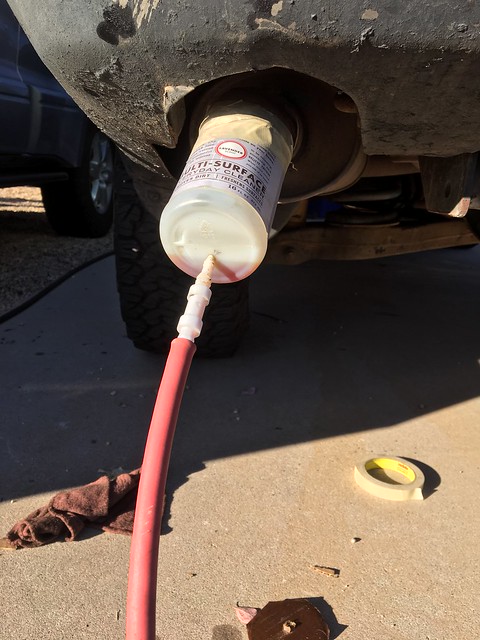
Step 5: Smoke test Exhaust system. The smoke machine is definitely geared for testing the intake system and doesn't come with any sort of tailpipe adapter so I had to improvise. I cut the top off a plastic bottler and then stuck it inside the tailpipe and then sealed the edge with tape before drilling a hole in the back and inserting the smoke nozzle.

This photo was taken after the testing was complete and as you can see the machine was not only producing smoke out of the nozzle but also burnt oil (it runs on mineral oil). I contacted the company and they said the air regulator that it came with is probably faulty so too much pressure is going through the can causing oil to travel with the smoke. They're sending me out a new regulator - good communication and customer service.

IMG_2820

Anyways, the test revealed several exhaust leaks:

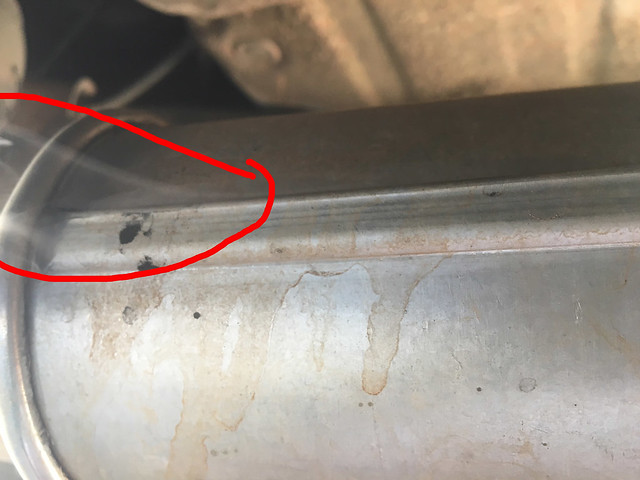
#1. Old pipe connection to rear of new muffler. Pretty small in size, very little smoke comes out.

IMG_2808

#2. The new muffler itself releases a tiny amount of smoke around the side seams:

IMG_2811

I don't think this can cause the CELs cuz it's aft of the O2 sensors and it doesn't seem like a big deal but I'll probably go back to the muffler shop and have them look at it.

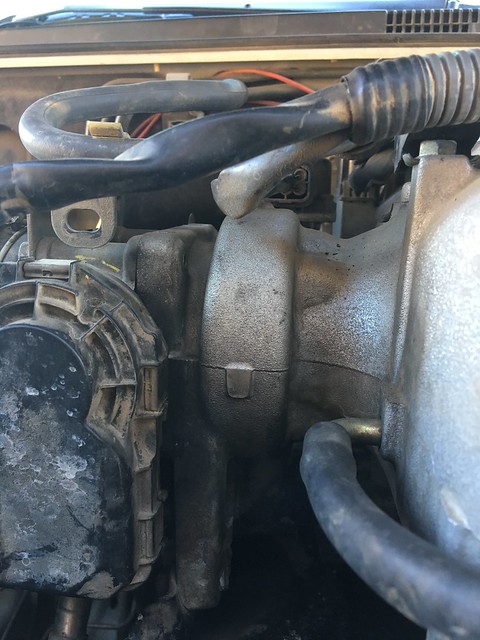
#3. I noticed a lot of smoke coming out near the throttle body, in this area:

IMG_2814

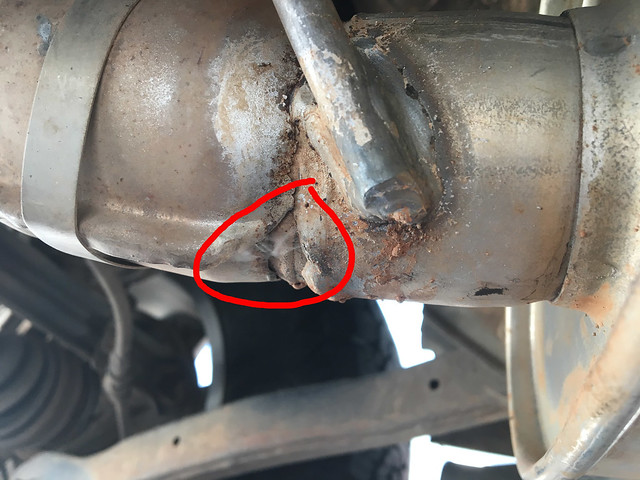
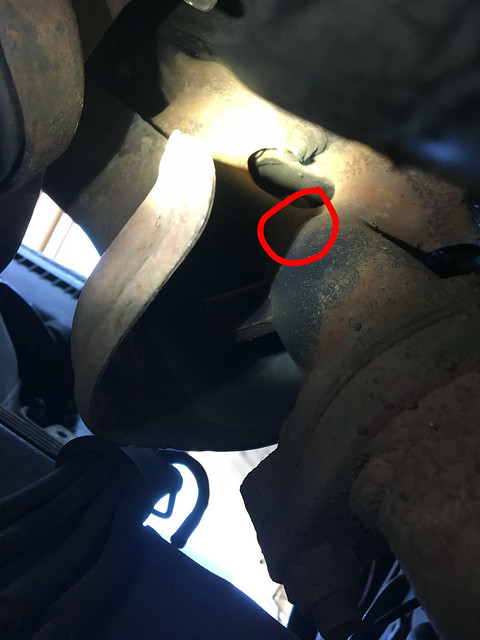
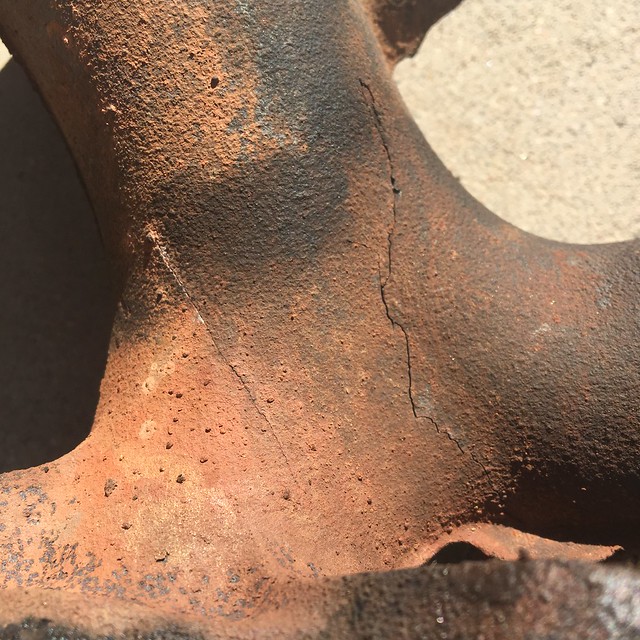
It looked like it was coming from the Throttle Body gasket but that didn't make sense to me during an exhaust system test. If the TB Gasket was leaking that should have shown during the intake system test. I figured it had to be coming from underneath so I took the exhaust manifold heat shield off expecting to see a big crack, just like when I bought my 98 Montero a few years ago. But nope, nothing. So then I started thinking maybe it was the EGR tube gasket but that didn't seem like the culprit (it was hard to tell because the smoke was in the whole area). Then, I got under the vehicle and inspected the passenger side exhaust manifold from underneath with a flashlight and BINGO - about a 1.5" crack on the under side with smoke coming out.

You can't see the smoke but you can barely make out the crack in this photo if you zoom in:

IMG_2817

So that explains my code for a lean condition reported by the upstream O2 sensor. The exhaust manifold crack is allowing air into the system causing the O2 sensor to think there is too much air in the combustion process (lean condition) which then tells the computer to increase the fuel mixture. I have not noticed horrible mileage because most of the driving I've done was downhill from Flagstaff to Phoenix with this CEL code on but I have noticed a strong gas smell coming from the exhaust which is consistent with running rich as a result of the O2 sensor thinking the engine is running lean.

Interesting note here for comparison - The massive exhaust manifold crack that came with my 98 didn't trigger a CEL, probably because of the more complex O2 + 3 catalytic converter system in Gen3s (Winner: Gen 2.5).
IMG_3649


The plan of attack:

1. Replace Fel-Pro Valve Cover Gasket with OEM and Inspect Surge Tank Butterfly Valves assembly in the process.
2. Remove Exhaust Manifold and have our resident welding master, Toasty, fix the crack. Since it is such a small crack I figure this is worth a shot vs buying a new manifold.
3. Have muffler shop fix small leaks around new muffler.
 

SONICMASD

Adventurer
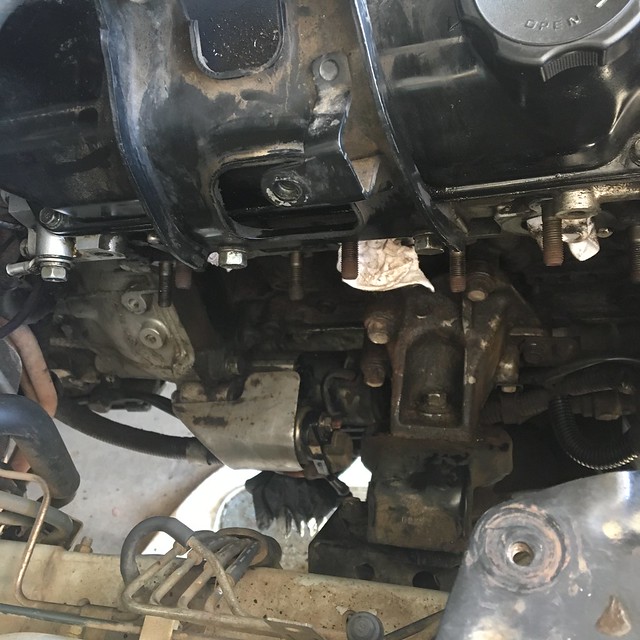
10/31/18: I parked the Bedouin in the garage and started tearing it down for much needed repairs. I started by removing the Passenger side Exhaust Manifold. This is a very easy job and I'm so thankful it wasn't the Driver's side that was cracked (that side had already cracked a few years ago and was replaced with an OEM unit by Marutuk). The only hard part is removing the 2 flange bolts that connect the manifold to an exhaust pipe but the easy work around for that is to just unbolt that pipe from the Y-pipe and remove the two pieces together.

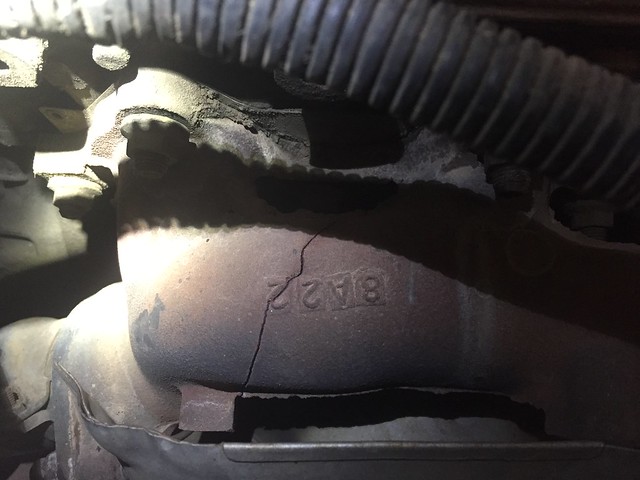
Once getting the manifold out of the vehicle I realized that the crack was a lot longer than I first thought, and also...there was another one just as big about an inch away from it:

IMG_2863
IMG_2862

Bummer. I decided it wasn't worth it to have Toasty weld it up for me because it would be much more work than originally thought and it's kind of impossible to know if more cracks are developing that we can't see yet and how long the repair would last. So that left me with just two options because there are no aftermarket exhaust manifolds for the 3.8L Montero: Buy an OEM unit for like $350 or pull one out of a junkyard that could also be cracked or have a ton of miles on it.

I decided on a third option: Find a factory in China and import a bunch of them because I can't be the only one with this problem (I do this for a living). Yes, I know what you're thinking: Chinese auto parts are crap. I agree for the most part but when faced with a similar dilemma with my '98 I elected to go with a Chinese manifold and it has been working great for the last 2 years. And now all I had to do was wait for them to show up.


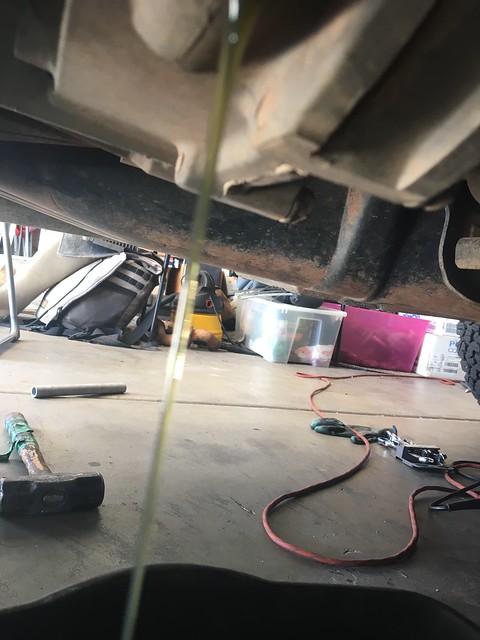
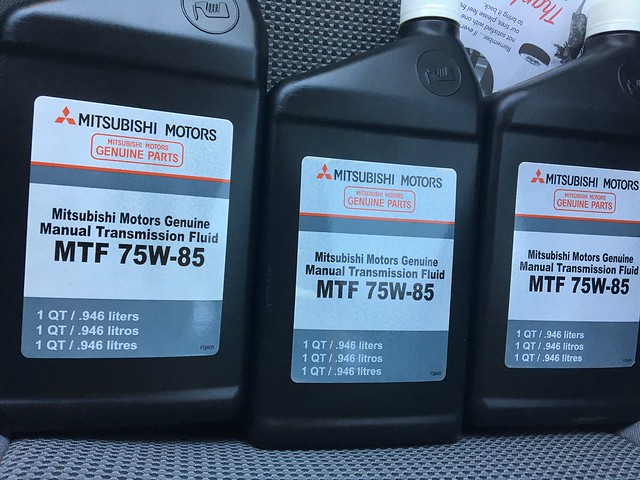
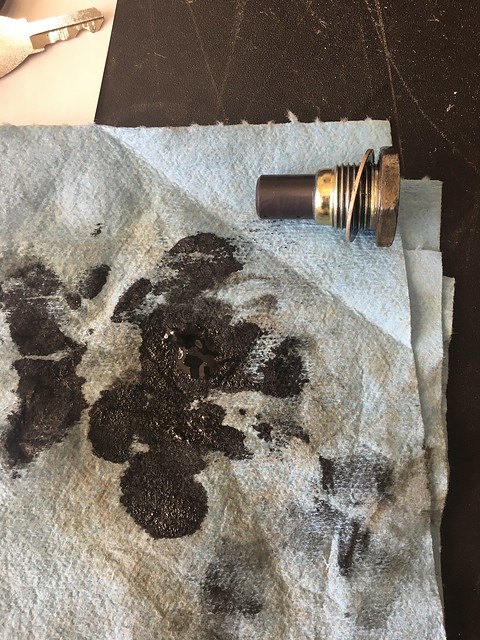
11/1/18: Transfer Case Drain and fill with the genuine stuff. A little more than 2qts came out, then I poured about 1/2 a bottle of Amsoil that I had left over from doing my 98s tcase a few years ago through to help flush out the old stuff further. Then 2.2ish qts of the new stuff went in. The fluid that came out was in really good shape - the last drain and fill was done about 20k ago and Ernest had replaced some that spilled out when he replaced the transmission about 3k ago, but I did it again because the Marutuk's shop only listed GL-5 on his invoice and the tcase calls for GL-4. So just in case any of the wrong stuff was used and any still remained, I wanted it out of there.

IMG_2865

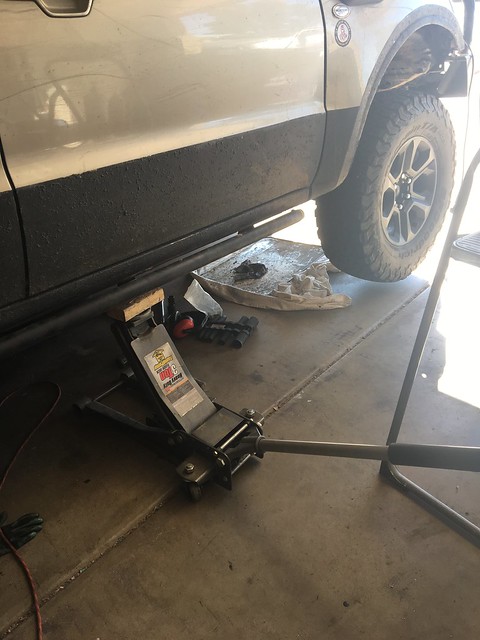
I used a floor jack on the rock sliders to tilt the vehicle up onto the driver side to get more fluid to drain out of the case:

IMG_2867

IMG_2859

I found no big chunks of metal or bronze colored debris in the fluid or on the magnet - just a normal shaving amount. That, coupled with the smooth shifting and operation of the tcase tells me the unit is in good shape and probably no harm was done even if some GL-5 might have been in there for a bit.

IMG_2866


11/5/18: I had Ernest knock out some other much-needed maintenance that is above my ability / desire at this point.

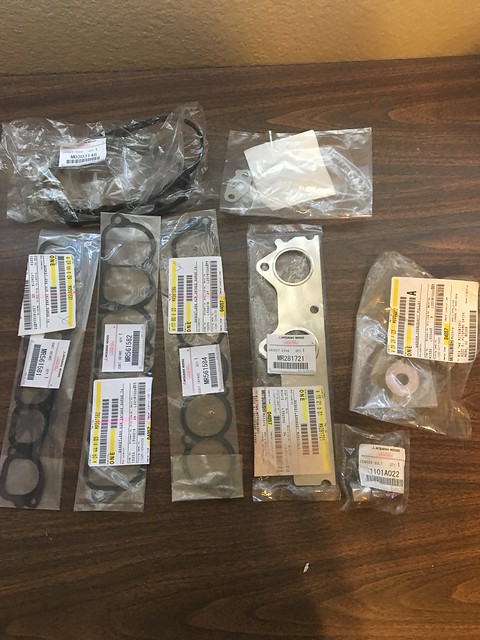
The parts waiting to be installed, OEM everything:

IMG_2889

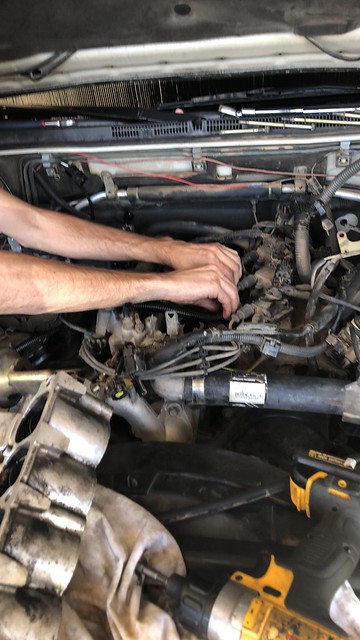
1. Passenger Side Valve Cover Gasket - OEM Mitsu gasket was used (not taking any chances with Fel-Pro this time since I've had 4 of their gaskets leak in the past few years across multiple vehicles. Ernest had left over Fel-Pro spark plug gaskets from the last time he did it a few months back and since those never leak we used those. I didn't have Ernest do the rear cam seal because he just replaced it 3k ago when he did the Fel-Pro gasket that didn't seal right.

2. With the plenum off, I inspected the infamous butterfly valve assembly and found all the screws to be tight, and no play in the bushings or rod. I cleaned up the butterflies a bit and then added red loctite with the unit upside down to the underside of each screw, hoping some of it would run down the threads a bit (wishful thinking, but I didn't want to risk stripping or damaging the screws while undoing them just to add loctite). While the plenum was off, I took the opportunity to replace all the plastic wire looms that had disintegrated under the plenum. Lastly, 3 new OEM gaskets were used to button everything back up. I feel a lot better driving this rig now knowing the butterflies are tight.

IMG_3202

3. When Marutuk first acquired the vehicle a few years ago he took it in for a timing belt job at around 180k. Unfortunately, the mechanic didn't know about the notorious Montero crank bolt issue and simply reused the original one. This was updated with a new bolt and washer (even though the washer is actually the new style on the 3.8L I decided to replace it because I bought it not knowing what washer was in there and then when it turned out to be the new style I figured why not replace it given how much heat it has been exposed to in 204,000 miles...and not wanting the hassle of returning it.) He also put on a new Bando drive belt while the fan was off to do the crank bolt.

Sorry for not taking more pics but we (mostly he) was busy. :)
 
Last edited:

Forum statistics

Threads
188,223
Messages
2,904,057
Members
229,805
Latest member
Chonker LMTV
Top