More pics and some more updates....
Sorry if I have some redundant photos, I have been figuring out this upload thing from Google photos. Should be all set.
So, we've been continuing with the stereo install and some other things as well. We have been working lots on the interior. We were held up by some April snow, cold temps, and the occasional wrench being aimed at my head by the poorly satiated GF.....
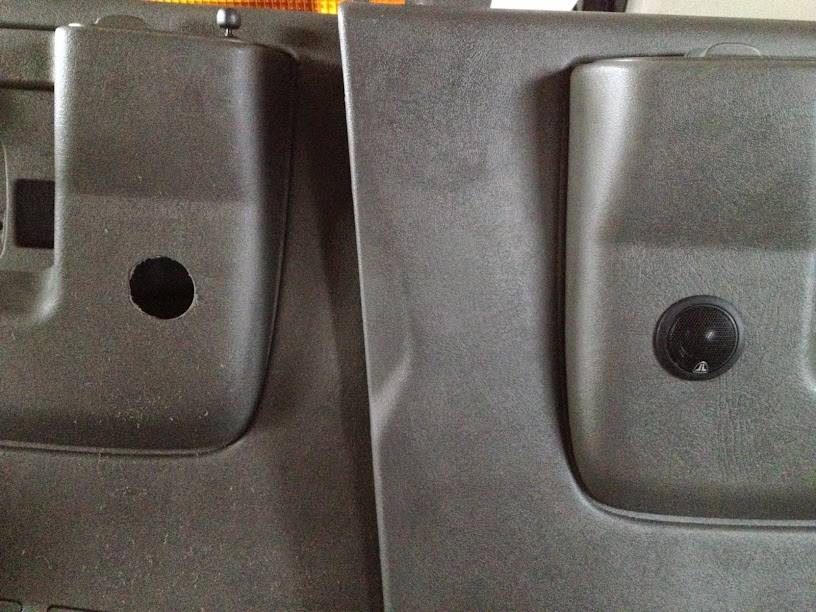
We drilled some custom holes in the front door panels to mount the front tweeters. The front component speakers, I must say, are well worth the extra work of wiring and mounting of the crossovers. They sound terrific. Also, I am sure the Dynamat in the doors also helps. On a side note, I will say that GM didn't do us any favors with the interior. The clips used in the door panels are an absolute pain in the *** to get out. Good luck on taking off the dash panel without cursing the ex mother-in-law.....Still, we did win the war on that one. Surprisingly, wasn't too bad going back in.
These are the door panels with tweeters mounted.
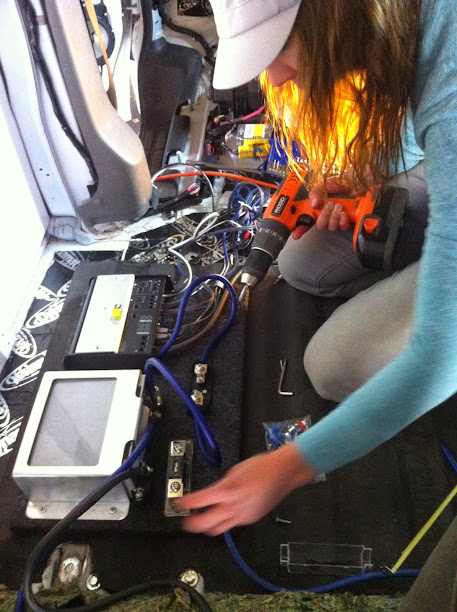
We "mocked" up a rear panel to house the second battery and the JL Audio 500 watt 3 channel amplifier. I went with a second battery kit from XS Power for now. It had basically everything I needed and was well priced. The second battery is not the biggest, but I also wasn't looking to carry a huge 2 battery as this adds significant strain to charging system. I know in the future I may want more power in the back, but I figured this would be a good start. I really plan on having power in the back for just the following:
- power amp and stereo when parked
- 800 - 1200 watt inverter (future mod)
- charging of computers, phones, etc.
- occasional heater, fan, appliance
That's about it.
Here is the first rendition of the rear battery set-up. Obviously, in future we are going to clean up and shorten many wires. We are holding off until gaucho sleeper/sofa is complete to shorten all wires appropriately.
When doing all the wiring for the second battery, I wanted to be able to isolate the rear battery when necessary. There are so many ways to do this that you can get dizzy just going over the details. There are expensive, fully automated, isolators which I am sure do a fabulous job but I simply didn't want to add another variable to think about and my needs simply don't require something as advanced as this. I's rather put the money towards something else like a better front fork for my GF's mountain bike or beer:. I did, nonetheless, find the following diagram quite useful. It is an exceptionally simple way to wire a second battery, and I took it one step further.
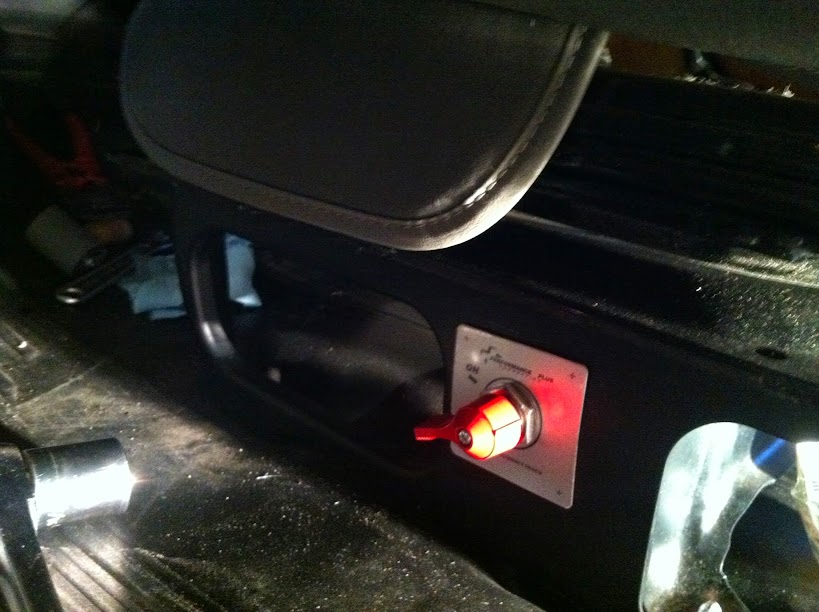
In this set-up, you would have an "automatic" connection whenever you turn the key to "ignition". It prevents them being connected for long periods of time or the driving forgetting to isolate them. I basically ran this set-up, but I made the relay completely manual.
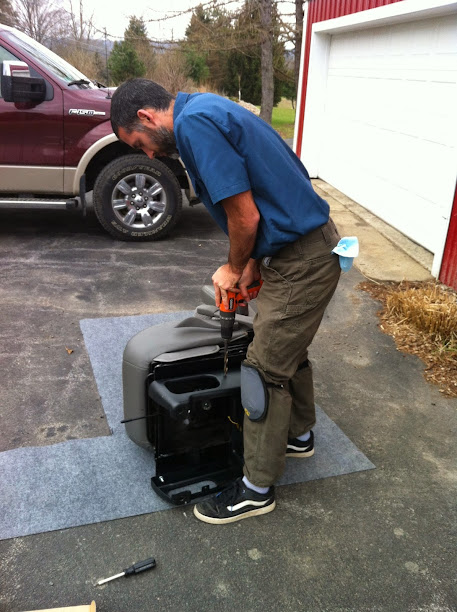
I purchased a standard battery disconnect that is often used in race cars or even ambulances. I used to work as a paramedic for years, and still remember reaching down to connect "the box" when going on calls. Now, instead of reaching down before going to pick up drunks and dead people, I reach down to give some juice to the rear amp
")
I mounted this relay right below the passenger seat, easy access.
Gotta love these knee pads:sombrero:
Final install, when connected. It is overly simple, I know, but I love it. Works great. I also like it because it gives me total control. I like the ability to start the car and let the van run for 10 minutes or so to just charge the starting battery and then I connect them. Pretty cool. Let me know what you guys think.
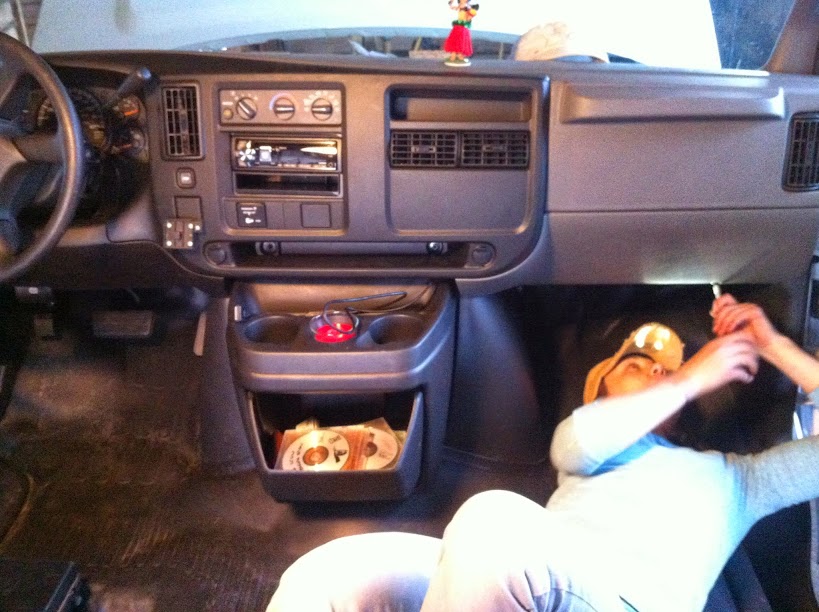
Interior going back together.....I know what you guys are thinking. Does this chick do all the work?? And, where can I find a girl like this?? Well, someone has to shoot the damn pictures, and yes, she is pretty damn gifted. Not an easy girl to find....if you look closely, check out that trick Craftsman hat with the LED lighting built in
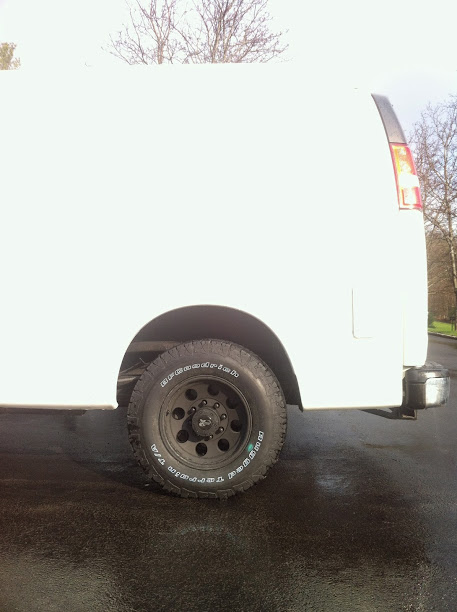
No adventure van is complete without proper footwear. The stock rubber was still on the van. Still had some tread, but definetly not ideal condition after 9 years. I figure I would go with a wheel upgrade as well. I have, since I was about 17, a sucker for black rims.....And, the matte black, even better.....
We are not planning on keeping this van completely white for very long. Planning out some possible decals/vinyl over the summer.
I will post the updates on the gaucho couch/sleeper, curtains, interior paneling coming up shortly......
Please let me know what you guys think, and of course, any suggestions!!!