Truck bed storage system.cont'd
Drawer Slides($$$):
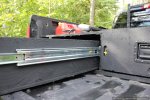
The basis of the design was two pairs of
48”(four foot) Extra Heavy Duty Full Extension Drawer Slides, as this is the longest/most heavy duty slide I could find. While some might argue that the 400lbs rated capacity is a bit overkill (I would agree), you should keep in mind that this load rating is actually for the 18” slide and that I intend to store tools/socket set/drill(s) and other misc. heavy items in these drawers. I sourced the slides from
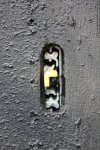
Lee Valley: fortunately for me, the Lee Valley distribution centre and storefront is minutes from my work. I decided to go with the “double locking” slides, to prevent the drawers from sliding open or closing on their own if I was parked on a slope. I’m glad I went with these slides as they work great and the locks are definitely a necessity for this application: if I don’t engage the locks the drawer will slide shut even on the slightest downhill. The locks engage automatically when the slide is fully extended and fully closed, and need to be released by pressing the yellow tab at the end of the slide. This means you will need to have access to these yellow tabs if you plan on using the locking slides. If you are closing the slides and aren't pressing the yellow tabs they can also lock at the halfway point...The slides cost me a whopping 175$ per pair, and were easily the most expensive (and IMO the most critical) component of the build.
**Note: I saw a build on the drawer thread where someone built two drawers, and bought one pair of double locking slides and one pair of non-locking slides. It looks like he had mixed the two slides to have one locking slide per drawer. In hindsight this would’ve been a good idea and would have been more than enough “locking” power to hold the drawers open or closed. With two locking slides per drawer, if the slides aren’t perfectly aligned only one of the slides will lock and you also need to release both slides in order to open/close the drawer which turns it into a 3handed operation (less than ideal).
Frame/Drawers:
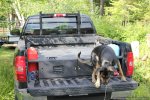
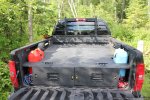
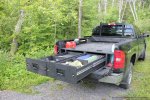
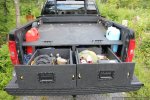
I wanted to be able to have some weight on top of the platform, so I decided to build the frame out of 2”x10” pressure treated lumber with a ¾” plywood top sheet. This would allow me to have roughly 8-9” deep drawers which should suffice for most of the stuff I want to have in there. The plan was to use some angle brackets/joist hangers to hold the frame together/square and have a ½” plywood sheet as a base. After cutting my 2”x10”s I decided a ½” plywood base was a bit overkill, and that I didn’t mind having the joists rest on the truck bed.
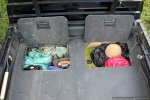
I made the top sheet in two pieces (left and right) and painted both sides with Dupli-Color Bed-Armour ($$) from Canadian Tire. I did one coat on the bottom side of the sheets and two coats on the top as per instructions on the can. I then cut out the hatch compartments and cut out two holes for my jerry cans, and sanded/painted the newly cut edges. I used white chalk to mark all my cuts on the painted plywood, it showed up well and washed away with the first rainfall.
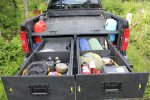
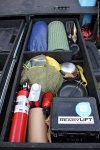
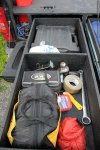
I built the drawers with ¾” plywood sides and a ½” base (mostly due to the wood I had available, and I figured ½” base would be plenty). I put a ¾” divider at the centre of the drawer to beef it up a bit, I will be putting in some more dividers for small/specific items once I figure out how I’m going to use the drawers. In the right hand drawer I cut out a notch in the divider to allow me to put my shotgun in there (or anything else longer than 24” but shorter than 48”). Hanging the drawers in the frame was relatively easy, I just followed the instructions provided by Lee Valley. The drawer on the left slides with no resistance, but I think I didn’t do as good of a job on the right drawer: it is noticeably more difficult to open/close. I attribute this to the frame or slides not being square, and will likely have to make some adjustments to get it right.
Once the drawers were hung in the frame, I screwed the top sheets to the plywood frame with #8x1 ¼” deck screws. I then painted over the screws and attempted to poly-fill and paint the joint between the two halves of the top sheet.
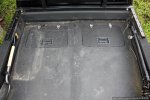
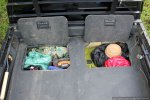 Handles/Accessories:
I ordered some recessed black handles from
ACKLANDS GRAINGER for about 24$ a piece. Since I have the locking slides to hold the drawers shut, I decided a latch type handle was unnecessary. The handles look great and are definitely “heavy duty”. That being said, one of the handles seems to have a problem with the spring already and the handle doesn’t fully spring back into the recessed pocket on its own. I think I might’ve tugged too hard on it or something during construction. They require #10 screws, #10x1/2” are tough to find, I had to get them at the fastener supply store as most hardware stores only had down to #10x1”. I wish I had been able to find some black screws as the shiny screws stand out with everything else being black. I might just give them a once over with the bed-liner paint.
Got some stainless steel hinges from Lee Valley ( they didn’t have any black ones. Installation is simple, line ‘em up and screw them down. No problems with these so far.
“Seat of my Pants” Modifications:
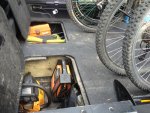
In the middle of construction I realized I had overlooked the fact that the hatch doors would need some sort of support to keep them from falling into the compartment. For the time being I’ve put a border of additional ¾” plywood around the perimeter of the hatch opening to hold the lid. This is a temporary solution, but it passed the “jump up and down on the hatch lid” test so we’ll see how long it lasts. I’d like to come up with a nicer looking, more robust solution. Maybe some steel/aluminum strips along the inside of the hatch opening instead of plywood.
I added a brace made of some cutoff strips of ½” plywood and angle brackets to keep the frame from shifting. While I was hanging the drawers and mucking around with the frame it was shifting quite a bit, and I realized there was nothing keeping the frame from “collapsing” in this direction. I had a few possible solutions for this but the strip of plywood seemed to be the least intrusive and most simple. I was unable to put a joist at the outside of the hatch compartment as it would interfere with the wheel well. If I had wanted to get real fancy I could have cut a 2x10 to fit over the wheel well but I chose the easy solution.
Future Modifications:
I’d like to make better use of the space in front of the jerry cans for storing bungees, tie downs etc. I might incorporate a little shelf with a backing to prevent anything from falling into the jerry can compartment when the jerry is removed.
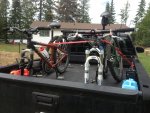
I will be adding some extra tie-down points for bulky items (coolers, bins, generators etc etc). I was planning on popping out the stake pockets around the truck bed and either using them as is or getting some stake pocket anchors to fit in each one. They aren’t quite flush with the top sheet, but I figure they’re low enough to hold down anything worth tying. With the two jerry cans removed, I can also access the stock tie down points on the side of the truck bed. I guess I could also access the front tie downs if the two hatch doors were open.
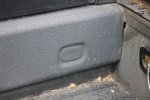 Extras:
Not part of the drawer system but part of the overall organization is my hi-lift and shovel storage.
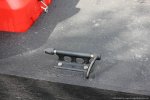
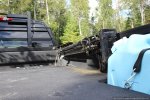
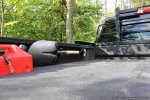
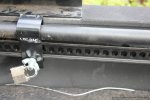
My 48” hi-lift jack is mounted to the bed rail with a “loc-rac” mounting kit. It seems pretty stable and I haven’t noticed any rattling or movement. I like that I can lock up the jack until I get my cap. One thing to consider if you’re considering the loc-rac is that it has to be oriented a certain way. The handle/locking portion needs to be on the left and the base holder needs to be on the right (otherwise it would be upside down). This limited me to putting the jack on the passenger side of the vehicle, to avoid interfering with the hatch lids. Didn’t create any problems, but its something I hadn’t considered.
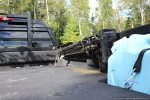
I wanted to get some of the infamous “quick fists” to mount my shovel to the bed rail on the opposite side, but found them a bit pricey and hard to get. I saw some “hold-its” at Canadian tire and thought I’d give them a whirl. So far so good, the shovel hasn’t moved or made any noise, but I’d prefer if there was some sort of strap/retention for the shovel like the quick fist has. We’ll see how well they last… I had considered using some of the RHINO atv tool grips but they were just way too big and overkill for this application.
