2011 Silverado 1500 Build Thread

Decided to start a build thread to document my trials and tribulations and hopefully save a few people from repeating my mistakes.


Truck:

2011 Silverado 1500 LS 4WD (“Cheyenne Edition”)

Current Mileage: ~50,000km


Intent:

Equip the truck so it is trail capable and can get me, the wife, the dog and all our gear to remote locations for camping, mountain biking etc. Versatility, simplicity and preparedness are important factors.


Conditions: This is our only vehicle and daily driver so it will need to remain highway/commuting friendly. I would also like to be able to do typical “truck stuff” with it, like haul lumber/furniture/motorcycles/ATV's etc (these duties can mostly be accomplished with my 5'x10' flat bed utility trailer).


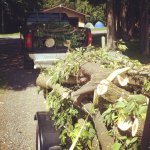
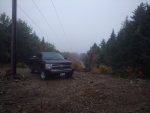
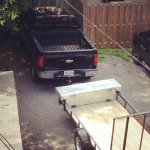
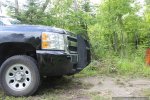
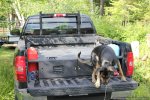
here's a few pictures of the truck and truck related activities from the past two years to set the mood...

870.jpg

canoe.jpg

lumber.jpg

nb.jpg

photo1.jpg

trailer.jpg

water.JPG
 
Last edited:
UPGRADES TO DATE

BACK RACK:

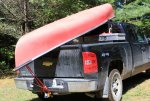
Got the BACKRACK to provide mounting points for rear facing lights, CB antenna, and to allow me to put a canoe/lumber on the back of the truck. Easy to install: no problems with it to date. The rack will be removed when I get a cap for the truck bed. I haven’t come up with a new use for the rack once I take it off my truck, might just end up selling it (although it has a few holes in it).

Aluminum Toolbox:

The toolbox has since been removed and put on the front of my utility trailer, in anticipation of getting a cap for my truck bed. The toolbox was very useful when I had it, and kept all my recovery gear, emergency first aid and repair supplies as well as a 20L jerry can and hi-lift jack secure and out of the elements. One of the downsides of my particular toolbox (especially when used with the BACK RACK), was that it basically made it impossible to see out the rear window, forcing you to back up with your side view mirrors. I had to get a special toolbox adapter for the back rack which added about 2” of height to the already tall toolbox. Another disadvantage was the toolbox occupying the first 1 ½’ of your bed, making it difficult to fit my dirt bike or even mountain bikes in the bed unless I put them on an angle.

Cobra CB Radio:

This was a spur of the moment purchase (on sale at Canadian Tire), but has proved to be a fun and practical accessory. I have done a few weekend trips with friends (in separate vehicles), and we can all communicate even without cell reception. I also have the weather channels, which have proved useful a few times, but the reception on these channels seems patchy (however, I can ALWAYS get the French weather). I have a large 4ft fibreglass antennae that I throw on when I’m in the bush, and a little 1ft rubber whip for day-to-day use (so I can get through the TIMMIES drive thru without any damage) I have the radio mounted on the underside of my dash (below the controls for the radio, A/C), the only time this location poses a problem is when you have someone sitting in the middle seat. Pictures to follow.

Ready Lift 2.25” Levelling Kit (Front)

Had this installed by a mechanic as I wasn’t comfortable at the time pulling the front suspension assembly apart (heard it can be a pain to get it back in), and I wanted them to do the alignment at the same time. This relatively inexpensive upgrade definitely improved my clearance up front (the stock setup is pretty lame, scraping your front bumper on curbs in grocery store parking lots).

Ready Lift 3” Lift Block (Rear)

After driving the truck with just the 2.25” front “levelling kit” I decided I wanted to put some rake back into the truck. I was repeatedly being flashed by passing drivers at night (I never re-aimed my lights to account for the level kit), and found that when the truck was loaded it felt and looked like a boat that wouldn’t plane out. I towed a friends mini-excavator and felt like I was doing a wheelie.

I did the install for this on my own as it was much more simple than the front. I thought I had all the tools I needed but ended up having to buy some extra deep sockets to drive the nuts onto the new LONG U-Bolts.

Warn “Trans4mer” Grille Guard:

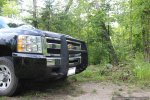
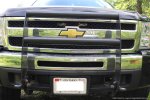
This will eventually hold a winch and some auxiliary lights. For now, it offers some protection for the front of the truck and two hooks for recovery. The guard wraps right under the front bumper, and is the lowest point on the front of the truck so it should be the first point to touch the ground in most cases (pictures coming soon).

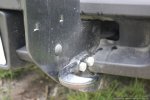
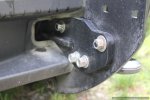
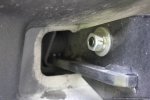
This was relatively easy to install, and only required two holes to be drilled in the frame. The whole assembly slides in where the stock tow hooks were. I made the mistake of assembling the grille guard before mounting it.. don’t do this. Just follow the instructions: it was more difficult to get everything to line up when the grille guard was already assembled.

Truck Bed Storage System:

Got a lot of inspiration for this ongoing project from the ExPo forum.. particularly the “drawers” thread:

The further I get along in this project, the more I am realizing I won’t ever really be DONE the storage system. I think as I use the storage and identify problems/weaknesses it will be an ever-improving system. I have already revised the plan a number of times and made changes to my initial concept. More details and info/pictures/technical info to follow.
 

hikingff77

Adventurer
Sounds awesome. I really would like to see the Transformer bumper. I have a 2008 Silverado Crew and love it, have a cap and Thule Rack for hauling anything long, kayak, ladder, canoe, etc. I'm glad to hear your reviews of the lift, I to would like to put that on my truck someday.
 
Warn Trans4mer

Here's some photos of the Warn Trans4mer grille guard...

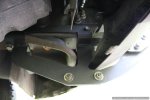
Comes in pieces in a very heavy box: a couple brackets to mount the grille guard to the frame, the grille guard side panels and the cross bars. Required me to drill one 1/2" hole on each side for the bracket to bolt to the frame.

IMG_0592-Optimized.JPG

IMG_0593-Optimized.JPG

IMG_0594-Optimized.JPG

IMG_0595-Optimized.JPG

IMG_0596-Optimized.JPG

IMG_0598-Optimized.JPG

IMG_0600-Optimized.JPG

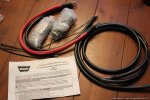
It also came with an wiring extension kit since the battery in the 2011 Silverado is WAY at the back of the engine compartment.... nice touch.

IMG_0606-Optimized.JPG
 
Last edited:
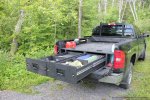
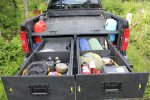
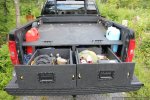
Truck bed storage system.

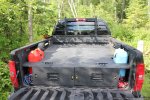
Once I made the decision that I was going to get a cap for the truck, I had to figure out what I was going to do with all the gear in my aluminum toolbox (since the toolbox rests on the bed rails it is not compatible with a cap). This is how I stumbled upon expedition portal: after a few google searches for “truck bed storage solutions” I ended up in the ExPo DIY DRAWERS thread. After checking out all the excellent drawer builds, I was able to come up with a basic concept and some key features I was looking for:

  • Robust drawer storage system that is weight bearing so I can still load large items in the truck, and so I can walk around everywhere in the bed.
  • Two 4’ full extension drawers, minimum 8” depth to store tools/gear/misc items.
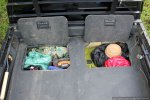
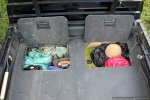
  • Two 2 ½’ compartments at the front of the bed with “hatch” type lids, to make use of the remainder of the space and to store bulky/heavy items and recovery gear. One thing to consider with the drawers is that you need to be able to open the tailgate to access the drawers. I decided I would need some additional storage for recovery gear that was accessible with the tailgate closed in case I’m stuck somewhere where I can’t open the gate or can’t pull out the drawers.
  • All exposed surfaces will be painted with black truck bed liner paint in an attempt to prevent rotting of the wood and give it a nice/durable finish. Plywood top sheet painted on both sides.
  • Recessed hardware wherever possible to make it more comfortable for sleeping back there, and to make it easier to slide large items in/out without getting hung up on handles etc.
  • Until I get the Thule roof rack I need to be able to transport at least two bicycles securely.
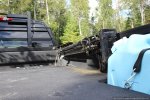
  • Integrated storage for my 20L fuel can, hi-lift jack, shovel, axe, bolt cutters etc…


I put all of this together, measured my truck bed and wasted some time at work on a Friday afternoon doing up a little concept drawing (see attached PDF, and feel free to use it/share it/print it, size: 11”x17”). This isn’t exactly how it turned out but it helped keep me focused during construction and allowed me to come up with a fairly complete shopping list to get started.

Unfortunately I didn’t take any photos during construction as I was “in the zone” and wasn’t thinking about documenting each stage. I’ll try to illustrate the steps with photos of the finished product… I am by no means a master carpenter and I have a limited tool selection. I’ll try to give as much detail as I can for all the steps to cater to all those in the same boat as me. For all the folks with experience in carpentry, just skip those details.

Tools:
Circular Saw
Jig Saw
Cordless Drill
Square
Work bench and C-clamps for cutting
Measuring Tape
White chalk


Materials & Qty:
4’x8’ ¾” Sheathing Plywood x2
4’x8’ ½” Sheathing Plywood x2
2”x10”x8’ x5
48” Extra Heavy Duty double locking full extension slides x2pr
Angle brackets x~12
Recessed handles x4
Stainless hinges x4
#10 x 5/8” wood screws (mounting handles and hanging slides) x100
#10 x 1” wood screws (hanging slides) x20
#8 x 1 ¼” deck screws (mounting top sheet and misc.) x400
Rubber bungee cords (to hold jerry cans) x2
Threaded eyelets (for jerry can bungees) x2

As you can see from this materials list: this is a HEAVY MOTHA F*$@#%% storage system. I did not design this with weight as a consideration. It’s also designed to be semi-permanent: while it can be lifted out of the truck bed, it would probably take 4 people and 8 cans of red bull.

Rocky: Carpentry Apprentice:
IMG_0567-Optimized.JPG

IMG_0568-Optimized.JPG

IMG_0569-Optimized.JPG

IMG_0570-Optimized.JPG

IMG_0571-Optimized.JPG

IMG_0577-Optimized.JPG

IMG_0578-Optimized.JPG

IMG_0581-Optimized.JPG

IMG_0584-Optimized.JPG
 

Attachments

  • TRUCK-VAULT2.pdf
    79.8 KB · Views: 43
Last edited:
Truck bed storage system.cont'd

Drawer Slides($$$):
IMG_0574-Optimized.JPG

IMG_0576-Optimized.jpg

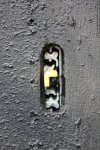
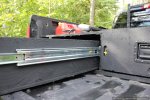
The basis of the design was two pairs of 48”(four foot) Extra Heavy Duty Full Extension Drawer Slides, as this is the longest/most heavy duty slide I could find. While some might argue that the 400lbs rated capacity is a bit overkill (I would agree), you should keep in mind that this load rating is actually for the 18” slide and that I intend to store tools/socket set/drill(s) and other misc. heavy items in these drawers. I sourced the slides from Lee Valley: fortunately for me, the Lee Valley distribution centre and storefront is minutes from my work. I decided to go with the “double locking” slides, to prevent the drawers from sliding open or closing on their own if I was parked on a slope. I’m glad I went with these slides as they work great and the locks are definitely a necessity for this application: if I don’t engage the locks the drawer will slide shut even on the slightest downhill. The locks engage automatically when the slide is fully extended and fully closed, and need to be released by pressing the yellow tab at the end of the slide. This means you will need to have access to these yellow tabs if you plan on using the locking slides. If you are closing the slides and aren't pressing the yellow tabs they can also lock at the halfway point...The slides cost me a whopping 175$ per pair, and were easily the most expensive (and IMO the most critical) component of the build.

**Note: I saw a build on the drawer thread where someone built two drawers, and bought one pair of double locking slides and one pair of non-locking slides. It looks like he had mixed the two slides to have one locking slide per drawer. In hindsight this would’ve been a good idea and would have been more than enough “locking” power to hold the drawers open or closed. With two locking slides per drawer, if the slides aren’t perfectly aligned only one of the slides will lock and you also need to release both slides in order to open/close the drawer which turns it into a 3handed operation (less than ideal).

Frame/Drawers:

I wanted to be able to have some weight on top of the platform, so I decided to build the frame out of 2”x10” pressure treated lumber with a ¾” plywood top sheet. This would allow me to have roughly 8-9” deep drawers which should suffice for most of the stuff I want to have in there. The plan was to use some angle brackets/joist hangers to hold the frame together/square and have a ½” plywood sheet as a base. After cutting my 2”x10”s I decided a ½” plywood base was a bit overkill, and that I didn’t mind having the joists rest on the truck bed.

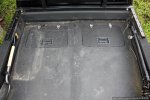
I made the top sheet in two pieces (left and right) and painted both sides with Dupli-Color Bed-Armour ($$) from Canadian Tire. I did one coat on the bottom side of the sheets and two coats on the top as per instructions on the can. I then cut out the hatch compartments and cut out two holes for my jerry cans, and sanded/painted the newly cut edges. I used white chalk to mark all my cuts on the painted plywood, it showed up well and washed away with the first rainfall.

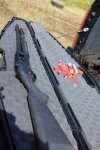
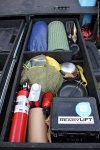
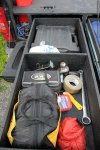
I built the drawers with ¾” plywood sides and a ½” base (mostly due to the wood I had available, and I figured ½” base would be plenty). I put a ¾” divider at the centre of the drawer to beef it up a bit, I will be putting in some more dividers for small/specific items once I figure out how I’m going to use the drawers. In the right hand drawer I cut out a notch in the divider to allow me to put my shotgun in there (or anything else longer than 24” but shorter than 48”). Hanging the drawers in the frame was relatively easy, I just followed the instructions provided by Lee Valley. The drawer on the left slides with no resistance, but I think I didn’t do as good of a job on the right drawer: it is noticeably more difficult to open/close. I attribute this to the frame or slides not being square, and will likely have to make some adjustments to get it right.

Once the drawers were hung in the frame, I screwed the top sheets to the plywood frame with #8x1 ¼” deck screws. I then painted over the screws and attempted to poly-fill and paint the joint between the two halves of the top sheet.
IMG_0579-Optimized.JPG

IMG_0580-Optimized.JPG

IMG_0583-Optimized.JPG

IMG_0584-Optimized.JPG


Handles/Accessories:

I ordered some recessed black handles from ACKLANDS GRAINGER for about 24$ a piece. Since I have the locking slides to hold the drawers shut, I decided a latch type handle was unnecessary. The handles look great and are definitely “heavy duty”. That being said, one of the handles seems to have a problem with the spring already and the handle doesn’t fully spring back into the recessed pocket on its own. I think I might’ve tugged too hard on it or something during construction. They require #10 screws, #10x1/2” are tough to find, I had to get them at the fastener supply store as most hardware stores only had down to #10x1”. I wish I had been able to find some black screws as the shiny screws stand out with everything else being black. I might just give them a once over with the bed-liner paint.

Got some stainless steel hinges from Lee Valley ( they didn’t have any black ones. Installation is simple, line ‘em up and screw them down. No problems with these so far.

“Seat of my Pants” Modifications:

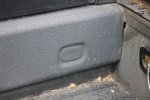
In the middle of construction I realized I had overlooked the fact that the hatch doors would need some sort of support to keep them from falling into the compartment. For the time being I’ve put a border of additional ¾” plywood around the perimeter of the hatch opening to hold the lid. This is a temporary solution, but it passed the “jump up and down on the hatch lid” test so we’ll see how long it lasts. I’d like to come up with a nicer looking, more robust solution. Maybe some steel/aluminum strips along the inside of the hatch opening instead of plywood.

I added a brace made of some cutoff strips of ½” plywood and angle brackets to keep the frame from shifting. While I was hanging the drawers and mucking around with the frame it was shifting quite a bit, and I realized there was nothing keeping the frame from “collapsing” in this direction. I had a few possible solutions for this but the strip of plywood seemed to be the least intrusive and most simple. I was unable to put a joist at the outside of the hatch compartment as it would interfere with the wheel well. If I had wanted to get real fancy I could have cut a 2x10 to fit over the wheel well but I chose the easy solution.

Future Modifications:

I’d like to make better use of the space in front of the jerry cans for storing bungees, tie downs etc. I might incorporate a little shelf with a backing to prevent anything from falling into the jerry can compartment when the jerry is removed.

I will be adding some extra tie-down points for bulky items (coolers, bins, generators etc etc). I was planning on popping out the stake pockets around the truck bed and either using them as is or getting some stake pocket anchors to fit in each one. They aren’t quite flush with the top sheet, but I figure they’re low enough to hold down anything worth tying. With the two jerry cans removed, I can also access the stock tie down points on the side of the truck bed. I guess I could also access the front tie downs if the two hatch doors were open.
IMG_0590-Optimized.JPG

Extras:

Not part of the drawer system but part of the overall organization is my hi-lift and shovel storage.

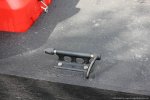
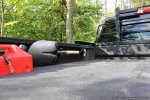
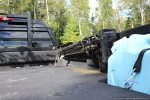
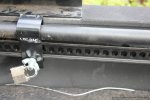
My 48” hi-lift jack is mounted to the bed rail with a “loc-rac” mounting kit. It seems pretty stable and I haven’t noticed any rattling or movement. I like that I can lock up the jack until I get my cap. One thing to consider if you’re considering the loc-rac is that it has to be oriented a certain way. The handle/locking portion needs to be on the left and the base holder needs to be on the right (otherwise it would be upside down). This limited me to putting the jack on the passenger side of the vehicle, to avoid interfering with the hatch lids. Didn’t create any problems, but its something I hadn’t considered.
IMG_0570-Optimized.JPG

IMG_0591-Optimized.JPG

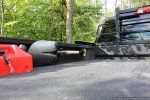
I wanted to get some of the infamous “quick fists” to mount my shovel to the bed rail on the opposite side, but found them a bit pricey and hard to get. I saw some “hold-its” at Canadian tire and thought I’d give them a whirl. So far so good, the shovel hasn’t moved or made any noise, but I’d prefer if there was some sort of strap/retention for the shovel like the quick fist has. We’ll see how well they last… I had considered using some of the RHINO atv tool grips but they were just way too big and overkill for this application.
IMG_0571-Optimized.JPG
 
Last edited:

Bushcoat

one trail at a time
Really nice job on the organization, should be great when you do find a cap for it!

Never been in that Lee valley store, I should check it out one day.
 
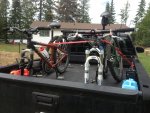
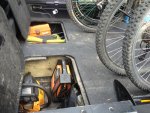
Took the truck up to the cottage for a week and the storage system worked great

image.jpg

image.jpg

I can still open the hatch doors with the bikes loaded: handy. (Never thought of that until they were in there.
 

Anthony24x

Observer
Awesome work, those drawers are an inspiration. Back when my company made me work out of a pickup I dreamed of something like what you did!
 

chilliwak

Expedition Leader
Nice looking rig James. Thanks for posting those pics. Also, glad to see another Canadian here on the site. Welcome and have fun...:)
 

Forum statistics

Threads
189,852
Messages
2,921,593
Members
233,030
Latest member
Houie
Top