obscurotron
Adventurer
First off, I've owned a good number of Tacoma pickups and a good number of winch mounting systems. This isn't the first piece of iron (or aluminum) I've installed on either a 1st or 2nd Gen Tacoma. So I'm going to detail, step-by-step, the process of install.
Step 1.
Yesterday morning I took my 1/2 Milwaukee drill and and 1/2" bit and slightly drilled out the 4 winch mounting holes. They were nominally 1/2", but my WARN M8000 uses 3/8" hardware. Kenny @ Aluminess, upon my pointing this out, promptly had some bushings shipped to me from McMaster-Carr. The fit was snug, but a hammer and block of wood got them seated. Of note, the powdercoating is THICK. Thicker than anything I've seen from WARN, ARB or CBI.
Step 2.
I mounted the solenoid on my M8000 with 2 large hose clamps (4-5" diameter, sourced at Home Despot). This works well on my older M8000, as the solenoid box has curved mounts just for this purpose.
Step 3.
Took off the front grille and the front bumper cover. This is easy. As I originally had a CBI front receiver for carrying a couple of bikes (no longer needed, anyway), I'd been down this road before.
Step 4.
Removed the aluminum factory bumper and bumper extensions. Again, easy.
Step 5.
Grabbed the Aluminess bumper by the bullbar, lifted, and carried it up my driveway. Yes, alone. It's only ~125lbs or so total, maybe less. I'm no muscle-bound freak, but you don't need to be. Placed bumper on a piece of the *enormous* carboard box used for shipping.
Step 6.
Oriented the bumper to face ahead, lifted and placed on the 6 bumper studs. With it in place and my holding it, I hand-tightened the 2 inner nuts to hold the bumper up. Then I installed the overlying stainless steel gusset plates and the outer nuts (hand tight).
Step 7.
I took a step back to look at fitment and about dropped a load in my shorts. The passenger side stuck out (forward) about 1", the driver side was hitting the trim below the headlights. (Insert a loud "Ugh" here).
Step 8.
Tightened the 6 nuts and re-assessed the fit, then loosen the nuts. About 3/4" out on the p/s, and slightly under the headlight trim on the d/s. (Insert certain cuss words here).
Step 9.
Wander into garage, grab a 1"x1/8" piece of aluminum flat bar, cut a chunk, drill two holes, channel them (so the holes look like elongated 'C's).
Step 10.
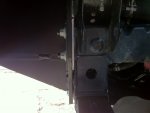
Insert my homemade spacer between the frame horn and the Aluminess bracket on the d/s.
Step 11.
Tighten nuts and assess fitment. I'm about 1/2" out on the p/s (good, need some clearance) and about 1/4" out on the d/s. How that works with a 1/8" spacer, I don't know.
Step 12.
Tighten all 6 nuts and accept that my bumper will sit cockeyed.
Step 13.
Get out the Milwaukee 1/2" drill and a 3/8" bit. Start drilling d/s crossmember. Break bit (thanks, DeWalt).
Step 14.
Give up on finishing the install of the bumper itself until I get more 3/8" bits.
Step 15.
Wire up the winch to the battery and a good ground.
Step 16.
Re-install the front grill. Install the top two push-clips and 2 screws. Note that the bottom of the grill is free to swing outwards, vibrate and generally move around. No provision provided for securing the lower part of the grille.
Step 17.
Get out my Bag o' Zipties (who doesn't have these laying around, after all?), remove the grille, drill two 3/16" holes in the outermost lower tabs of the grille.
Step 18.
Install the grille with upper factory hardware and lower zip tie B.S. solution. (At this point, I'm questioning the money spent on this thing).
Step 19.
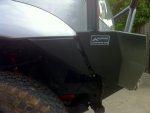
Go to install the little wing "trim" pieces. The instructions say to use the provided hex head bolts and factory hardware. Neither fits right. They stick out, since they sit almost perfectly vertical (90 deg. in relation to the ground), while the bumper itself angles slightly inward. ******?
Step 20.
Channel locks and some gentle persuasion to reposition the brackets on both the fenderwell and the wing pieces gets a somewhat acceptable fit. One wing piece needed the rear hole wallowed out with a round file. That was easy (aluminum) but not fun (should I have to? Come on).
Step 21.
Go buy more 3/8" drill bits at the local hardware store. Proceed to wander over to the local pizza joint where my wife and kid are having their first soccer team meeting, pound a pitcher of Anchor Steam beer and mumble to myself.
Step 22.
Come home (driven by wife!) and write an informative, but slightly annoyed email to Kenny @ Aluminess.
Step 23.
Go outside this morning with the tape measure and a try square. Start looking around. Determination. Front frame, body mounts and other mounting hardware are all set up within 1/16-1/8" of an inch of each other. In other words, the frame and body mounts are true and square. The bumper is square, but it appears the p/s bumper mount (on the Aluminess, not the frame) is about 5/16" longer than the d/s.
Step 24.
Go inside, contemplate kicking something, stare at my beagle whose only goals in life are to sleep, eat and go on adventures with me, sit down and pet the dog.
Up to this point the customer service from Aluminess (Kenny, really) has been exemplary. I've never dealt with a better company. He even made sure to know, at order time, that I have a DCSB Tacoma, since AC and DC bumper mounts are apparently different. He sent the bushings to make up for the 1/2" winch mounting holes quickly and without hesitation. Will they make it right? I don't know. I hope so. We'll see. I just hate burning time like this. The general quality of the bumper materials and welds is rock solid. Whoever does their welding is a master in his craft. The front shackle mounts alone are impressive.
FWIW I've owned the truck since new. No accidents, no alterations, etc. I'm leery of the spacer I had to fab up for the d/s and I still have holes to drill this morning for the lower mounting bolts. That said, I really question whether this bumper would withstand winching forces on a 4000lb Tacoma. More a question of how the bumper mates up to the truck than the bumper itself.
I'll update this thread as I go.


