2021 RAM 3500 Tradesman | AEV Prospector | FWC Grandby

Tex68w

Beach Bum
I guess the first questions would be does your truck have OEM fogs and are they LED?

If you have fogs and they are halogen you can plug them in and update your BCM to reflect that you now have LEDs installed. If you already have factory LEDs it's just plug and play.

If you do not have factory fog lights you must decide how you would like to switch your new LED fogs - OEM headlight switch like I am doing, one of your six auxiliary switches or separate third parts switch. Third party switch is easy - find 12 Vdc and send it out. Auxiliary switches are quite easy and look good also but they are not triggered on or off by low-beam of high-beam lights. Running through the OEM headlight switch is the most difficult but the cleanest. Lot's of choices.

I have the same truck as yours, Tradesman, no fogs. Looking to run the OEM switch like you've done here, I have plans for the Aux/Upfitter switches. I am looking to run the same setup you've done here just with another brand of aftermarket LED lights is all. You show part # 68156061AD for the switch.
 

ramblinChet

Well-known member
I have the same truck as yours, Tradesman, no fogs. Looking to run the OEM switch like you've done here, I have plans for the Aux/Upfitter switches. I am looking to run the same setup you've done here just with another brand of aftermarket LED lights is all. You show part # 68156061AD for the switch.

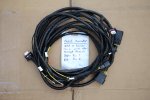
Copy. You will need all of these parts:
Untitled.jpg

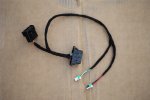
Plus a custom harness (this one is for LED projector headlights and LED fogs):
IMG_0004.JPG

Plus a security bypass cable:
IMG_0014.JPG

Plus an OBDLink MX+:
OBDLink MX+.jpg

Plus the AlfaOBD software and your foglights.

Keep in mind that components such as the security cable, MX+ and AlfaOBD can be used for other purposes such as adjusting your tire size, enabling or disabling other features, etc. It's a few dollars to invest up front although if you are planning additional modifications and/or may have the vehicle for a few years I consider it worth it.

If you would like additional details PM me for a link to some additional information.
 

Wilbah

Adventurer
Really thoughtful build and looks like you're getting it exactly the way you need it (which is ultimately all that matters- everyone has different needs/wants). Very clean additions.

A close friend has the Tradesman and has been very happy with it. His is the Cummins and the issues have been mostly related to not working it as hard as is needed to keep the DPF system clean. Although it's hard to argue with 20+ mpg when fully loaded (four guys plus gear) for a fishing trip!

I saw you felt the BE on gas v diesel would be 250-500k miles (IIRC), curious what mileage you are assuming for the gas version with the camper? And what your assumption is for annual maintenance (I've assumed 2x for diesel). And make no mistake- this is not meant as a challenge or to be argumentative, I'm just a math geek and am always curious about the assumptions so I dont misunderstand or miss something- I'm always learning! Thanks!

Cool to see an old style pickup (regular cab, long bed) being bought new and built!
 

RAM5500 CAMPERTHING

OG Portal Member #183
Does anyone know exactly what type of terminal and seal are being used for the underhood connections for the auxiliary switches?

I believe I have found them here but I would like to confirm:

Terminal - https://connectorexperts.com/i-31645545-term500.html?ref=category:1458515
Seal - https://connectorexperts.com/i-31646169-seal71.html?ref=category:1458549

View attachment 652191

The female ends are already ready to go under the hood at the aux switch distribution block. No additional parts are needed.

Beautifully done mods and truck sir! Love the color scheme!
 

RAM5500 CAMPERTHING

OG Portal Member #183
Love everything about this build!

Word of unsolicited advice... Ditch the entire turnbuckle idea, regardless of brand or method and hard mount it through the floor of the camper to the bed.

I had a FWC hawk and after breaking the factory turnbuckles, i upgraded to beefier ones, and bent the actual mounts offroad and they were all constantly needing checking. They constantly flexed and moved offroad

I eventually drilled 4 hidden holes through the floor of the camper and the bed and mounted it permanently with huge 3/4" bolts and drove the snot out of it offroad with zero issues.

I was hesitant to drill such large holes in a brand new camper and truck, but after so many issues with the other method, it was a no brainer.

The FWC mounting system is sub par at best for those that spend a lot of time on rough roads
 

ramblinChet

Well-known member
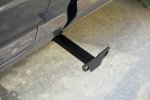
Today I ordered MOPAR trailer wiring harness and mud flaps. Since much of my time involves driving on dirt and gravel roads I consider good mud flaps a necessity for a multitude of reasons.

tow and flaps.jpg

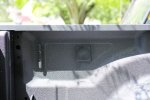
My goal is to install the fifth wheel / gooseneck harness into this existing square that is already in my bed and connect it to the power and ground for the running lights on my camper. Here is a picture of the existing square:
IMG_0004.JPG
 

Tex68w

Beach Bum
Mine has the fifth wheel package, I'll snap a pic Sunday and send it over. That square is actually for the inverter plug, the 7-pin and 4-pin hook-ups actually mount to the left of it, but I don't see why you can't use the existing blank for the camper.
 

ramblinChet

Well-known member
@RAM5500 CAMPERTHING your build is nothing short of amazing! I have been following it for sometime and sat down this afternoon to binge watch your videos. If my future plans include building a RAM 5500 it will be very much like yours.

The female ends are already ready to go under the hood at the aux switch distribution block. No additional parts are needed.
Copy - what I am actually looking for are the bare connectors and seals so I can create a loop with the one wire. All of the wires that came with my kit only have a connector and seal on one end.

Beautifully done mods and truck sir! Love the color scheme!
Well thank you. I considered a few other colors but decided to take advantage of fact that it's just another gray truck and will not stand out that much.

Word of unsolicited advice... Ditch the entire turnbuckle idea, regardless of brand or method and hard mount it through the floor of the camper to the bed.
Agreed and have already done so after seeing too many pictures of brand new beds with damage from being stressed by the turnbuckles. Right now I have installed Torklift frame mounted tie downs and Springload XL external turnbuckles. They are not the prettiest but I am working on a few designs for a superior attachment system that permits the frame/bed to flex independently of the camper while maintaining overall alignment.

Front mount
IMG_0001.JPG

Rear mount
IMG_0008.JPG

The FWC mounting system is sub par at best for those that spend a lot of time on rough roads
Yeah, some folks were quite offended when I called the Four Wheel Camper turnbuckle tie down system amateurish at best. I think they do a nice job building the camper shell but they really fall short when it comes to their installation and outfitting the interior.
 

RAM5500 CAMPERTHING

OG Portal Member #183
@RAM5500 CAMPERTHING your build is nothing short of amazing! I have been following it for sometime and sat down this afternoon to binge watch your videos. If my future plans include building a RAM 5500 it will be very much like yours.

Thank you sir! Its my mid life crisis build! I've done everything else in between, so now its time to go big! Literally! Hahahaha


Yeah, some folks were quite offended when I called the Four Wheel Camper turnbuckle tie down system amateurish at best. I think they do a nice job building the camper shell but they really fall short when it comes to their installation and outfitting the interior.

Yes, i could rant about FWC quality for pages and pages... The ONE huge glowing issue i'd address before you even use it, is the WIRING!!!!!

I'd STRONGLY suggest gutting most of it and redoing it yourself before you get too far along with your build. Its like their wiring department is run by middle school kids.

Main Issues:
-The wiring for the truck charging plug (or whatever they call it) is 10awg. This is ridiculous. During testing, while driving, my house batteries were getting around 11-13 amps. I gutted it all, replaced it with 2awg and i was getting a consistent 45-55amps of charge while driving
-The "prewired solar" wiring that runs from the roof plug to the main electrical area is 12 gauge, very much limits your options and is silly
-Their wiring for the Blue Sea isolator for the charging is also wired with 10awg. It literally says right on the Blue Sea manual right on their website, it should be a minimum of 2awg!

I could go on for awhile ranting but i digress! :)
 

RAM5500 CAMPERTHING

OG Portal Member #183
I noticed quite a few issues when I started digging around too. Some of it is understandable but others aren't acceptable for the price point. I'd like to check out an OEV pop up in person to see if they do things better.

Based on literally everything else i have seen from OEV and their build quality, i am sure its night and day better
 

Tex68w

Beach Bum
Factory fifth wheel package 7-pin/4-pin in bed hook-up. As you can see the square blank is left for the inverter in-bed plug. I need to undo the mounting plate to see how large the actual plug is, in theory it should mount through that blank so long as you aren't using the mount shown here.

fJ3ntHn.jpg
 

ramblinChet

Well-known member
Yes, i could rant about FWC quality for pages and pages... The ONE huge glowing issue i'd address before you even use it, is the WIRING!!!!!

I'd STRONGLY suggest gutting most of it and redoing it yourself before you get too far along with your build. Its like their wiring department is run by middle school kids.

Main Issues:
-The wiring for the truck charging plug (or whatever they call it) is 10awg. This is ridiculous. During testing, while driving, my house batteries were getting around 11-13 amps. I gutted it all, replaced it with 2awg and i was getting a consistent 45-55amps of charge while driving
-The "prewired solar" wiring that runs from the roof plug to the main electrical area is 12 gauge, very much limits your options and is silly
-Their wiring for the Blue Sea isolator for the charging is also wired with 10awg. It literally says right on the Blue Sea manual right on their website, it should be a minimum of 2awg!

Yes, we are entirely on the same page. After placing my order with them last year I began to research specific details such as wiring to a much greater degree. The reason I ordered a Grandby Shell is because I simply did not like their factory choices for heater, layout, etc. so I decided to buy the shell and take care of those myself. And that naturally led to the wiring...

When I began researching the wiring and century-old-battery technology I was disappointed to see that this also must be replaced. The dealer I am purchasing from offered a $595 installation package that included wiring the camper to my vehicle's electrical system and physically attaching it to my truck bed via eyebolts and turnbuckles. I too was confused by the 10 AWG wiring for the charging system and wondered just how the heck they came to such a poor decision. My plan is to also run 2 AWG back to my bed and then from my bed into my camper. Currently I am planning to position my batteries near the front section of my camper.

I am designing my electrical system so my primary source of power comes from at least two or possibly three residential solar panels up top. Some days I will not be driving at all while on others I may drive two to six hours so my truck charging system will be secondary. I would be really interested in hearing additional information related to rewiring a new FWC camper so if you have info, links, pictures, etc. please share them.
 
Last edited:

ramblinChet

Well-known member
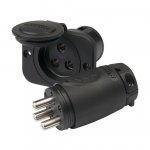
OK, here is what I have decided to use in the bed for the connection between the Four Wheel Camper and my truck. The system can accept 6 AWG wire and handle 70 Adc and this is what each wire will be used for:
  • 12 Vdc at 30 amps running from vehicle battery to DC charge controller
  • ground running from engine block to DC charge controller
  • 12Vdc running from 7-pin trailer connector to camper running lights
MARINCO 70A 3-Wire Trolling Motor Plug & Receptacle Combo

375397-39735.jpg

marinco.jpg
 

Attachments

  • Untitled.jpg
    Untitled.jpg
    106.8 KB · Views: 48

Forum statistics

Threads
188,040
Messages
2,901,542
Members
229,352
Latest member
Baartmanusa
Top