2022 Ford F550 - DIY - Adventure Expedition Vehicle Build Thread

Vance Vanz

Well-known member
Looks great! Appreciate you taking the time to post and document your work.
Thank you and you are welcome.

I've thought about some videos as well, but I just don't have the time for all that jazz. Maybe a final walk through video will be the ticket.

Thanks again for replying to my PM.
 

rruff

Explorer
Hopefully I will say it was all worth it in the end. You know, when I'm parked on a beach in some foreign country staring out into the ocean while relaxing in the shade under the awning of this beast after an amazing surf session............ Of course reggae would be playing in the back ground and I would be sharing the moment with a beautiful woman I had met along my travels.............., since we are swinging for the fences here ?.

What!? No wife and kids? This is your mobile party pad? (y)

You might be pleasantly surprised how easy it is to find women willing to share your lifestyle... at least for awhile if not long term. Especially if you can afford to pay their way... ;)
 

Vance Vanz

Well-known member
What!? No wife and kids? This is your mobile party pad? (y)

You might be pleasantly surprised how easy it is to find women willing to share your lifestyle... at least for awhile if not long term. Especially if you can afford to pay their way... ;)
It will definitely be my mobile adventure and exploration pad. My body can't handle the partying and shenanigans anymore ??????............. !

No buono on the sugar daddy badge ?; I like my female companions to be both independent and securely attached - financially and emotionally. I can't wait to start traveling and meet awesome peeps from all over the world.

Back to the shop for some more composite ? business.
 
Last edited:

Vance Vanz

Well-known member
Pass Through - Layout

Random, but may be helpful to someone doing a pass through, (while working solo).

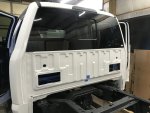
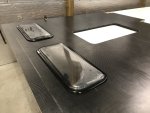
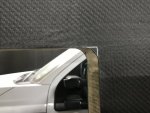
I was having trouble transposing my measurements from the outside wall on the back of the cab to the inside wall of the cab, or vice versa. This was important when trying to see where things coming from the front wall of the camper would land on the inside of the crew cab, or where things on the inside of the crew cab would pass through/land on the outside of the cab's back wall and therefore the front wall of the camper. This may sound simple, but when the window is still in, it is actually a bit challenging. The back window is tinted and also blacked out along the edges, everything tapers on the window and the back wall of the cab also arcs slightly, so it is hard to get a reference point when working solo. Drilling a pilot hole was also not an option as I was still in the decision making process of the layout.

Then the light bulb finally when on, pop out the vents as they are NOT permanently sealed and are super easy to get out/in, seconds. There are also two of them, so you can get a straight line across the entire width of the cab.
IMG_8199.jpeg

I'm no rocket engineer/scientist , but I'll eventually figure it out ?.
 

Vance Vanz

Well-known member
Resin Infusion – All of the Front Walls in One Panel – Layout & Prep

So I thought I would include a few pics to remind everyone of all the tedious tasks involved in prepping for a panel layup. You know, when someone says to me "How does it take two full weeks to do one simple panel?" ??.

Juuuust kidding; I'm a lover not a fighter ?!

IMG_8202.jpegIMG_8203.jpeg
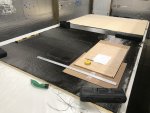
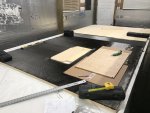
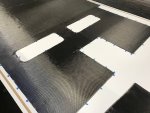
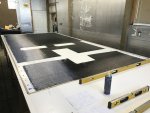
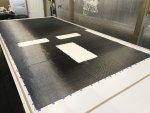
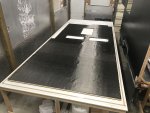
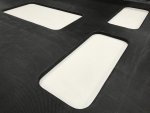
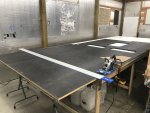
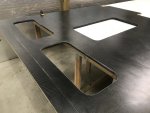
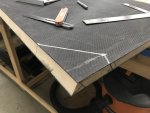
Laying out the pass through and having to put cardboard and plywood down, so I can crawl up on the layup to reach/mark the cutout area. At least I don't have to build scaffolding like some of the huge layups. I also have to weigh down the corners of the biaxial carbon fiber cloth, as it likes to shrink after you have rolled it out-pesky little bugger. And then there is the fun of laying out/marking the cutout hole twice, once for the actual size opening of the hole/pass through in the core material and a second time coming in 3/4" for the cloth that needs to wrap the inside edge of the core material. Almost forgot, blocking up the cutout hole in the core material so the CF cloth does not sag into it when you are laying everything out, which often makes the cloth come up short on the ends of the panel.

Oh, this one is my FAVE (y)(y).
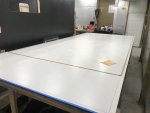
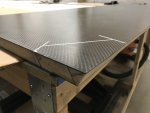
Not only scraping the table from the previous layup to get any and all of the dried resin off (one pass with a scraper and another pass with a box razor knife), but also rubbing alcohol along the edges for the tacky tape. And here comes the fun filled icing on top................., Wait for it......................., Your'e going to love it....................., waxing. Oh do I ? me some waxing.
IMG_8206.jpeg

Next up on the tedious list, placing tape everywhere so the first layer of carbon fiber cloth for the layup sits perfectly on the table, in order for all of the other subsequent layers, cutouts and overlaps to line up perfectly. DON'T SCREW THIS ONE UP as you also spray tack this first layer to the table and having to pull it up and reorient it is ABSOLUTELY NO BUONO!! Been there and done that (once) and never again.
IMG_8210.jpegIMG_8211.jpegIMG_8212.jpeg

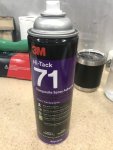
And for the GRAND finale, which always comes on those late nights when you should have left the shop hours ago and your patience has vanished....... spray tacking and wrapping the cloth inside the cutouts OHHH SOOO perfectly. Using cardboard cutouts to catch all of the spray tack overspray is a must. AND yes, your gloves and/or hands are always covered in the :poop: in the end no matter how careful and clean of a person you are ?. But, with patience and persistence comes great reward-at least that is what my fortune cookie said.
IMG_8214.jpegIMG_8213.jpeg

Enough, onto real progress and things people actually want to see.
 
Last edited:

Vance Vanz

Well-known member
Resin Infusion – All of the Front Walls in One Panel – Layup

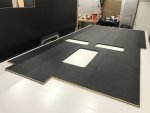
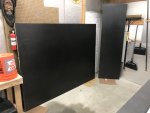
I laid out and laid up all of the front walls in one panel, similar to my larger interior wall(s) panel. I will rip each wall/piece off of the larger panel as needed. This is why the panel looks a bit odd.

The Final Product - Three sections combined into one Layup (One: 90-1/16"W x 94-1/4"L, Two: 84-15/16"W x 84-1/4" L, Three 7-1/4"W x 30-3/4"L) Total Dimensions: 90-1/16" W x 185-5/8" L Panel

My make shift oven to speed up the curing process: plastic with two space heaters underneath
IMG_8215.jpeg

Peel Ply Side:
IMG_8217.jpegIMG_8220.jpegIMG_8218.jpeg


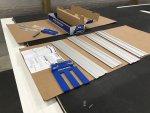
My New Toy for ripping these bad boys and girls a little quicker.
IMG_8222.jpegIMG_8223.jpeg
It's always a little anxiety provoking when you are about to rip into an expensive carbon fiber panel, not to mention the amount of time it will take you to remake it if you SCREW something up.

Layup Table Side:
IMG_8225.jpegIMG_8228.jpegIMG_8226.jpeg
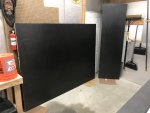
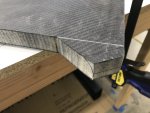
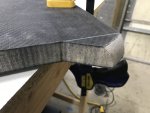
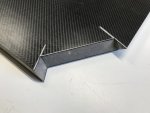
I ripped two sections off of the main panel: One, the bed floor in the cab over and Two, the angled part of the roof for the cab over.

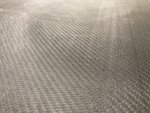
Everything came out similar to the finish of the previous panels.

Technical info from the layup for those that are interested:
  • 7.69 gallons of epoxy was used for the layup
  • Infusion time was about 2 hour and 45 minutes.
 
Last edited:

Vance Vanz

Well-known member
Resin Infusion – All of the Front Walls in One Panel – Layup (Continued.....)

Layup Table Side:
IMG_8231.jpegIMG_8230.jpeg

It sure feels good to dry fit the last remaining windows. These windows are for the front wall panel of the cab over section. The front wall of the main camper floor, with the pass through in it, is sitting right above the cab over front wall panel. All of the major items that penetrate through the camper are complete, except for the pass through boot and the rear/oversized door for the MTB locker/gear storage.

Next steps are cutting, dry fitting and bonding all of the front walls/panels for the camper. If everything goes well, I should have this done by the end of this week. It will be AMAZING to finally see this thing start to take some shape.

My oversized door for the MTB locker should also land the end of this week, or early next week. It would also be AMAZING if the door shows up on time. The door is the last piece needed to create a template an finalize/layup the back wall. I'll tell Santa all I want for Christmas is for the shipping company to do their job and get me my door on time.
 

Vance Vanz

Well-known member
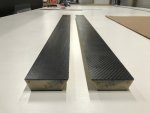
Carbon Fiber External Wall Panels Weight

I weighed the two smaller external walls panels that I Just laid up and ripped, the cab over section bed floor panel and the angled roof panel in the cab over section. Please remember that I'm using a bathroom scale to weigh these, so they may be off a pound or two in either direction.

if anyone wants to buy me a fancy pantsy NEW hanging scale and send it on over to the shop, I'd be happy to add it to my tool collection and take super accurate weight readings for everyone ?.

IMG_8225.jpeg

Cab Over Bed Floor Panel:
59.2lb (68" W x 90-1/16" L)

Cab Over Angled Roof Panel
19.8lb (26-1/16" W x 90-1/16"L)

These are 1" core and the exact materials/layup schedule is already posted in the thread.
 

ITTOG

Well-known member
Resin Infusion – All of the Front Walls in One Panel – Layout & Prep

So I thought I would include a few pics to remind everyone of all the tedious tasks involved in prepping for a panel layup. You know, when someone says to me "How does it take two full weeks to do one simple panel?" ??.

Juuuust kidding; I'm a lover not a fighter ?!

View attachment 756200View attachment 756201
Laying out the pass through and having to put cardboard and plywood down, so I can crawl up on the layup to reach/mark the cutout area. At least I don't have to build scaffolding like some of the huge layups. I also have to weigh down the corners of the biaxial carbon fiber cloth, as it likes to shrink after you have rolled it out-pesky little bugger. And then there is the fun of laying out/marking the cutout hole twice, once for the actual size opening of the hole/pass through in the core material and a second time coming in 3/4" for the cloth that needs to wrap the inside edge of the core material. Almost forgot, blocking up the cutout hole in the core material so the CF cloth does not sag into it when you are laying everything out, which often makes the cloth come up short on the ends of the panel.

Oh, this one is my FAVE (y)(y).
Not only scraping the table from the previous layup to get any and all of the dried resin off (one pass with a scraper and another pass with a box razor knife), but also rubbing alcohol along the edges for the tacky tape. And here comes the fun filled icing on top................., Wait for it......................., Your'e going to love it....................., waxing. Oh do I ? me some waxing.
View attachment 756202

Next up on the tedious list, placing tape everywhere so the first layer of carbon fiber cloth for the layup sits perfectly on the table, in order for all of the other subsequent layers, cutouts and overlaps to line up perfectly. DON'T SCREW THIS ONE UP as you also spray tack this first layer to the table and having to pull it up and reorient it is ABSOLUTELY NO BUONO!! Been there and done that (once) and never again.
View attachment 756205View attachment 756203View attachment 756204

And for GRAND finale, which always comes on those late nights when you should have left the shop hours ago and your patience has vanished....... spray tacking and wrapping the cloth inside the cutouts OHHH SOOO perfectly. Using cardboard cutouts to catch all of the spray tack overspray is a must. AND yes, your gloves and/or hands are always covered in the :poop: in the end no matter how careful and clean of a person you are ?. But, with patience and persistence comes great reward-at least that is what my fortune cookie said.
View attachment 756207View attachment 756206

Enough, onto real progress and things people actually want to see.
It all looks fairly simple and I kept my hands clean. ;)

Okay, but seriously, the pic of the tap on the table appears it is not on the carbon fiber at all? Is that the case?

Resin Infusion – All of the Front Walls in One Panel – Layup

I laid out and laid up all of the front walls in one panel, similar to my larger interior wall(s) panel. I will rip each wall/piece off of the larger panel as needed. This is why the panel looks a bit odd.

The Final Product - Three sections combined into one Layup (One: 90-1/16"W x 94-1/4"L, Two: 84-15/16"W x 84-1/4" L, Three 7-1/4"W x 30-3/4"L) Total Dimensions: 90-1/16" W x 185-5/8" L Panel

My make shift oven to speed up the curing process: plastic with two space heaters underneath
View attachment 756208

Peel Ply Side:
View attachment 756210View attachment 756212View attachment 756211


My New Toy for ripping these bad boys and girls a little quicker.
View attachment 756213View attachment 756214
It's always a little anxiety provoking when you are about to rip into an expensive carbon fiber panel, not to mention the amount of time it will take you to remake it if you SCREW something up.

Layup Table Side:
View attachment 756215View attachment 756217View attachment 756216
I ripped two sections off of the main panel: One, the bed floor in the cab over and Two, the angled part of the roof for the cab over.

Everything came out similar to the finish of the previous panels.

Technical info from the layup for those that are interested:
  • 7.69 gallons of epoxy was used for the layup
  • Infusion time was about 2 hour and 45 minutes.
How did you like the new toy? I have thought about getting one but have not due to all the sections for the track making me feel like it wouldn't stay straight.

Great progress. The box will be together shortly.
 

rruff

Explorer
Cab Over Bed Floor Panel:
59.2lb (68" W x 90-1/16" L)

Cab Over Angled Roof Panel
19.8lb (26-1/16" W x 90-1/16"L)

These are 1" core and the exact materials/layup schedule is already posted in the thread.

Great info as always, and you are making great progress!

1.2-1.4 Lb/sq-ft ... and and should be very strong and stiff with carbon infusion. You are using H80 PVC foam which is 5 lb/cu-ft (.42 Lb/sq -ft @1") and your layup posted earlier is:
  • First/base layer - 9.5oz plain weave
  • Second/middle layer - 8.85oz biaxial stitched
  • Third/top layer - 5.7oz 2x2 twill weave
Which is 24 oz/sq-yd total per side or .168 x2 = .333 Lb/sq-ft for cloth. To get ~1.3 Lb/sq-ft total, that would be ~.55 Lb/sq-ft for the epoxy. I guesstimated that the foam itself needed ~.04 Lb/sq-ft each side to fill it, so that leaves ~.47 Lb/sq-ft epoxy in the matrix or ~1.4 epoxy/carbon ratio by weight. Does that sound about right?

You definitely aren't encouraging me (or anyone) to try infusion! I feel your pain regarding "solo" work on something like this. It was a ********** to wrangle help just moving things around. It will be even more fun once you start filling and sanding... ? :cry: ?
 

Vance Vanz

Well-known member
It all looks fairly simple and I kept my hands clean. ;)

Okay, but seriously, the pic of the tap on the table appears it is not on the carbon fiber at all? Is that the case?


How did you like the new toy? I have thought about getting one but have not due to all the sections for the track making me feel like it wouldn't stay straight.

Great progress. The box will be together shortly.
I'm glad someone else has mastered it, I'm still working on it :rolleyes:?.

Correct, the tape is not on the carbon fiber. The tape is only there as reference markers when placing the first layer of carbon fiber down. Once the carbon fiber is in place, using the tape as a reference mark to butt up against, the CF is held in place using spray tack. I keep the tape in place until all CF and core material have been laid down. I remove the tape before I start applying consumables. This is the quickest way I have found to make sure that all of your cutouts and material edges land where they should as each layer is applied.
NOTE: if you tape your first layer of CF down, it is a bit tricky getting the tape off of the first layer of CF after the other layers (CF and core material) have been applied. You will also probably start pulling strands of CF cloth out when you remove the tape. I learned this one the hard way ;).​
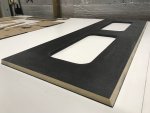
The new toy works for what it is. If I needed a track saw more often, I would have coughed up the $900-$1,200 for a complete setup. Having the built in vacuum port in the saw would be nice, especially for cutting composite material. Since I only needed one for this project, $140 was better than $900-1,200. I have a Skill Saw circular saw and the Kreg slide does not fit it all that well, but it still works. It just takes a little time/patience to set up. There is a tiny bit of slop in the slide, but if you apply steady pressure on the saw/slide, holding it against one side of the track base, you can get a perfect cut. I've used it about ten times now and I get a perfect cut. I was a bit hesitant about the long track as well, but it stays tight and together. Basically, for the price you can't beat it.
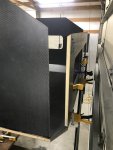
Thanks. Long days this week, but I'm going to do my best to get the front of the camper dry fit and bonded. It's crazy how long this stuff takes. Slow is fast in the composite world.
 
Last edited:

Vance Vanz

Well-known member
Great info as always, and you are making great progress!

1.2-1.4 Lb/sq-ft ... and and should be very strong and stiff with carbon infusion. You are using H80 PVC foam which is 5 lb/cu-ft (.42 Lb/sq -ft @1") and your layup posted earlier is:
  • First/base layer - 9.5oz plain weave
  • Second/middle layer - 8.85oz biaxial stitched
  • Third/top layer - 5.7oz 2x2 twill weave
Which is 24 oz/sq-yd total per side or .168 x2 = .333 Lb/sq-ft for cloth. To get ~1.3 Lb/sq-ft total, that would be ~.55 Lb/sq-ft for the epoxy. I guesstimated that the foam itself needed ~.04 Lb/sq-ft each side to fill it, so that leaves ~.47 Lb/sq-ft epoxy in the matrix or ~1.4 epoxy/carbon ratio by weight. Does that sound about right?

You definitely aren't encouraging me (or anyone) to try infusion! I feel your pain regarding "solo" work on something like this. It was a ********** to wrangle help just moving things around. It will be even more fun once you start filling and sanding... ? :cry: ?
Thanks and thanks for crunching some numbers. I'll have to revisit the math when I haven't worked consecutive 14 hour days ?! My brain is fried ?.

Not to get too technical, but most of the exterior walls are H80. I had some H100 left over after laying up the floor and floor boxes, so I used H100 for the: cab over section bed floor panel and front wall/nose panel, as well as the front pass through wall panel. For the two exterior wall panels that I just weighed, the (Cab Over Bed Floor Panel: 59.2lb (68" W x 90-1/16" L) has H100 as its core) and the (Cab Over Angled Roof Panel: 19.8lb (26-1/16" W x 90-1/16"L) has H80 as its core). This is also some of what contributes to the difference in weight (lb per square foot) calculations if/when comparing the two.

To be honest, I had no idea infusion would take this long. It just takes a ton of time and there is really no way around it unless you have a mold. Vacuum bagging was an option, but you have to lay up each panel twice if you are shooting for a smooth surface on both sides. This also takes a ton of time. Yes, I will have one of the strongest and lightest campers out there and the finished product should look like it came out of a high end professional shop, but will it have been worth it in the end? My design had to be built with fiberglass or carbon fiber and carbon fiber given my subframe design was a better option. I was also thinking of resale value, as I will most likely sell the rig after returning from my trip. For me, this rig will be too expensive to have sitting in the driveway and only use on weekends.

I'm not trying to convince anyone, one way or the other, related to wet layup, vacuum bagging or infusion, but I am definitely trying to be as transparent as possible about everything that goes into it-TIME and $ being the big ones.

This type of build is not for the faint of heart. We'll chalk it up to the once in a life time project-I did it once, but never again ?.

Yah, I still have to tab all of the seams/joints in the camper before I even start fairing and sanding. SO MUCH FUN TO COME...........
 
Last edited:

Vance Vanz

Well-known member
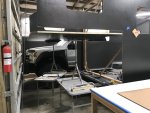
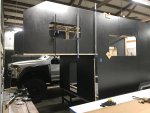
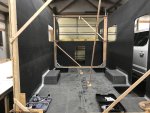
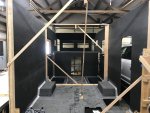
Carbon Fiber Cutting & Dry Fitting - Front of Camper

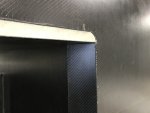
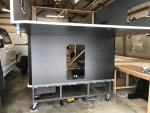
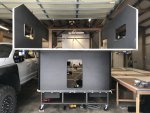
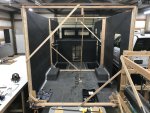
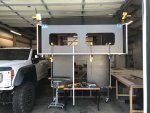
Well ?‍♂️, I gave it all I had and I was not able to get everything bonded by the end of the weekend. You know the saying, "Everything takes longer than you expect!" I did however get everything cut and dry fitted. Bonding should happen Monday or Tuesday.

I'll let the pictures do most of the talking, but here are a few comments:
  1. Angles, angles, angles! Where the angled cab over roof panel meets the two corner side angle pieces of the front wall of the cab over section was a head scratcher. It took me a bit of time to visualize the angles and then be able to lay them out so they could be cut. No CAD or CNC department on this DIY build, just good old manual imagination, geometry and hand tools baby. And when you are cutting sheets of gold, you don't want to make a mistake.
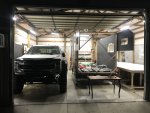
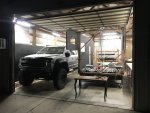
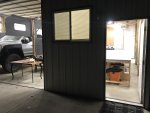
  2. The lighting on the last few pics sucks because it was dark out and I was using head lights to try and brighten things up. I'll get some better ones during the day and/or after everything is bonded.
You can never have too many pictures can you ?? It is a build thread, we gotta look at something. The pics start with the bed platform for the cab over section.

OH YAH, Let me know what you think of the profile for the front of the camper: love it, hate it, (y), ?, looks like a pile of :poop:, don't care,.......... ?:ROFLMAO: Give me something.

IMG_8233.jpegIMG_8234.jpegIMG_8235.jpegIMG_8239.jpegIMG_8240.jpegIMG_8245.jpegIMG_8243.jpegIMG_8248.jpegIMG_8250.jpegIMG_8254.jpeg
 
Last edited:

Forum statistics

Threads
188,039
Messages
2,901,516
Members
229,352
Latest member
Baartmanusa
Top