2022 RAM 5500 Composite "Super Camper"

StenchRV

Well-known member
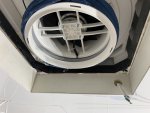
Fixed. Tomorrow we find out if the thick roof kit is needed.
The mistake I made was not putting enough point pressure on the TC plug to test compression, and then not following the instructions.
I used 3/4" furniture grade plywood ripped to the exact thickness of the void after foam removal, minus 1/16" for some 3M 4000 (what I had left over).
All the way around the opening. Good news is I got my one mistake on the entire build out of the way early......NOT...LOL...JK.
We all learn as we go. Lesson learned!

CHEERS!!

THANK YOU @RAM5500 CAMPERTHING !
IMG_5785.jpeg

IMG_5786.jpeg


IMG_5787.jpeg
 

RAM5500 CAMPERTHING

OG Portal Member #183
I went through all my pics of the build last night and couldnt find any of this particular area.

Its been a while now, but i remember mine looked a bit different and that black plastic came down a fair bit on mine from what i recall.

Maybe its a 13.5 vs 9.5 variation? Not sure...

Glad you got it squared (see what i did there) away...

k
 

StenchRV

Well-known member
I went through all my pics of the build last night and couldnt find any of this particular area.

Its been a while now, but i remember mine looked a bit different and that black plastic came down a fair bit on mine from what i recall.

Maybe its a 13.5 vs 9.5 variation? Not sure...

Glad you got it squared (see what i did there) away...

k

Thank you for looking.

It could be the difference between the 13.5 and 9.5. Now there is 9.5 pics out there, the way the instructions say.
I did use the measurement for the wood from the good side of the plug carved out, just to make sure.

I felt kind of square last night.......the 32oz beer tasted great after a day like that!

CHEERS!!
 

Alloy

Well-known member
Fantastic Build!

For the FW tanks a side pickup will allow water to drain vs. siphoning if the pump stops. A drain in the bottom makes winterizing and rinsing/sanitizing the tank(s) easy. I could spin weld the fittings for you......it's only a short drive : )

A check valve before the pump can cause issues getting the pump to prime. A check valve after the pump makes the check valve in the pump last longer if/when it is connected to city water.

If your thinking of an external tank (See Level and others) sensor I'd ask them if it works on a 3/8" thick tank.

1/8" setting (windshield) blocks between the alum angle and FRP will allow the angle to be easily removed with a cable cutter if ever the need be.

Nylon redi-rod for thru bolting will not transfer the cold. Running the bolt/redi-rod through PVC pipe inserted (sometime insterted from the bottom through a larger hole) into the panel so wood isn't needed.
 

StenchRV

Well-known member
Fantastic Build!

For the FW tanks a side pickup will allow water to drain vs. siphoning if the pump stops. A drain in the bottom makes winterizing and rinsing/sanitizing the tank(s) easy. I could spin weld the fittings for you......it's only a short drive : )

A check valve before the pump can cause issues getting the pump to prime. A check valve after the pump makes the check valve in the pump last longer if/when it is connected to city water.

If your thinking of an external tank (See Level and others) sensor I'd ask them if it works on a 3/8" thick tank.

1/8" setting (windshield) blocks between the alum angle and FRP will allow the angle to be easily removed with a cable cutter if ever the need be.

Nylon redi-rod for thru bolting will not transfer the cold. Running the bolt/redi-rod through PVC pipe inserted (sometime insterted from the bottom through a larger hole) into the panel so wood isn't needed.

How things change when you are building. Overcome and adapt! Changed my mind on a few things....go figure :cool:

A short drive, you must be close :). I am going to use the flush style spin weld fittings 1/2" or 3/4" side, low as possible. 2 tanks into one, with a winterize drain and pump feed off of the "main" line. https://www.icondirect.com/fittings-accessories/ I plan on machining a spin weld tool.
NOT paying the $250 for something so easy to make.

Great ideas on the tank mounting! I had a few ideas and was doing some research to make sure it is done RIGHT! Thru bolting was on my list.
The tanks will be completely surrounded by angle, 8020, and the forward wall. The tanks, dual 50 gallon, will be mounted all the way forward and in the middle of the wall.

GREAT news this morning, the tanks will arrive Friday! Over a week early! ONWARD with the interior build.
I have to put the front end back together first :)
 

StenchRV

Well-known member
Oh boy.... Here we go...

Protip 2: If you have the 360 camera system, good luck! :)

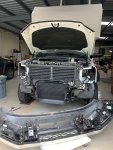
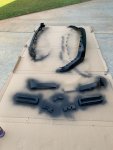
A picture is worth a 1000 words! All hand sanded with Scotchbrite....FUN! Will put it back together today. Protip...Grill parts are a PITA to remove.
Just have to work on the headlight chrome "fix". I know what you did....might go the replacement route.
IMG_5814.jpeg

IMG_5816.jpeg
Spend the money on the good stuff! $55 well spent.

CHEERS!!
 

RAM5500 CAMPERTHING

OG Portal Member #183
A picture is worth a 1000 words! All hand sanded with Scotchbrite....FUN! Will put it back together today. Protip...Grill parts are a PITA to remove.
Just have to work on the headlight chrome "fix". I know what you did....might go the replacement route.
View attachment 723752

View attachment 723753
Spend the money on the good stuff! $55 well spent.

CHEERS!!

Awesome!

do you have the 360 camera system?
 

Alloy

Well-known member
How things change when you are building. Overcome and adapt! Changed my mind on a few things....go figure :cool:

A short drive, you must be close :). I am going to use the flush style spin weld fittings 1/2" or 3/4" side, low as possible. 2 tanks into one, with a winterize drain and pump feed off of the "main" line. https://www.icondirect.com/fittings-accessories/ I plan on machining a spin weld tool.
NOT paying the $250 for something so easy to make.

Great ideas on the tank mounting! I had a few ideas and was doing some research to make sure it is done RIGHT! Thru bolting was on my list.
The tanks will be completely surrounded by angle, 8020, and the forward wall. The tanks, dual 50 gallon, will be mounted all the way forward and in the middle of the wall.

GREAT news this morning, the tanks will arrive Friday! Over a week early! ONWARD with the interior build.
I have to put the front end back together first :)

I've seen tanks with pink slime growing in 1/2"-1" of water that hasn't been able to drain so I prefer bottom (3/4"-1") drains and sloping (1/4"/ft) the tank toward the drain. With a 3/8" wall roto (1/2"-1" thick in the corners) mold tanks holes can be drilled so the IS of a fitting is flush to the bottom IS surface of the tank.

Air gap around the tank allows air (heat) to circulate or on insulation with groves for PEX (heating) tube.

Flush mount are better fittings as the wall of the tank prevents the fitting from expanding. Teflon tape + pipe (food grade) dope.

I made my mandrels from aluminum and tapped 1/2" NC. A 1/2 NC bolt with the head cut off fits a 3hp (base removed) router. Large fittings stall the router so the speed needs to be kept up before applying pressure. Extra fitting is good for practice:)
 

StenchRV

Well-known member
Let me know if you figure out how to get it functioning with the Buckstop bumper.

I tried like hell but gave up and put It lower on priority list

Will do. I REALLY would like the 360 system to work. I will give it some time. If I have to machine a custom housing to change the camera mounting location, that is not out of the question. I can work on it when I am doing the rear camera mounts.
Will keep you posted.

CHEERS!!
 

RAM5500 CAMPERTHING

OG Portal Member #183
Will do. I REALLY would like the 360 system to work. I will give it some time. If I have to machine a custom housing to change the camera mounting location, that is not out of the question. I can work on it when I am doing the rear camera mounts.
Will keep you posted.

CHEERS!!

Keep me posted. One of the issues I found was the cable for the FRONT camera was super super short so it wouldn’t reach anywhere useful.

The rear is easy. Cable is super long and can be mounted everywhere. But check the dimensions that recommend. They all have to be on a certain plane for the “system” to work.
 

StenchRV

Well-known member
Keep me posted. One of the issues I found was the cable for the FRONT camera was super super short so it wouldn’t reach anywhere useful.

The rear is easy. Cable is super long and can be mounted everywhere. But check the dimensions that recommend. They all have to be on a certain plane for the “system” to work.

I purchased a new FAKRA cable for the rear cargo camera relocation idea. Tested it and it worked. Do you think we could do the same for the front? Purchase a bit longer cable?
I will look at it when I get home. I have the long FAKRA cable on the shelf. I will test it. Will post results.

I had planned on trying to reproduce the same camera angle, location, view on a new mount. Now maybe mounts. Definite maybe it will work….LOL. I believe the software makes the 360 picture. Some form of picture “gauge” would be helpful.

Cheers!!
 

Forum statistics

Threads
188,029
Messages
2,901,362
Members
229,411
Latest member
IvaBru
Top