2022 RAM 5500 Composite "Super Camper"

ahb1989

Fix My Camper LLC
So how is the ride with the Kelderman compared to stock?

I've been debating liquid spring vs air ride on my service truck but just haven't had any 1st hand experience. They both are now within a grand or two for a full system. One is was more technical then the other but just curious at least for the Kelderman, was it a night and day difference?
 

RAM5500 CAMPERTHING

OG Portal Member #183
So how is the ride with the Kelderman compared to stock?

I've been debating liquid spring vs air ride on my service truck but just haven't had any 1st hand experience. They both are now within a grand or two for a full system. One is was more technical then the other but just curious at least for the Kelderman, was it a night and day difference?

I have the same truck and suspension and the difference between stock and Kelderman is literally night and day better, and I am still even running stock-shocks. I expect it to be even better when I get those upgraded also.

No first hand experience with liquid spring, but just thinking about a field repair of that system would be a massive nightmare should a line or fitting get damaged and leak.

With the Kelderman, it can all be easily swapped out with basic hand tools very easily

my .02
 

StenchRV

Well-known member
So how is the ride with the Kelderman compared to stock?

I've been debating liquid spring vs air ride on my service truck but just haven't had any 1st hand experience. They both are now within a grand or two for a full system. One is was more technical then the other but just curious at least for the Kelderman, was it a night and day difference?

After driving the truck from Atlanta GA to Tacoma WA, both ways, I can say NIGHT and DAY difference. I had about 2000 miles on the stock spring truck and I can tell you empty the ride....SUCKED. I know it is a 5500! I had a few 2000 LB loads on the truck, stock, and still not great. Empty with the Kelderman was a really good ride, with the right pressure. I put 5000 of metal on the rear deck with the Kelderman and it rode great and I like being able to level the load. With the new TC box on it, even better.

I agree with Camperthing, read his post during his build. I talked with another forum member who had the Kelderman on his truck and I asked the same question "would you do it again" YES, he said....goes for me too. I echo the above statement "With the Kelderman, it can all be easily swapped out with basic hand tools very easily" Pretty basic self install and GOOD shocks later will make it even better :)

With the Kelderman people say lots of parts over springs, agreed but I say the benefits are many...personally.

I looked at Liquid Spring, the actual demo truck. More parts, "more technical" but good system. It came down to thinking of a failure for me. I can make air in the middle of no where, I can not make hydraulic fluid.

MY 2 cents :)

CHEERS!!
 
Last edited:

ahb1989

Fix My Camper LLC
I have been leaning towards the Kelderman for the simplicity of a repair, event though I think the liquid springs would be slightly better because it's reactive by nature. Frankly I'm just tired of the ride of my 4500. It's tolerable with a trailer but even with my PGND bed and base tools it's unbearable without a trailer. The only time it's ever rode good is when I put a 6000 Lb compactor in the bed.

I like the beef of the truck and most importantly love the turning radius, I think I'm going to order the Kelderman system based on y'all's testimony.

Now I just have to decide if I want to do four corners or two. Thanks for y'all's insight!
 

zb39

Adventurer
I have over 10K miles on my Full Kelderman system now. All loaded. LOVE it! Best mod ever.........period! It's not cheap, but it works very well and is VERY heavy duty.
 

RAM5500 CAMPERTHING

OG Portal Member #183
Since a couple people have asked about it.

I just got an email from Kelderman about their free shipping promo running now.

If I remember correctly I paid $250 or so for freight so a decent savings

84225B57-9509-4FAB-948A-1CDDB3A7E984.jpeg
 

StenchRV

Well-known member
Progress. Captain overbuild here.

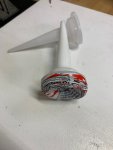
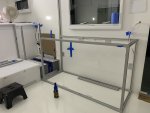
Decided to glue everything to the wall, yes I used Sika 205 primer just in case. I had some extra Korapop so decided to use it. You sure get everything out of the tube you pay for! VHB held everything in place until the glue dried. OH, and if you slip and a little VHB is ALMOST where you want it, it is TOUGH to move....ask me how I know :) .

Power is here! I originally planned on 600 AMP hours but for a few more $$....800 AMP hours it is. EVERYTHING electrical will be in the bay with the batteries, BIG hatch for easy access and repair, possible future modification.

Spin welding. I took the time to make two spin welding fixtures, each one does two size fittings. Watch about 10 videos and off we went. First one was ok, also learned how to redo one when you are afraid of tank burn through on the first try :). Easy fix. Second attempt...MONEY! Did 6 more and done for now. Kitchen grey tank later after final sink placement.

Should be done with the lower half of the glue in this week. Upper cabinets to follow.
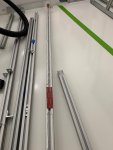


IMG_5958.jpeg
Could, or should, have bought the one flat side 8020 (same cost) for a total glue in. Decided on this method. Personal choice :)
IMG_5959.jpeg

IMG_5951.jpeg
There might have been a little left!
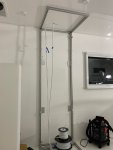

IMG_5960.jpeg
Fridge box.

IMG_5961.jpeg
Kitchen counter. Realized the beer was there after the photo...#not sponsored :)
IMG_5921.jpeg
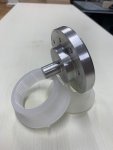
Made a bunch of shavings! 2.75" 6061 round bar to this, but it was FUN!
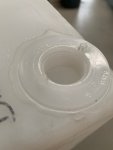
IMG_5975.jpeg

CHEERS!!
 

StenchRV

Well-known member
Well after taking one of @RAM5500 CAMPERTHING 's online HVAC courses, see his thread for details :cool: , I decided to be the East coast rep for custom "auxiliary" expedition HVAC installations!

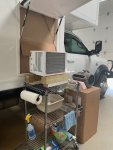
The TC box is so well insulated it keeps the heat in! A little 5000 BTU window unit, $185 well spent, keeps the builder cooler during the build.
Original Lasko fan did well below 90 degrees but after that I "upgraded"
IMG_5931.jpegONWARD!!

CHEERS!!
 

RAM5500 CAMPERTHING

OG Portal Member #183
Well after taking one of @RAM5500 CAMPERTHING 's online HVAC courses, see his thread for details :cool: , I decided to be the East coast rep for custom "auxiliary" expedition HVAC installations!

The TC box is so well insulated it keeps the heat in! A little 5000 BTU window unit, $185 well spent, keeps the builder cooler during the build.
Original Lasko fan did well below 90 degrees but after that I "upgraded"
View attachment 729905ONWARD!!

CHEERS!!

I think you an missed the episode of HVAC training course.

The episode is titled:

“Once your roof AC unit is in place, temporarily attach a 120v plug to one end and run an extension cord to an outlet to power it while you are in the build process, once ready for permanent install, hack said temp end off and wire it for real”
 

StenchRV

Well-known member
I think you an missed the episode of HVAC training course.

The episode is titled:

“Once your roof AC unit is in place, temporarily attach a 120v plug to one end and run an extension cord to an outlet to power it while you are in the build process, once ready for permanent install, hack said temp end off and wire it for real”

I knew the final grad course was missed! I was hoping you did not have a "thing" against custom cardboard plenums!

No really....I did not want to suck up any junk into my nice roof unit.....save it for later :)
I am wearing the steps out fast enough...LOL GLAD they are well built! Feel like I go in and out of the box 25 times a day!

CHEERS!!
 

supdies

New member
Looking great! Thanks for posting your progress.

For the 8020 to wall attachment - I was wondering if another method could be to glue 5/8" wood strips on the inside of the framing and then using wood inserts and bolting the 8020 along the strip, say every 12" or so? The wood could be ~4-6" wide. I was thinking maybe that would provide even more surface area to glue to and also some flexibility when mounting the 8020? Could line up the wood on the inside of your framing so it would be hidden.Downside is more material and a bit more complicated/busy.
 

StenchRV

Well-known member
Looking great! Thanks for posting your progress.

For the 8020 to wall attachment - I was wondering if another method could be to glue 5/8" wood strips on the inside of the framing and then using wood inserts and bolting the 8020 along the strip, say every 12" or so? The wood could be ~4-6" wide. I was thinking maybe that would provide even more surface area to glue to and also some flexibility when mounting the 8020? Could line up the wood on the inside of your framing so it would be hidden.Downside is more material and a bit more complicated/busy.

If you look at the fridge and sink cabinet, kind of the same idea with aluminum angle. I can tell you the bond is STRONG between the 8020 and the TC wall. I also ran a sealant line along the edge of the 8020 and the TC panel. I am personally keeping as little wood in my build as possible. Personal choice after owning way too many wood filled RV’s. The cabinets doors, drawers and a few wall ends should be it.

You are correct, the more surface area the better. That line of thinking and a few extra tubes of Koropop, I ordered a case just in case, lead me to change my mounting technique to increase the total bonding surface area. Total Composites has a good cabinet mounting tutorial., example, to reference.


One thing I want to do, for my own knowledge. Glue up my standard set up as pictured and test it to failure. I will glue one, or more, of the widow cutouts to 3/4 plywood then glue/VHB 8020 (say 12”) to the TC panel. Allow to dry for at least 72 hours and then screw the plywood to my large trailer. Use a strain gauge and an engine hoist and pull on it until something fails, or I lift the 2000 LB trailer up. Record the value. Repeat with 8020, angle, screws, glue, VHB….PULL. Again, just because I want to know. Will cost me just the cost of the strain gauge that can record max value. Simple enough…..when I am bored and waiting for parts!

CHEERS!!
 

Forum statistics

Threads
188,251
Messages
2,904,516
Members
229,805
Latest member
Chonker LMTV
Top