SRN
Adventurer
I purchased my Armada with one goal in mind, to replace my 1994 Isuzu Trooper as my primary backcountry exploration vehicle. Since September, I’ve put over a thousand mines of dirt under it and have been very impressed with what it can do stock. But, it’s a big, long beast and I’ve been nervous about its break over angle. My typical upgrade path with vehicles has been lift > tires > traction aid (locker, LSD) > armor. But the lift kit I want (Ironman) is out of stock at the moment, without the lift I can’t fit the tires I want, and the factory traction control is very good; so armor is the first modification!
I purchased a set of DASH Offroad skid plates from Nisstec. These are for the Patrol, which means that it is just the three plate kit for the oil pan, transmission, and transfercase. It excludes the radiator skid plate, as the Armada has a longer nose. They are developing a radiator plate, but no ETA on that. The guys at Nisstec in Denver were great to deal with and I’m super happy that they are beginning to bring in more DASH products. The kit came with no instructions, which is fine; they’re just skid plates. But I figured I do a short write up on how I installed them just in case anyone is looking for a little guidance in the future.


I purchased a set of DASH Offroad skid plates from Nisstec. These are for the Patrol, which means that it is just the three plate kit for the oil pan, transmission, and transfercase. It excludes the radiator skid plate, as the Armada has a longer nose. They are developing a radiator plate, but no ETA on that. The guys at Nisstec in Denver were great to deal with and I’m super happy that they are beginning to bring in more DASH products. The kit came with no instructions, which is fine; they’re just skid plates. But I figured I do a short write up on how I installed them just in case anyone is looking for a little guidance in the future.
1. Unboxed everything. Three skid plates (obviously):
And a package of fasteners:
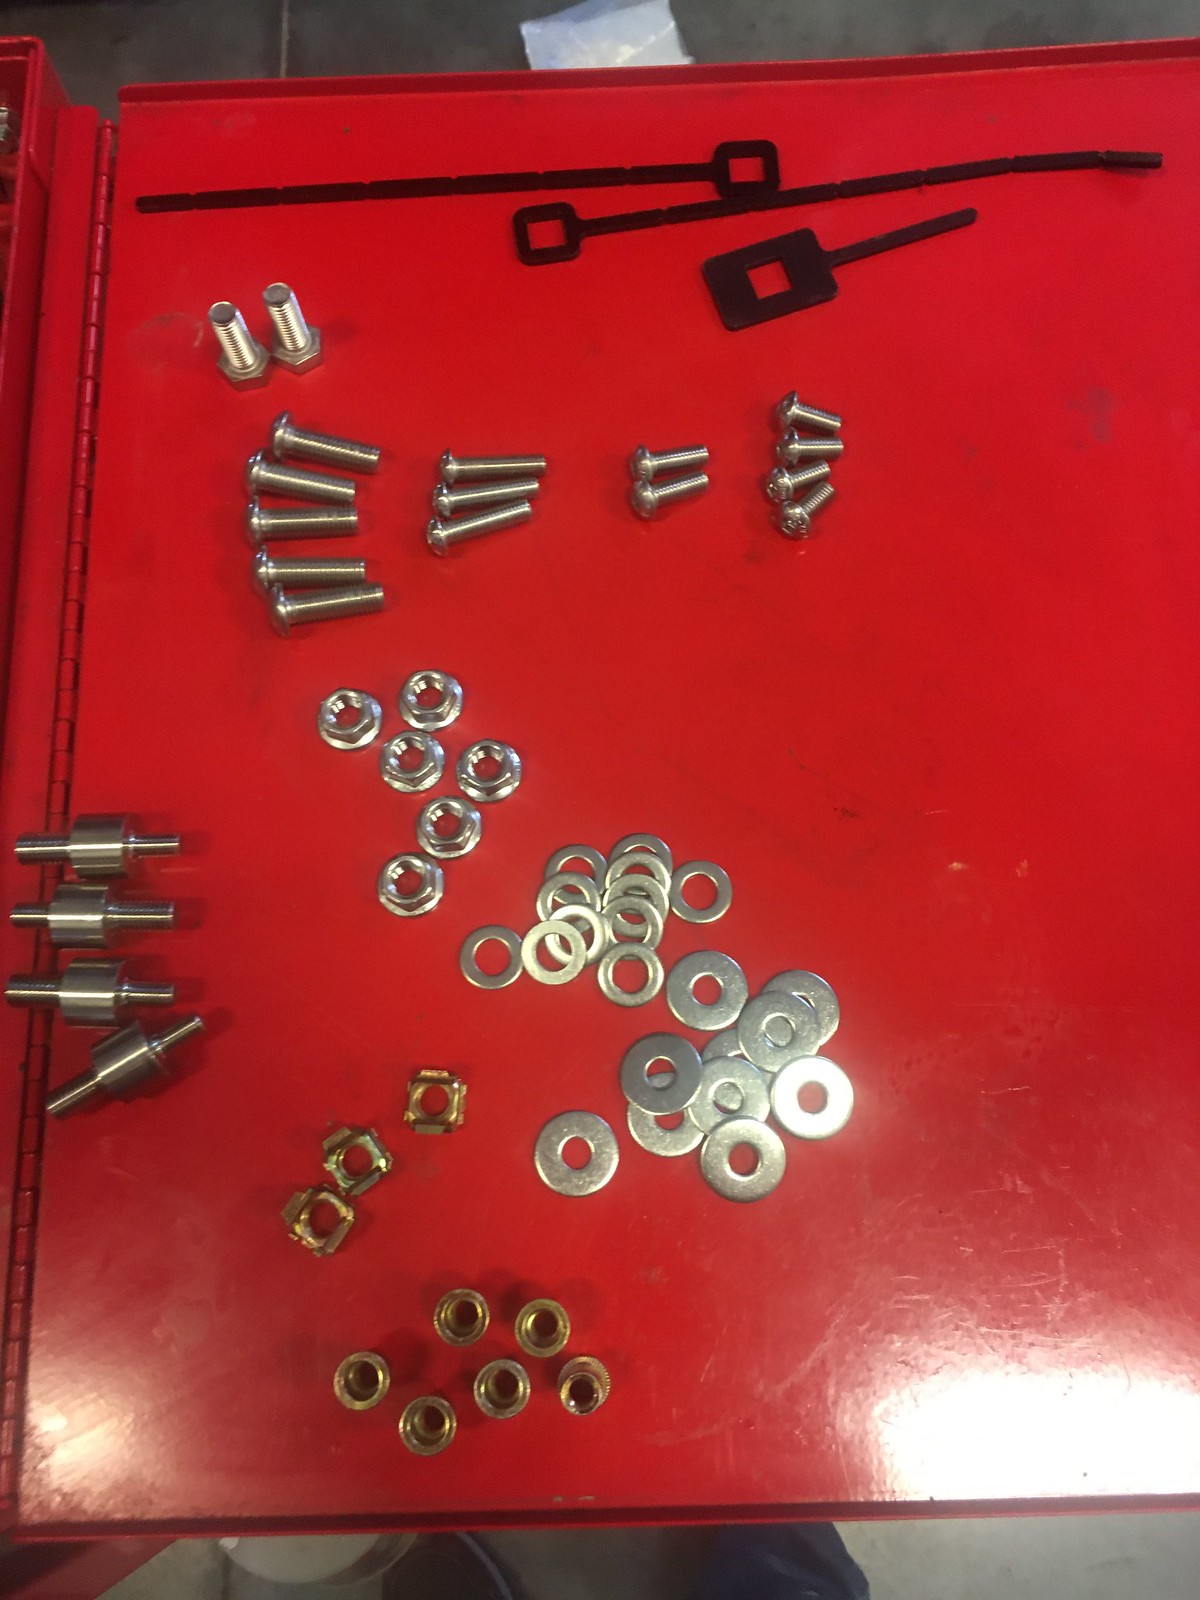
In the fastener package I had the following:
Bolts:
Two (2) M10 x 1.25 hex head
Five (5) M10 x 1.25 Allen head
Three (3) M8 x 1.25 Allen head (long)
Two (2) M8 x 1.25 Allen Head (medium)
Four (4) M8 x 1.25 Allen head (short)
Studs:
Four (4) M10 x 1.25 | M8 x1.25
Nuts:
Six (6) M10 x 1.25 hex nuts
Three (3) M10 x 1.25 captured nuts
Six (6) M8 x 1.25 rivnuts
Fish Rods (or whatever they’re called):
Two (2) long
One (1) short
2. Next, I lined up all the skid plate in order under the vehicle and make note of where the rivnuts will need to be installed. There are four holes on the cross brace behind the oil pan and two on the cross brace in front of the transfer case.
(As a note, to install the rivnuts you will need an installation tool like this: RZX 8” Rivet NUT Gun)
For the two in front of the transfer case, I had to mark the location and drill holes. Since mine is a fairly early build date ’17 Armada, not sure if this will be the case for everyone. All the other holes lined up perfectly.
3. Next, I fished in the captured nuts. The two longer fish rods go in the cross brace in front of the transfer case. I fished them in from the sides, but there may be other ways.
The short one went in the very back. I forgot to grab a picture of that, but it’s pretty obvious.
4. Install the studs in the cross brace behind the oil pan.
5. Install the bracket at the rear. Again, I forgot to get a picture of it installed, but its obvious:
My only note on this is that the threaded hole that is already part of the vehicle was an M10 x 1.50, not an M10 x 1.25. So I had to source my own bolt for that.
6. Install the skid plates rear to front. The reason for this is that you want the front lip of each plate to be covered by the plate ahead of it so if you do slide these over a rock, the lip doesn’t catch.
7. Tightened them all up, and it looks pretty slick!
This is never going to be a rockcrawler, but it sure feels better to have these on there protecting all the sensitive stuff underneath. Next project is rock sliders. Those get mocked up and powder coated this week.