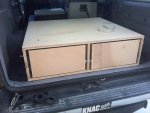
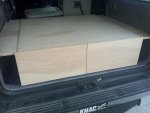
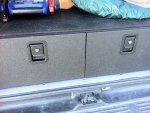
3rd Gen 4Runner Rear Storage/Deck

4RunAmok

Explorer
Stage 1...

You can never have enough storage. Camping for four days in Death Valley really had me thinking about what I wanted from a storage system.

I know that buying one wouldn't suit my needs, and I would also miss out on making it myself.

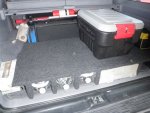
So... Remember this thing???
P2250012.JPG
(Click to enlarge)

Well forget about it... It's gone, it went into the trash today!
It did what I needed it to do for the time I had it, until I decided that we no longer had the need nor the space for our stereo system. The amps and rack are gone, and the huge heavy speaker box is gone. That will be replaced with a compact subwoofer box (14"x9"x3") sometime in the future.

I went to work on a more practical system, designed to eliminate the action packers entirely, or at least move them to "optional" status instead of required as they were up until now. What I dislike about the action packers is the wasted space. Instead of having 90° vertical walls, they have angled walls, causing a lot of wasted space between the containers. I will be able to fit everything from all three action packers into ONE 17.5"Wx35"Dx9"H drawer, leaving the other drawer for food and other items we currently use a large tote for.

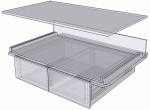
The Design...
storage.gif

Here's the progress I've made so far... Click to enlarge any pic.

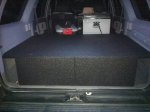
Base and walls, with plenty of material removed for weight reduction...
Leaving enough material to attach the drawer slides to and support the deck.
Size 38" deep, 39" wide, 10 1/4" tall
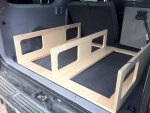
Photo Feb 02, 4 14 28 PM.jpg

Deck attached
Size 38" deep, 39" wide, 11" tall
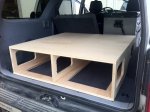
Photo Feb 02, 5 00 36 PM.jpg

Wings installed, shoring up the deck to the width of the interior.
Size 38" deep, 52 1/2" wide, 11" tall
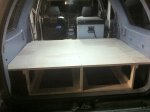
Photo Feb 02, 6 11 49 PM.jpg

The wings are easily removable with 1/4-20 hardware (threaded inserts on the wing side)
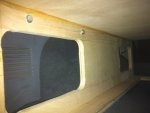
Photo Feb 02, 6 12 11 PM.jpg

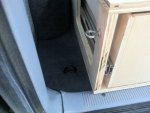
The space between the wheel wells is 39" wide, keeping the main body from moving side to side, and with the wings installed, movement from front to rear is near impossible, but I'll be using some turnbuckles to hold it all down when it's all finished.

Speaking of finish... what to do... I'm undecided. There's trunk liner carpeting.. There's Lon Coin (see example photo below)... There's Line-X... There's Raptor bed liner, but I'm waiting to see how Trump's finish comes together, since he's using the Raptor liner. If Raptor liner compares to Line-X, it will probably end up being the way I'll go, since going with Line-X is not the cheap way out!

(Lon Coin rubberized flooring example)
EnlargeC150.jpg

TASKS UP NEXT...
-Putty over screws and staples, sanding all surfaces and routing all edges
-Build drawers
-Build pull out platform (a 48" wide surface will be installed on the deck, and will pull out using drawer slides)
 

Mtn Mike

Observer
Lookin good. I like the cutouts to save weight and the "wings" you added to make it flush with the side of the cabin. How much will it weigh with drawers? Do you have any plans to extend it forward to make a "sleep platform".
 
Last edited:

4RunAmok

Explorer
Thanks Mike!

No plans to extend it forward... We use a rooftop tent.

When I add the slideout on the deck, I may even take more material out of the top piece, since the slideout will cover it.

I've not tried to weight it yet, but will try to when it's finished...
 

4RunAmok

Explorer
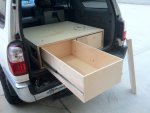
Some progress made today... I got the drawers assembled, and the slides installed. I have two different types of the slides, locking and non-locking... I'm not pleased with the locking slides, they extend slightly longer than the non-locking, causing the drawer to lock sort of twisted... I'll be swapping them out for non-locking. I got a good deal on these slide sets, and I have more than I'm going to use (extras already claimed :)), so switching out to non-locking is not a problem.

Photo Feb 05, 5 13 06 PM.jpg

The drawers extend nicely to the full length! No problem getting something out of the back of the drawer!
Photo Feb 05, 5 13 23 PM.jpg

I also got the threaded eyelets installed for the turnbuckles, I just need to pick up a set up in the proper length.
Photo Feb 05, 5 13 46 PM.jpg

Next up...
More surface finishing
Drawer faces to match the sketchup design
 

taugust

Adventurer
Nice work so far, Mitch. The big question though: How many dutch ovens will fit in the remaining drawer? And what about tongs, and charcoal chimney, and cake mix, and...? :chef:
 

4RunAmok

Explorer
I made some more progress today after work...

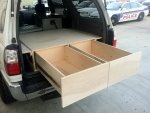
The drawers are finished; faced and sanded.
Photo Feb 06, 4 59 02 PM.jpg
The grain kinda looks cool, but that will be covered with something, probably Line-X due to the Durability.

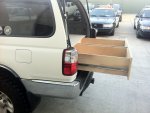
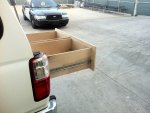
The drawers extend quite a bit, and will offer nice access to everything.
Photo Feb 06, 4 59 22 PM.jpg

Photo Feb 06, 4 59 31 PM.jpg

Photo Feb 06, 4 59 39 PM.jpg

I still need to do sanding on the main box, and move on to the electronics compartment (dual battery placement, air compressor, Ham, cell booster, etc), this will be in the front of the box, in the space behind the drawers, shown here...
storage2.gif

So far, I am VERY happy with how this is turning out... It was hard to actually visualize it all, even after drawing it in Sketchup, but as it came together piece by piece, it's exactly how I wanted it thus far.

Here is a sort of concept image of what I may end up doing. The "3rd level" shown will be supported using the mounts for the stock Toyota pull out cargo cover. Shown here is the drawer box, a pull out platform/storage area, and the 3rd level storage area.
storage3.gif

We will see if I actually get that far. :D
 

4RunAmok

Explorer
Thanks, Crom! I've made a lot of progress, but I'm holding off on posting pics until I have a larger update...
 

4RunAmok

Explorer
Sometimes, LUCK has everything to do with it...

Every once in a while, when designing something, you stumble around until everything just falls into place...

Now I never set out to design an electronics compartment to be on the lower level of the box. I have a second battery awaiting installation... And I have a few electronics items mounted here and there around the truck... And when I imagined my drawer setup, I pictured the drawers being as deep as the box, and as wide as I could get them, so electronics were originally planned to go on some vertical uprights built onto the deck above the drawers. As it turned out, I got the drawer width I wanted, but the slides are 28". Which means if my drawers were any longer than 31" (30" interior), I wouldn't be able to access items in the back without unpacking things in front of them.

The overall depth of the box is 38", dictated by the space given with the rear seats in the upright position interacting with the 11" height of the box, etc... With the unbelievable deal I got on the slides, there was no turning away from those. Down the road, I may replace them with Accuride slides, but of the same length, and only because I fear these slides, as good as they are, may not take the weight. Now I'm left with this space hidden behind the drawers in the forward part of the box.. Seems like a good spot to hide all those unsightly electronics pieces, right?

So... Fast forward to today, when I open sketchup, and start modeling the electronics components.

We'll start with the things I need to have in there to give them a real home vs. their current scattered arrangement around the truck...
A) The battery
B) Circuit Breaker
C) Fuse Block
D) Cellular Booster
E) Ham Radio

I start building the shapes to the actual size of the components, and start arranging them, adding a wall to mount items to.

storage4.gif

Looks good so far...

storage5.gif

This is that luck part I was talking about... The Odyssey PC1700MJT fits in there as though I had this planned all along, and I can assure you: I didn't!

I still have space left over on the left, which of course means I need to run out and buy more electronics!

Next up,... Real world implementation of the sketchup design!
 
Last edited:

4RunAmok

Explorer
So far I've got the box covered with Line-X, finished up my drawers and latches... Now I just need to paint the non-Line-X surfaces with weather sealing paint, and finish the electronics and battery compartment.

Here are some photos of it so far..

Fresh out of Line-X, without latches...
Photo Feb 11, 5 57 26 PM.jpg

Using the beautiful new surface as a backdrop for a photo! :)
Photo Feb 28, 3 20 07 PM.jpg

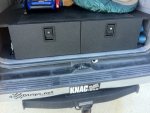
Latches installed...
Photo Mar 13, 4 53 35 PM.jpg

Please note the drawer faces. I SHOULD have designed the deck to come out over the drawers, this would have solved a couple of problems that exist as a result of my design.

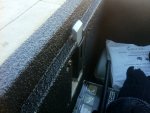
First, the latches I bought would have been fine had the deck been over the drawers, instead I had to modify the latch by shaving down the catch to be thin enough to catch the pocket I made in the underside of the deck (reinforced the pocket with a deadbolt catch plate).
Photo Mar 13, 4 54 09 PM.jpg
I will eventually fill in the nasty open areas, grind down the mounting screws flush, and fill them in as well. I secured the screws with washers and a ny-lock nut, so if anyone gets the bright idea to unscrew them to get inside, the screw will become slightly lose, but the ny-lock will just spin, and the screw won't come out.

Second, you'll see in this pic, that because the deck does not go out over the top of the drawers, I have created an entry point for liquids to get between the deck and the drawers, and find its way inside! I discovered this while camping at the Desert Rendezvous... very unnerving.
Photo Mar 13, 4 53 20 PM.jpg

This will end up being remedied when I eventually install my slide out table on the deck, I will make sure it comes out over the drawers by 1/4" or so...

So I'm a couple steps closer to completion...
 

baughb

New member
Just keeping this thread alive. Got a 99 limited and I’m planning step 1 which will be my rear deck. Gotta start somewhere ya know?

The rest of this post is just idea sharing but I will be starting a build thread.

Had a “hallelujah” moment just earlier today and my plan became whole.

Simply, a bolted down rear area cargo deck (3/4”) shaped from using the removable cargo area mat.
Remove the 4 tie down points, find longer bolts, drill through deck, remount on deck surface using oem holes in body.
Remove driver side rear bottom seat, putting my CFX50 there. Aux Battery box (Currently a Flexopower 444) will live on the floor, behind the driver seat with a Blue Sea fused outlet run from the car battery.
Tempted to remove the seat back of the rear seat as well and build a half width platform using the seat bolt in points to mount the platform. Now this would be the first “destruction” point in that I would have to cut the carpet from the seat back to the cargo area carpet. Unless I choose to remove the seat-back back and use that carpet as a covering aspect for the new platform.

Now, I can mount, unmount, rearrange, and try out what works until I discover the best situation for our mission and with the fridge in the proposed spot, I saved a bit on a fridge slide!

Thanks to all of you who thought about this stuff....6 years ago.
 

Forum statistics

Threads
188,171
Messages
2,903,055
Members
229,666
Latest member
SANelson
Top