4Door Bronco build

patl

Adventurer
Well JC, if everyone had one it wouldn't be near as desirable. I really get off on things that are different.

Progress is still being made- just a little slower. Have been cutting the floor and installing the twin stick shifters on the Atlas. Very tedious cutting a little at a time to keep the hole as small as possible. Just about there. Now begins the cover plates to dress the opening for the ZF and t-case. Will have pictures later this week.
 

patl

Adventurer
Things are still coming together, but at a slow pace. Still waiting for Thomas to catch up on other builds to get the engine wiring completed, so haven't been able to start the dash install. Rollcage is back from powder coat as well as front and rear seat brackets. Working on tunnel covers for trans and t-case in the meantime.

006.JPG

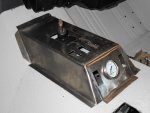
Will use this pedestal for air pressure gauge and auxiliary switches.
Fiber glass guy called and said the top was out of the mold and being cleaned up and buffed. Will check it out this afternoon.
 

toddz69

Explorer
A little adjustment on the rear seat bottom. Didn't like the way it was turning out so found another bottom and reworked it. This looks a little better. Front seat mounts are built and ready for install.

What front seats are those?

Todd Z.
 

patl

Adventurer
Hey Todd
Seats are Procar Elite sourced through Wild Horses. If you go on their site and use their link it shows all the options available. You can get black on grey/charcoal, grey/charcoal on black, etc. Other colors also available. These have a cloth insert, hopefully to make summer driving a little more comfortable. The upholstery guy called Scat, who imports these, and ordered the material to do the inserts on the rear to match. Hasn't shown up yet, but I'll get some picts when it does since David lives just down the road.
 

toddz69

Explorer
Hey Todd
Seats are Procar Elite sourced through Wild Horses. If you go on their site and use their link it shows all the options available. You can get black on grey/charcoal, grey/charcoal on black, etc. Other colors also available. These have a cloth insert, hopefully to make summer driving a little more comfortable. The upholstery guy called Scat, who imports these, and ordered the material to do the inserts on the rear to match. Hasn't shown up yet, but I'll get some picts when it does since David lives just down the road.

Thanks! I didn't even recognize them as the ProCar seats.

Todd Z.
 

patl

Adventurer
Finally, the wiring of the engine has begun. Been waiting for this day for a long time.

Wiring 003.JPG

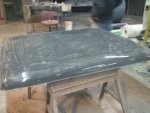
Top is out of the mold and being trimmed and buffed out.

top.jpg

Material from Scat came in and rear seats should be ready next week. Finally everything is coming together.

Wiring 002.JPG

Material matches inserts in Procar front seats. Can't wait to see them.
 

big a

Adventurer
Cool!!! I bet it's real exciting seeing it all come together! I really like the finish on the roll bar too!!!
 

patl

Adventurer
Yeah Brett
Not setting any more goals, since I've missed so many already, but everything is starting to come together. Engine wiring should be completed this week and I can start on the dash and rest of the wiring. Once the dash and roll cage are in it should start to look like something.
 

patl

Adventurer
Thanks Andy-
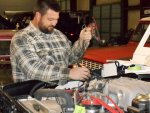
Been a good week as far as wiring progress, I think. Thomas takes the Centech harness and strips out unused wires and adds wires for the add ons. A slow process, but necessary to keep the overall harness looking and working correct. It's amazing. This will be my 3rd harness to install in an old Bronco so the work is fairly familiar. But EFI and additional circuits take a little study. Thomas can see these systems in his head. He is definitely one of the best. No long balled up wire with zip ties crammed everywhere. He cuts everything to length and installs the proper terminal with heat shrink. All plugs are de-pinned and the wire shortened as needed and put back together. I'm cutting out the Ford plugs and using Weatherpak terminals for all tail and side marker lights. The effect is a professional looking and functional harness.

008.JPG

Electrical box in place of factory passenger vent . Houses relays, circuit breakers, and auxiliary and EFI fuse blocks and has a cover to keep out moisture and dirt.

018.JPG

All tape and shrouds removed to clean up and add new circuits. Modern replacement harness wires are marked every few inches so it keeps confusion to a minimum. Ac unit in this picture is now completely wired and and installed. It's looks impossible, but if you focus on one circuit at a time it all gets done eventually.
019.JPG

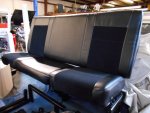
Rear seat completed with insert material to match front seats. Thanks to David at ProStitch Auto Interiors and Scat for helping us out with that. David lives just down the road from me and his work is fast and looks good. He even made a set of map pockets to add to my door panels.
014.JPG

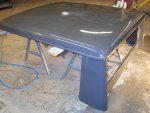
Top being buffed out. Now I need to find someone to build a slider rear window. Anyone-Anyone?

If we can Keep Thomas off the phone long enough, the dash should be able to be started wiring the first of next week. Once the dash is installed, the rollcage, seats, top, and final wiring can be done. A necessary part of the business, I know, But I can't see inside his head so it will be when it will be. Now I know why he likes to work late at night- no interruptions.
 

big a

Adventurer
That looks so cool! I realize I'm in the minority, but I enjoy wiring and laying out circuits. In fact, I spent ystrdy at work designing a electrical schematic for a new drill rig. Anyway, someday I'll b done with mine and I'll make it a priority to catch up with u at some event. My kids r really looking forward to going on a trip. Still a long ways off for me though. I'm in the middle of remodeling our new home and building a shop!!!
Thx for continuing to update this thread! I think we all look forward to seeing the progress!!!
 

Forum statistics

Threads
187,898
Messages
2,899,712
Members
229,072
Latest member
fireofficer001
Top