MateoDiego
Member
We have been lurking here for years, but given all the good information we gleaned here over that time we decided we needed to give back a little on this next project.
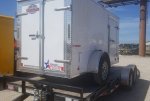
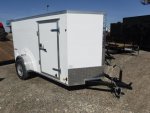
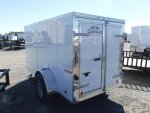
Last week we bought the 5x10 V Nose Enclosed Cargo Trailer pictured to convert into a camping trailer. The trailer is still in Texas and we are working on having it shipped to Arizona. I expect to get it by the end of the month one way or another.
To give you the back story we are a family of five, do a good bit of camping, often for a week or more, long distance (100's or 1000's of miles) and off road. We do not mind roughing it. Tent camping, hammock camping or sleeping under the stars is just fine. Mountain biking, hiking, exploring, rock hunting, astronomy and "hanging" out reading in a hammock are some of the things we often do while we are camping. We have used all kinds of trailers from small 4x7 box trailer, to pop up tent trailer, to 25' travel trailer and a bunch of others in between. We just sold a 22' hybrid trailer that we used for the past two years. We keep coming back to the smallish lighter gear hauler as the trailer of choice. We are not looking to sleep in it. It would just be for hauling our gear/supplies/water and provide a decent kitchen. It will give us access to more remote sites that we like to go to and is easy to store/maintain. We would not expect to take it on any serious off-road efforts, but it should handle forestry service roads and jeep trails.
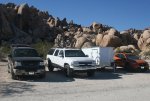
Our rig is a 2001 Chevy Suburban 1500 4x4. Ordered from the factory for us, this truck has taken good care of us over the years. It has a lot of miles (thousands of them off road) on it, but it has been well cared for and it returns the favor. We have had it down some seriously sketchy tracks and always gotten us back home. There was that one time it spent the night stuck in the middle of a river, but that was all driver error and we got it out on our own the next day. Now days we no longer put it into too many risky situations, but the plan is to drive it until it can no longer go on.
We have built utility trailers from scratch in the past. We are currently building a smaller off road 5x4 box trailer to haul gear and we have drawn up custom plans for our ultimate off road "Challenger" like trailer, but both those projects are a way off. This will fill an immediate need since selling the hybrid trailer for upcoming trips we have planned.
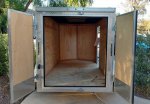
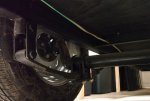
The trailer is just under 14’ long, 6’ 6” tall and 6’10” wide over all. The interior is 4’ 11” high and 4’ 8” wide. It is a pretty short as enclosed cargo trailers go, but that is what we were looking for. It will sit behind our Suburban nicely. This will help with fuel efficiency and provide better side clearance on narrow trails. It has double doors on the back and a single 32” door on the side. It has a Dexter 3500# axle with standard 15” trailer tires on it currently. I am assuming it has a 5x4.5 lug pattern. I am told the frame is 3" square tube.
Some key desires for the trailer are; light off road capability, secure dry storage for gear, 40-50 gal. water storage (we are in AZ), 50 to 100 qt. 12v fridge(s), 12v solar and battery system, interior\exterior LED lighting, complete ready to go kitchen, rain/sun awning(s). We already have many of the needed items. We would like to finish at least some of the build out by early summer.
We will insulate the walls, ceiling and floor and add one or more roof vents with fans. Here in Arizona the temps can get brutally hot. While we have the walls open we would install wiring and any additional support needed for other plans. We would like to have spare tire carriers on the sides. We expect to need to beef up the frame a bit and extend the tongue. We have been toying with a way to shorten\extend the tongue depending on the situation. Maybe a receiver tube with a pin at the tongue to move it in or out 12" to 36".
The truck has Goodyear Wrangler 285/75R16 tires and we want to match those on the trailer including two spares. This way we could share the three spares between the trailer and truck. We have saved about six good ones from previous re-tiring of the truck. They are older, but still very serviceable. The truck has the standard GM\Toyota 6x5.5 lug pattern which we want on the trailer. I expect we will need to replace or modify the axle, hubs, suspension and fenders.
We are planning to build a kitchen across the back to be accessed from the rear doors. We have several ideas including a slide out section (think a L shaped) on one side of the kitchen that contains the fridge and stove. The advantage to this would be that the fridge would be accessible from inside\outside and move its weight over the axle when slid in\underway. There would be a sink and cabinets to hold food, pots and pans, tools, plates and utensils.
We intend to use two or more mounted water tanks and would mount them inside over the axle. Something like two 25 gal tanks or three 15 gal tanks ideally with baffles to reduce sloshing. We have a nice marine SureFlo fresh water pump and a used 25 gal tank already. Not sure if we will use that existing tank though. We would have a sink in the kitchen area and maybe an external spigot outside. Gray water would likely go into a 5 gal bucket from the sink. If we could find a small 25-40 gal grey water tank we might consider that. We are also considering eventually springing for a on demand water heater to help with washing dishes. Heating wash water on the stove can be such a hassle at times.
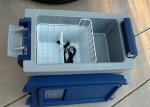
We have most of our big ticket electrical gear covered. We already have a super nice Xantrex inverter/charger, Xantrex solar controller, five 130w 12v solar panels, four Diehard Platinum Deep Cycle AGM Group 31 batteries, 12v circuit panel, 120v shore power cable and a mess of other stuff. We are thinking of two or three 130w panels on the roof charging two 103Ah batteries depending on the load. We just ordered an ARB 50 12v fridge last week and it should come in today or tomorrow. Once we get it we will decide on the size of a second one. Having two will allow us the option to use one as a freezer or shut one down when we don’t need it. All the wiring should be installed behind the walls. We would like to setup exterior LED lighting on all four sides, in the kitchen area and a couple internal ones. We would have 120v, 12v, and USB charging ports internally and in the kitchen area. Ideally, we would have very few reasons to use the inverter. Maybe the blender on those special trips.
We are thinking of creating some sort of storage solution inside the front part to hold all the camping gear. Something where heavier stuff (clothing bags, camping chairs, horse shoes) goes on the bottom and lighter items (tents, sleeping bags, etc.) on the top. All this would go above the water tanks, batteries and fridges are mounted. We have several telescopes and mounts that we would like to figure out how to securely store them inside. Bikes normally go on the truck roof, but we are considering a receiver hitch on the back of the trailer or some sort of solution over the tongue.
That is what we are thinking. Once we have the trailer here we will plan it out in more detail. We are going to journal our efforts here. We are open to any suggestions or critique.
Matt and Autum


Last edited:

