You are using an out of date browser. It may not display this or other websites correctly.
You should upgrade or use an alternative browser.
You should upgrade or use an alternative browser.
97 E350 Crestline Ambo Build/Mod
- Thread starter Bikersmurf
- Start date
Bikersmurf
Expedition Leader
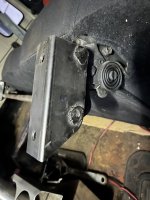
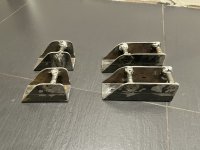
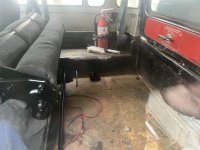
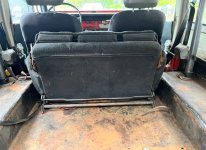
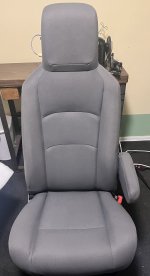
2003 Jeep TJ. They are a perfect fit with wise between the inner fenders. Only thing that would make them better is having the mounts closer to the ends.What seat is that?
Jonathan
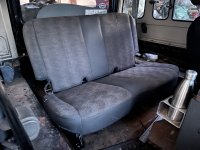
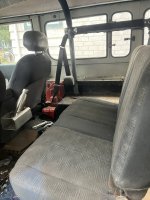
The seat should tumble forward and stay upright for more cargo space. Or pull a lever and it should lift right out easily. It’s fairly lightweight and folds up into a compact package.
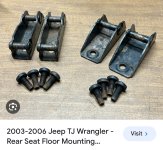
Based on this listing I believe they ran 2003-2006.
Bikersmurf
Expedition Leader
Bikersmurf
Expedition Leader
I’ve long since accepted that an 88” wide box with 8’ wide duallies that is 21’ long won’t go the places my 13’ long 5’ wide Fj40 will. Long term plan is to use the Ambo as a base and explore with the 40.
Installed and painted all the TREs…

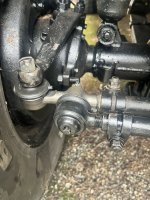
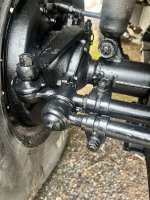
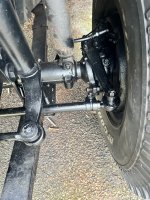
Makes the shocks look old… suppose they are. These days I can do a lot better than RS5000s. When I installed them, they were what all the magazines were recommending, and at the time I didn’t know any better.
Installed and painted all the TREs…


Makes the shocks look old… suppose they are. These days I can do a lot better than RS5000s. When I installed them, they were what all the magazines were recommending, and at the time I didn’t know any better.
Last edited:
Bikersmurf
Expedition Leader
Push pin wheel alignment. Put a pin in the back of both tires at the back as close to the centre as possible. In this case 14” off the ground. Measure between the pins.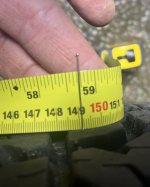
1491 mm
Drive forward till the pins are 14” off the ground again.
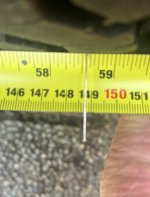
1488 mm
1491-1488=3mm toe in.
Pin pushed in about 3mm into tread.
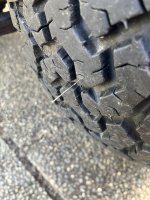
Did the same on the ambulance and then adjusted to have 3 mm toe in for it also.
Extend shackles for the 40, I previously added castor shims to keep castor in check.
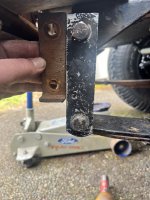
Right side after.
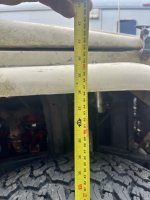
Left side after.
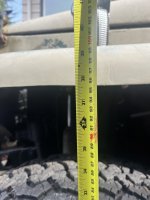
Front after.
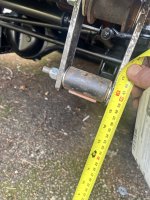
Front before.
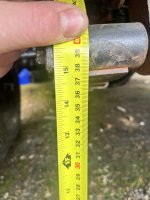
Right before.
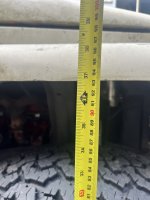
Left before.
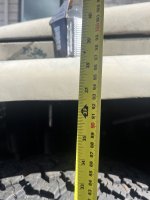
Net is about 1.25” front end lift.
4.5 C-C is a bit longer than I’d like for front shackles, but I plan to drive it before making a decision about shortening them to 3.5 C-C

1491 mm
Drive forward till the pins are 14” off the ground again.

1488 mm
1491-1488=3mm toe in.
Pin pushed in about 3mm into tread.

Did the same on the ambulance and then adjusted to have 3 mm toe in for it also.
Extend shackles for the 40, I previously added castor shims to keep castor in check.

Right side after.

Left side after.

Front after.

Front before.

Right before.

Left before.

Net is about 1.25” front end lift.
4.5 C-C is a bit longer than I’d like for front shackles, but I plan to drive it before making a decision about shortening them to 3.5 C-C
Bikersmurf
Expedition Leader
Picked this up today... I feel like it needs to go on a diet. I'm thinking: chop the step up off on both side, section 4" out on either side near the light holes, taper the bottom up from the middle to the outer ends, and shorten the segments going towards the front wheels.
I'm considering cutting some off the bottom also, but that'll quickly start running into the winch mount that I'd rather not alter unless it's unavoidable.
Even if I need to modify it a fair bit, it should be easier than starting from scratch, and the $100 I paid for it wouldn't buy the steel to make one these days.
Bikersmurf
Expedition Leader
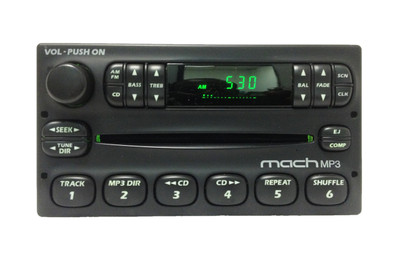
Many years back I made a conversion harness to connect a 2004 Stereo like the one above to work i my 1997 E350. It mounts perfectly without any modifications. The plugs are different, and that's why I ordered a plug to plug into the back of this Stereo, and a harness to connect an aftermarket harness into my 1997.
Anyway, when I installed it, it worked great. I'd used western union splices and taped all the joints with splicing tape that bonds permanently to itself. Recently, I found that the stereo was cutting in and out and the time was resetting till noon.
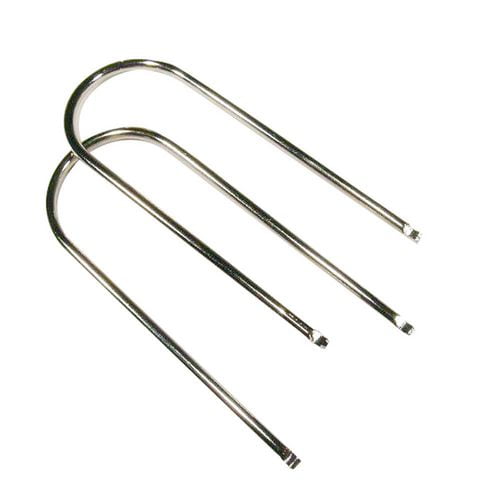
So I cut up a steel coat hanger to make the equivalent U shaped tools to remove the stereo from the dash. I then redid all of the western union splices and soldered the splices this time. After reinstalling the Stereo and going for a drive... no more cutting out, clock resetting after it looses the time, and the volume doesn't change.
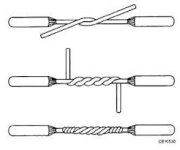
Western union splices are one of the tidiest splices, and usually work great when done well (even without solder). I'm not sure if there was an open circuit or a short between two wires... but redoing all the connections resolved the problems.
I know that a lot of people put in aftermarket stereos, but I chose to replace the 5 watt AM/FM radio that barely worked. The newer radio will play CDs, MP3s, and also has higher output and better sound quality (as opposed to the cheapest AM/FM radio Ford had). I like that it doesn't stand out, but works well.
FDM2012
Adventurer
I put a front bumper from a Dodge Ramon mine and it turned out great. Mostly, it just takes a "Can Do" attitude. The rest is imagination and Fab Skills. I'm sure that it will turn out awesome. Git er Done!
Picked this up today... I feel like it needs to go on a diet. I'm thinking: chop the step up off on both side, section 4" out on either side near the light holes, taper the bottom up from the middle to the outer ends, and shorten the segments going towards the front wheels.
I'm considering cutting some off the bottom also, but that'll quickly start running into the winch mount that I'd rather not alter unless it's unavoidable.
Even if I need to modify it a fair bit, it should be easier than starting from scratch, and the $100 I paid for it wouldn't buy the steel to make one these days.
Bikersmurf
Expedition Leader
Unfortunately it'll be on the back burner for a bit... kids, wife, house, and two other vehicles to maintain. I'm sure if I can adapt a Sterling sway bar to work on my Dana 70 axle...I put a front bumper from a Dodge Ramon mine and it turned out great. Mostly, it just takes a "Can Do" attitude. The rest is imagination and Fab Skills. I'm sure that it will turn out awesome. Git er Done!
then putting this bumper on a diet won't be hard... and bolting it on will be even easier. BTW. if you don't have a rear sway bar, I'd highly recommend it. It was awesome on our last highway trip. This 10k k rig handles way better than ever before.
Bikersmurf
Expedition Leader
Been on the lookout for some new front seats. Our market here is very limited... in more than 10 years the only "good" seats that I found for sale locally were in worse condition than the ones I was replacing.
A couple years back I had a lead on some in Vancouver while I was there, but it didn't work out because they weren't as advertised, and the whole deal was sketchy as can be. This last weekend my perseverance paid off... I found a pair that the seller claimed were perfect.
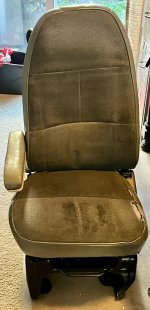
Well they were super dirty but in decent condition. a bit of foam break down on the drivers seat that I've now repaired.
As they looked when I picked them up...
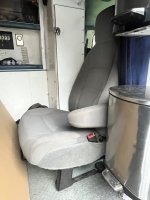
The picture doesn't show half of the dirt and grime. 14 years and 60k miles in a service truck without cleaning once (I strongly suspect).
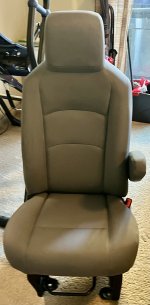
Now...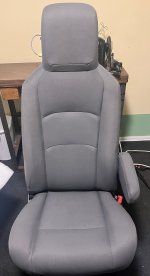
They are still damp, and I'll likely run the upholstery cleaner over them again, but they are so much cleaner now. I'd like them to be clean enough that the water in the machine isn't the colour of dark chocolate. I'm not sure if they'll be clean enough that the water will come out looking clean... but we'll see.
A couple years back I had a lead on some in Vancouver while I was there, but it didn't work out because they weren't as advertised, and the whole deal was sketchy as can be. This last weekend my perseverance paid off... I found a pair that the seller claimed were perfect.
Well they were super dirty but in decent condition. a bit of foam break down on the drivers seat that I've now repaired.
As they looked when I picked them up...

The picture doesn't show half of the dirt and grime. 14 years and 60k miles in a service truck without cleaning once (I strongly suspect).
Now...

They are still damp, and I'll likely run the upholstery cleaner over them again, but they are so much cleaner now. I'd like them to be clean enough that the water in the machine isn't the colour of dark chocolate. I'm not sure if they'll be clean enough that the water will come out looking clean... but we'll see.
Bikersmurf
Expedition Leader
Bikersmurf
Expedition Leader
Bikersmurf
Expedition Leader
I recently pick up this industrial machine to donate to my son’s school. His textiles teacher had said she wanted an industrial machine for students to learn how to sew leather and other heavy materials. Now that I have it, they aren’t sure they have space for one.
It’s a beautiful 1938 Singer that was made in Scotland. It has been used some, but is close to being mint. It certainly doesn’t look 86 years old. It came with the original operating manual and a box of accessories.
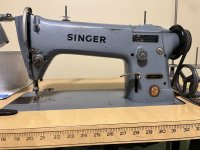
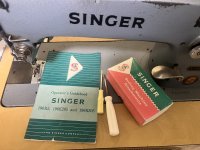
Everything is in excellent condition and I believe it has seen very little use. It almost seemed to nice for a bunch of students to learn on… and maybe they won’t.
As I’ve likely posted about previously, my first industrial machine was this 1908 Union Special with a variable speed motor.
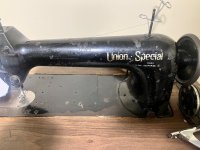
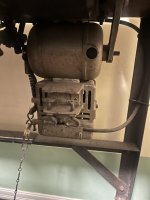
It is a very beautiful machine and sews cloth and leather equally well. It has seen a lot more use, but has lots more life.
The holy grail of industrial machines is a walking foot machine. Materials are pulled from the top and bottom at the same time. When I found this Seiko walking foot machine at an amazing price, I jumped on it. There’s very little about them online, but they are excellent machines that are built in Japan whereas most industrial machines are now built in China. It’s the same machine as the highly revered Consew 206… in fact I’ve read they were actually built for Consew by Seiko. Used Seiko machines are usually listed on eBay for $1800-2000 USD for just the machine (without a table or motor). I picked this one up as a complete package for roughly 1/4 of that price.
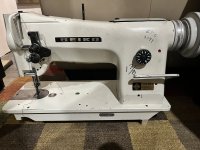
After taking this picture I cleaned off the writing and mounted it in the table. It is an excellent machine, and has the capability to sew leather up to 1/2” thick.
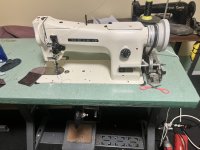
The Seiko is a keeper. I’ll be teaching my kids to sew with it… and possibly their kids. The sky is the limit for a machine like this. I’ll likely be reupholstering all my vehicles with it eventually.
Needless to say, I need to sell off an industrial machine or two… three industrial machines, two home, and two sergers is way too many sewing machines for me to use. When I used them at work we would often have one threaded with black thread and the other with white.
I almost forgot I also have a blind stitch industrial machine that I’ve not even used yet… 8 sewing machines is too many for one small room. If only they were Landcruisers.
It’s a beautiful 1938 Singer that was made in Scotland. It has been used some, but is close to being mint. It certainly doesn’t look 86 years old. It came with the original operating manual and a box of accessories.


Everything is in excellent condition and I believe it has seen very little use. It almost seemed to nice for a bunch of students to learn on… and maybe they won’t.
As I’ve likely posted about previously, my first industrial machine was this 1908 Union Special with a variable speed motor.


It is a very beautiful machine and sews cloth and leather equally well. It has seen a lot more use, but has lots more life.
The holy grail of industrial machines is a walking foot machine. Materials are pulled from the top and bottom at the same time. When I found this Seiko walking foot machine at an amazing price, I jumped on it. There’s very little about them online, but they are excellent machines that are built in Japan whereas most industrial machines are now built in China. It’s the same machine as the highly revered Consew 206… in fact I’ve read they were actually built for Consew by Seiko. Used Seiko machines are usually listed on eBay for $1800-2000 USD for just the machine (without a table or motor). I picked this one up as a complete package for roughly 1/4 of that price.

After taking this picture I cleaned off the writing and mounted it in the table. It is an excellent machine, and has the capability to sew leather up to 1/2” thick.

The Seiko is a keeper. I’ll be teaching my kids to sew with it… and possibly their kids. The sky is the limit for a machine like this. I’ll likely be reupholstering all my vehicles with it eventually.
Needless to say, I need to sell off an industrial machine or two… three industrial machines, two home, and two sergers is way too many sewing machines for me to use. When I used them at work we would often have one threaded with black thread and the other with white.
I almost forgot I also have a blind stitch industrial machine that I’ve not even used yet… 8 sewing machines is too many for one small room.
Last edited:
Bikersmurf
Expedition Leader
Similar threads
- Replies
- 1
- Views
- 2K
- Replies
- 0
- Views
- 671
- Replies
- 3
- Views
- 2K
- Replies
- 3
- Views
- 2K

