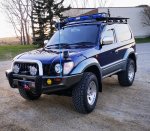
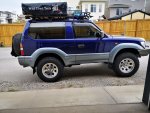
'99 Land Cruiser 90 Series diesel (Canada - JDM import)

PajEvo

JDM Journeys
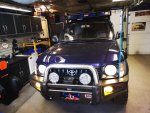
Bumper is all painted, getting winch ready to go in place... Also swapped wheels and tires since the snow is hopefully all done for now. BFG AT's on 17" AR's...
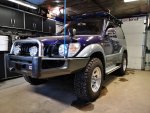
prado bump.jpg

Have new buckets coming to fill in the gaping holes in the wings of the bumper. Also need to actually bolt on those PIAA's. In the pic above they are simply laying there, pointing off into oblivion. And I guess pull those running boards off, at least until winter commuting starts again?
 
Last edited:

PajEvo

JDM Journeys
Running boards got deleted just before I finished the bumper.
IMG_20200429_175548.jpg
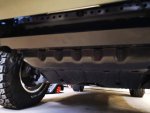
Also... The "Deluxe" ARB mounting kit (as I said earlier, they sent the wrong kit) came with a quasi-skidplate / gap-fill panel that I thought I wouldn't be able to use with the Sahara bar, but I managed to make it work. There's still room for airflow, but it protects some of the vulnerable bits under the bumper from flying debris, or errant rocks.
IMG_20200429_175624.jpg

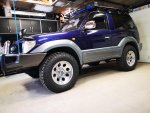
Now it's time to address the rubber elephant into the room: the tires that don't actually fit.
 
Last edited:

PajEvo

JDM Journeys
Okay. So I bought this rig with winter tires on it, since it was winter, and I had to get it from the okanagan, back to Calgary, via the Rocky Mountains. And then I was going to be driving it the rest of the winter. Winter tires would be helpful in this goal.

However, the seller also included brand new BFG KO2's (what I would've picked) on 17" American Racing wheels (I wouldn't have picked AR's or 17's) and so beggars can't be choosers. I squeezed themn in the back (SWB remember?) and went on my merry way, with the knowlege from the seller, that "they fit, but you have to pull the mudflaps".

Fast forward till April 2020. I put the tires on. Pulled the mudflaps. Yeah... no go. There must't be any roads with turns in the Okanagan, because even attempting to get out of my garage resulted in scrapey-scrapey.

SO... I cut some plastic away from the inner fender liners. "Lightened" the factory flaps. Even briefly revisited my youth as I pounded the body seam flat. All for naught. Tire still made contact at full lock.

Just for reference, the PO had purchased LT275-70R17's for this little machine. And wheels appeared to be 8" wide.

Challenge accepted.
 
Last edited:

PajEvo

JDM Journeys

PajEvo

JDM Journeys
Okay... Shoehorning tires...
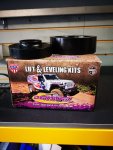
Preface... This vehicle only has about 60k miles on it. Suspension feels like new. So, I did what any young teenager (which I'm not) would do with his first vehicle :giggle:. I have to admit it: I put in spacers. Only inch and a half, f&r. But it was enough to clear the previous owner's tire ambitions. Bonus: CV angles are still good.
IMG_20200505_182752.jpg

IMG_20200506_151558.jpg

IMG_20200507_153903.jpg

IMG_20200513_211547.jpg

Mounting the awning is up next!
 

Todd n Natalie

OverCamper

PajEvo

JDM Journeys
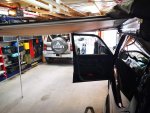
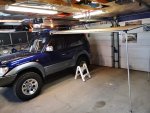
Awning is an ARB 2000 long by 2500 wide. It is now on and secure. One of the problems I always seem to run into is the awning and the RTT competing for the same real estate. I think I have it figured out this time around. But one step at a time. Awning first.

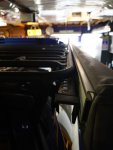
Attached a piece (actually two bolted together) of slotted angle to the awning (think upside down L) and then used bolts up through the slots on either side of a perpendicular roof rack bar through a piece of drilled metal stock, in three places. Very solid, both packed up, and deployed. Hard to see it since the business is behind the awning.

Used a cap on each end of the angle.
awning 1.jpg

awning 2.jpg

awning 3.jpg

awning 4.jpg

Difficult to fully secure, but I did put a padlock though a hole in the angle, and then a cable lock goes through padlock, around roof rack, and through traction boards. It could still be unbolted, but to separate it from the angle requires six bolts (and counting) to be unfastened, so perhaps a decent deterrent?


Rooftop tent is next.
 

PajEvo

JDM Journeys
Been busy in June, getting this thing ready for some trips, and then did a complete about face a week or so ago. But let's get caught up first:

The mundane:

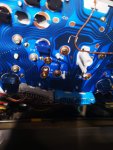
Finally reset the timing belt light. I did the easy part of changing the belt/tensioner et al. Resetting the light was the hard part, sort of. It required completely dismantling the instrument cluster, where I had to invert the whole binnacle (because how often do you get to use the word binnacle?), and move a screw from one hole to another. Really TOYOTA? You couldn't just put a button in the glovebox? Guess it discourages the unscrupulous from pretending they did the t-belt, because if you went to the trouble to get to that screw, you likely did the belt.

IMG_20200517_181117_BURST001_COVER.jpg
 

PajEvo

JDM Journeys
Okay, more exciting stuff - got my RTT mounted!
IMG_20200528_162744.jpg

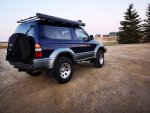
This is a Wild Coast Tent, from Nova Scotia over on the east coast of Canada. It is the Sundog model, and came with an annex, extra fly, etc. Its awesome, and I can't wait to use it.

But wait. Do you see what I see? Yep. Saggy rear end. NOT MINE. The KZJ90's! A bit of weight in the back, and on the roof, and it sits 1/2" lower in the back than the front, according to the hub center to fender lip measurement. More cargo (including mountain bikes) will exacerbate that. SO...

Next mod: Airbags!
 

PajEvo

JDM Journeys
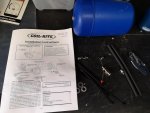
I'd previously used AirLift in two Pajeros, and they were "fine", but felt a little flimsy. This time around I tried Firestone. Much heavier duty. Thicker bags, heavier duty lines, metal fittings - real nice piece of kit.

IMG_20200604_131442.jpg

I used the 4135, the version specced for the 4Runner. That would be slightly problematic, as I'll show later.

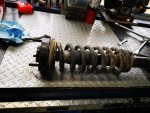
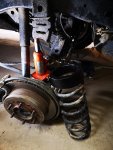
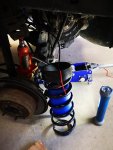
They fill the coil so completely, that I had to lube them in order to get them in there, after I pulled the spring out.


IMG_20200604_135709.jpg

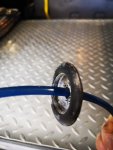
In running the lines, I discovered that right above each coil was a small body plug, just begging to be plumbed with an airline! Perfect! No worries about hot exhausts, or road hazards, since the line is safely tucked away inside.

IMG_20200604_142259.jpg

IMG_20200604_135738.jpg

Now I can level the truck with a load, firm up the rear for spirited driving, or even lift the rear a little (an inch or so).

So what was the problem with 4Runner bags? Well, it's more a problem with the KZJ90 - on the 4runner, the bumpstops are inside the coils. But on mine, the bumpstops are frame mounted, and the bottom of the coil has a blunt conical projection in the center of the base of the spring. The airbag perched precariously on this projection, and looked primed for puncture as the suspension cycled.

Easy fix, and typically Canadian: I put a cone-shaped hole in a pair of hockey pucks, and siliconed them over the projections. Now the coil sits flat on the spring's base, and does what it is supposed to do.

Soon need to hard mount my compressor for ease of filling...
 
Last edited:

PajEvo

JDM Journeys
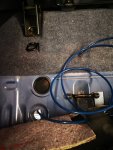
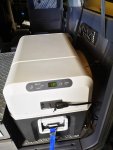
Mounted a 12v socket in the right rear (the swb didn't get one from the factory) and for now my Dometic will be drawing from it, to the second battery, via an aux fuse box. Eventually I'll be using a better power port, since rough roads can jar the cigar socket loose.

Also strapped down the fridge using some D-rings and straps to some tie-downs.
IMG_20200623_193519.jpg
 

Forum statistics

Threads
187,620
Messages
2,895,944
Members
228,596
Latest member
donaldsonmp3

Members online

Top