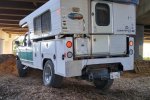
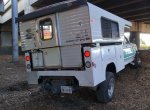
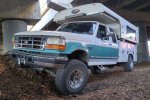
Alaskan on a 97 F250 4x4 Diesel

Motafinga

Adventurer
The idea was to see how much the frame/bed wanted to flex at least partially unhindered hence the test without the last 2 bolts in place. As you can see it's quite bit!
Screen Shot 2016-07-09 at 11.12.13 PM.jpg


Stuffed side
Screen Shot 2016-07-09 at 11.02.33 PM.jpg


Flexed side
Screen Shot 2016-07-09 at 11.02.18 PM.jpg

I'm thinking of running a bolt through the bed, bracket and a spring to incorporate a bit of give to the rear bed mounts. The Camper will be mounted to the bed floor and I don't want too much flexing and twisting translating to the camper.
 

Attachments

  • Screen Shot 2016-07-09 at 11.18.12 PM.jpg
    Screen Shot 2016-07-09 at 11.18.12 PM.jpg
    187.8 KB · Views: 69
Last edited:

Redline

Likes to Drive and Ride
The idea was to see how much the frame/bed wanted to flex at least partially unhindered hence the test without the last 2 bolts in place. As you can see it's quite bit!
I'm thinking of running a bolt through the bed, bracket and a spring to incorporate a bit of give to the rear bed mounts. The Camper will be mounted to the bed floor and I don't want too much flexing and twisting translating to the camper.

I had a 1996 F350 for 18 years and used it much off-highway, and those old frames can/do twist lots. Was never a problem for me then but I wan't running a popup camper either. The added space between the cab and camper can be a plus for clearance when you are flexing.

Nice work and looking better all the time.

That weight is not bad, many fully loaded modern campers are that or more (the quoted 'dry/shell' weight is inaccurate).
 

Motafinga

Adventurer
I had a 1996 F350 for 18 years and used it much off-highway, and those old frames can/do twist lots. Was never a problem for me then but I wan't running a popup camper either. The added space between the cab and camper can be a plus for clearance when you are flexing.

Nice work and looking better all the time.

That weight is not bad, many fully loaded modern campers are that or more (the quoted 'dry/shell' weight is inaccurate).

Yeah they do like to twist and that's what they're designed to do I'm sure. I'm trying to take a route that lets it do just that but with out it taking the bed/camper with it. I can already tell from a couple tests I did with the camper in the bed that leaving the rear portion of the bed unbolted (temporarily till I add the spring/bolt arrangement) lets the bed stay much more flat and the camper door swings open and closed quite easily and it all seems alot more square and lined up.

Speaking of flex I got a chance to see how the Daystar air bag cradles allow the rear axle to do it's business without any hinderance as well. Before the airbag was bolted to the lower bracket which acted like a limiter to it's articulation. Now it obviously can do it's thing much better!

Screen Shot 2016-07-10 at 10.40.51 PM.jpg
 
Last edited:

Redline

Likes to Drive and Ride
......lets the bed stay much more flat and the camper door swings open and closed quite easily and it all seems alot more square and lined up.

Speaking of flex I got a chance to see how the Daystar air bag cradles allow the rear axle to do it's business without any hinderance as well. Before the airbag was bolted to the lower bracket which acted like a limiter to it's articulation. Now it obviously can do it's thing much better!

Good call on both!

I dislike how traditional air spring setups limit travel.
 

Motafinga

Adventurer
Got the spring mounts installed and tested today. I used valve springs from a Ford V10 and some big fat carriage bolts from a 5th wheel mount. This is my 1st test driving the rig all together after doing a few upgrades including new custom tuned shocks from Agile Off Road, DayStar air bag cradles and of course the utility bed. So far all this shows a very noticeable improvement in both the little bit of flex/off road testing and street manners. Ride is still nice n controlled but more plush. The spring mounts really seem to be working as intended too!
Felling pretty good about it

Screen Shot 2016-07-12 at 8.27.14 PM.jpg
Screen Shot 2016-07-12 at 8.26.42 PM.jpg
Screen Shot 2016-07-12 at 8.27.53 PM.jpg
Screen Shot 2016-07-12 at 8.28.20 PM.jpg
Screen Shot 2016-07-12 at 8.28.47 PM.jpg
Screen Shot 2016-07-12 at 8.28.58 PM.jpg
 

jackattack

Observer
yep-mmmm-hmmm.jpg
 

Motafinga

Adventurer
Thanks guys glad someones still watching!
I sorted out the camper mounts and went straight through the floor, I also end up adding a couple extra mounts for the bed to the frame. The truck had some big L shaped 5th wheel mounting points that sat about 4 inches under the new ute bed and outward of the frame. I had some big solid urethane bump stops that fit in between the bed and 5th wheel mounts perfectly so I utilized them into the mix (forgot to take pics). After a couple trial and errors of loading and unloading the camper I knew I need a better solution as the campers forward edge trim pieces were catching on the bed and tearing em out as I unloaded it! Obviously that's unacceptable so I had to come up with a solution.Since I'm bolting the camper down through the floor, I needed a way to line the holes up without too much drama. I ended up with a skid along the driver side that solves both problems of catching trim edge and lining up the bolt holes. I basically just back up against the skid and roll back till the camper hits home. Miraculously the bolts drop right in place now using this method!

Skid
Screen Shot 2016-07-14 at 10.26.10 PM.jpg

I also glued a piece of this door mat to each of the "wings" of the camper since these butt against the bed cut outs when loaded.
Screen Shot 2016-07-14 at 10.29.41 PM.jpg

The rear "wings" of the camper also were showing some signs of separating from the upper portion of the camper so I used some wood glue and strong ties to repair and reinforce things.. seems super strong now
Screen Shot 2016-07-14 at 10.33.49 PM.jpg

The rig finally found it's way home from the space I've been using for the build over the last 4 months too, so I'm done with that phase of the build and can finish the rest at my place which is great. I did the whole ute bed build in my buddiess dirt lot with nothing but a 120 power cord and some occasional running water so it'll be nice to have my garage as modest as is at hand.
Stoked

Screen Shot 2016-07-14 at 10.37.38 PM.jpg
 
Last edited:

Nosferatu49534

Observer
It's not even mine and I'm stoked. :) I love when some one takes time and this much pride in what they are building. I hope you keep it all for a long time. Should serve you well. :) just keep us updated the whole way.

The carpet is a great idea by the way. Think I'm gonna steal it for the front of my camper. :)
 

Motafinga

Adventurer
It's not even mine and I'm stoked. :) I love when some one takes time and this much pride in what they are building. I hope you keep it all for a long time. Should serve you well. :) just keep us updated the whole way.

The carpet is a great idea by the way. Think I'm gonna steal it for the front of my camper. :)

Thank ya kindly! Please steal away any ideas you want that's why I post it, lord knows I've pilfered many ideas from this forum. Anyone that's wanted to do this kinda of project on their rig I'd say go for it. If you have the time , patience and even modest skills like myself it's not that hard. I looked into what new ones cost built to fit a camper and they are about 6k! I scored mine albeit needing a bunch of work for 400 bucks, I haven't kept super close tabs on expenses but I'd say I have maybe a G into the whole mod.
 

Forum statistics

Threads
188,044
Messages
2,901,593
Members
229,352
Latest member
Baartmanusa
Top