Well as you've all surely been hoping, Ive been busting ass on the RV even though I havent posted any updates so get ready. Theres a lot coming over the next few days even though I had a week long hiatus spent in Flagstaff because Snowbowl got 90" of snow in 7 days. I still have my priorities. Other than touchups that are inevitable in this situation the painting is done. Thank the lord. What an unbelievable amount of time for such a small space/small amount of square footage, even with 3 people working on it. Pictures do zero justice to the amount of work required. Also black is a bad choice when it comes to interior color because it shows every blemish, looks friggin rad though.

There are 10 cabinet doors that needed paint. There were also 10 panels for a DIY chest that I assembled for extra storage that will be installed later. The floor of the house was taken up by cabinetry for a week as we painted, sanded and waited between coats.

The amount of trim, switchplates, control panels, light fixtures, speakers and misc. plastic crap on the walls of an RV is off the charts.

Sad dog is sad she isnt getting much attention lately.

Took a break from painting to make a new support panel for the mattress and cover it in vinyl I got from a local upholstery shop. Pretty decent match considering every piece of vinyl/fabric/plastic trim in the cab of the van is a different shade of light taupey grey. The original mattress was 4 pieces of tetris'd together plywood panels with foam and cloth that formed a mattress or were able to be moved around to create an area between the front seats where you could stand up. Im not exactly sure why they did this, you dont need it to get into the back of the RV and there is plenty of headroom when seated in the front seats. We opted to create a small platform to cover the "cutout" and be able to use a regular mattress so our bed is comfier, looks nicer, doesnt have large gaps/seams in the cushions and doesnt need to be broken down and remade constantly.


A keen eye will notice something is missing...

Next I got to making the new counter top. Decided on butcher block for a variety of reasons but mostly because its cool looking and relatively easy to work with. Since our sink is round and we're keeping it due to size/shape constraints down below I decided to build a trammel for my jig saw. I used the old counter as a template for the shape and it worked out really well.

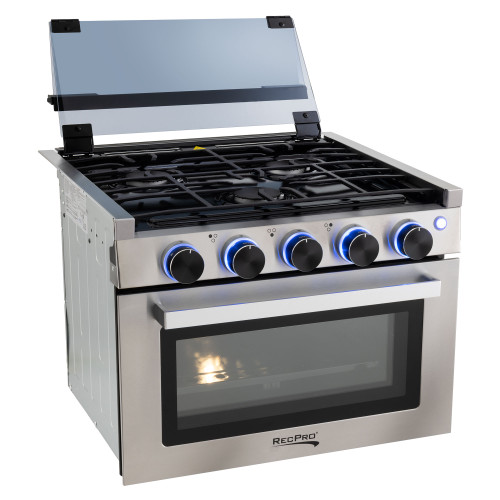
Fast forwarding a little bit here. Counter top is done and dusted. Took about a week to get it cut, test fit, trimmed, test fit, router'd, sealed and installed. Then it took a day or two to get the new range installed but Im happy to report that its all up and running and works like a champ. Pretty huge upgrade with this one.


