Another Ambo Build

gnhuntin

New member
The custom wheels from Staz got the track width front to back pretty much dead on, that is why we went with the steel wheels, they are not crazy heavy (possibly lighter than the aluminum mwraps) even with the tires mounted. One of these days I will weigh the spare before I make the bumper / tire carrier.
 

Brewdiak

kodiak conversionator
fun times - glad to see someone else used 3m panel adhesive to patch the light holes ... that's what i did with mine, stuff works fantastic and it's way easier than welding (plus...i've never welded anything so there's that)

I like the way you did the scene lights too- i'm actually considering the same idea - but i'm going to cut out the panels from the piece where I cut out the windows, so the red paint will be the same as the surround, then the LED light mounted into that.

enjoy! love the wheels too - i ended up going with alcoa 22.5's instead of super singles... oops :)
 

patoz

Expedition Leader
I like the way you did the scene lights too- i'm actually considering the same idea - but i'm going to cut out the panels from the piece where I cut out the windows, so the red paint will be the same as the surround, then the LED light mounted into that.

That is a great idea, and it should look more like it was meant to be that way. Before I found the Whelen 900 series LED Scene Lights that I have now, I was planning on doing the same thing, but I was going to use the Rigid brand LED SCENE-LIGHTs in white.
 

Brewdiak

kodiak conversionator
that's perfect I was looking for the right light to use in the patch panel and hadn't seen those - will be ordering two and going ahead with the plan thanks Pat!
 

patoz

Expedition Leader
that's perfect I was looking for the right light to use in the patch panel and hadn't seen those - will be ordering two and going ahead with the plan thanks Pat!

Jim, they're not anywhere near as bright as the Whelen 900 LED Scene Lights, but should be more than adequate for camping.
 

Brewdiak

kodiak conversionator
lucky you can work on it outside - when I was doing mine i was in a garage ... mess!!!!

also your color looks close to the red mine is - if you want a temporary color 'match' I found that the krylon rattle can "cherry red" over a black primer is actually pretty darn close. You can absolutely still see it but it's not obnoxious. What I did was tape a square around each patch etc, then sand / prime / paint. For a show truck it'd be horrible, for a rough-road RV (to use JAVA's perfect descrption of this truck) it works well - plow through trees? who cares :)

Krylon K09112000 COVERMAXX Spray Paint, Gloss Cherry Red
 

patoz

Expedition Leader
lucky you can work on it outside - when I was doing mine i was in a garage ...

Hey Jim, I'll trade you my outdoor 60's area broken concrete driveway strips for your indoor garage any day! It's still 90+° with 70%+ humidity here, and right now we are waiting on Hurricane Michael, which is supposed to make landfall as a Cat 3!

hurricane_flags.jpg


Bring it on, and let's get this season over with!
 

gnhuntin

New member
lucky you can work on it outside - when I was doing mine i was in a garage ... mess!!!!

also your color looks close to the red mine is - if you want a temporary color 'match' I found that the krylon rattle can "cherry red" over a black primer is actually pretty darn close. You can absolutely still see it but it's not obnoxious. What I did was tape a square around each patch etc, then sand / prime / paint. For a show truck it'd be horrible, for a rough-road RV (to use JAVA's perfect descrption of this truck) it works well - plow through trees? who cares :)

Krylon K09112000 COVERMAXX Spray Paint, Gloss Cherry Red

Thanks for the tip on the Krylon, that may come in handy. I'm not shooting for perfection but would like it to look ok from a distance. George says no one will look past the tires.
 

Brewdiak

kodiak conversionator
hah yeah probably not with those meats on it! the krylon definitely isn't perfection it just hides/makes it not super obvious - realistically I need to do another coat of body filler and block it out better but then again i don't want it to be so nice i'm reluctant to push down a road with tree branches in the way. I was not patient on decal removal either but was amazed what a polisher from harbor freight and a container of meguiars scratch remover did ... mirror finish for the most part. anyway, will be watching your progress - mine was only going to take me 3-4months maximum that was almost exactly a year ago :)
 

gnhuntin

New member
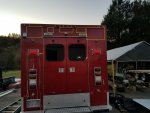
We painted all the patched areas yesterday except for where I removed the cabinet door on the right side (it needs more work). Looking at the weather and the time of the year, yesterday was probably the last day to paint outside. The main push was to finish the top of the cab where we are going to mount a roof basket. We removed the interior to patch the holes in the roof (at least 10) and the basket will be mounted directly to the top of the cab on aluminum standoffs I machined and bolted down to the cab from inside. Now that the cab is painted we can reinstall the headliner and move on and cut up some more body panels for window openings, ac, vents, water heater, etc. The local paint store mixed the paint, a single stage urethane and the match looks pretty good. I will cut and buff it soon. It's not show quality but will be fine, George says we wont be able to see it any way for the dirt and mud that will cover it.
Paint Work.jpg
 

Forum statistics

Threads
188,360
Messages
2,903,722
Members
230,227
Latest member
banshee01
Top