Another Ambulance! Converting a 1998 Type III Ford 7.3L E350

New to the RV/Vanlife community, but have been looking to make the leap for some time! I've been set from the start on doing a custom rig, and while I started looking at Sprinter Vans, I ended up settling on an ambulance! Inspired by builds by Ian Dow and the several builds on here; Ambot, HobieTony's awesome AmboVan, and several others, I made the jump, and bought my 1998 Type III Ford 7.3L Powerstoke E350 this February! It took about a month to finalize paperwork, another month to find time to drive it back, and I've been travelling since a lot for work. But! Somewhere in there I've found time to do a full gut, strip my rig down to bare metal and wire, and am in the process of planning my next phase; welding modifications and installing all my desired appliances and electrical components!

I'll be working on the ambulance full time in about 3 weeks, so I'm open to any advice or suggestions throughout the build and especially as I'm in this current planning stage! Here are some pictures of my rig from when I first picked her up! :

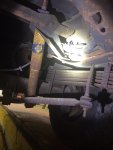
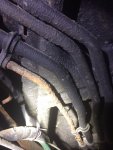
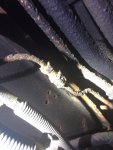
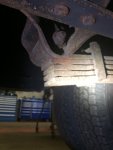
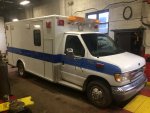
In the shop! The previous owner had an enclosed shop where I could walk underneath it. I made sure to take several pictures of the underside before purchase. Normal amount of rust, with some shocks and brake lines that I plan on replacing very soon. However, the mechanic I had look at it said I'd be fine to drive as is, so I didn't make any changes before driving it out of state.
IMG_8743.JPG
Here are a couple of the pictures I took beneath it. Was a little worried about the brake lines, but she ended up making it from New York down to Texas just fine.
IMG_8715.JPG IMG_8726.JPG IMG_8730.JPG IMG_8731.JPG IMG_8739.JPG
I was worried about driving with red/blue lights, so I ended up just putting some painters tape over them for the trip out west.
IMG_9266.JPG
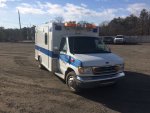
Side profile! Looks pretty good. I'll need to remove those red/blue lights, maybe replace them with speakers, and I need to work on replacing those broken Kussmaul auto eject/block heater covers.
IMG_9267.JPG

Made a quick pit stop on the way home in Pennsylvania. These are probably going to be the most critical supplies for this build's success:
IMG_9305.JPG
If any of you guys drive through Yardley, make sure to check out the Vault! They're a small craft brewery that took over the old downtown bank. They make some darn good beer, but then again it's my relatives who own it, so I may be a little biased.
 
Last edited:
Made a quick pit stop along the trip. Ended up doing a full gut!

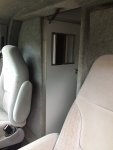
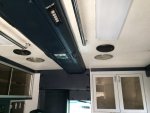
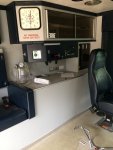
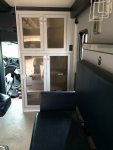
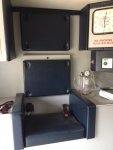
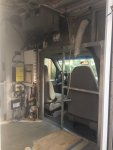
Here are a few pictures of the interior before:
IMG_9776.JPGIMG_9777.JPGIMG_9779.JPGIMG_9780.JPGIMG_9795.JPG
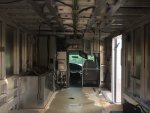
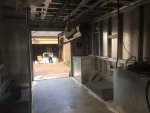
And with everything taken out! Took about 4-5 days to have everything removed and trashed or stowed in the attic.
IMG_9877.JPG IMG_9882.JPG IMG_9885.JPG
I plan to reuse much of these parts and material, so for now, all of this goes into storage:
IMG_9874.JPG

My helper throughout the whole 'gut' process:
IMG_9697.JPG
 
Last edited:
To mimic other posts I've seen on here; I'll start posting my purchases in a list, and edit them as I go along!

So far I've only made the one purchase. I'm continuing to research solar panel systems, exhaust fans, etc. so I'll add those items when I finally settle.

  • Kussmaul Auto Ejector (I have two broken covers, and one, I believe faulty ejector. If I get the old one working, I'll have this as a spare)
  • Kussmaul Auto Eject Cover (from Firepenny.com)

So... what started as an affordable, only second-hand parts type of build, has turned into a Jurassic Park-Jon Hammond 'spare-no-expense' type of rig...

I'm looking at possibly hitting burning man in August! Which, due to my work schedule, means I'll have to finish out the rest of this build in about three weeks! I want to have my welding completed and electronics/insulation/fabrication completely done before I start making this livable, and that means I'm starting to order parts and whole kits like crazy off of Amazon. Here are some of the purchases I've made these past couple weeks, all off of Amazon:

  • Miller Electric Tig Welder Diversion 180 - I'm planning on doing a roof raise, with plenty of cargo racks and a wrap-around platform up top, so rather than rent out or hire someone to do the welding for me, I'm going to attempt to tackle this all on my own. While this unit wasn't cheap, miller welders are what I've used through college and work, and I'm certain it'll last me quite some time. Looking forward to getting this setup first thing when I get back to the ambulance.
  • Fluke 15b+ Digital Multimeter - another tool that I bought not just for this project. Have always used fluke meters at work, just never had one of my own. Will use this around to test my system as the build goes along.
  • 1998 Ford 7.3L Powerstroke Diesel Powertrain Service Manual - Always nice to have a good manual. My rig only came with the electrical manual for the box, so I've been collecting all the maintenance schedules and manuals I could find online.
  • Aluminum Telescopic Ladder - I'm going with a telescopic ladder. For ease of storage, and security (I plan to have solar panels on the roof that I wouldn't like to see stolen) I'm going to give one of these ladders a shot.
  • RV Windows - Did not expect these to be this expensive! But, I'll really enjoy having the ability to look out through the raised roof, have a means to let in fresh air around the ceiling, and the natural light will definitely be appreciated.
  • Fan-Tastic Vent 807350 Series - the reviews convinced me the newer model was worth getting. Apparently older versions of the less capable models were quieter, and you have to buy the latest and greatest for no noise nowadays.
  • Solar - This is where I really stabbed a hole in the wallet. Rather than try to design a system myself, I'm going with Go Power!'s Weekender kit with the added 160 Watt expansion. This should cover my exhaust fans, ARB fridge, phone charger, LED lights and other 12 volt loads I may later see fit to add. This way I should only have to connect to shore power or start a generator when I'm cooking (looking at induction cooktops) or making margaritas.
  • Mars Solar Panel Rack Mount - While I want to weld as much as I can, the stand for the solar panels I wanted to have already made. I plan on building a couple mounts on the ambulance for this to rest on. That way I can move the panels around so they always face the sun. I'll install mounts on the roof so I can lay my panels flat when on the highway.
  • Link Solar Weatherproof ABS Solar Double Cable Entry Gland - Definitely want to make sure all my connections are properly sealed.
  • ARB 50 Quart Fridge/Freezer - I'm hoping to boondock for weeks at a time, so I went with an ARB over a pelican cooler. We'll see how this does hopefully soon in that Nevada desert heat.
  • RV recessed ceiling lights 3x 4-pack super slim led's. I plan on using these around the ambulance on two or three different circuits. I already have a 12 Volt LED color changing light string which I'll use for party-lighting.
  • Diamond Life HPB2448.B Pegboard, Brushed Aluminum - This is one of my more cosmetic purchases. I want a rack by the door I can hang tools, clothes etc. on, and while I'm going to try to do the rest of the walls in reclaimed pallet wood, I wanted to have something metal still showing so there was still a bit of an industrial look.
  • Cast aluminum heavy duty stern handles and weld on aluminum cleats - While I have everything stripped out, I'm going to be sure to weld plenty of hammock hangers and cleats on the roof to hang my waterproof tarp. The cleats on the roof should also be nice to help tie down luggage etc.
  • Sound deadening and flame retardant - I bought a few sheets of dynamat and noico sound mats. Dynamat for my critical compartments - the cab and around the future generator doghouse, and noico for the floor of the box. I bought thermo guard flame retardant insulation and some high temp rated adhesive to line the inside of the generator box. Any left over I'll use to insulate the cab from the main engine.
  • Nature's Head Self Contained Composting Toilet - Another big purchase. While I looked at a bunch of the more affordable options, and even watched a few videos for the 'do it yourself style' toilets, I eventually decided to go all in and get the top of the line. Reviews claimed little to no smell if maintained right, and since I plan to place this in the cab right behind the passenger seat, those factors are big concerns for me.
21dF6qjndqL._SY90_.jpg41+wgRcwKbL._SY90_.jpg41b1K02Co6L._SY90_.jpg31wAIc6CAkL._SX90_ (1).jpg41Kti6XilgL._SX90_.jpg41Pkpzj7naL._SX90_.jpg41ntd61S3JL._SY90_.jpg41SmbARF9HL._SY90_.jpg41swQHT0X-L._SY90_.jpg519oUd8qEJL._SY90_.jpg

Still to come! I'm looking at generators, propane heaters, and I'll eventually need to get a sink and build that platform futon/bed. Though for now, I'll try to focus on the things I need to build while the metal framework and electrical wiring is still exposed. The sound system will probably be the big thing I purchase next.
 
Last edited:

Bikersmurf

Expedition Leader
B watching your build also. I may gut mine someday... but the cabinets work for now. For now I’m focused on building the passenger side. It’ll have a ‘Murphy’ bed/desk/table on that side. There’s a fridge, microwave, laser printer, and storage on the driver side.
 

patoz

Expedition Leader
B watching your build also. I may gut mine someday... but the cabinets work for now. For now I’m focused on building the passenger side. It’ll have a ‘Murphy’ bed/desk/table on that side. There’s a fridge, microwave, laser printer, and storage on the driver side.

I'm curious to see what you do on the passenger side also. I've come up with several fairly good ideas, but still haven't found 'the' idea yet.
 

Bikersmurf

Expedition Leader
I'm curious to see what you do on the passenger side also. I've come up with several fairly good ideas, but still haven't found 'the' idea yet.

I’ve got an 8” thick double mattress that will fold up to the side. Off the bottom there’ll be a desk that folds down. Since desk space will be limited there’ll be narrow shelves across the bottom of the bed. These shelves will double as support for the bed since it’ll need to be elevated to clear the passenger side inner fender. I’ll post pictures when I eventually get to it... a picture of the mattress leaned against the wall or on the floor wouldn’t be worth 1000 words.
 
B watching your build also. I may gut mine someday... but the cabinets work for now. For now I’m focused on building the passenger side. It’ll have a ‘Murphy’ bed/desk/table on that side. There’s a fridge, microwave, laser printer, and storage on the driver side.
I'm curious to see what you do on the passenger side also. I've come up with several fairly good ideas, but still haven't found 'the' idea yet.
On the passenger side I plan on putting a compost toilet, behind the passenger seat where it can be easily removed or cleaned, enclosed in a cabinet for when it's not 'in use', a handbuilt fold-down, interlocking wood bedframe with house batteries and solar equipment, maybe a bit of storage underneath, and I plan on converting the back right cabinet into a storage closet/wardrobe that can be accessed from the inside. I also plan to put a bit of shelving up top for storage, since I'll have the space once I do the roof raise. I'm also planning on putting a fridge on the driver's side, along with storage, a generator doghouse on the back left outside box, and a fridge/kitchen up forward left behind the driver's seat.
 

Forum statistics

Threads
188,598
Messages
2,907,594
Members
230,704
Latest member
Sfreeman
Top