(Another) Forest Living Suburban Build Thread

Burb One

Adventurer
Not sure how weak it is, looks to be on par with Chevy stuff.
First generation Expedition and F150 had bigger front brakes than GMT400 vehicles.
I found one Expedition with lift spindles that were 20" tall, stock is 16" on first generation and I know Chevy spindles are shorter than that, so if you could, please measure your lift spindles for me.
The later model Expedition with the factory coil over and 6 lug bolt pattern is just a hair off of the Chevy 6 lug pattern.
They have a 20" tall aluminum spindle.

The inner CV can't hurt. When you broke your drive axles was it at the CV or inner tripot joint?
I always thought drive axles with slip joints was the answer, but the off road racing guys are getting enough plunge with CV's at both ends of the drive axles.
About 14 inches between the top and bottom ball joints
 
Last edited:

Atomic178

New member
I am glad you like the swap so far!

The GMT400 torsion bar LCAs are much different than the GMT800s, and my brackets will not work with them. You will have to go a little more custom on that platform to do the swap, but nothing some welding skills cant solve if you are motivated enough.
 

Burb One

Adventurer
I am glad you like the swap so far!

The GMT400 torsion bar LCAs are much different than the GMT800s, and my brackets will not work with them. You will have to go a little more custom on that platform to do the swap, but nothing some welding skills cant solve if you are motivated enough.

Hey! Haven't been on the site recently...

I LOVE the coilovers. It has completely changed the truck. I will do a write up in a week or two when work dies down. There have been one or two "modifications" necessary to the kit, but nothing major.

Also, am currently modifying the stock rear bumper (going to add a swing out for the tire/ jerrycans, rather than the swing down I currently have. Going to use my good friend's new welder and his teaching me how to properly weld skills. Starting it 8AM tomorrow:)
 

boll_rig

Adventurer
Howd the welding go? Was thinking I might be needing a new bumper/hitch soon, mine is sagging quite a bit but cant figure out exactly why. Was going to try shimming down from the frame about 3/8-3/4" on the furthest bolt, and progressively moving forward. Just cant stand it sagging, especially with my dirtbike hitch carrier on there. Not 100% sure on how much shimming would effect strength and rating.

Loving everything you've done and admire the amount of work you have put into you burb, she looks great!

Was wondering how big the alpine woofer was you put in? I was thinking of replacing mine/removing it. Someone did it on here to fit their goal zero yeti and I was thinking of doing the same but didnt want to get rid of my sub completely and wondered if the alpine was smaller and if you put it in the same spot.
 

Burb One

Adventurer
We decided to forgo the old bumper ans go heavy duty..... here's a sneak peak.... should be done by the end of the day except for painting. I'll get some good pictures.

@boll_rig I will ge the details on the sub. I believe it was 8 inches. I just replaced the woofer in my stock bose woofer box under the dash. I mounted the amp underneath the cup holders.....

Sent from my SAMSUNG-SM-G870A using Tapatalk
5b315b6ee839f894540e99f00624f3b7.jpg
a74cc5035538e53f8a7086866d3ead22.jpg
 

Burb One

Adventurer
Not done yet..... but close!
Just need to weld the hitch receiver on the swing arm for my existing tire carrier/ jerrycan carrier to slot into, add some of the ambient lighting from the old bumper, attach the license plate to the bumper itself, as well as the license plate lights, weld the latch, and a few other finishing touches (champher the wedge where the swing arm rests, etc.), add a high lift lift point, etc.

Super excited about this, because, my end goal for having the swing arm so long, is to make an aluminum popup pole which will attach on the end, so that between that pole, and some quick disconnects on the top of the truck a windproof/storm proof shelter can be created off the back of the truck (With a ground attachment side next to the awing arm, to create a square box for the tarp/tent material and water will run down that way, away from the truck. This is just a long term plan, for now.... time to finish the bumper tomorrow, and add sliders to my drawers!:) I will upload pictures next week when it is all buttoned up and done!

20160528_172553.jpg
 

Burb One

Adventurer
Howd the welding go? Was thinking I might be needing a new bumper/hitch soon, mine is sagging quite a bit but cant figure out exactly why. Was going to try shimming down from the frame about 3/8-3/4" on the furthest bolt, and progressively moving forward. Just cant stand it sagging, especially with my dirtbike hitch carrier on there. Not 100% sure on how much shimming would effect strength and rating.

Loving everything you've done and admire the amount of work you have put into you burb, she looks great!

Was wondering how big the alpine woofer was you put in? I was thinking of replacing mine/removing it. Someone did it on here to fit their goal zero yeti and I was thinking of doing the same but didnt want to get rid of my sub completely and wondered if the alpine was smaller and if you put it in the same spot.

The BOSE (make sure you have the bose package) subwoofer is under the front dash, in front of the cupholder). The amp is underneath the center console. I removed all of the bose amp, and added my own amp, which I mounted underneath the cupholder for easy access.

For the sub, I simply removed the stock bose box, removed the bose woofer (I think drilled or dremeled it out), and then put in the new woofer in it's place and reinstalled the bose box. The woofer I got was a 6 inch woofer (same size as the bose). I am not by any means an audiophile, but do enjoy good music, and it sounds great. Probably won't do for many deep bass liking people, but for rock it works great, and with the alpine speakers and amps, even sounds better than the bose.

let me know if you need more info!
 

jcoov1104

New member
Really enjoying your build.

I really like what your doing with your suburban, especially the multi-use mobile living/house setup. Reading through your posts, I noticed the mention of the heat exchanger/hot water pump system in your misc mods on your truck, from the beginning of the thread. As you suggested, would you mind doing a write up or explaining how you put it together?
 

Burb One

Adventurer
Jcoov- I am currently redesigning the water setup. I had the pump mounted in the engine bay but I have had two pumps fail. (second one happened this weekend after only a few trips.) I am assuming it is the engine heat. Going to be putting the new pump (and thermostat) in a tool box. I will make a writeup when I do the project this week.

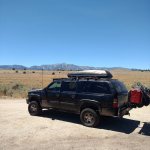
I know some people wanted to see the "stance" of the truck, with the six inch and coilovers. Went out this weekend, of course forgot a nice camera, but got some cell phone pictures.

Gearing up for Yellowstone soon as well!

13731365_511153509074690_1758279518_n(1).jpg

13770495_10155187023739968_766043110788021791_n.jpg
 

adrstout

Adventurer
I have a soft spot for suburbans and this body style in particular. Looks like a really well set up rig. Glad to see you enjoying it!
 

PGW

Observer
Is your coilover setup still working good? I am strongly considering going that direction on my 2500 Yukon XL.
 

Burb One

Adventurer
adrscout- thanks!

PGW- the Coilovers are working great! The difference between the torsion bars and the coilovers at 20-60 mph off road is staggering. The truck soaks up bumps , much, much better. I also can adjust the ride height of the truck simply by adjusting the coils which is awesome. Saying that, I am not sure if he makes 2500 compatible mounts....., so you will have to check. I made a mini writeup below, of the only problems I have had.


The only "installation notes" are:

Minor Problem:
The driver side spring, under complete compression, rubs on the bolt on the inside of the fabricated top mount. I shaved a bit of material off the spring, and it doesn't rub anymore. Unsure if this is due to slight differences in GM fabrication, or if it will be a problem one everyone's truck. Very minor (probably didnt even need to do anything, If i hadn't painted the springs black over the PAC orange, I probably wouldn't have noticed the rub marks.)

Major Problem (but not for stock hubs, so if you have a stock hub this shouldn't apply):
The brake calipers under full lock would hit the bottom of the coilover mount and press the pistons away from the brake pad, and after full steering lock would lose brake pressure for a pump or two (scary when it first happened pulling out of my driveway). I had to shave the mount, and in doing so, I feel I made it too weak, so I welded some 1/2 bar in the mount to make it stronger again (I will take some pictures). SAYING THAT, I do not think this is the coilover mount's fault. It looks like the Rough Country lifted wheel hub allows for more turning radius than stock. Between the shaving/reenforcement of the mount, and then welding a 2"x2" 1/4 bar onto the steering stopper on the front of the stock suspension arm so that the stering stops before the mount and caliper hits, everything is fine and I still have more turning radius than stock. I will take a picture of this and post it, as pictures are worth a thousand words it seems.

Saying that, if you don't have the rough country lift and have the stock hubs, there will be no welding required. The only problem would be where the spring hits the bolt, but you'll just need an angle grinder. Everything else fits perfectly, and I am completely happy with it! I cannot say enough on how much better the truck rides at mid-speed off road.

Also- I went with the 650 lb 14 inch 2.5 PAC Springs for the coils for reference. If I did it again, I may have gone for the 700lb, but maybe not. It would probably be a toss up between the two, where only test and tune could find out the better. For those without a winch and two batteries, the 650's are probably perfect. Atomic's calculator and excel sheet was great for figuring out what you need, givcen you have some simple measurements of the truck's height and weight. Awesome customer service (emailing me back in the middle of the night, etc.)
 
Last edited:

rayra

Expedition Leader
Man I damned near killed myself this morning working in the heat and the smoke (santa clarita fire) to put in my 2" Lift / leveling kit (Rough Country, with their N2 shocks). Felt pretty satisfied with it, then I see Geron's with the 6" lift and I've already got buyer's remorse.

/heh
/no pix ain't finished with it yet
 

Burb One

Adventurer
Man I damned near killed myself this morning working in the heat and the smoke (santa clarita fire) to put in my 2" Lift / leveling kit (Rough Country, with their N2 shocks). Felt pretty satisfied with it, then I see Geron's with the 6" lift and I've already got buyer's remorse.

/heh
/no pix ain't finished with it yet

HAHA Could have told you better:) I had that exact lift! Put some 33's on, get your use out it, and then in a few years go for the 6!
 

Forum statistics

Threads
186,667
Messages
2,888,644
Members
226,767
Latest member
Alexk
Top