57Cessna172
Member
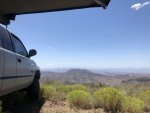
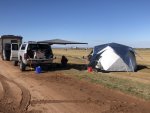
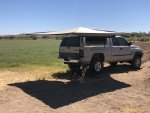
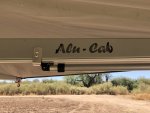
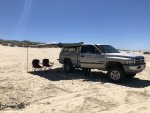
I do a lot of mild off roading exploring the southwest part of the US. Being stuck without shade in this area of the world is not good for the skin in the long term. As such I’ve used pop up shade tents for years. That gets old after awhile. A few years ago the AluCab products made it to the states. They‘ve been in the outback of Australia for quite awhile. Well tested equipment that just happens to be well built and very user friendly.
 ok4wd.com
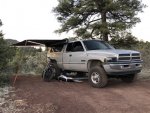
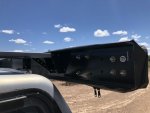
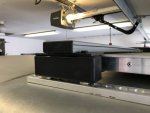
Decided to install one on my truck. While the awning is a well proven product, if you don’t use one of their roof racks and mounting brackets, you’ll need to be a bit crafty. My goal from the beginning it to be able to keep the vehicle from gaining excessive height front the install. Needs to be able to park in a standard size garage. And I wasn’t looking to have storage on the roof. I ended up installing aircraft style seat rails to my low profile fiberglass topper. No idea of the make of the topper. Bought second hand a long time ago") .
.
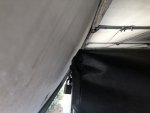
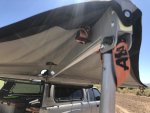
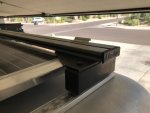
I used a 1x2 piece of oak wood on the inside of the camper shell. Mounted the rails to the topper using countersunk screws that bolted to the inside of the camper shell. (The oak wood helps to distribute the load and forces of the canopy). Once the seat tracks were installed I used some tubing and some flat plate steel to make the four corner mounts. I had intended to have these welded up. I suck at welding and didn’t have the equipment anyway. Just bolted them together. I did use two cross bars from Alu cab to assist in mounting the awning.
The tricky bits.
1. Ensuring the canopy won’t interfere with the suicide doors and still fits in the garage.
2. Making a strong support mount for the main support for the canopy.
For the first item. Just took time measuring to see how much clearance was needed for the awning. Lot’s of time measuring and scratching the noggin. Throw in some luck and it all worked out.
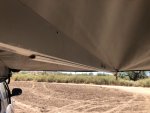
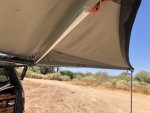
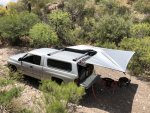
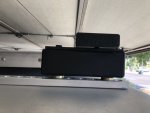
For the aft mount. This needs to be as stout as possible. The awning is designed to be able to be used with no support struts or tie downs. (for most conditions). I ended up using a chunk of 4x6 inch steel tubing. Used a cutoff wheel and an angle grinder and split it in half. I used a couple of the mounts included in kit for the awning to assist mounting to the tubing for the rear mount. The forward mount doesn’t carry much torsion loads. Just the weight of the canopy when it is stowed. Used the mount that came in the kit for this as well.
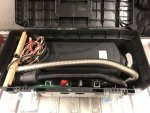
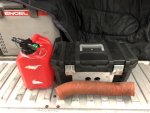
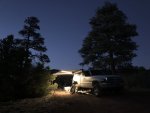
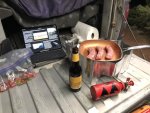
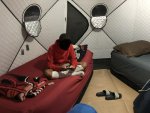
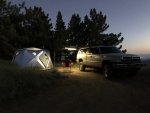
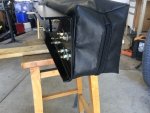
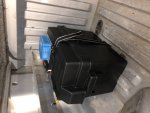
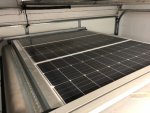
Additionally I have added strip LED lighting to the three support bars. And two strips of led lighting on the rear window of the camper shell. Put this on an dimmer. Goes from barely lit to the equivalent of daytime lighting under the canopy. To power all of this and other electrical loads for primitive camping ie. refrigerator, inverter, diesel heater for my tent, charging batteries etc... I have installed a solar system. Have a victron charge controller, 100AH batt fed by 300 watts of solar panels. I had originally installed a 165 watt panel that was one of the semi flexible panels. I had that bonded to the camper shell. Failed after a year of use due to the excessive heat we have here. Removed it about a month ago and put in the new panels. They weigh quite a bit more than the flexible panel.... But they‘ll last a long time.
I’ve had this on the truck now for well over a year. One of the best and most useful mods I’ve done so far. Enough of my rambling. Pics should help.
Alu-Cab Products & Accessories for Sale | OK4WD
Transform your adventure-ready vehicle with Alu-Cab products and accessories at OK4WD. Our Alu-Cab products will elevate your overlanding experiences.
ok4wd.com
Decided to install one on my truck. While the awning is a well proven product, if you don’t use one of their roof racks and mounting brackets, you’ll need to be a bit crafty. My goal from the beginning it to be able to keep the vehicle from gaining excessive height front the install. Needs to be able to park in a standard size garage. And I wasn’t looking to have storage on the roof. I ended up installing aircraft style seat rails to my low profile fiberglass topper. No idea of the make of the topper. Bought second hand a long time ago
. I used a 1x2 piece of oak wood on the inside of the camper shell. Mounted the rails to the topper using countersunk screws that bolted to the inside of the camper shell. (The oak wood helps to distribute the load and forces of the canopy). Once the seat tracks were installed I used some tubing and some flat plate steel to make the four corner mounts. I had intended to have these welded up. I suck at welding and didn’t have the equipment anyway. Just bolted them together. I did use two cross bars from Alu cab to assist in mounting the awning.
The tricky bits.
1. Ensuring the canopy won’t interfere with the suicide doors and still fits in the garage.
2. Making a strong support mount for the main support for the canopy.
For the first item. Just took time measuring to see how much clearance was needed for the awning. Lot’s of time measuring and scratching the noggin. Throw in some luck and it all worked out.
For the aft mount. This needs to be as stout as possible. The awning is designed to be able to be used with no support struts or tie downs. (for most conditions). I ended up using a chunk of 4x6 inch steel tubing. Used a cutoff wheel and an angle grinder and split it in half. I used a couple of the mounts included in kit for the awning to assist mounting to the tubing for the rear mount. The forward mount doesn’t carry much torsion loads. Just the weight of the canopy when it is stowed. Used the mount that came in the kit for this as well.
Additionally I have added strip LED lighting to the three support bars. And two strips of led lighting on the rear window of the camper shell. Put this on an dimmer. Goes from barely lit to the equivalent of daytime lighting under the canopy. To power all of this and other electrical loads for primitive camping ie. refrigerator, inverter, diesel heater for my tent, charging batteries etc... I have installed a solar system. Have a victron charge controller, 100AH batt fed by 300 watts of solar panels. I had originally installed a 165 watt panel that was one of the semi flexible panels. I had that bonded to the camper shell. Failed after a year of use due to the excessive heat we have here. Removed it about a month ago and put in the new panels. They weigh quite a bit more than the flexible panel.... But they‘ll last a long time.
I’ve had this on the truck now for well over a year. One of the best and most useful mods I’ve done so far. Enough of my rambling. Pics should help.
Attachments
-
 27FCB863-9358-47DE-9A19-82DCF573F40F.jpeg92.6 KB · Views: 63
 -
 EB783FEE-BE63-43EC-AB99-7BEA04E086F4.jpeg163.2 KB · Views: 63
 -
 7F80C564-EA15-4B1E-A044-DDE8F75EE551.jpeg65.6 KB · Views: 62
 -
 0540A309-01B3-4723-81B7-1146E7607ADE.jpeg78.2 KB · Views: 64
 -
 C7BDA814-E04C-4FD3-81EE-035FF7F82A88.jpeg91.9 KB · Views: 64
 -
 CA53355E-3356-4648-802B-EC98CF7C1311.jpeg128.9 KB · Views: 64
 -
 A6C7091E-D159-4772-8BAB-620D17B6A4B9.jpeg67 KB · Views: 50
 -
 B93C5AA2-3399-4686-ACC4-8846A3DF1730.jpeg71.3 KB · Views: 50
 -
 556105E7-8060-4E46-9E12-0F83517E5999.jpeg56.2 KB · Views: 58
 -
 65C11EE5-9346-4EFD-ADDE-9819351FEBA9.jpeg86.6 KB · Views: 48
Last edited: