Backyard's M416 Overland Trailer build!

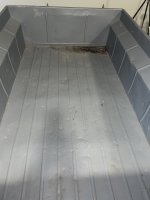
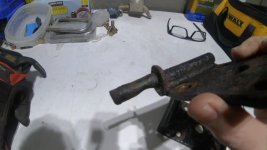
I took a trip out west with some friends of ours 1.5 years ago and they made a overland trailer from a M416 and that got my wheels turning. 1.5 years later I picked up this M416 and I am going to start a build.
I plan to post pictures as well as my videos of the journey!

I have a lots of thoughts/plans for it such as:
  1. a receiver hitch on the back
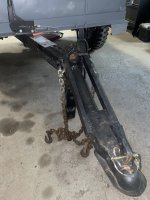
  2. extend the tongue
  3. tongue box for electrical/battery
  4. tongue jack
  5. stabilizer jacks
  6. Jeep wheels/tires
  7. update the electrical
  8. a hinged lid
  9. a raising roof top tent
  10. propane tank
  11. a solar panel

I Will be asking some questions along the way from experience of others that have gone this path already. I am really excited for it as we plan on using it on a big trip next summer (of 2024).

The trailer is in pretty good shape overall. My plan is to do the build/fabrication this winter and then in the spring have it blasted and i will either pant/ powder coat then once I am done with the fab work.

I have a YouTube channel called Backyard Hotrods where I am going to post frequent and detailed build videos. So far on my channel its been of my Cuda I have been working on so this is a different project/path for the channel.

Here is my first video
Thanks,
Wayne


Attachments

  • IMG_1133.jpeg
    IMG_1133.jpeg
    1.8 MB · Views: 30
  • IMG_1134.jpeg
    IMG_1134.jpeg
    1.8 MB · Views: 28
  • IMG_1135.jpeg
    IMG_1135.jpeg
    1.7 MB · Views: 29
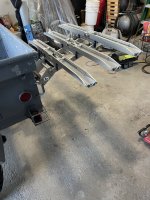
Part 1 is done! I needed a hitch to take our bikes with us. They don't exactly make a good kit for something like this. Decided to make my own. I did a quick 3D CAD model to visualize and tweak things before I started cutting metal which helped.

I used a company called SendCutSend to laser out the rear bracket. It was cheap and quick and turned out perfect. The front bracket I used some angle steel by buddy had that I cut two pieces from. I used 5/8", grade 8 plated fasteners which might of been a touch overkill....but why not...until it was time to drill out those big holes which took some time and lots of patience.

It came out nice and I'm real happy with how it turned out.

Thanks,
Wayne
Hitch 1.jpg
 

Attachments

  • HItch 3.jpg
    HItch 3.jpg
    488.5 KB · Views: 27
  • HItch 2.jpg
    HItch 2.jpg
    438.1 KB · Views: 25
  • HItch 4.jpg
    HItch 4.jpg
    853.3 KB · Views: 25
Sendcutsend is awesome! What cad program do you use? I used one of their basic designs last time but it would be nice to use them for more intricate work. Looks a like a fun build.
 
Thanks, I'm excited for this project. Lots to do right now but its fun.

I use Solidworks really nice to be able to design and then think, review, tweak it and even get weights calculated on bigger projects like the lid I am working on.
 
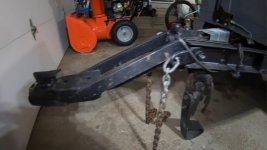
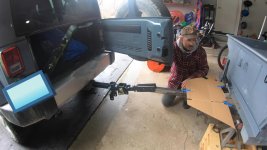
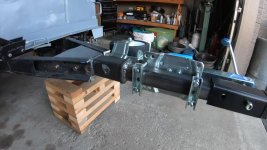
I wanted to get rid of the dropped tongue and ball hitch that was put on this trailer. Went with the compact camping concepts tongue bracket and in the long run decided to go with a 2" tongue tube that was 29" long which gave me the clearance i wanted with my Jeep swing gate while using a extended hitch reciever on the vehicle side. Also mocked up a cardboard template for the tongue box I plan to use. This allowed me to keep my tongue length down.

I picked up the tongue tube stock at my local metal supplier. Just had to drill a few holes for the hitch and safety cables. I did this as I decided I wanted to weld the tube the CCC adapter for a secure connection. I also cut 2 square pieces of metal to close up the tongue tube to seal it up.

I went with the lock n roll hitch as it seems like a great option and is well proven. Overall I'm happy with how it came out.


Attachments

  • Post 1.jpg
    Post 1.jpg
    126.1 KB · Views: 21
  • Post 2.jpg
    Post 2.jpg
    183.2 KB · Views: 20
  • Post 3.jpg
    Post 3.jpg
    176.3 KB · Views: 20
  • Post 4.jpg
    Post 4.jpg
    114.7 KB · Views: 19
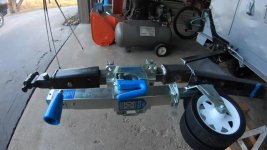
I looked at a lot of options for a tongue jack now that the original landing leg is gone. I think the extra money for the Ark tongue jack/jockey wheel is worth it. The quality is incredible and I really wanted theirs for its adjustability. I have a small packaging window on my trailer tongue and when folded up I wanted it out of the way and not hanging down. In the end it fit great, I ended up cutting the mounting brackets down for a cleaner look. When its folded up it will clear my hitch and tuck underneath the tongue box I plan to install.

Really happy with this one. Rolling around the garage is a breeze. Going to look into their corner stabilizer jacks as well.

There is one tongue box I really liked and it fit dimension wise perfect...but they make it to order apparently...so that will be a few weeks out. I was wanting to wrap up the tongue side but I will have to come back to that project later.


Attachments

  • Jack 1.jpg
    Jack 1.jpg
    219 KB · Views: 23
  • Jack 2.jpg
    Jack 2.jpg
    181.8 KB · Views: 23
  • Jack 3.jpg
    Jack 3.jpg
    186 KB · Views: 24
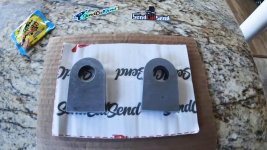
I decided I wanted to add a pair of D ring / shackles to the back of the trailer. These will mostly be for fun, hopefully won't ever need to use them lol. I went with the cheap route from Amazon. I really couldn't see a need for spending more for these. Then I figured I would design up some simple brackets in CAD and send them out to Send Cut Send to laser them out for me. I wanted to make the brackets out of 1/2" steel....my welder is only a 110...i know not ideal and not recommended but thats all I have. I think 1/2" is a good compromise. Most of the bolt on brackets are pretty big and wouldn't fit on the back of the rear channel frame.
I had some extra space to take up once the D rings were in place on the mount. I have 1.5" rod of delrin and cut two 3/8" pieces to use as a spacer/washer opposite of the 2 thick rubber washers that came with the D rings. worked perfect.
I prepped and heated up the metal till it was really toasty and welded them on. It went better than expected and I'm confident they will hold up to anything I throw at them.
Overall really pleased for the very little $$ into this project.


Attachments

  • Ring 1.jpg
    Ring 1.jpg
    92.5 KB · Views: 21
  • Ring 2.jpg
    Ring 2.jpg
    194.7 KB · Views: 20
  • Ring 3.jpg
    Ring 3.jpg
    142.1 KB · Views: 21
  • Ring 4.jpg
    Ring 4.jpg
    125.5 KB · Views: 20
Last edited:
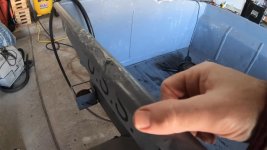
This weeks project was to straighten out the tube rails. As I am going to build a lid for the trailer I wanted a good sealing surface and these were pretty rough. Seems to be only 2 good options...Option 1: replace the rail with new metal such as welding in angle iron to recreate the rail. Con's to that is buying 60 ft of material and lot of welding. Option 2: weld up and grind the damaged areas. Con's to that is lots of grinding. Positive is no money spent...just time. I didn't want to just throw a bunch of body filler on the rail as that would be easiest but I'm sure that would get damaged easily over time after constantly lifting items into and out of the trailer.

I also wanted to get rid of the step in the corners as that wouldn't seat very well. So i put down a few beads of weld there and grinded them down for a smooth transition.

So I decided I would weld and grind the dents on the tub rail. That was a lot of work but in the end I am glad I did it. It looks so much better and will give me a good surface now. A light coat of all metal filler in a few areas that will mostly get sanded away and it will be good.

I am glad thats over! 😃


Attachments

  • Corner 3.jpg
    Corner 3.jpg
    84.3 KB · Views: 22
  • Corner 2.jpg
    Corner 2.jpg
    172.5 KB · Views: 22
  • Rail 1.jpg
    Rail 1.jpg
    149.5 KB · Views: 22
  • thumbnail_IMG_1521.jpg
    thumbnail_IMG_1521.jpg
    390 KB · Views: 22
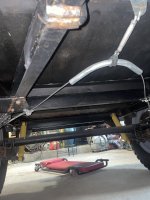
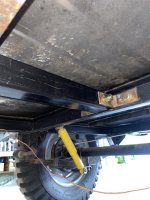
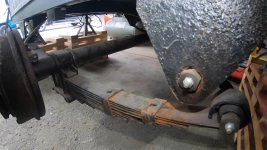
Spent this past week removing the suspension and taillights. The man I bought the trailer from was interested in any parts that I didn't use so he came up on Saturday and bought the wheels, fenders, axle and the modified drop tongue that was on the trailer. That worked out great, gave me a few bucks and cleared out some garage space.

I also spent some time measuring for a new axle. I ended up ordering one but being a custom size it will be a few weeks. I also spent some time finishing up my design for the lid and picked up the materials for the structure as that will most likely be my next project as I can do the suspension till the axle gets here. Will post more details on those when its time to install them.

Will have to figure out if I want to get new springs the same length as the originals....it seems most trailer springs they offer now are much shorter. My spring hardware is pretty much shot too so will be looking into upgrades for those.


Attachments

  • Pic 1.jpg
    Pic 1.jpg
    206.6 KB · Views: 19
  • Pic 2.jpg
    Pic 2.jpg
    118.6 KB · Views: 18
  • Pic 3.jpg
    Pic 3.jpg
    127.4 KB · Views: 17
Is there anything wrong with the springs? If not you could easily remove a few leafs to soften it up. Those old military leafs are pretty stout. Plus the longer ones tend to ride a little better.
 
Is there anything wrong with the springs? If not you could easily remove a few leafs to soften it up. Those old military leafs are pretty stout. Plus the longer ones tend to ride a little better.
I am not sure if the springs are ok....I am going to see about replacing them at my spring shop and see their reccomendations based on the trailer weight. Im hoping they can give me a solution for the hangers too.
 
I have been busy the last few weeks on the lid. This is going to be a big / involved project and I'm not a fast worker so I know it will probably take a month realistically. I have made good progress and I wanted to share the first phase of the project rather than waiting till the lid is done. Still probably 2 weeks out for that.

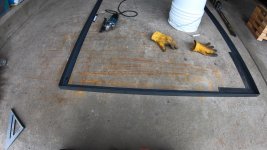
I have the main frame all done and it fits up nice. I used 1.5" Angle iron. I designed it to have a 3/8" gap around the trailer. It is nice and square...and flat for building and welding it on the garage floor lol. I welded it on the inside and outside after putting a nice chamfer on the edges. Then ground the welds down smooth.

I will have a video of the project when the lid is done.LId 2.jpgLId 3.jpgLId 4.jpgLId 5.jpgLId 6.jpg
 
Thought I would share the CAD model of the lid I did. Doing this helped me adjust the design and bring the weight down. 1st iteration was made with 1" square thick wall tubing and the lid was 110 lbs lol. Was able to make adjustments and bring the weight down to 55 lbs without any sheet metal on it yet So I am happy with that and think that's the best I can do with steel. Again, I can only MIG so aluminum structure is not an option. I modeled more of the trailer and have the rim of the tub in my lid file to check clearance and fitment. I also did a quick model of a large 65 qt electric fridge and 24 G water tank to see how that would look.

Almost done with the lid frame itself. Should have that done in the next few days and will follow up shortly.Lid ONly.JPGLid ONly 2.JPGLid ONly3.JPG
 
Last edited:
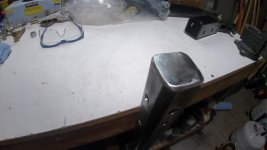
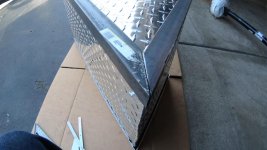
I took a break on the lid as I was waiting for the sheetmetal to finish it off. The tongue box just showed up. I ordered it a while ago but they were out and had to build it and I was fine waiting for it. I spec'd this one out as I thought it was the ideal size and gave me enough room for the electronics I want to add to it. Plus I really wanted to go with aluminum so it wouldn't rust.

Since there was a bit of overhang on the tongue I decided to build a frame for it out of 1.5" angle iron. I added a couple strips down the middle with a couple tabs that ran down and bolted to the inside of the c channel on the trailer tongue. Then I just used 4 bolts to bolt the box to the bracket I made. Its rock solid and now. I do have it spaced out to hopefully use the original parking brake with the new axle.


Attachments

  • tb 1.jpg
    tb 1.jpg
    186.3 KB · Views: 15
  • tb 3.jpg
    tb 3.jpg
    162.9 KB · Views: 13
  • tb 4.jpg
    tb 4.jpg
    184.8 KB · Views: 16
  • tb 5.jpg
    tb 5.jpg
    146.3 KB · Views: 16
  • tb 6.jpg
    tb 6.jpg
    200.4 KB · Views: 16
Last edited:

Forum statistics

Threads
188,206
Messages
2,903,770
Members
229,665
Latest member
SANelson
Top