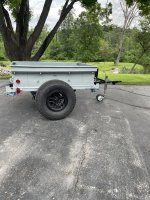
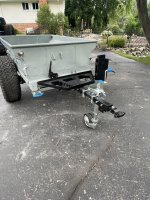
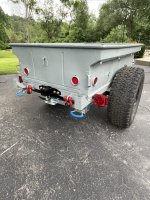
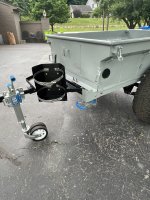
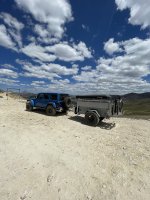
Backyard's M416 Overland Trailer build!

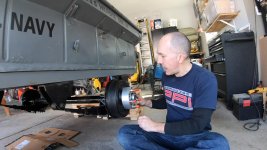
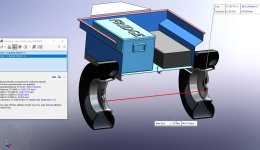
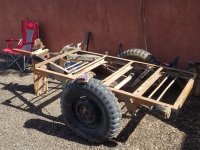
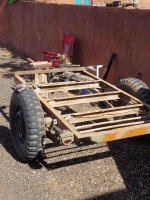
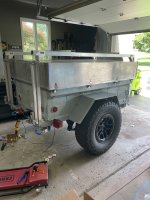
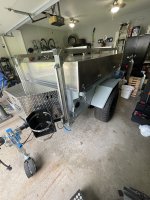
The sheet material for the lid didn't show up last weekend so I was able to get the suspension installed and mocked up. I was curious to see how the new 3500HD axle would fit. I did order it with electric brakes as I figured now would be the time to do so. I ordered the axle at 53.5" as I will be using 2" wheel spacers for the desired 57.5" axle width I measured. It fit great. I have 1.5" to the trailer frame and a little less at the top of the tire to the tub. I ordered the axle the same bolt pattern and thread size as the Jeep. I also added wheels and tires to my CAD model which allowed me to double check my axle width size.
I ordered the axle from trailer parts outlet: https://thetrailerpartsoutlet.com/

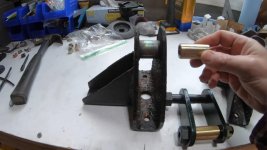
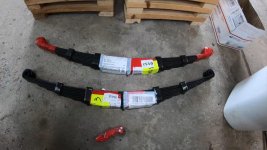
I ordered new 10 leaf springs, hd shackles and new u bolts from vintage jeep parts. They were great to deal with. https://www.vintagejeepparts.com/categories/1949~1953-CJ3A/Suspension-.and.-Lift-Kits

For the 2" spacers bought them from adapt it usa. You have to run spacers to clear the trailer hub if you want to run a automotive wheel. I had the spacers spec'd with the same lug size as the jeep to keep everything common.

We recently sold our JK sahara and picked up a lightly used JL Rubicon extreme recon. the only problem there was trying to find used take offs to match was impossible. I did find Defiant wheels make a wheel that is very close in design and is the same size and offset as the XR wheel. I picked up 2 of those and so far I am pleased with them. I found a guy selling two take off bfg's in the same 315 size that came off a Raptor so i scored those for cheap.

Overall I am really happy with how everything fit and is looking.


Attachments

  • Image 1.jpg
    Image 1.jpg
    151.4 KB · Views: 18
  • Image 2.jpg
    Image 2.jpg
    218.6 KB · Views: 17
  • Image 3.jpg
    Image 3.jpg
    117.9 KB · Views: 19
  • Image 4.jpg
    Image 4.jpg
    217.8 KB · Views: 19
  • Image 5.jpg
    Image 5.jpg
    219 KB · Views: 19
  • Trailer for tires 2.JPG
    Trailer for tires 2.JPG
    108.8 KB · Views: 18

84-4runner

Active member
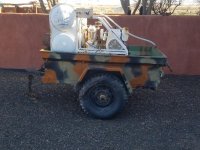
waiting for a tongue kit, which is back ordered. So I can get rid of a giant ass compressor that is in the bed. I will be pulling the bed
off to do some stuff. If you have haven't heard anything by then I will be able to help you. If anyone wants really cheap let me know.
 

Attachments

  • thumbnail (1).jpg
    thumbnail (1).jpg
    166.5 KB · Views: 13
After looking at how my axle and suspension is sitting...it doesn't seem quite right. I think someone replaced one or two of the frame rails (that run side to side) and the spacing is off. My leaf spring shackle angles don't look correct which was my first sign.

Can someone please tell me distance the two center frame rails are suppose to be apart from each other? This should be the same as and tell me the distance of the leaf spring shackle mount distance from eye to eye .


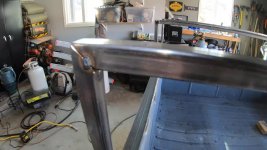
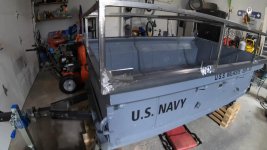
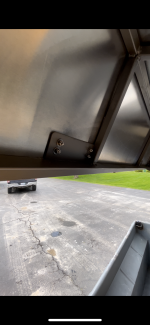
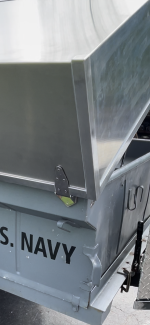
Here are pictures of the finished lid structure. The square tubes I am using are .75" and .065" wall. This will help keep the weight down but be plenty stiff enough for the structure.

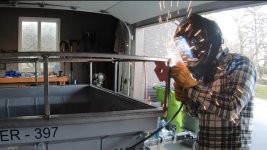
I also added .125" reinforcing plates for the hinges on the passenger side and the latches & handles on the driver side. After all the welding I ground the welds down flush so the sheet metal has a smooth surface to lay on.

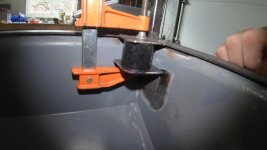
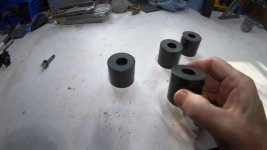
I also welded in "pads" on the corner of the lid and brackets in the tub corners...I wanted to build a hard stop for the lid so the weight of the lid won't crush the gasket I am going to use. I have designed a .25" air gap between the tub and lid. For the spacers I used 1.5" delrin. Its easy to cut and drill and will be strong enough to support the lid.
 

Attachments

  • Lid 7.jpg
    Lid 7.jpg
    169.9 KB · Views: 17
  • Lid 8.jpg
    Lid 8.jpg
    173.3 KB · Views: 16
  • Lid 9.jpg
    Lid 9.jpg
    189.7 KB · Views: 17
  • Lid 10.jpg
    Lid 10.jpg
    161.1 KB · Views: 17
  • Lid 11.jpg
    Lid 11.jpg
    113.4 KB · Views: 16
  • Lid 12.jpg
    Lid 12.jpg
    112.7 KB · Views: 16

84-4runner

Active member
Ok I got rid of the albatross in the trailer and can now move it around.
If you can show me on a diagram or picture of the measurements that
you need I should be able to get them for you. I don't see the cross members
being moved unless the long side to side tabs underneath are cut off.
I will get some pictures for you if needed.
that would be very helpful. After looking more...i am quite confident the entire frame on this trailer has been replaced.

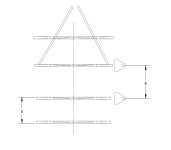
Attached is an image. Looking for 2 dimensions.

1) the leaf spring mount spacing, which should be the same as the 2 center frame rail spacing as the mounts are centered.
2) the distance of the 2 rear frame rails.

Thanks a ton!
 

Attachments

  • m 416 frame.jpg
    m 416 frame.jpg
    27.8 KB · Views: 9

84-4runner

Active member
Your way I come up with 33 1/8
I came up with 34 3/4 from the center to center of the mount holes which could vary a simge
and 18 inches outside to outside on the rear spacing
it is a little muddy and will be power washed
 

Attachments

  • thumbnail.jpg
    thumbnail.jpg
    184.7 KB · Views: 17
  • thumbnail (2).jpg
    thumbnail (2).jpg
    281.2 KB · Views: 16
Thank you I appreciate it. I am surprised the spring mounts are designed to be so close to each other after my research. shows they should be about 35.5" apart.
 
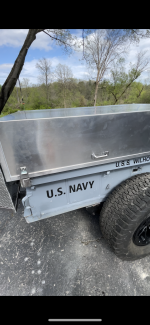
I couldn't be more excited to say the lid build is done! This has been a big project and I've been working on this one for a while.

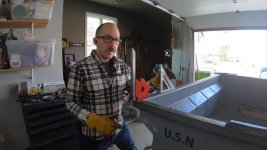
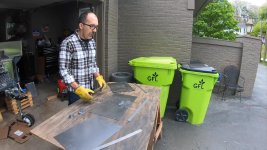
I ended up using .032 aluminum to skin the outside of it. The reason of going with that thickness is because I rented an aluminum siding brake which has a maximum material thickness of .030 (don't tell Home Depot, but I did by insurance for the 4 hours lol). It worked well. I won't be attaching anything to the outside of the lid FYI. The long edge was hard to bend but I managed. The tricky thing was keeping everything nice a square.

Then I used 3M VHB 4941 (I talked to them for their recommendation) tape to attach the aluminum to my steel structure. I bought it off Amazon actually. I was hoping to not to have to use any trim to finish it off....but that wasn't the case. I had some slight gaps on the edges and I decided the corners would be more robust and be sealed up better if I did. I ended up using 1" x .125 aluminum strips that I bonded again with the VHB along the bottom edge and in the corners I used 1" x .125" 90 deg. angle aluminum. Then I used Sikka 221 in grey as a caulk to close up any gaps on the trim pieces. Very confident now there is no way water is getting in this thing now.

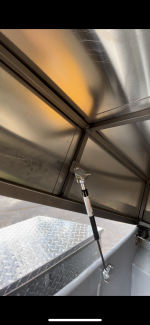
Overall I am glad I used the trim pieces as it gives it a nice finished look. I did hit the trim with a light polish which helps tie it into the hardware. The has struts works perfect. The lid goes up and down easy and my wife has no problem lifting / closing it.


Attachments

  • IMG_1894.png
    IMG_1894.png
    6.2 MB · Views: 8
  • IMG_1896.png
    IMG_1896.png
    6 MB · Views: 8
  • IMG_1897.png
    IMG_1897.png
    6.1 MB · Views: 8
  • IMG_1898.png
    IMG_1898.png
    6.4 MB · Views: 8
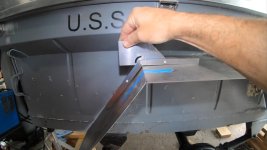
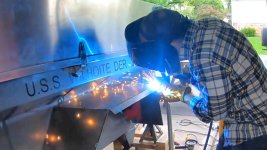
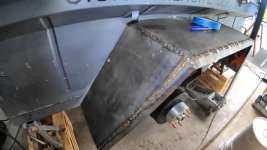
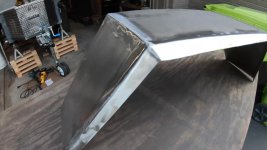
This week it was time to make some fenders for the trailer. The originals were pretty banged up and wouldn't clear the 35" tires. I had a quote for a tube fender that I did up in CAD...but those came in at around 1k so I decided to keep it simple with some sheet metal fenders....but without any bending tools. So lots of welding and grinding.
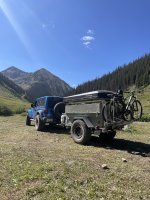
I used 16 gauge metal. I made them 11" wide with the front and rear wings taper from 11" TO 9" to give them a little more style. I wanted decent tire coverage but not full coverage. I also wanted them just tucked inside the tread....in case I was on a trail in a tight spot to not rip them off. I then made a 1" flange at a 45 degree which added the necessary strength and rigidity to the fender. I had to cut off the mounts and move them up and out. Picked up some new plated 3/8" hardware as well.

Overall I'm real happy with how them came out for a weekend of work.


Attachments

  • Fenders 1.jpg
    Fenders 1.jpg
    309.9 KB · Views: 10
  • Fenders 2.jpg
    Fenders 2.jpg
    129.6 KB · Views: 10
  • Fenders 3.jpg
    Fenders 3.jpg
    166.5 KB · Views: 10
  • Fenders 4.jpg
    Fenders 4.jpg
    163.3 KB · Views: 10
  • Fenders 5.jpg
    Fenders 5.jpg
    143.1 KB · Views: 8
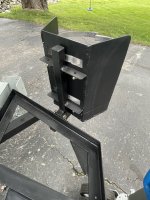
Haven’t posted in awhile… been so busy working on the trailer as a summer vacation is approaching quickly that we want to use this on. Has to slightly change my plans as I just wrapped up all my fab work and was going to get everything stripped and then powder coat the frame… but I called the shop and they were 6 weeks out 😳. So I decided to get the tub and frame prepped and rattle can it for now. I am happy with how came out…it will be easy to touch up at least 😂 fenders are off as it’s easier to work on it that way.
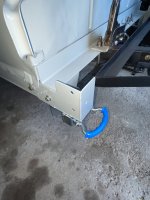
I made a propane tank mount, finished the mounts for my rack which are bolted & welded to the frame. The raising rack is done and I will post that during the final assembly. I added the ark corner stabilizers which have already come in handy as they can lift the trailer up if you need to work on the suspension 👍

Currently working on the plumbing and just starting wiring it.
 

Attachments

  • IMG_2141.jpeg
    IMG_2141.jpeg
    2.7 MB · Views: 10
  • IMG_2143.jpeg
    IMG_2143.jpeg
    2.3 MB · Views: 10
  • IMG_2142.jpeg
    IMG_2142.jpeg
    2.5 MB · Views: 9
  • IMG_2144.jpeg
    IMG_2144.jpeg
    2.1 MB · Views: 10
  • IMG_2145.jpeg
    IMG_2145.jpeg
    2 MB · Views: 10
  • IMG_2146.jpeg
    IMG_2146.jpeg
    1.6 MB · Views: 8
Thanks I appreciate it 👍


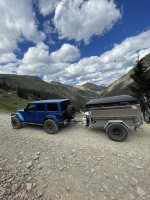
Nice to finally have it all assembled and see it come together. I’m liking how it looks. I’m on the last steps now which is the wiring. My least favorite part of any project
 

Attachments

  • IMG_2176.jpeg
    IMG_2176.jpeg
    1.8 MB · Views: 23
  • IMG_2177.jpeg
    IMG_2177.jpeg
    2.3 MB · Views: 22

b63215b

Adventurer
Looking good, nice clean work. Check my build out that I've been working on modern military trailer, it's all aluminum minus a few things.

Sent from my Pixel 5 using Tapatalk
 
Looking good, nice clean work. Check my build out that I've been working on modern military trailer, it's all aluminum minus a few things.

Sent from my Pixel 5 using Tapatalk
Thanks a lot. I will check out your build!

With 2 days to spare I finished the trailer just before we planned to leave in our vacation. Had 3 friends help me out the tent on the rack then took it out for a test drive. She towed great. 75mph no problem as long as the roads are smooth.

We went to CO for 2 weeks. The first few nights were in a little canyon on the Poudre River outside of Fort Collins. We got to relax and do some fishing. Caught a bunch of rainbows.
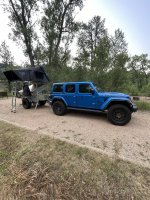
Then we went into RMNP as we had a a backcountry permit for 2 nights.

Then we headed to the San Juan mountains in the SW and did the Alpine Loop. That as incredible. Proud to say the trailer went up and over Engineer & Cinnamon Pass.

The trailer o performed great. The water system worked and 21G was perfect. My 11 lb propane tank was plenty for our meals. The actuators worked as they should and gave me no issues… wished they were a little faster at times lol but no big deal.

One thing I noticed that I will adjust over winter is my fender to tire clearance. Once the trailer was loaded up I lost a bit of clearance and I want at least a 1” more.
On the rough trails the brackets I made for the telescopic tubing / tent rack wasn’t as sturdy as I would like. I made them out of .125” and they need to be thicker. Will probably have some lasered out of 3/8” and be done with it.
Also want to add an awning of some type.
So those are my projects to come.
 

Attachments

  • IMG_2419.jpeg
    IMG_2419.jpeg
    2 MB · Views: 19
  • IMG_2408.jpeg
    IMG_2408.jpeg
    2.8 MB · Views: 17
  • IMG_2395.jpeg
    IMG_2395.jpeg
    2 MB · Views: 16
  • IMG_2333.jpeg
    IMG_2333.jpeg
    3.7 MB · Views: 17
I finally took the time to finish the video of our first trip to CO using the trailer. I liteally had the trailer done 2 days before we left. We had a great time exploring some new areas such as the Poudre river / canyon area. Backcountry hiking in RMNP never gets old chasing trout. Exploring the Alpine Loop and surrounding areas was a blast!

I also have had time to reflect to go over some things on the trailer. Which means I am also shopping for a more versatile welder that can handle thicker metal. Some items I plan to update over the winter are the following:

Beefier brackets for the telescopic tubing
raised or improved fenders for more tire clearance
add a possible 270 awning
Possibly move the power station to the tongue box...but that would require a new tongue box and create a snowball effect of change...


Forum statistics

Threads
188,206
Messages
2,903,763
Members
229,665
Latest member
SANelson
Top