Barn Door for JK factory hardtops

jscherb

Expedition Leader
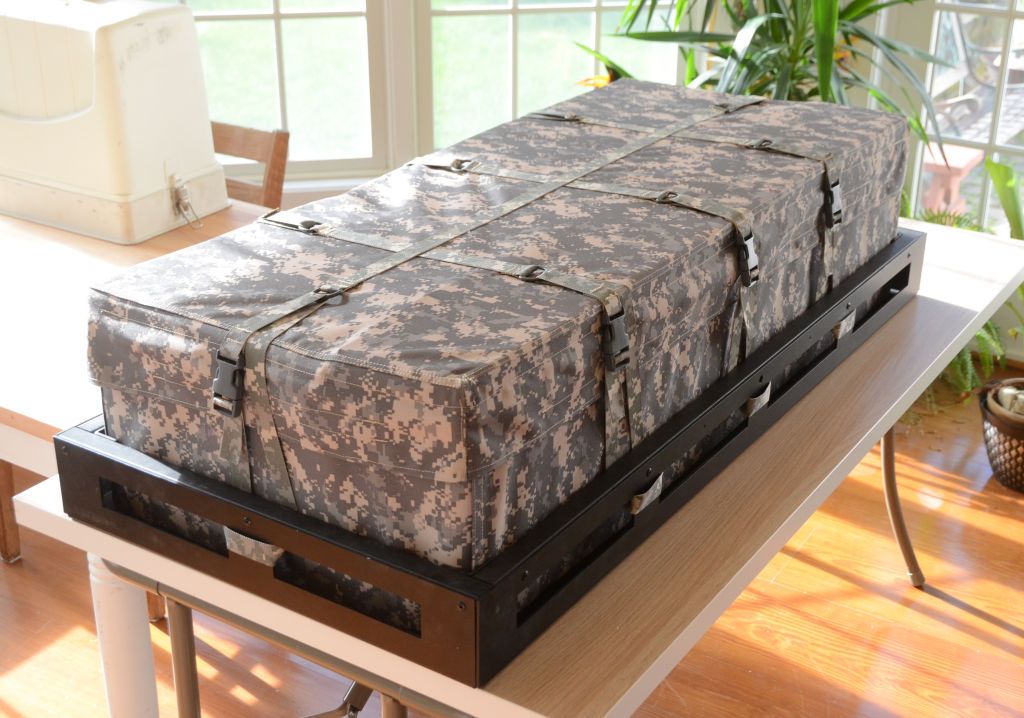
While I'm on the subject of sewing...

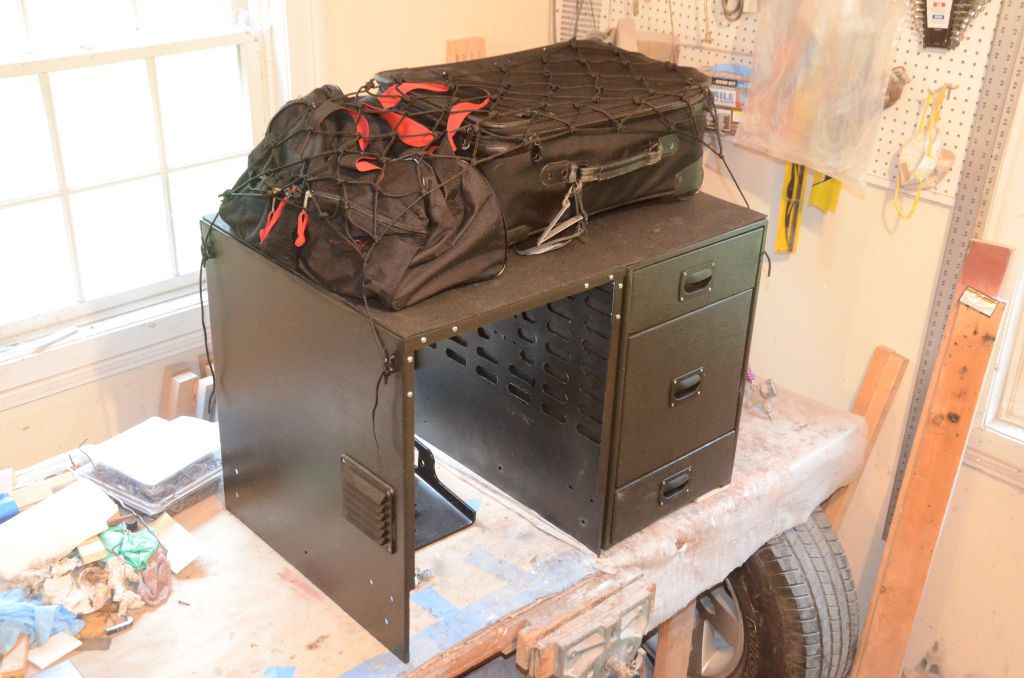
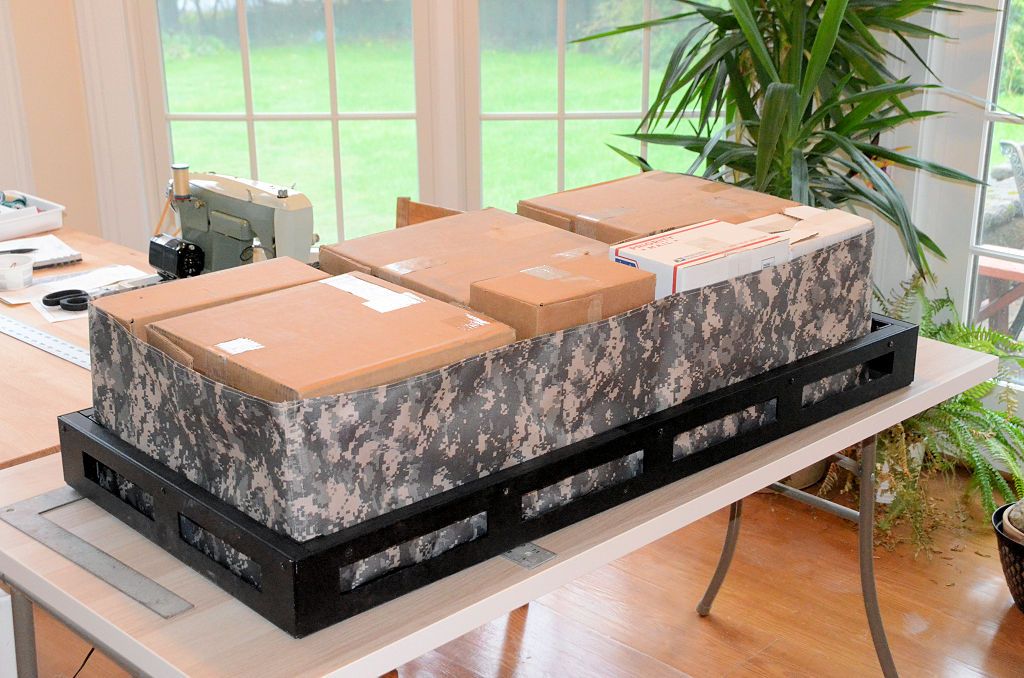
A few weeks ago I tested a cargo net on top of the Trail Kitchen:

CargoNet1_zpsnjmfk8qv.jpg


I had modified a cargo net I found at a u-pull junkyard for that test, I think it came from a minivan. It was made of elastic netting. Being elastic, I felt that it probably wouldn't contain the cargo as well as necessary on a rough trail.

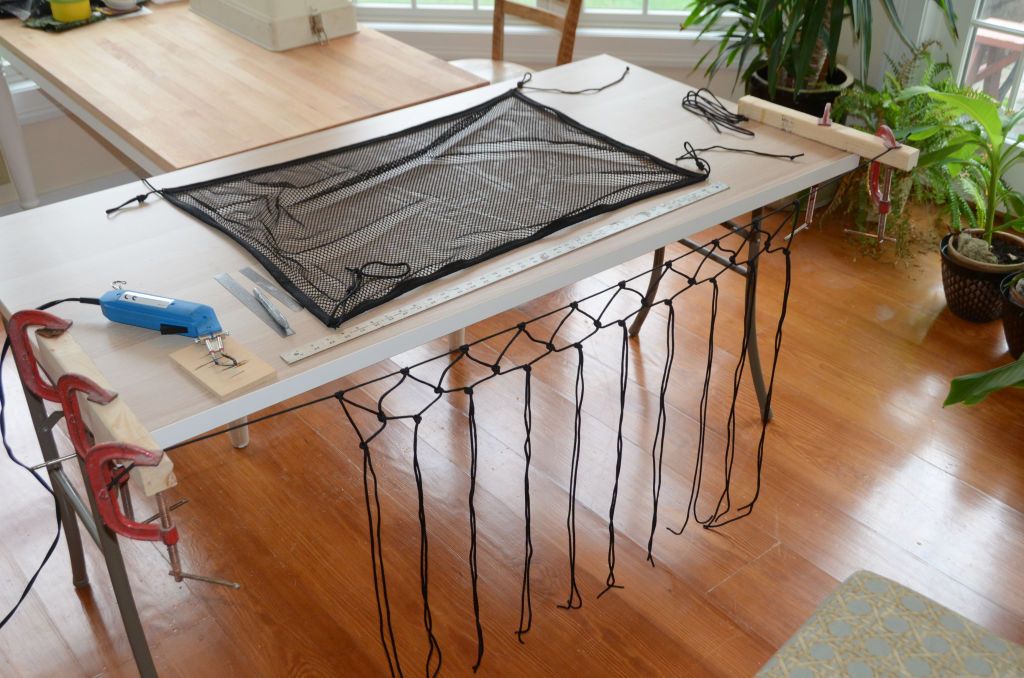
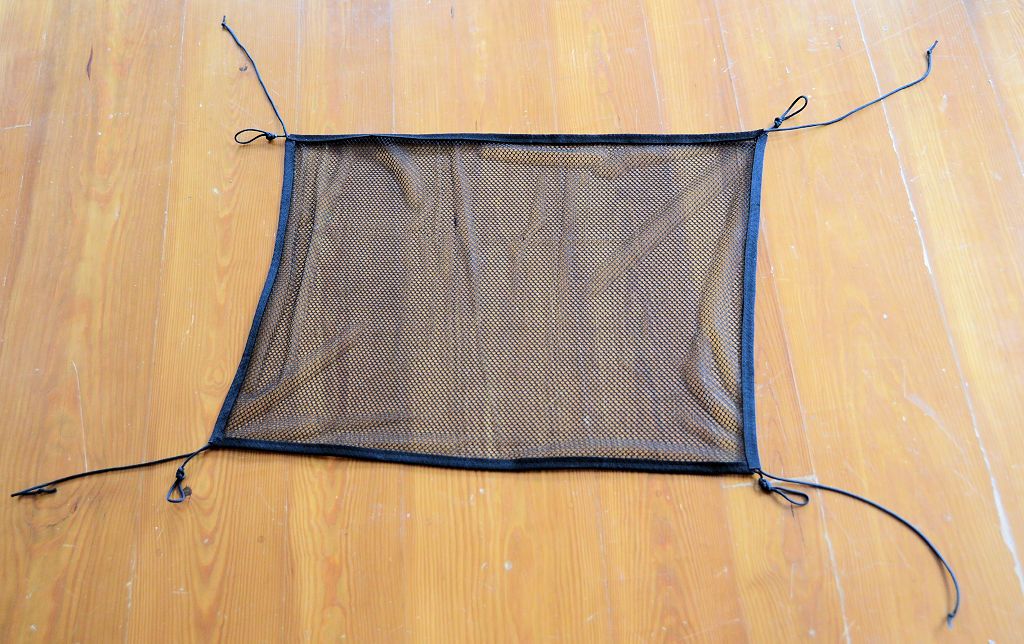
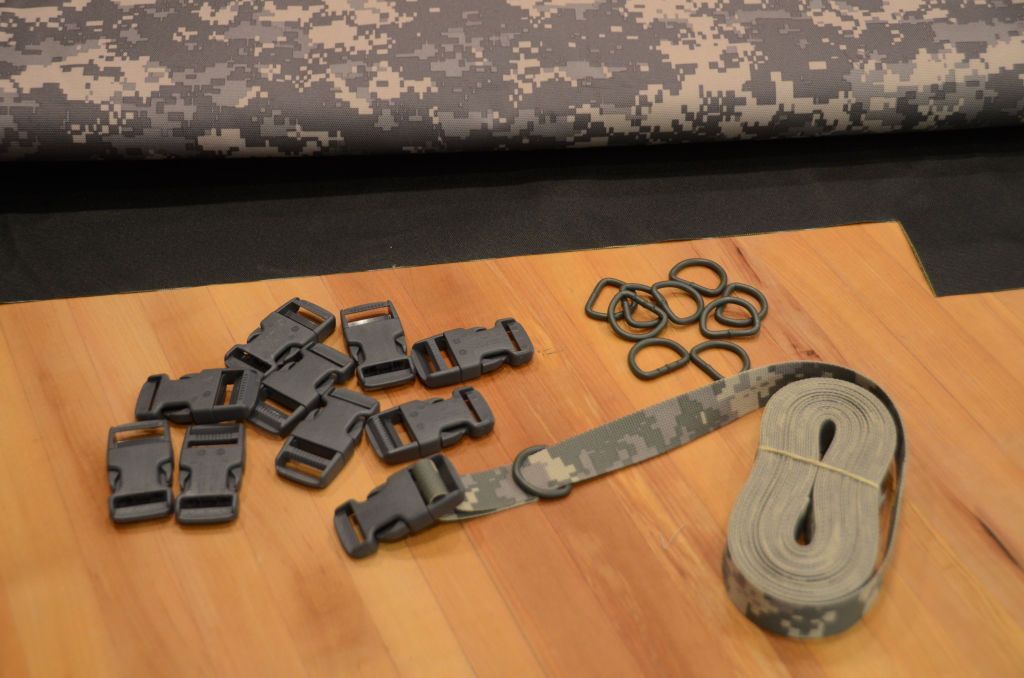
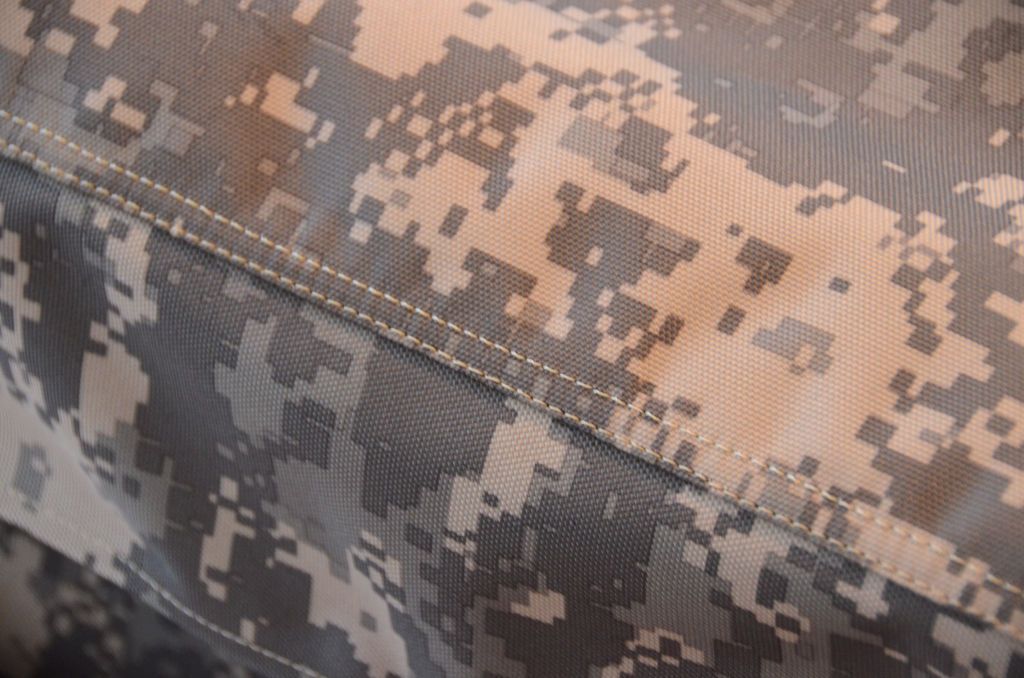
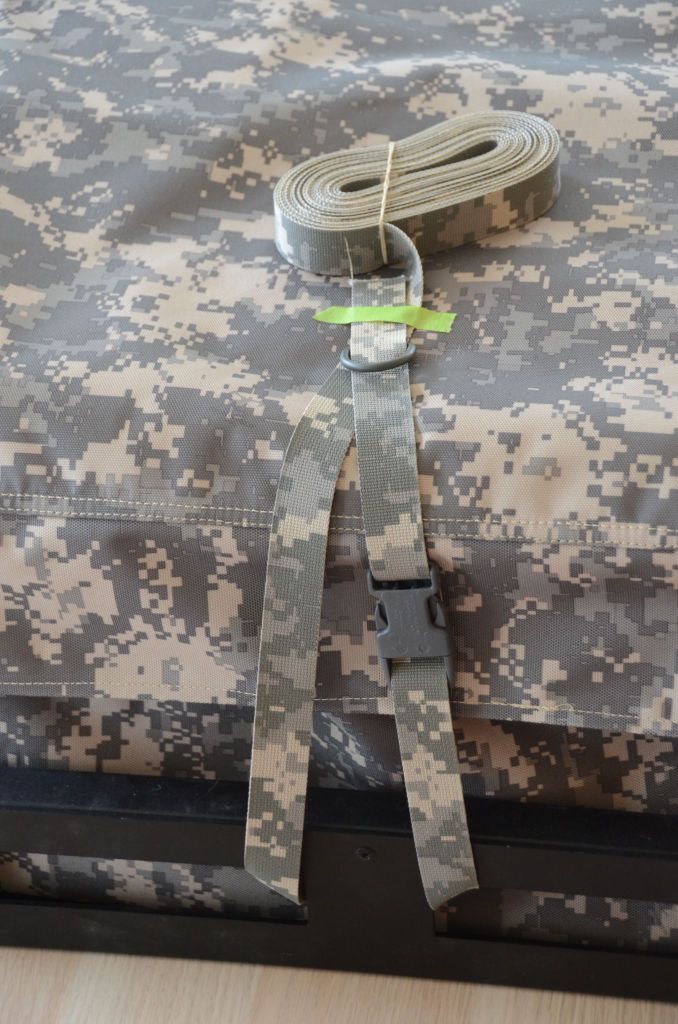
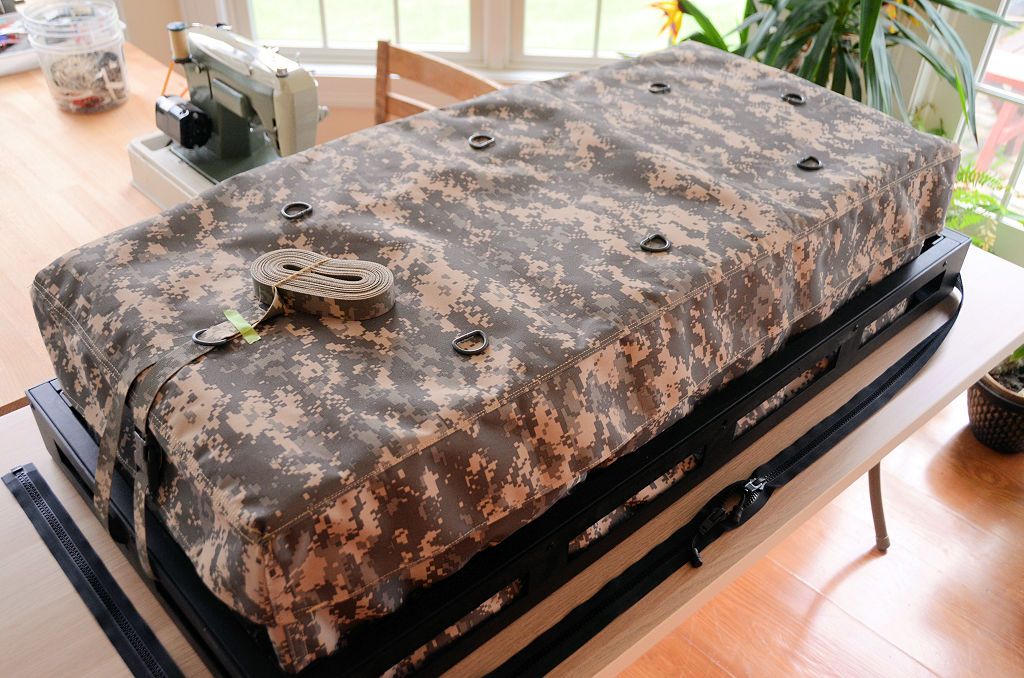
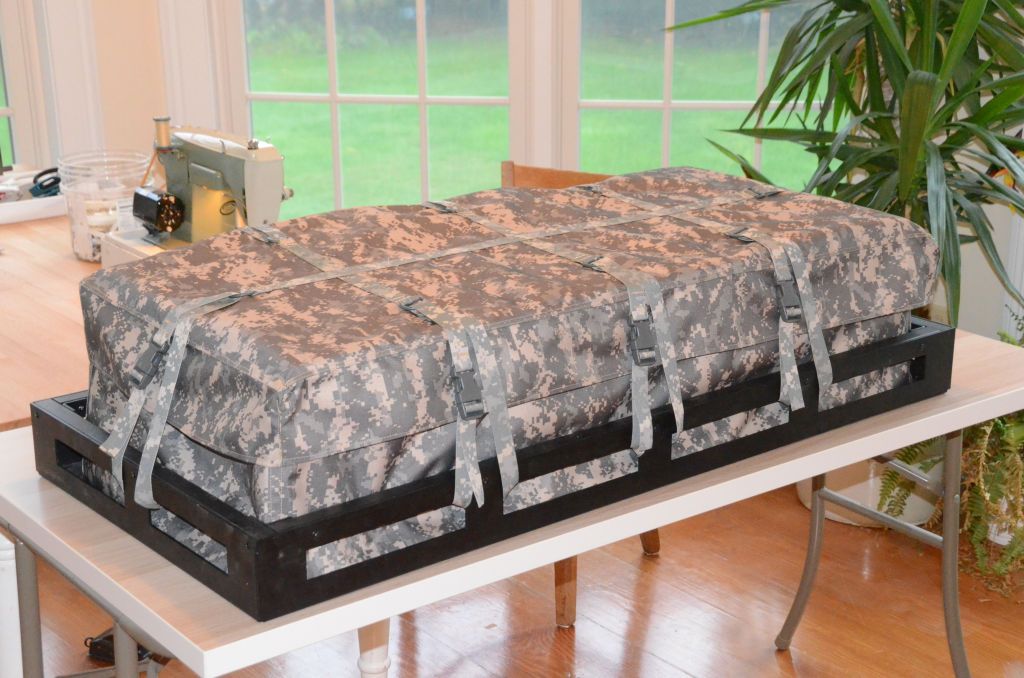
This morning I sewed a new net, this one is made from a non-elastic fabric. I've hemmed the net with polyester webbing, and inside that webbing I've put tie-down cords made from paracord. One end of each cord has a loop to be used on the cleats on each corner of the kitchen enclosure/drawer cabinet and the other end does not have a loop, this allows it to be adjusted to correct length for the load and secured on the cleats with a simple cleat hitch.

NetJoann1_zpsihueytau.jpg


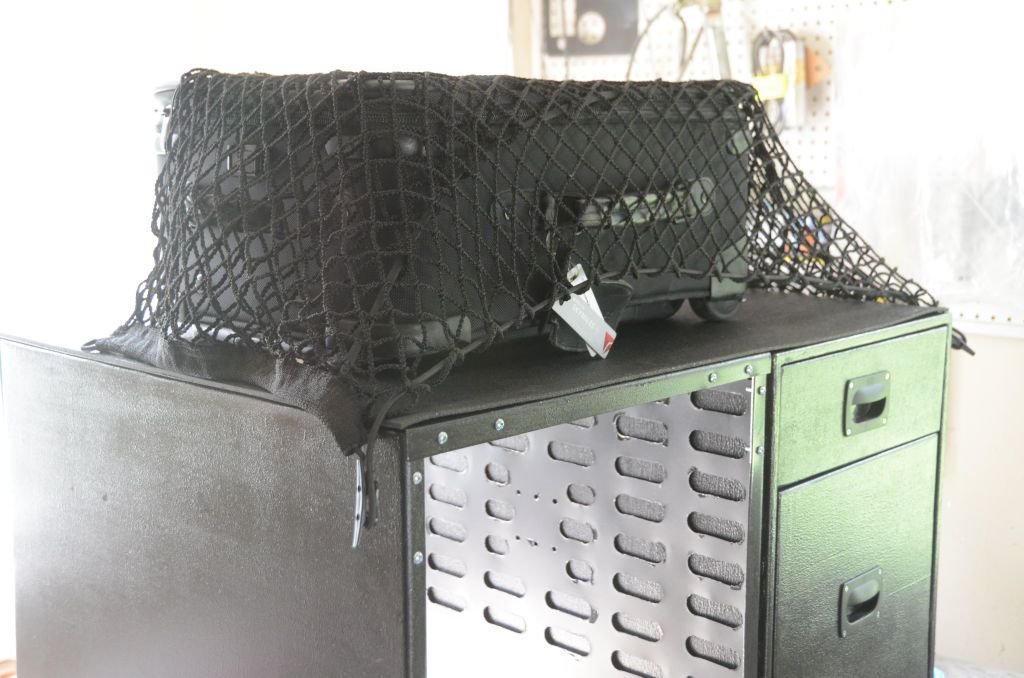
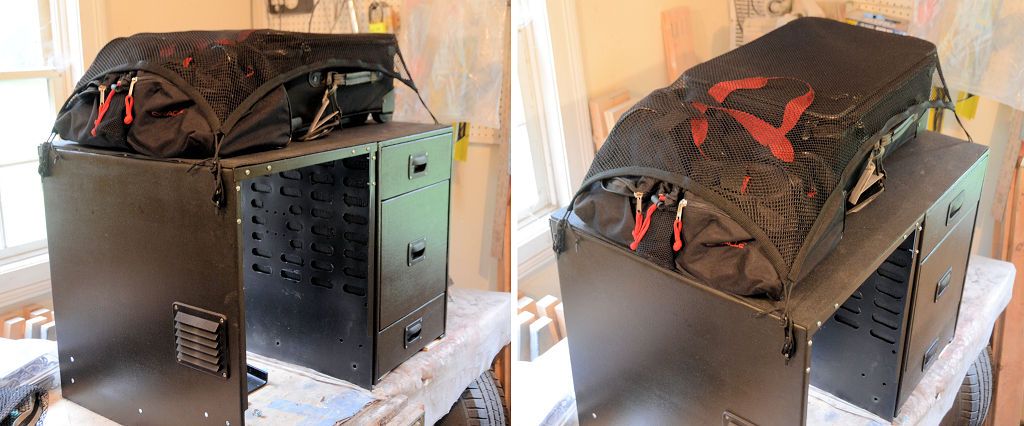
Trying to push the cargo off the kitchen, I found that this net retains the cargo very well and I think it will perform very well on a rough trail, or during a panic stop on the road.

NetJoann2_zps12r1vdmw.jpg


I was also planning to try tying a net completely out of paracord, but I'm very happy with this one so maybe I'll skip that project.
 

jscherb

Expedition Leader
Since I've had Donny's half doors on hand I've been able to do a few final tweaks to the fit - I can now call this project complete. The rears need the same tweaks as the fronts, but even without actual rear half doors I can make the changes to finish them. A few photos of the completed fronts...

HalfDoorTesting_zpsosilk3y5.jpg


FinalDriversSide_zpsbpzmae1u.jpg


A view from the driver's seat:

FinalDriverView_zpsk4adcryt.jpg


I've been driving with them for about two weeks now, both around town and on the highway up to 75mph and I'm very happy with their performance. They're so much nicer than the factory soft uppers, and something I'd be happy using all year. I really need to get my own set of half doors now (or maybe I'll build some in fiberglass).
 

jscherb

Expedition Leader
I started work on the cargo bag for the Overland Rack today and finished the bottom. Sewing it takes a while because I'm using double stitched seams that will be very weather resistant (for the sewing people: flat felled seams, french seams and single flat felled seams). I've got the rack basket in the sewing room for sizing, here's the bag in the basket with some boxes to give it shape for now:

BagBottom_zpsitj4oxhu.jpg


The fabric I'm using is coated Cordura nylon, so it's waterproof. I managed to find a fabric that's black on the inside instead of off-white so it won't show dirt as much. I've also got camo d-rings and parachute buckles for the straps, and I managed to find double-sided ACU webbing for the straps - there's no "wrong side" to the webbing so no matter how the straps are used they'll look good.

Materials_zpstrc1a8tw.jpg


I plan to sew the top tomorrow morning.

As a reminder, the concept drawing:

CargoBagConcept1_zpslqkttxqh.jpg
 

jscherb

Expedition Leader
Continuing with the sewing, this morning I sewed the top of the bag. I have not installed the zipper yet or any of the tie-down hardware/straps, that will be next.

BagTop1_zpsbpun18qv.jpg


A quick view of some of the seam stitching, this is a flat-felled seam, which is watertight.

BagTop2_zpssb89urlc.jpg
 

jscherb

Expedition Leader
A mockup of a tie-down strap. I'll probably do something like this, and do three across the front, three across the back, and one on each side.

StrapMockup_zps9asg9kxr.jpg


StrapMockup2_zpsywthx5ng.jpg
 
Last edited:

jscherb

Expedition Leader
Picked up the JK quick-install front receiver and the tow bar shackles from the powder coat shop this morning.

JKReceiverPowderCoat_zpsvlbpd5z8.jpg
 

jscherb

Expedition Leader
Finished up the tie-down straps this morning. There are 8 straps in all, 3 in the front, 3 in the back and 1 on each side.

Straps1_zpsoqqvcsib.jpg


In this next photo I've removed the straps to show how the rings are attached to the bag - opposite rings are sewed onto the ends of pieces of webbing that are sewn across the top of the bag so when the straps are in place, they go all the way around the top of the bag so no stress is on the bag fabric. This method provides for very strong securing of the cargo inside and there's no danger a ring will tear loose from the bag. I'm confident the Jeep could roll over on its side and the bag and its cargo would remain in place.

Straps3_zpsdamtvajo.jpg


All that's left to do to finish the bag is install the zipper that keeps the cover closed and some velcro to keep the edges of the cover below the zipper from flapping up. Hopefully I'll get to that tomorrow morning.
 

jscherb

Expedition Leader
Finished the work on the tailgate rack cargo bag. The bag's shape in all photos so far is due to a bunch of cardboard boxes inside; the design criteria is a bag that can strap down as necessary to handle small or irregularly-shaped cargo, so in many uses it won't be brick-shaped like this, it might end up looking more like a duffel bag when irregularly-shaped cargo is inside.

BagDone1_zps03igktwt.jpg


BagDone2_zpsux0ui2ki.jpg


BagDone3_zpsqugrqtcz.jpg


There's a double-pull zipper that runs around 3 sides of the bag; the back side of the top is sewn to the bottom. There are also Velcro closures below the zipper to keep the edges of the top from flapping.

ZippersAndClosure_zps36xcmfjj.jpg


One of my design criteria for this bag is that it should fold small enough to be kept in the Jeep when not needed. In this photo it's folded into a 10 x 14 package held together by two of the bag's straps.

BagFolded_zpsjgpkw7ue.jpg


I'll be putting the Overland Rack back on the Jeep in two weeks in preparation for the Jeep's appearance at SEMA, I'll post photos of the bag in place when I do that.
 

jgaz

Adventurer
Great execution on your design. It would be hard to believe that the vendor that sells your rack wouldn’t be able to sell a bunch of these to the people that buy the rack.
 

jscherb

Expedition Leader
Great execution on your design. It would be hard to believe that the vendor that sells your rack wouldn’t be able to sell a bunch of these to the people that buy the rack.
Thank you.

Actually I've got a new company interested in this bag already. I've been doing some design work for a startup company that will be launching itself in the Jeep market in the coming months... their initial product line will be custom-fit storage products for the Jeep made of leather and high-quality fabric - they noticed that pretty much all the fabric storage products on the market are cheap black or tan vinyl and they think (and I agree) that a higher-quality/higher-style line of products at a reasonable price will find good acceptance in the market. I've given them several designs for storage inside the Jeep already and they've got prototypes in the works now. They've been sending me in-progress photos of their prototypes for my input and I really like the higher-style/higher-quality look and the leather.

I've been showing them this design and the progress photos as I've been sewing this bag and they're very interested in it. I think they'd do it in a nylon fabric like I did, but they've got some cool design ideas like leather accents (maybe the straps). And it turns out that two or perhaps three different sizes of this bag will fit most of the dozen or so tailgate racks on the market, so they think this could be a good product for them.

If anyone has any suggestions on the design of this bag or any other storage ideas you'd like to see I'll pass them along the this company.
 

jscherb

Expedition Leader
This morning I made my first attempt at tying a cargo net out of paracord.

NetTying2_zps93uvmb4f.jpg


I followed the steps in this video:


This small net took a little over an hour, although about half of that was learning time so I could do another one in 30-45 minutes. Here's the setup:

NetTying1_zpsax9sfmey.jpg


My previous net is sitting on the table for size. I did all the cutting of the paracord with my hotknife (the blue tool on the table). I use it a lot for cutting synthetic fabric like nylon, acrylic, polyester. It works great on webbing too; the heat cuts through and melts the edges together so nothing frays.

The video shows how to tie a net but he doesn't talk about how long the cords should be to end up with a specific size net and as a result, mine ended up too narrow - if you look at the first photo my vertical cords reach the floor, it turns out to get a net that would be as wide as I wanted it to be I'd need at least two feet more on the end of those cords. I used about 60 feet of paracord for this net, and the vertical cords were 6' long, doubled so three feet to the floor, they needed to be maybe 10', so to get the net to be the size I really want I'd need about 110' of paracord.

This method definitely produces a workable net, but I like the net I sewed from net fabric better, I've posted these photos before but here they are again for comparison...

NetJoann2_zps12r1vdmw.jpg
 

Forum statistics

Threads
187,243
Messages
2,892,511
Members
228,046
Latest member
evilgirl
Top