You are using an out of date browser. It may not display this or other websites correctly.
You should upgrade or use an alternative browser.
You should upgrade or use an alternative browser.
Barn Door for JK factory hardtops
- Thread starter jscherb
- Start date
jscherb
Expedition Leader
This Jeep was in the show and shine area at the Bantam Show.
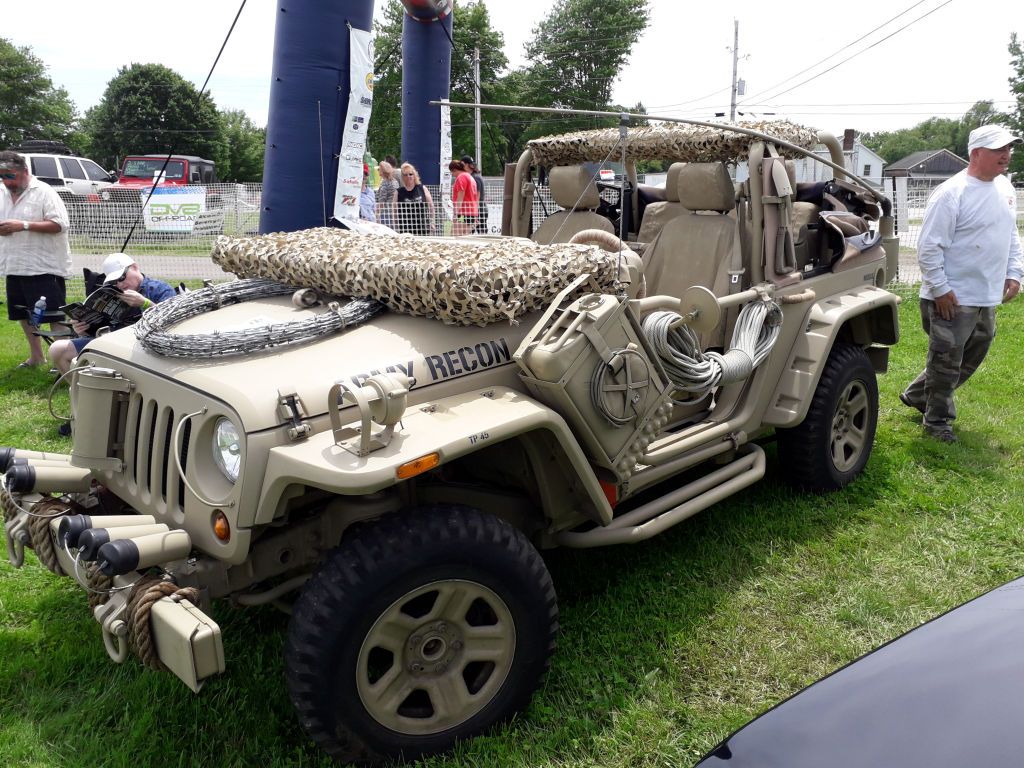
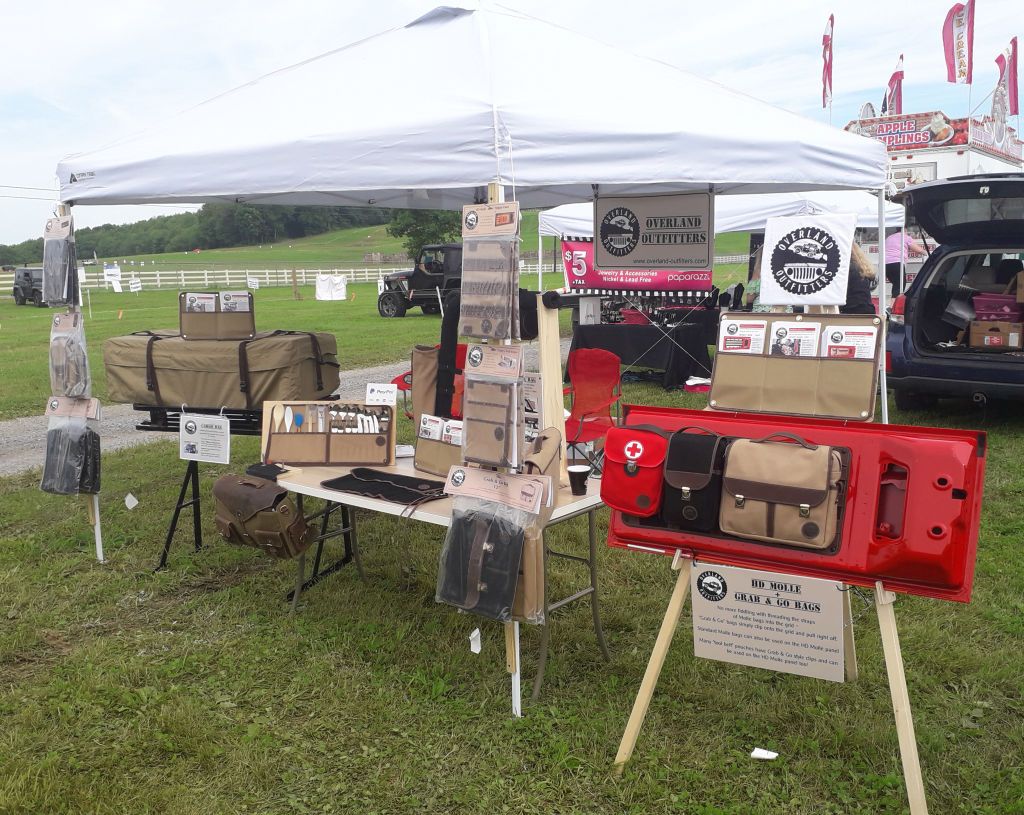
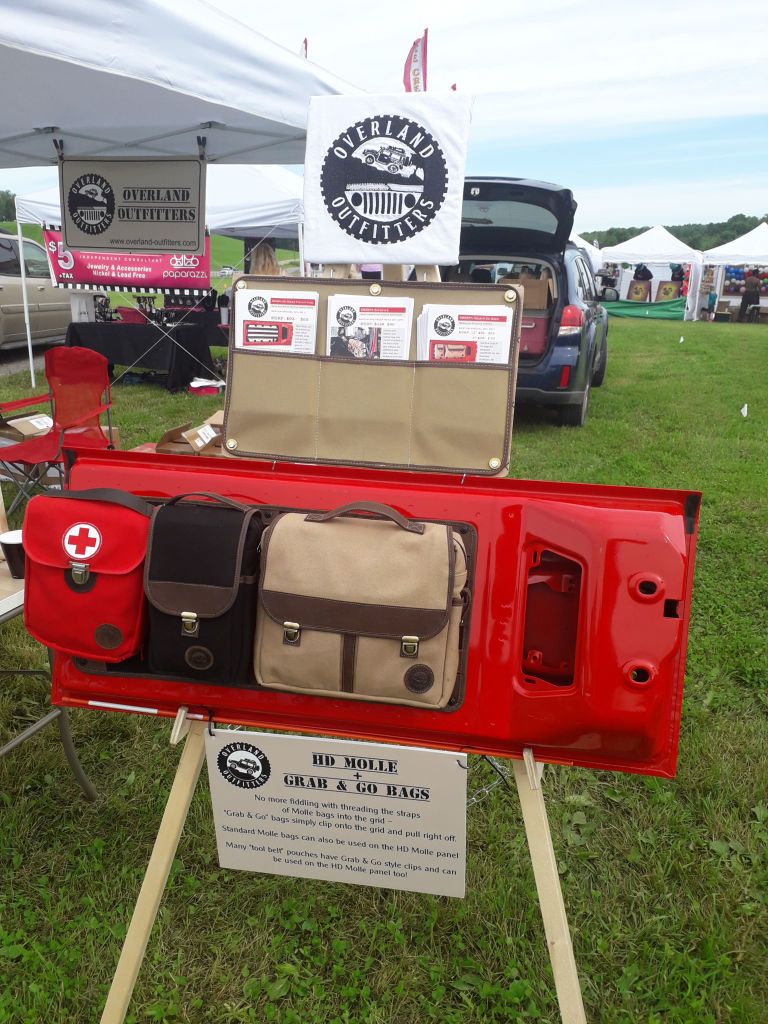
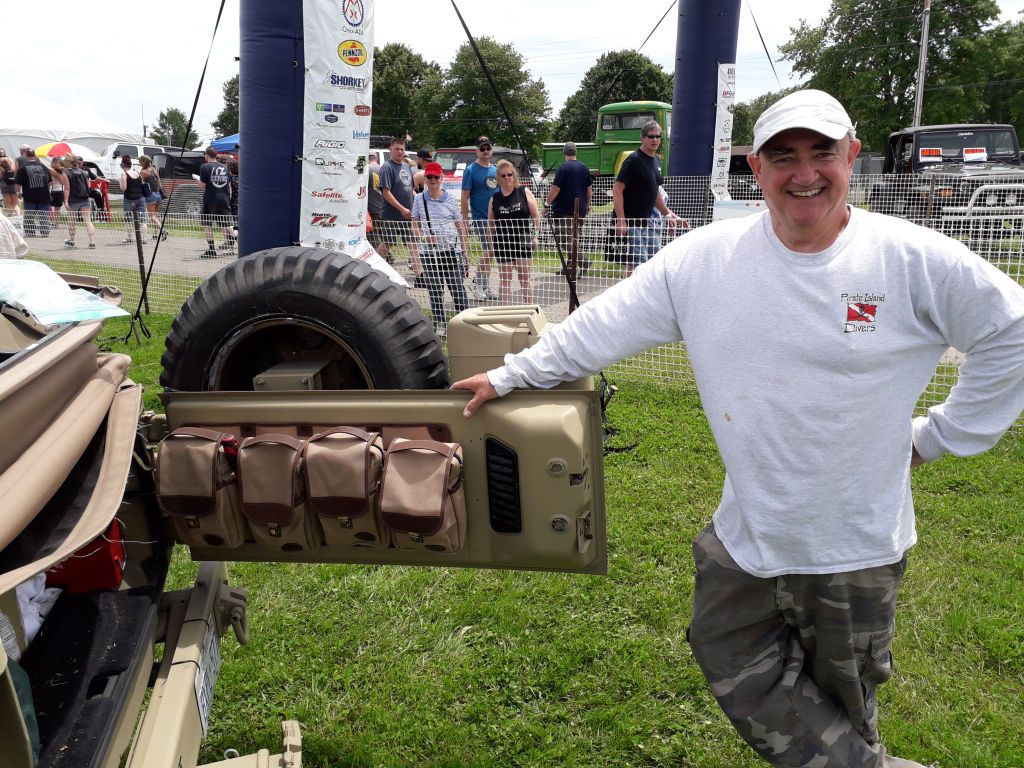
I wouldn't have gone into the show and shine area but that the guy who owns the Jeep came by the Overland Outfitters booth and bought an HD Molle Tailgate Panel and 4 Grab & Go bags, and asked if I would install them for him. I was happy to oblige, here's the happy Jeep owner with his new tailgate panel and pouches, he loaded them up with tools and other stuff the second I finished putting his panel in place. I think it's a perfect addition to his desert military theme.
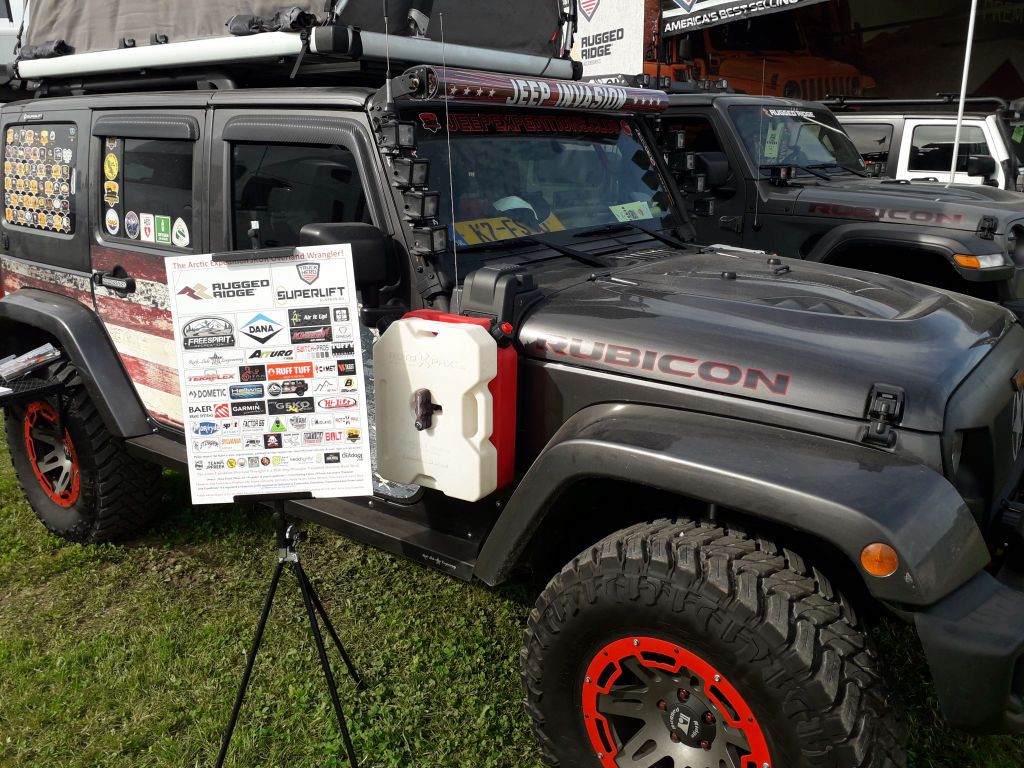
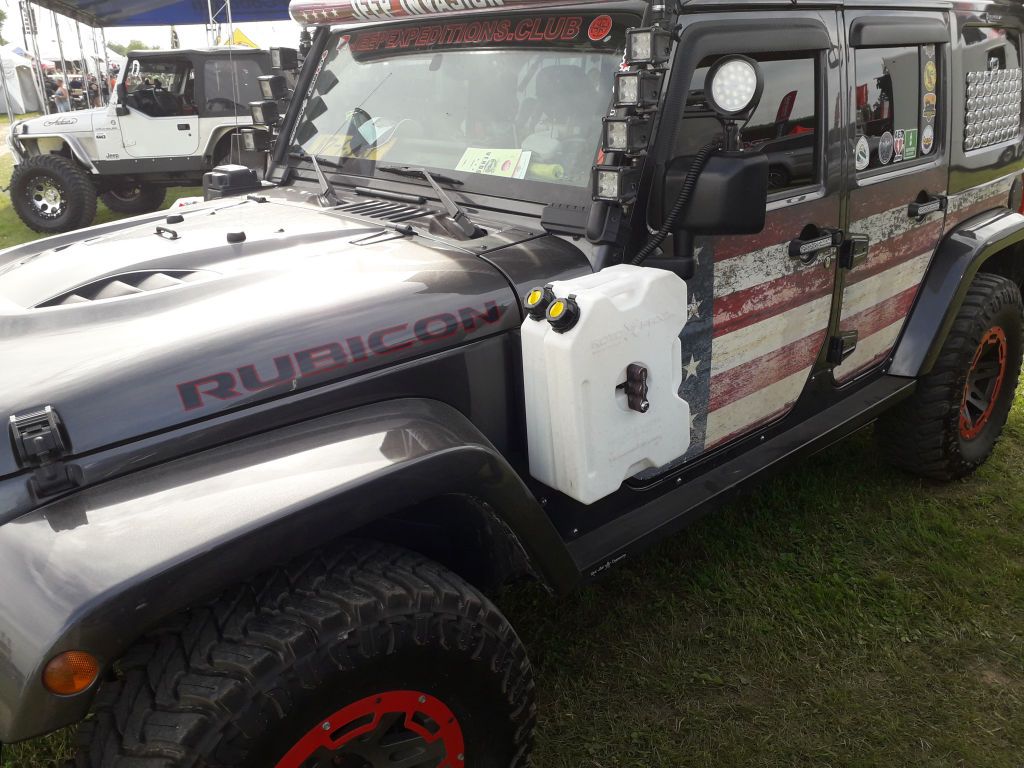
And it's always fun to see things I've designed out in the wild. Ran across this Jeep at the show today, its got the Rotopax side mounts on both sides, each with two 2-gallon containers...

I wouldn't have gone into the show and shine area but that the guy who owns the Jeep came by the Overland Outfitters booth and bought an HD Molle Tailgate Panel and 4 Grab & Go bags, and asked if I would install them for him. I was happy to oblige, here's the happy Jeep owner with his new tailgate panel and pouches, he loaded them up with tools and other stuff the second I finished putting his panel in place. I think it's a perfect addition to his desert military theme.

And it's always fun to see things I've designed out in the wild. Ran across this Jeep at the show today, its got the Rotopax side mounts on both sides, each with two 2-gallon containers...


jscherb
Expedition Leader
I got home late last night from the Bantam Jeep Fest and my first task this morning was to turn the Jeep back into a daily driver, so I removed the roof top tent, the roof rack basket and the Trail Kitchen. All of that took less than an hour. I've got it worked out so I can do it very easily by myself, without any heavy lifting. What I do might help others so here are some photos. (These weren't taken this morning, they were taken at various points in the past but they illustrate exactly what I did this morning.
First thing was to remove the RTT. I do that with two 10' 2x8's set up as a ramp. Once I unbolt the RTT from the rack (4 bolts), I let gravity to the hard work, I push it over onto the boards and slide it down.
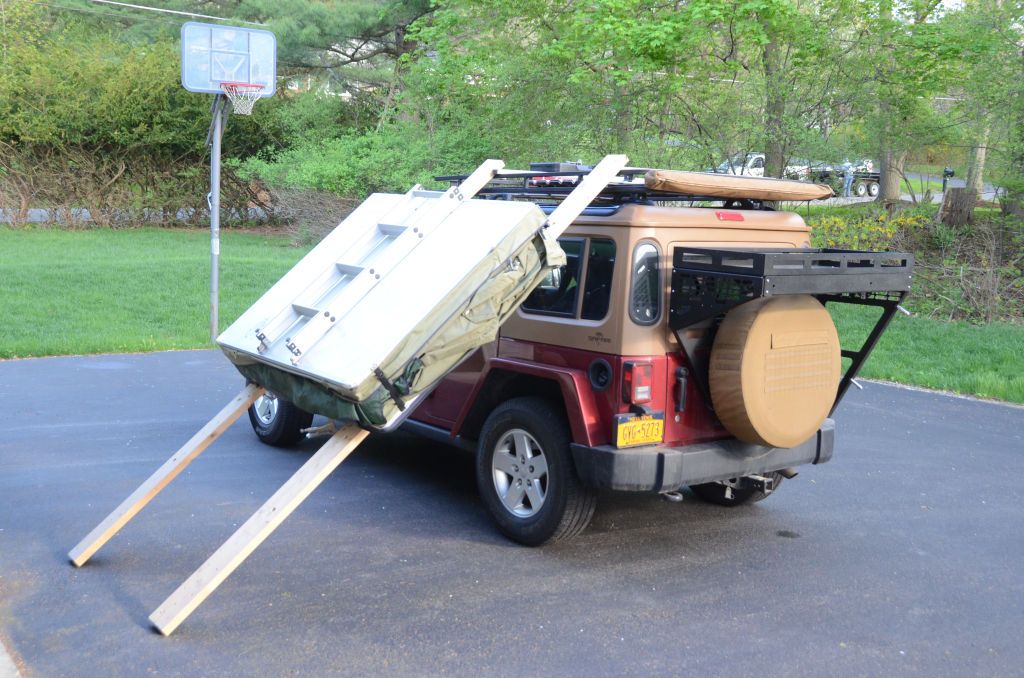
I install the RTT the same way, I just push it up the ramp and over onto the roof rack. No heavy lifting.
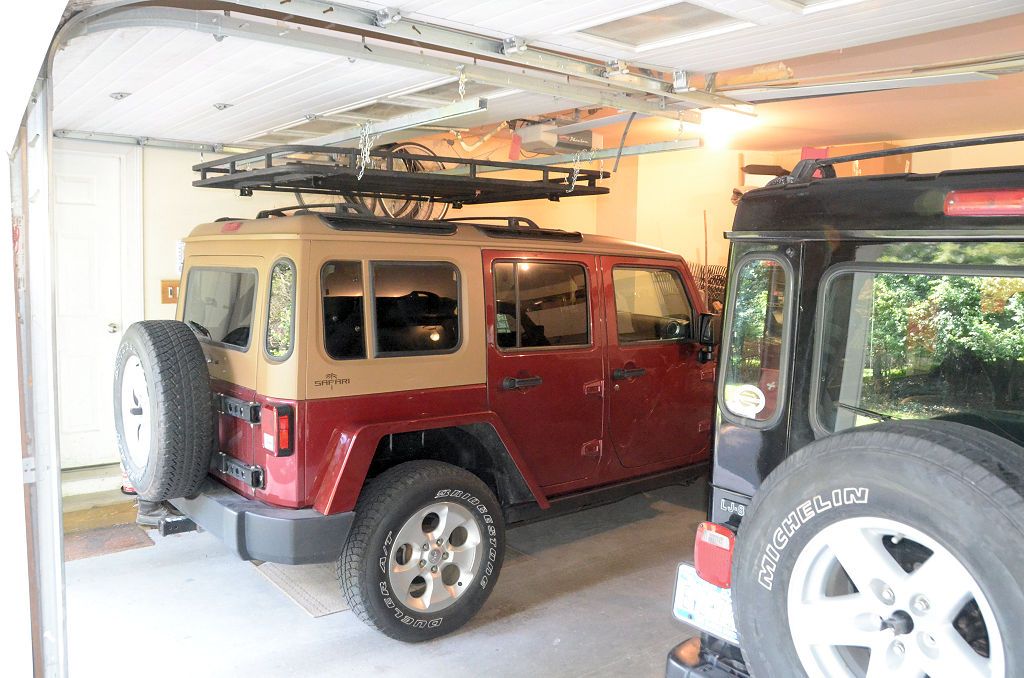
Then the rack basket comes off, it's roughly 4x6 and awkward and heavy for one person, so to remove it I drive into the garage. I've got crossbars hanging from the garage door rails that I hang the rack basket on, all I've got to do is unbolt the rack basket from the rack rails on the roof, lift each corner a few inches and secure it to the crossbars with a u-bolt. Once secured, it's a few inches above the Jeep and I can drive out and in under it. BTW I use this same basket on both Jeeps so to install it I just drive the Jeep I want to use it on under the rack, undo the u-bolts and let it down onto the rack rails on the roof. (In this photo the rack is held to the crossbars with chains but since the photo was taken I switched to u-bolts, which are much quicker and easier than the chains).
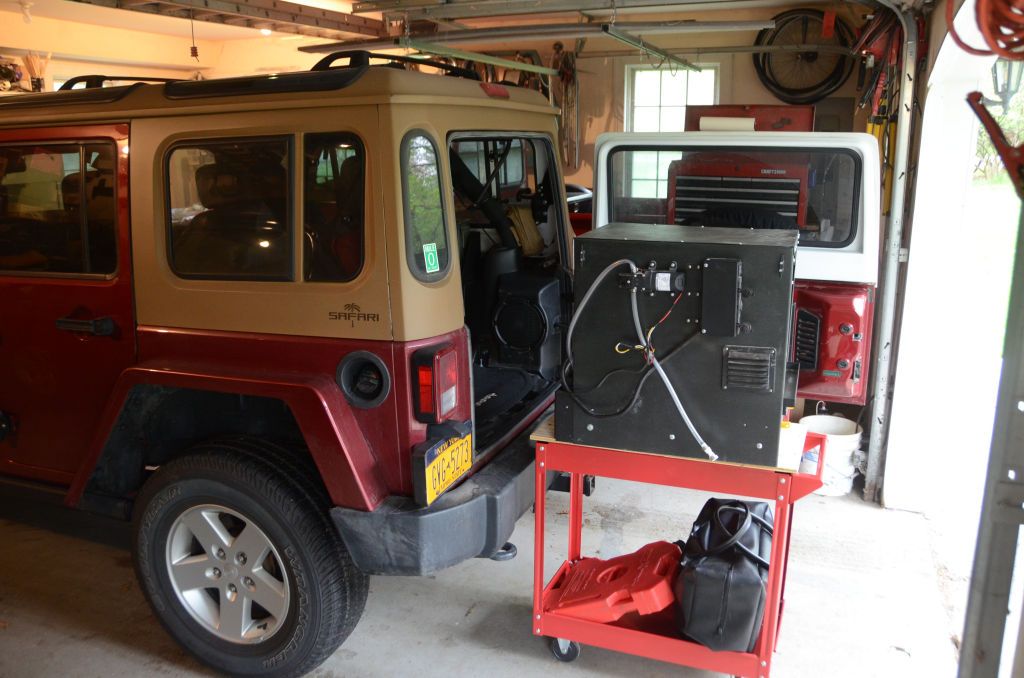
And finally, the kitchen comes out. First I remove the fridge, I carry that into the kitchen in the house to unload its contents and wash it out. Then the Trail Kitchen comes out of the Jeep. It's pretty heavy because it's sturdy enough to take the abuse of the trail, so I'd rather not lift it if I don't have to. The drawer unit attaches to the main kitchen with 4 bolts and then lifts out (the drawers are light and easy to lift). Then I remove the 3 bolts that secure the main kitchen to the Jeep and slide it out onto a Harbor Freight tool cart. No lifting, and they I can roll the kitchen to a corner of the garage for storage. Removal of the fridge, drawer unit and main kitchen takes all of 10 minutes.
Total time for all of the above is less than an hour, installation takes about the same amount of time.
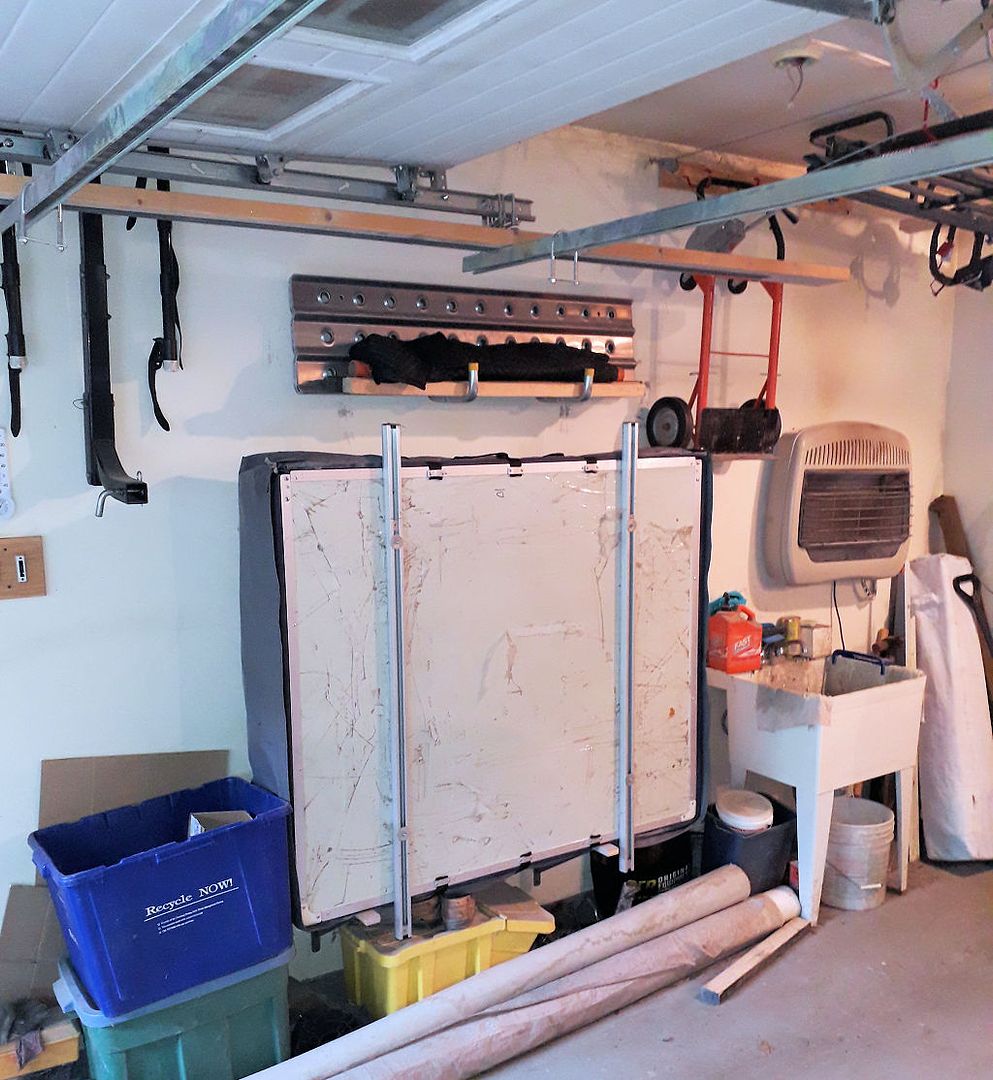
One more thing, to store the RTT I've installed shelf brackets on the garage wall about a foot above the floor. The RTT goes up on those brackets agains the wall so it's off the floor and it doesn't take up much space. Also visible in this photo are the crossbars and the u-bolts that I hang the rack to.
All of the above is very efficient and makes it easy to singlehandedly install and remove these heavy and awkward items very quickly. I hope this helps someone else.
First thing was to remove the RTT. I do that with two 10' 2x8's set up as a ramp. Once I unbolt the RTT from the rack (4 bolts), I let gravity to the hard work, I push it over onto the boards and slide it down.

I install the RTT the same way, I just push it up the ramp and over onto the roof rack. No heavy lifting.
Then the rack basket comes off, it's roughly 4x6 and awkward and heavy for one person, so to remove it I drive into the garage. I've got crossbars hanging from the garage door rails that I hang the rack basket on, all I've got to do is unbolt the rack basket from the rack rails on the roof, lift each corner a few inches and secure it to the crossbars with a u-bolt. Once secured, it's a few inches above the Jeep and I can drive out and in under it. BTW I use this same basket on both Jeeps so to install it I just drive the Jeep I want to use it on under the rack, undo the u-bolts and let it down onto the rack rails on the roof. (In this photo the rack is held to the crossbars with chains but since the photo was taken I switched to u-bolts, which are much quicker and easier than the chains).

And finally, the kitchen comes out. First I remove the fridge, I carry that into the kitchen in the house to unload its contents and wash it out. Then the Trail Kitchen comes out of the Jeep. It's pretty heavy because it's sturdy enough to take the abuse of the trail, so I'd rather not lift it if I don't have to. The drawer unit attaches to the main kitchen with 4 bolts and then lifts out (the drawers are light and easy to lift). Then I remove the 3 bolts that secure the main kitchen to the Jeep and slide it out onto a Harbor Freight tool cart. No lifting, and they I can roll the kitchen to a corner of the garage for storage. Removal of the fridge, drawer unit and main kitchen takes all of 10 minutes.

Total time for all of the above is less than an hour, installation takes about the same amount of time.
One more thing, to store the RTT I've installed shelf brackets on the garage wall about a foot above the floor. The RTT goes up on those brackets agains the wall so it's off the floor and it doesn't take up much space. Also visible in this photo are the crossbars and the u-bolts that I hang the rack to.

All of the above is very efficient and makes it easy to singlehandedly install and remove these heavy and awkward items very quickly. I hope this helps someone else.
Last edited:
jscherb
Expedition Leader
I've got two screws in the end of each 2x6 - the screws stick out about 3/4", and one goes on each side of the rail on the top of the rack. The screws straddle the rail and prevent the 2x6's from sliding.Hi Jeff, Thank you for sharing! It appears to us that the rails on the bottom of your RTT may keep the ramps from sliding sideways but how do you keep the ramps from sliding off the jeep? We also like your setup for installing and removing your roof rack.
jscherb
Expedition Leader
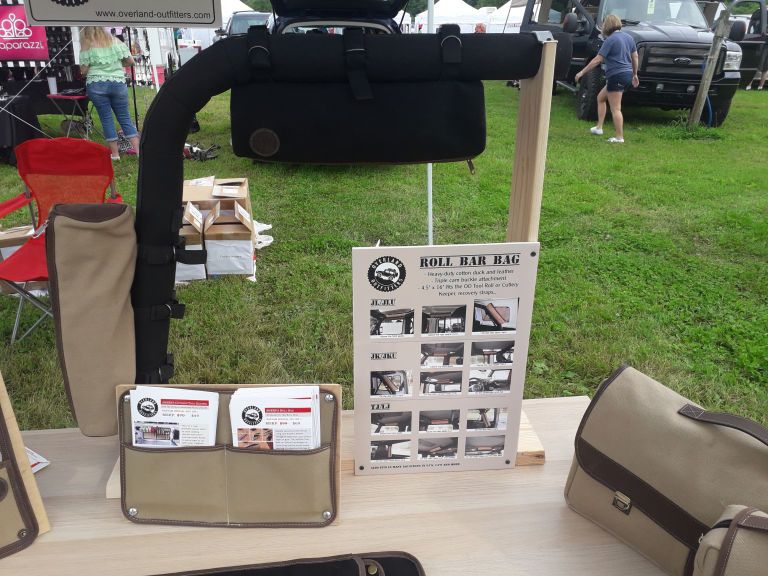
I've been using the new Overland Outfitters Rollbag in my Jeeps and I'm finding it very useful. Here's one in my JKU, when I have the Trail Kitchen in the Jeep I use this one with a Cutlery Keeper rolled up inside to hold utensils.
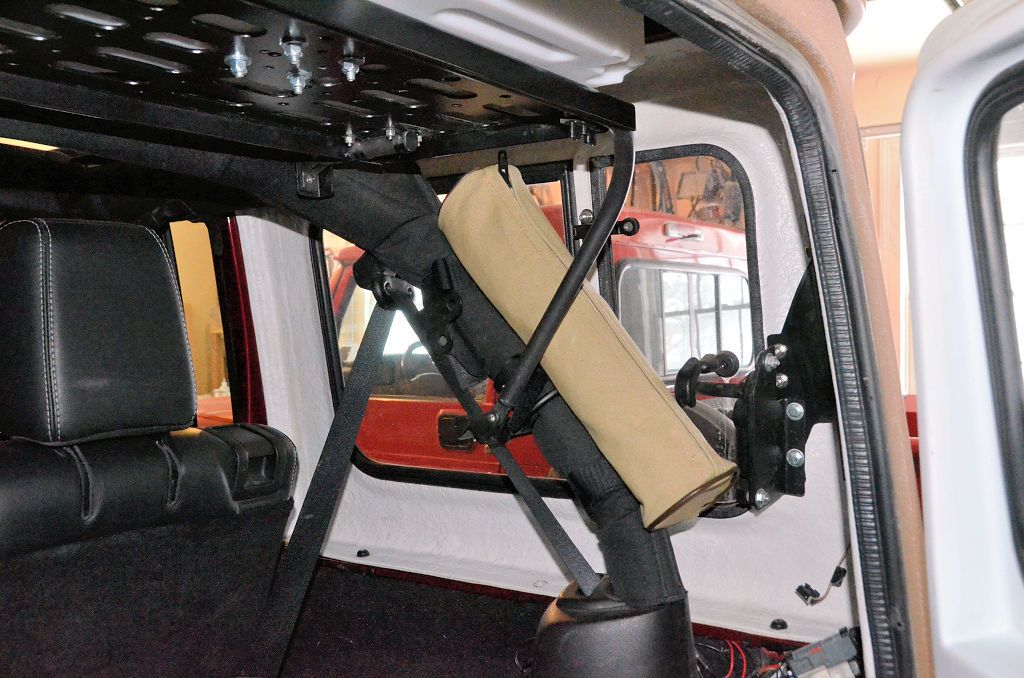
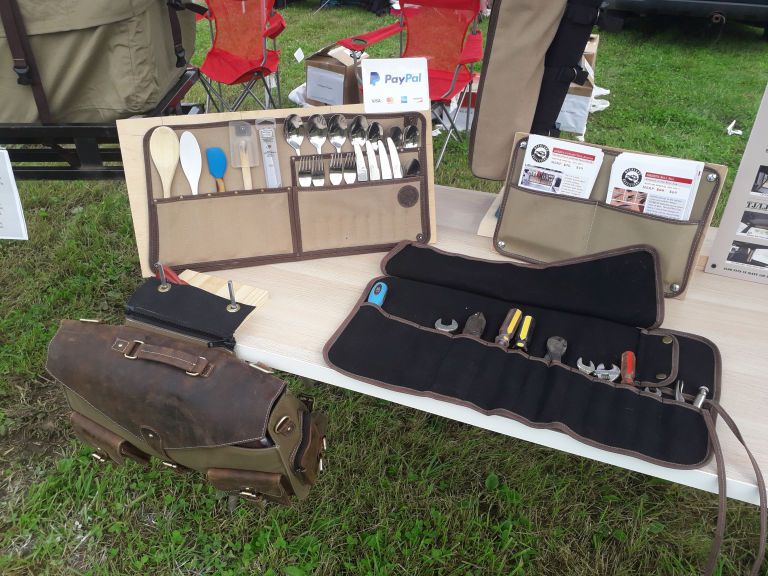
I use another one with a tool roll in it; I move it from Jeep to Jeep depending on which Jeep I'm taking on a long trip at the time. The tool roll I'm using is also from Overland Outfitters, it just came on the market and they were selling them at the Bantam Jeep Fest last weekend.

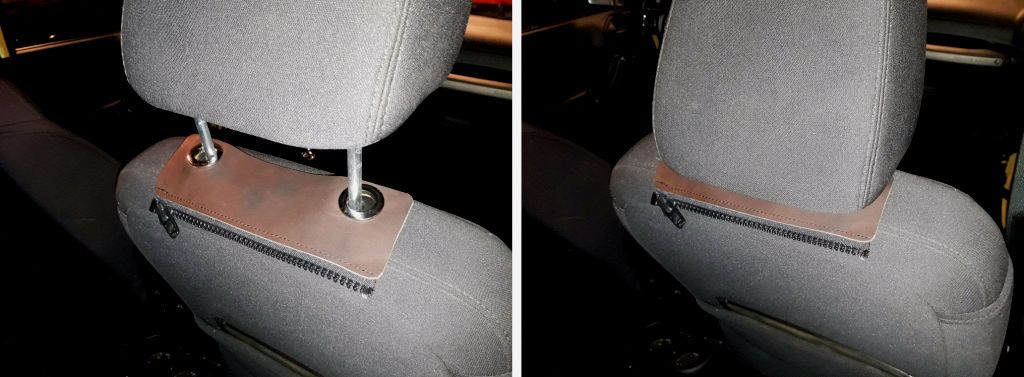
I was thinking having some storage on the back of the seat might be useful, so yesterday I sewed a zipper on a Rollbag attach it to the seat using the same zipper that the Backpack bag uses.
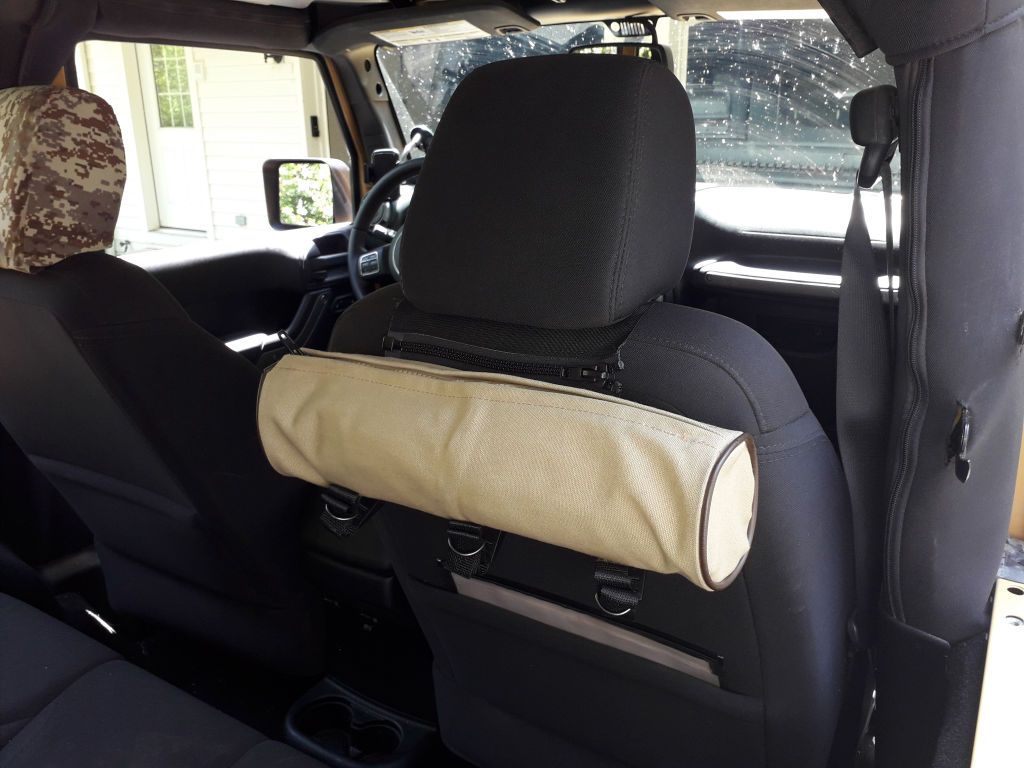
A tool roll with tools is in the bag in the photo above.
The attachment:
I don't need something as large as a Backpack bag (pictured below) on the seat, but I really like the Rollbag there and I've suggested to Overland Outfitters that they consider offering a Rollbag that mounts on the seat like the one above. Maybe others would find it useful too.
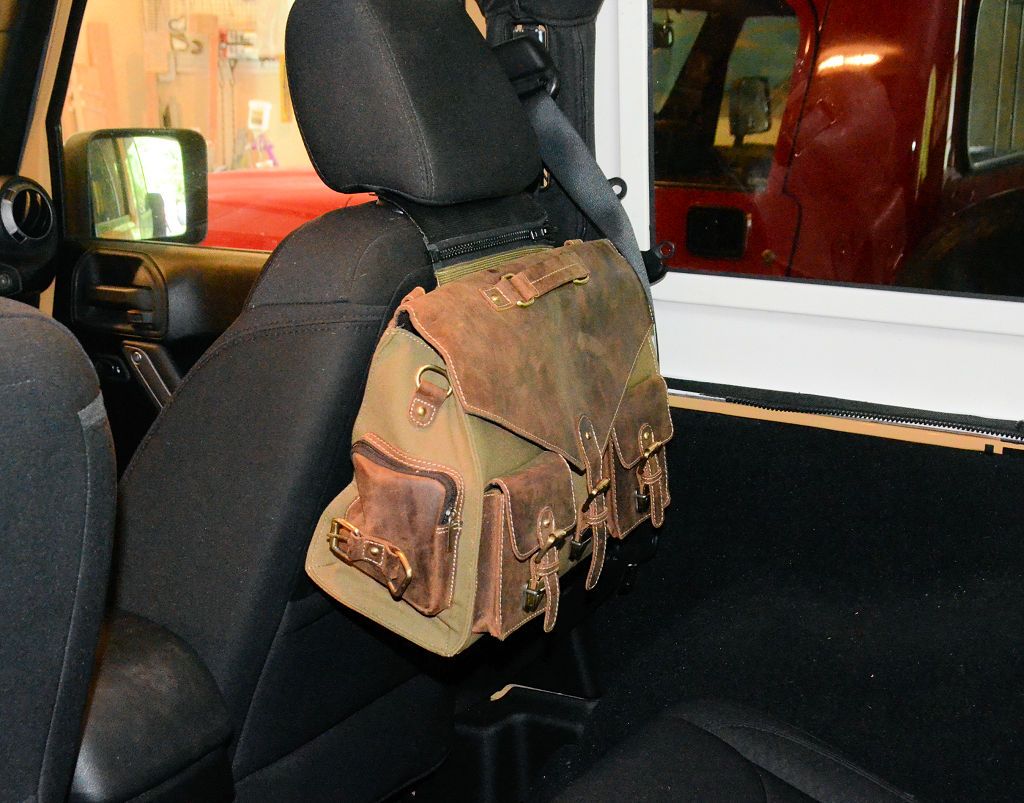
In addition to the Rollbag and the Backback, I'm working on a few other ideas that could go on the seat and use the same attachment. If anyone has any other ideas for things to go on the back of the seat let me know.

I use another one with a tool roll in it; I move it from Jeep to Jeep depending on which Jeep I'm taking on a long trip at the time. The tool roll I'm using is also from Overland Outfitters, it just came on the market and they were selling them at the Bantam Jeep Fest last weekend.

I was thinking having some storage on the back of the seat might be useful, so yesterday I sewed a zipper on a Rollbag attach it to the seat using the same zipper that the Backpack bag uses.

A tool roll with tools is in the bag in the photo above.
The attachment:

I don't need something as large as a Backpack bag (pictured below) on the seat, but I really like the Rollbag there and I've suggested to Overland Outfitters that they consider offering a Rollbag that mounts on the seat like the one above. Maybe others would find it useful too.

In addition to the Rollbag and the Backback, I'm working on a few other ideas that could go on the seat and use the same attachment. If anyone has any other ideas for things to go on the back of the seat let me know.
jscherb
Expedition Leader
A few weeks ago a company sent me a switch panel to test and review. This is one of their advertising images for the panel:
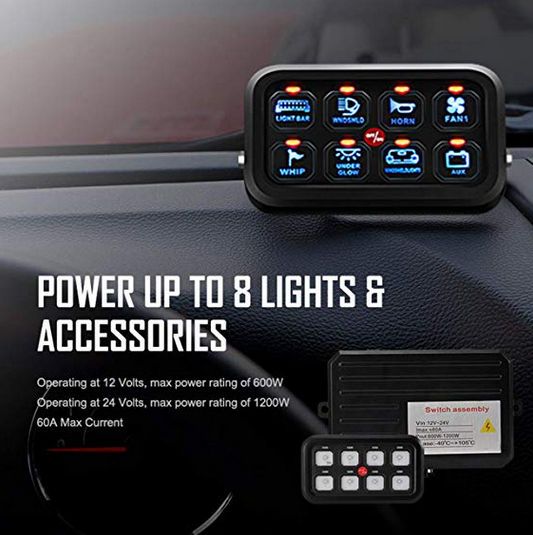
I posted a review here: https://www.expeditionportal.com/fo...ch-accessory-power-panel.206225/#post-2640852

I posted a review here: https://www.expeditionportal.com/fo...ch-accessory-power-panel.206225/#post-2640852
jscherb
Expedition Leader
This fridge arrived this morning, courtesy of Dometic. Based on the success of the Trail Kitchen design, I've been asked to design a pull-out kitchen for an off-road trailer manufacturer (you'd know them if I were allowed to mention their name at this point). The current Trail Kitchen (and typical fridges used in Jeeps) are not idea for this trailer, so I asked Dometic for one of their drawer fridges. These fridges are most often used in marine and RV applications and rarely, if ever, seen in Jeeps and other off-road applications but they have a 30-qt. capacity and have a much lower profile than the typical top-load fridge.
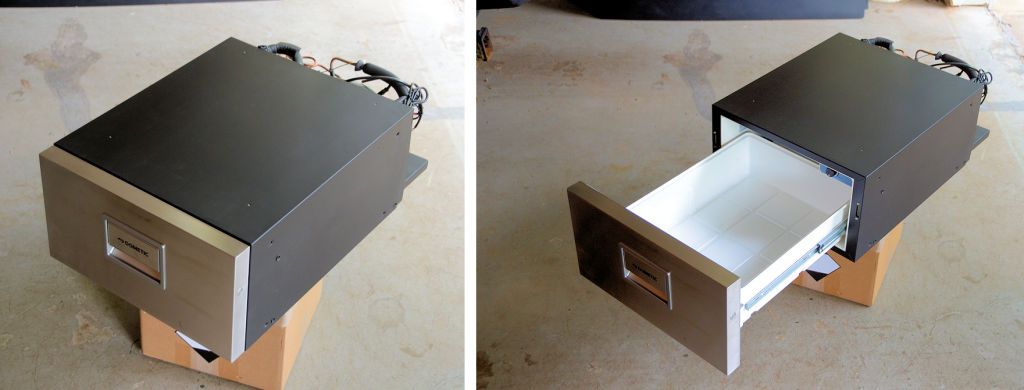
Even though I'm doing this design for a trailer, I put the fridge in the back of the Jeep just to see what design thoughts for Jeep kitchens it might inspire...
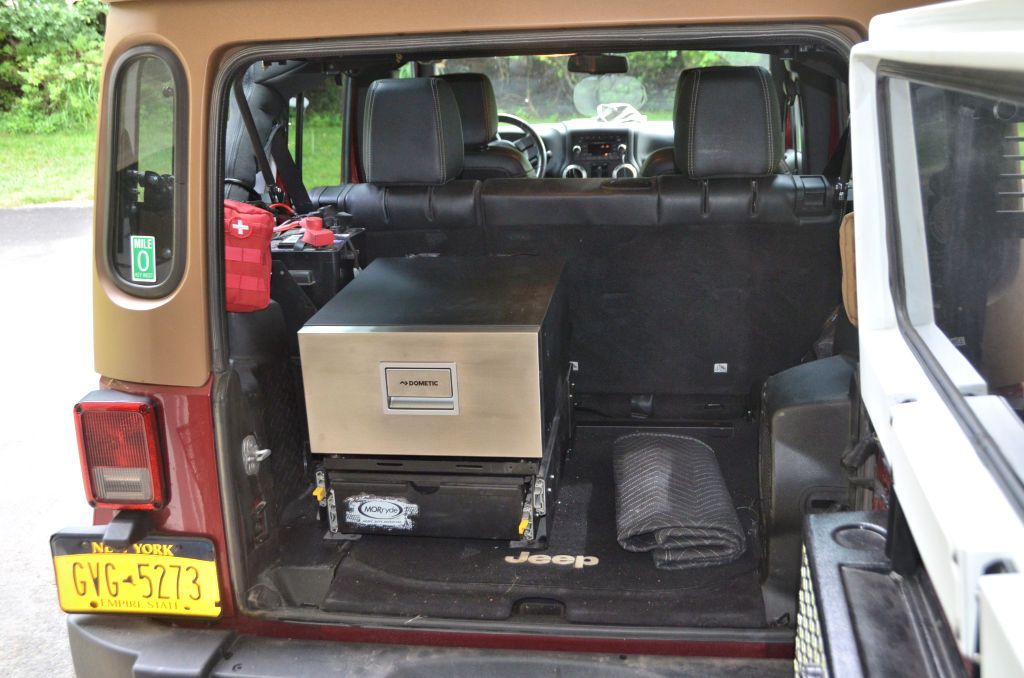
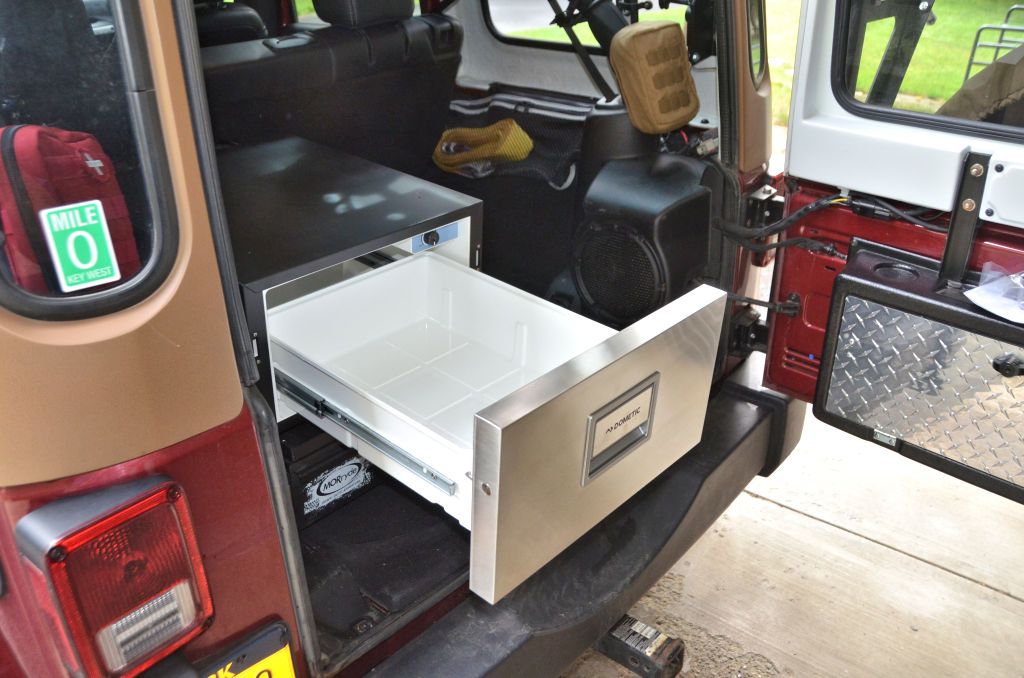
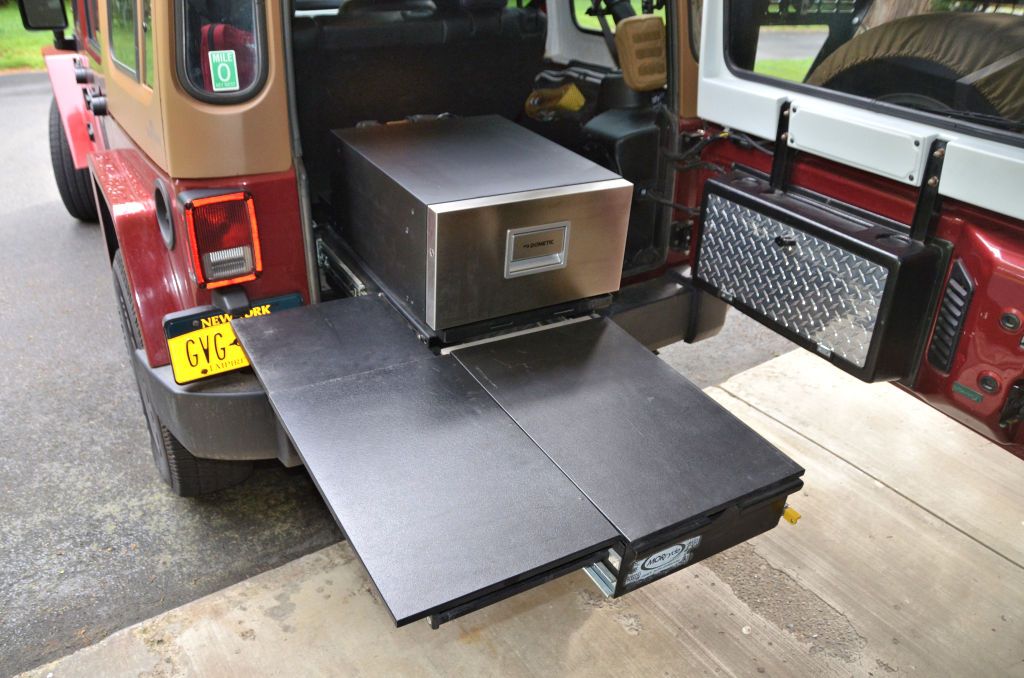

Even though I'm doing this design for a trailer, I put the fridge in the back of the Jeep just to see what design thoughts for Jeep kitchens it might inspire...


This fridge arrived this morning, courtesy of Dometic. Based on the success of the Trail Kitchen design, I've been asked to design a pull-out kitchen for an off-road trailer manufacturer (you'd know them if I were allowed to mention their name at this point). The current Trail Kitchen (and typical fridges used in Jeeps) are not idea for this trailer, so I asked Dometic for one of their drawer fridges. These fridges are most often used in marine and RV applications and rarely, if ever, seen in Jeeps and other off-road applications but they have a 30-qt. capacity and have a much lower profile than the typical top-load fridge.

Even though I'm doing this design for a trailer, I put the fridge in the back of the Jeep just to see what design thoughts for Jeep kitchens it might inspire...


Any idea how your trail kitchen would work in a truck? Traded my JLUR for a JTR and now not sure how I can leverage the trail kitchen. It'd still work fine with the tailgate (and actually provide more work space to the right of it), but I'm not sure how to mount without drilling holes in the bed and how to keep it dry. Might have to look into incorporating it into a drawer type system, or selling it and building something else. Not really looking at putting a cap on the truck, which would probably be the more correct setup...
jscherb
Expedition Leader
I haven't looked closely at the truck's bed - are there any tie-down points in the floor? For both the JKU and JLU there are tie-down points that are used for a no-drill installation, so if there are tie-down points in the bed perhaps they can be used. Post a photo of whatever tie-down points are there; maybe there's an easy way to use them for the kitchen.Any idea how your trail kitchen would work in a truck? Traded my JLUR for a JTR and now not sure how I can leverage the trail kitchen. It'd still work fine with the tailgate (and actually provide more work space to the right of it), but I'm not sure how to mount without drilling holes in the bed and how to keep it dry. Might have to look into incorporating it into a drawer type system, or selling it and building something else. Not really looking at putting a cap on the truck, which would probably be the more correct setup...
This has a good pic - mine is exactly the same including the trail rail system. There's a tie down loop in the 4 corners of the bed (you can see them in the pic) but nothing in the floor of the bed, which is covered in bed liner.
Last edited:
jscherb
Expedition Leader
It's a little hard to see the details in that photo, so while I was out doing errands just now I passed the Jeep dealer so I stopped in and took this photo. There's a tie-down loop in the bed side towards the rear, and in the front there's a black tie down point, I think that one's removable or at least lays flat when not needed.This has a good pic - mine is exactly the same including the trail rail system. There's a tie down loop in the 4 corners of the bed (you can see them in the pic) but nothing in the floor of the bed, which is covered in bed liner.
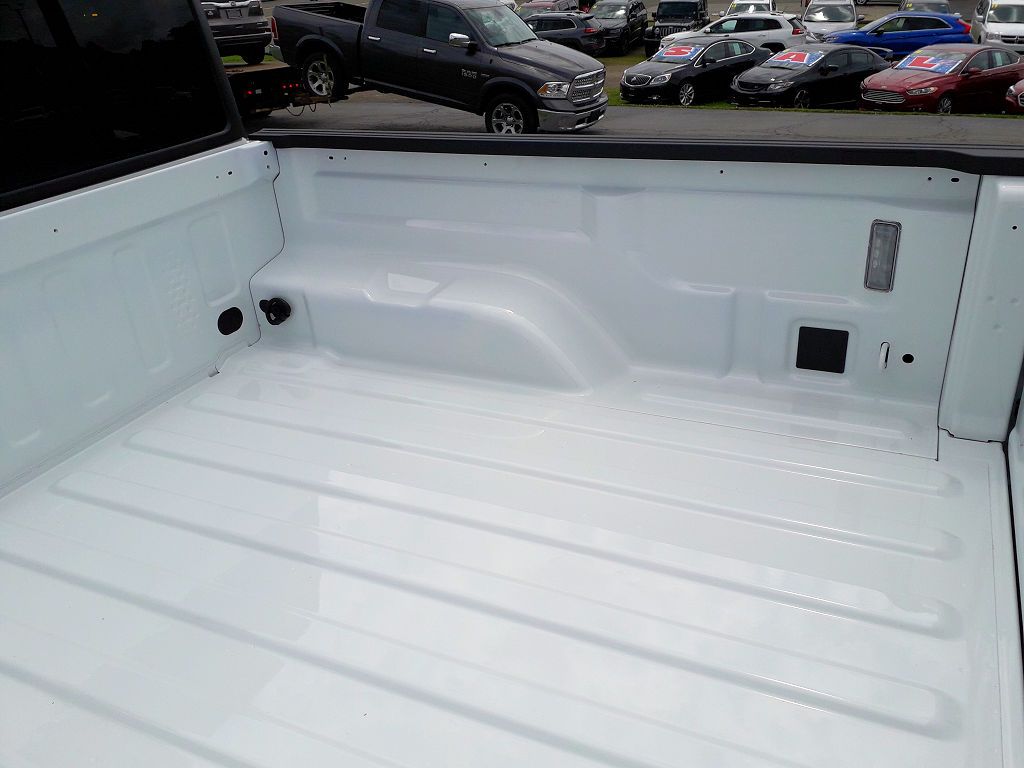
It would be possible to design a no-drill installation kit for the Trail Kitchen that works with these tie-down points. I'll discuss it with MORryde but I won't push them to do it at this point because they're got other projects in the queue for their Jeep engineers that would be higher priority than this.
Or, a couple of rivnuts in the bed floor would do the job very nicely.
It's a little hard to see the details in that photo, so while I was out doing errands just now I passed the Jeep dealer so I stopped in and took this photo. There's a tie-down loop in the bed side towards the rear, and in the front there's a black tie down point, I think that one's removable or at least lays flat when not needed.

It would be possible to design a no-drill installation kit for the Trail Kitchen that works with these tie-down points. I'll discuss it with MORryde but I won't push them to do it at this point because they're got other projects in the queue for their Jeep engineers that would be higher priority than this.
Or, a couple of rivnuts in the bed floor would do the job very nicely.
I'm a little hesitant to drill the bed - what's your idea for a no-drill installation? I built one that worked for my JLUR so could do the same on this. I've got a welder, band saw and drill press so could do a decent amount of fabrication.
jscherb
Expedition Leader
The MORryde no-drill kit is a three-point installation. In the JKU, a crossbar mounts to the two forward tie-down points (just behind the back seat) and the third point is the middle tie-down point on the driver's side. The fourth corner of the kitchen isn't tied to the floor, it's got a rubber foot to support it. The kitchen is pretty rigid so three-point mounting works just fine.I'm a little hesitant to drill the bed - what's your idea for a no-drill installation? I built one that worked for my JLUR so could do the same on this. I've got a welder, band saw and drill press so could do a decent amount of fabrication.
What I'd do for the truck is create a crossbar that secures to the rearmost tie-down points in the truck bed; the kitchen base would bolt to this crossbar on each side of the kitchen. In the front of the bed, I'd make a bracket that runs from the kitchen to the driver's side front tie-down point and prevents the front of the kitchen from moving. The front passenger side of the kitchen would be supported by a foot.
The MORryde no-drill kit is a three-point installation. In the JKU, a crossbar mounts to the two forward tie-down points (just behind the back seat) and the third point is the middle tie-down point on the driver's side. The fourth corner of the kitchen isn't tied to the floor, it's got a rubber foot to support it. The kitchen is pretty rigid so three-point mounting works just fine.
What I'd do for the truck is create a crossbar that secures to the rearmost tie-down points in the truck bed; the kitchen base would bolt to this crossbar on each side of the kitchen. In the front of the bed, I'd make a bracket that runs from the kitchen to the driver's side front tie-down point and prevents the front of the kitchen from moving. The front passenger side of the kitchen would be supported by a foot.
Gotcha, I did 3 point for my JLUR. I'd have to do something in a triangle shape or similar as the tie down parts are way further back in the bed than the tied downs in the JK/JL, at least if I want the kitchen oriented to the tailgate opening at the same depth. I'll see what I can come up with.
Similar threads
- Replies
- 7
- Views
- 3K
- Replies
- 2
- Views
- 2K
- Replies
- 1
- Views
- 2K
- Replies
- 2
- Views
- 2K

