You are using an out of date browser. It may not display this or other websites correctly.
You should upgrade or use an alternative browser.
You should upgrade or use an alternative browser.
Barn Door for JK factory hardtops
- Thread starter jscherb
- Start date
jscherb
Expedition Leader
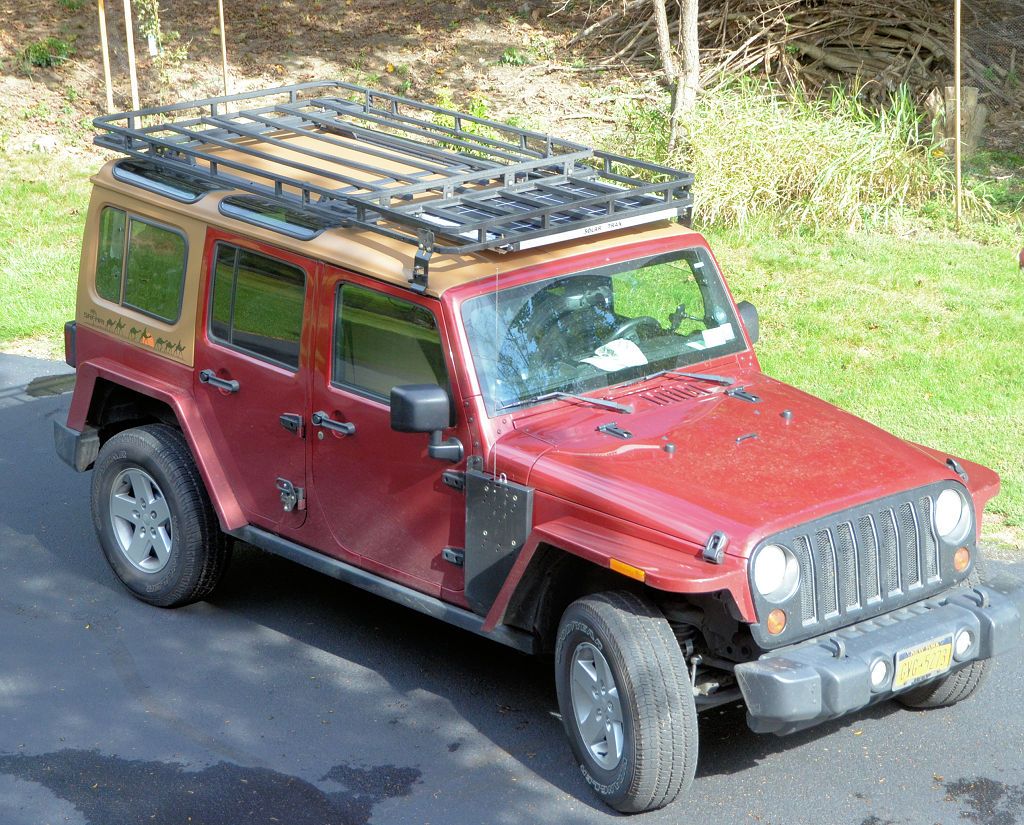
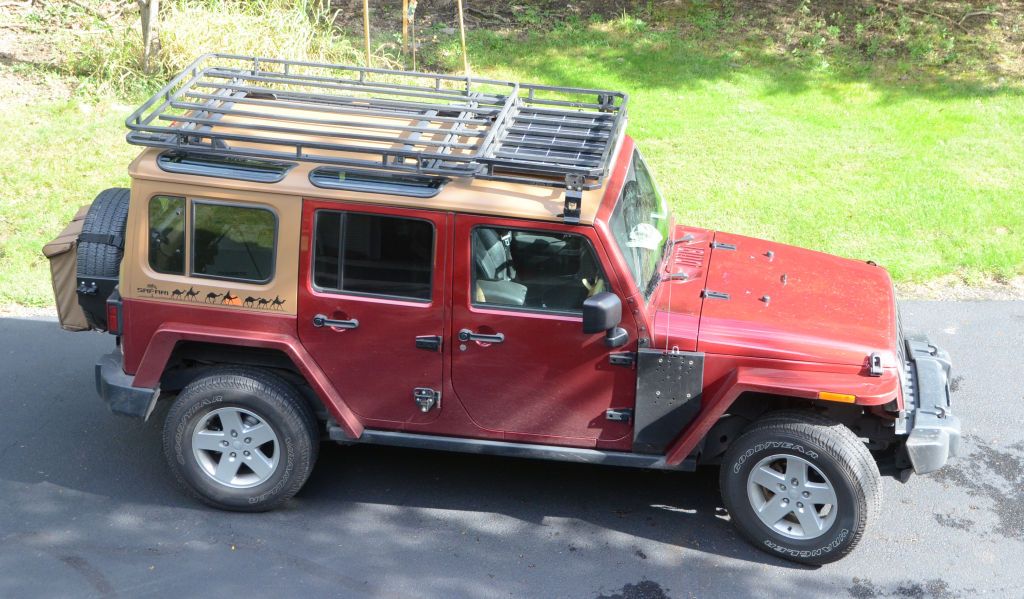
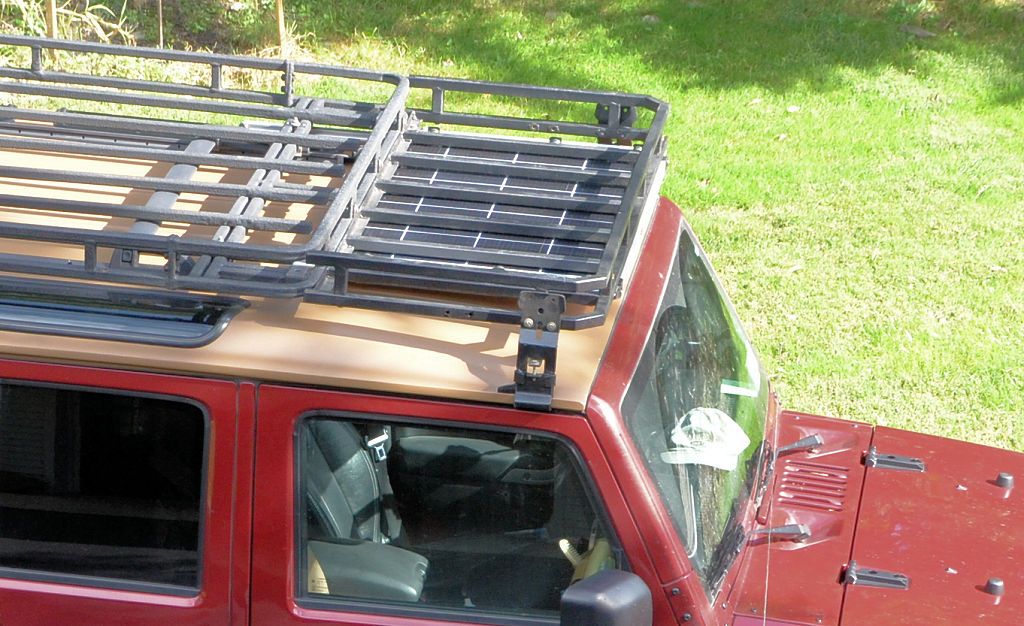
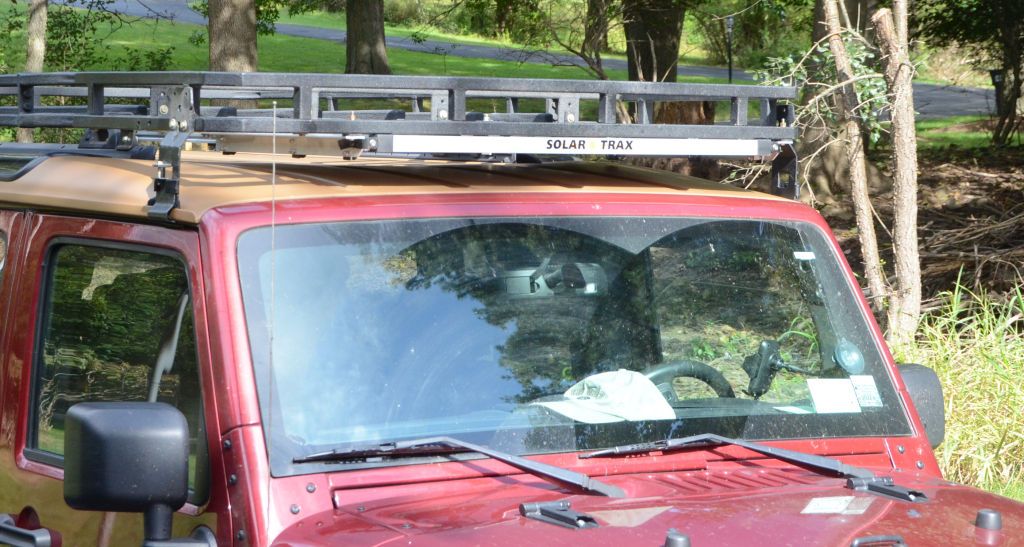
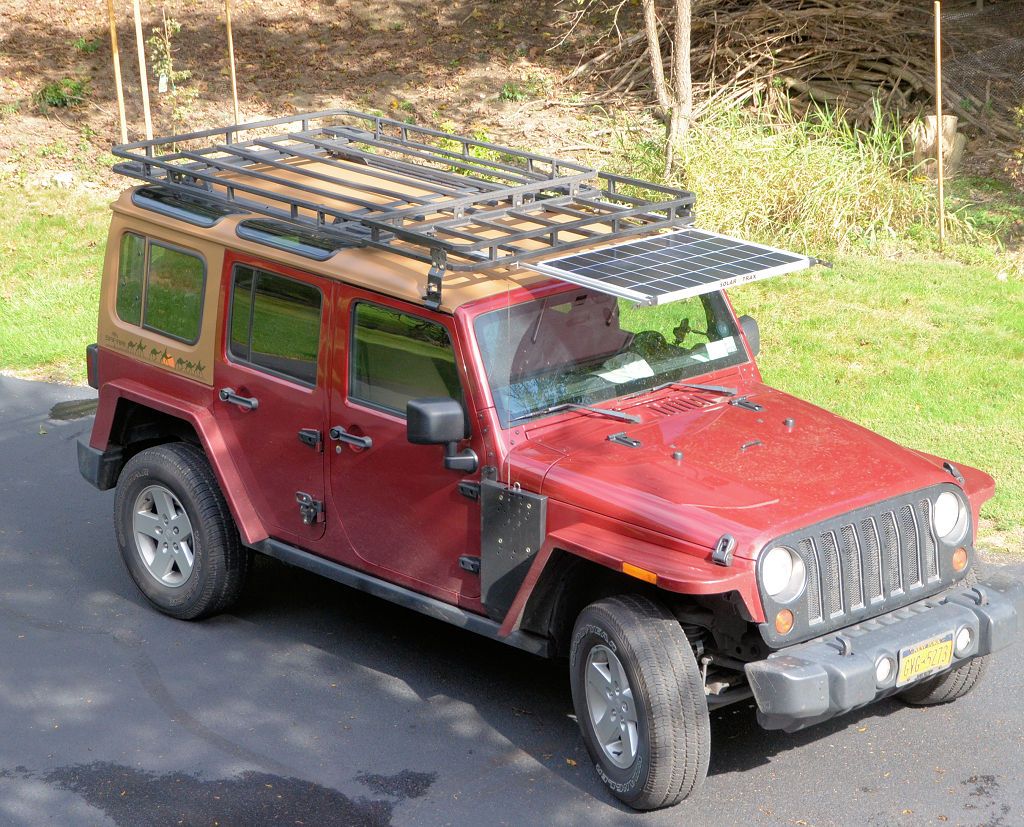
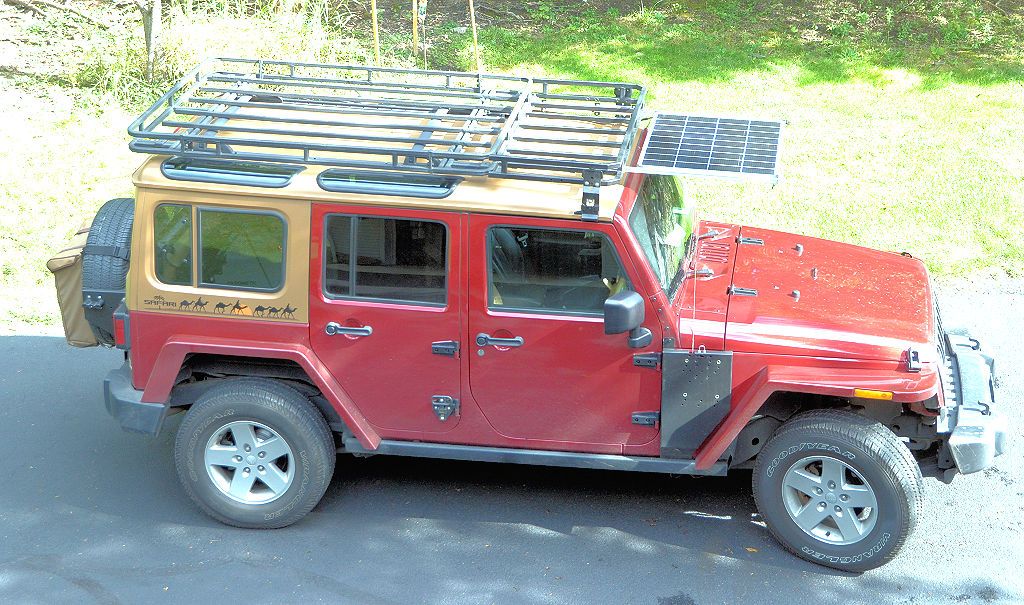
It's this one from Harbor Freight (https://www.harborfreight.com/100-watt-monocrystalline-solar-panel-57325.html), rated at 100 watts. I've been doing a lot of testing with it, and I've posted most of the tests and results over the last two months, so if you haven't been following along there's a lot of info posted. In full sun with aiming I've gotten about 6 amps out of it and on overcast days about 1 amp or a little more. Even on overcast days it's kept the battery charged with the fridge running. I paid $80 for it and given its performance I'd rate it a very good value.Looking good as usual Jeff. What is the output of the panel your using?
jscherb
Expedition Leader
This morning's Harbor Freight email lists the solar panel I'm using:
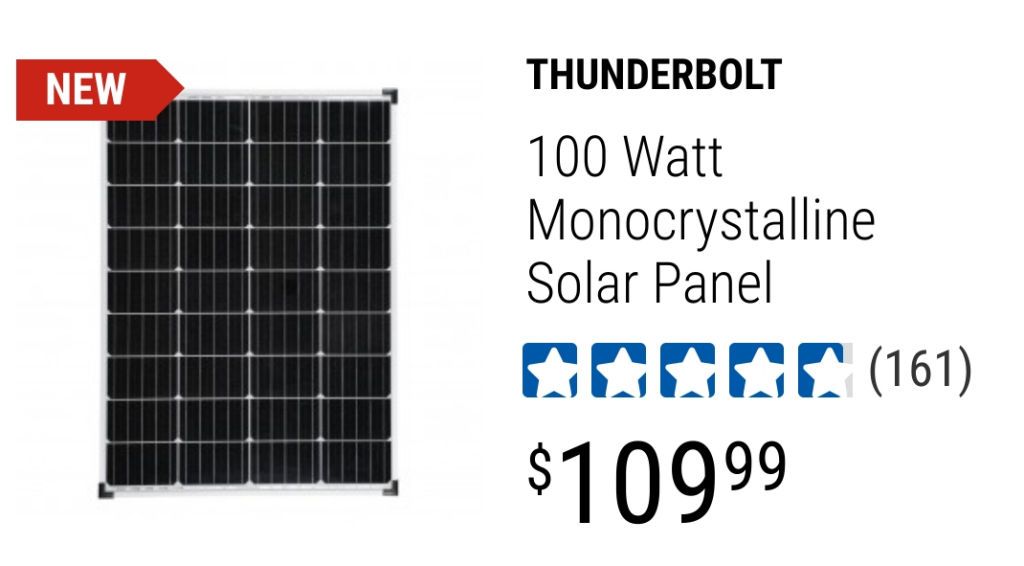
The bad news is that the regular price has gone up $10 - when I bought it, the regular price was $99.99 and I used one of the rare post-covid 20% off coupons to get it for $80. I think it's still a good value at $110 though.
I'm working on final details of the slide - stops to prevent the v-slot extrusions from running out of the rollers, routing the solar panel output wire so it doesn't flap in the wind at speed, things like that. I'll post details as I finish them.
jscherb
Expedition Leader
With the basic slide working, it's now all about the details.
The solar panel comes with a long cord. For driving at speed with the panel on the roof, something needs to be done to tame the cord. I opened the wiring box on the wiring box on the bottom of the panel to see what my options might be:
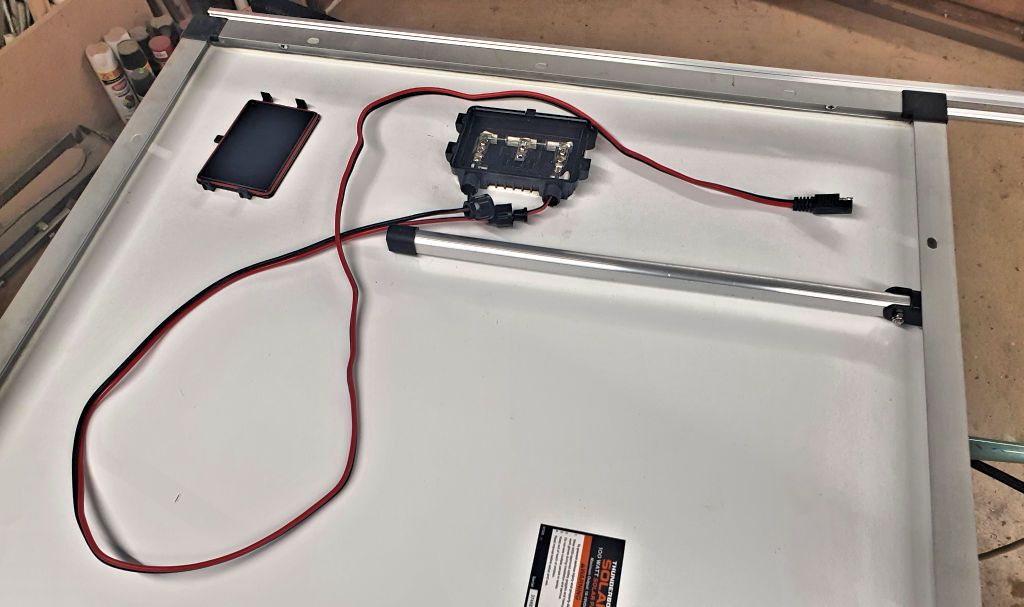
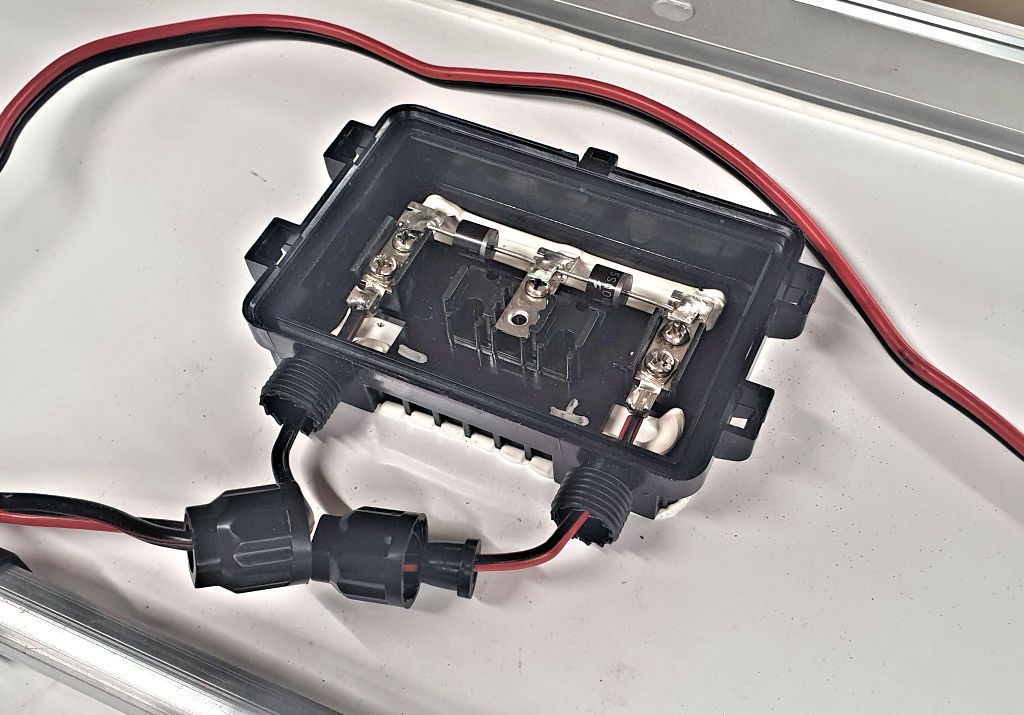
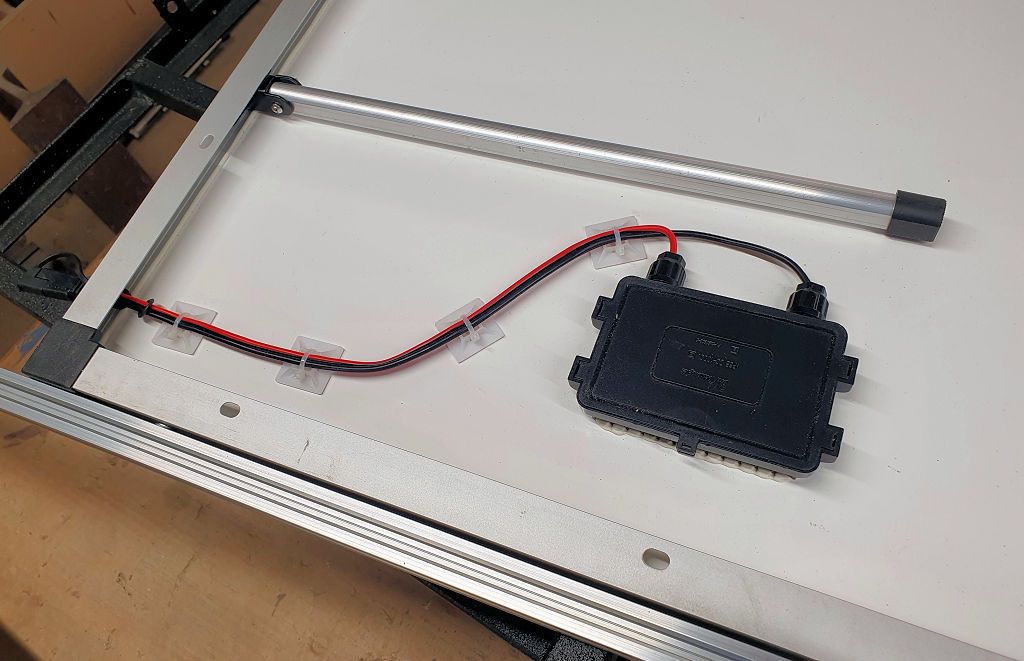
The ends of the wires are soldered to lugs inside the box, and the wires enter the box through waterproof grommets, so it's easy to shorten the wire.
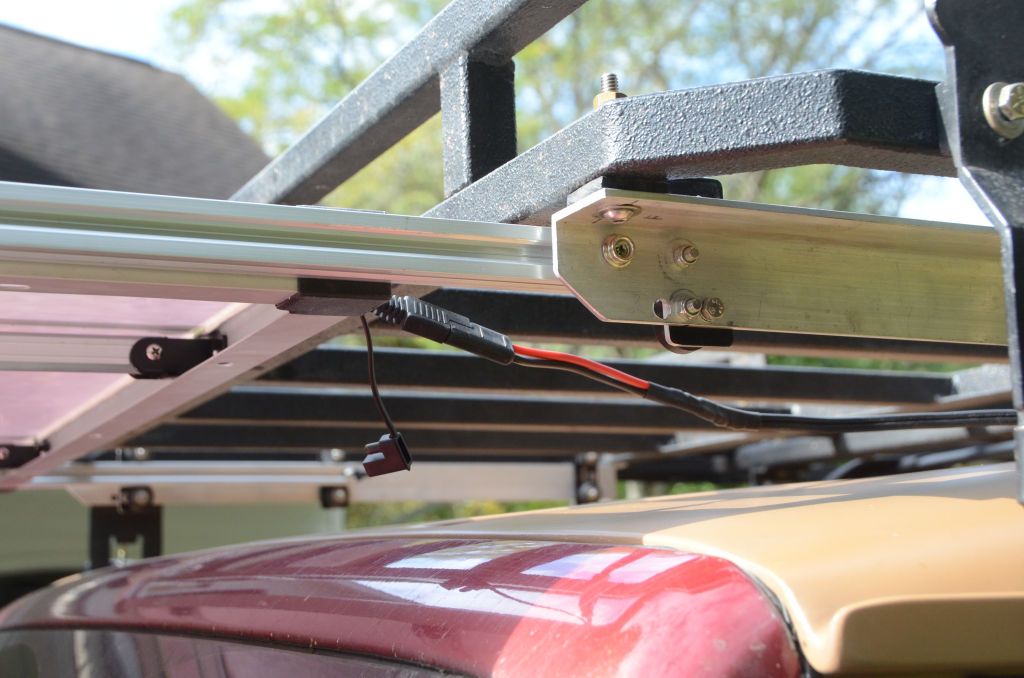
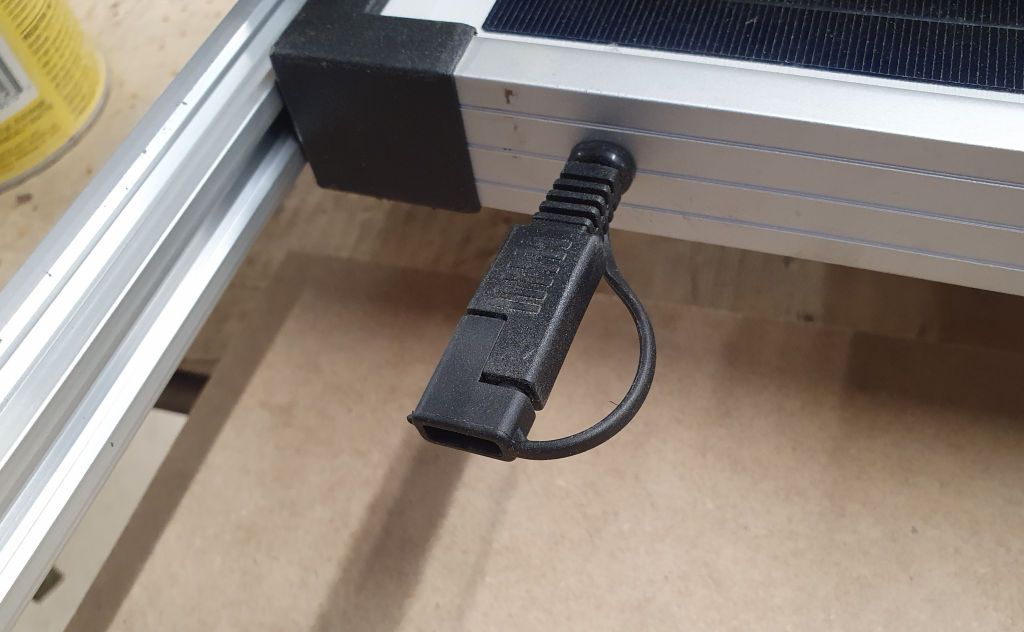
To control the plug end, I installed a grommet in the edge of the solar panel and allowed the plug to protrude just enough so it's accessible but not so much that it will flap in the wind at speed. I also installed an end cap to protect the contacts - every milliamp is important so the cap will keep the contacts from corroding.
Then I shortened the wire, dressed it along the bottom of the panel with wire clips and into the wiring box.
When the panel is in use, I'll use an extension wire to reach from the panel to the solar controller in the back of the Jeep. I'll also use the same extension when I need to remove the panel from the slide and place it on the ground to catch the sun if the Jeep can't face the right way.
The solar panel comes with a long cord. For driving at speed with the panel on the roof, something needs to be done to tame the cord. I opened the wiring box on the wiring box on the bottom of the panel to see what my options might be:


The ends of the wires are soldered to lugs inside the box, and the wires enter the box through waterproof grommets, so it's easy to shorten the wire.
To control the plug end, I installed a grommet in the edge of the solar panel and allowed the plug to protrude just enough so it's accessible but not so much that it will flap in the wind at speed. I also installed an end cap to protect the contacts - every milliamp is important so the cap will keep the contacts from corroding.

Then I shortened the wire, dressed it along the bottom of the panel with wire clips and into the wiring box.

When the panel is in use, I'll use an extension wire to reach from the panel to the solar controller in the back of the Jeep. I'll also use the same extension when I need to remove the panel from the slide and place it on the ground to catch the sun if the Jeep can't face the right way.
jscherb
Expedition Leader
Next problem - preventing the panel from sliding out of the rollers.
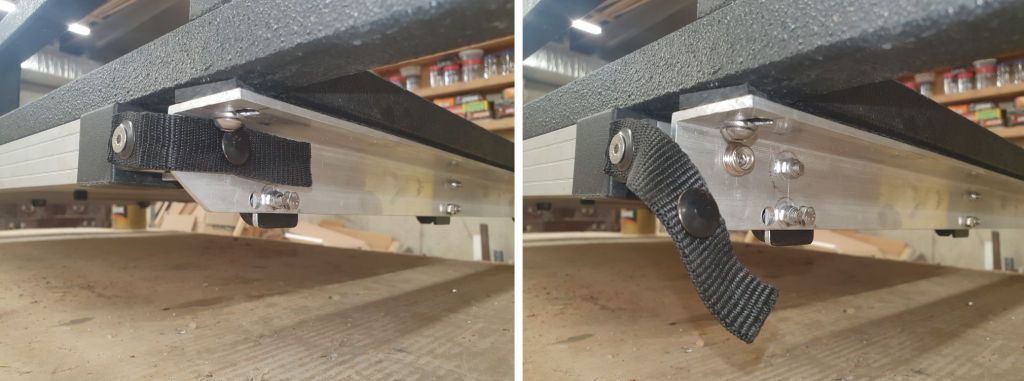
In the back, I installed window latches from the marine space, used for boat windows. In the vertical position, they won't go through the rollers; facing inward horizontally they go right through so the panel can be removed.
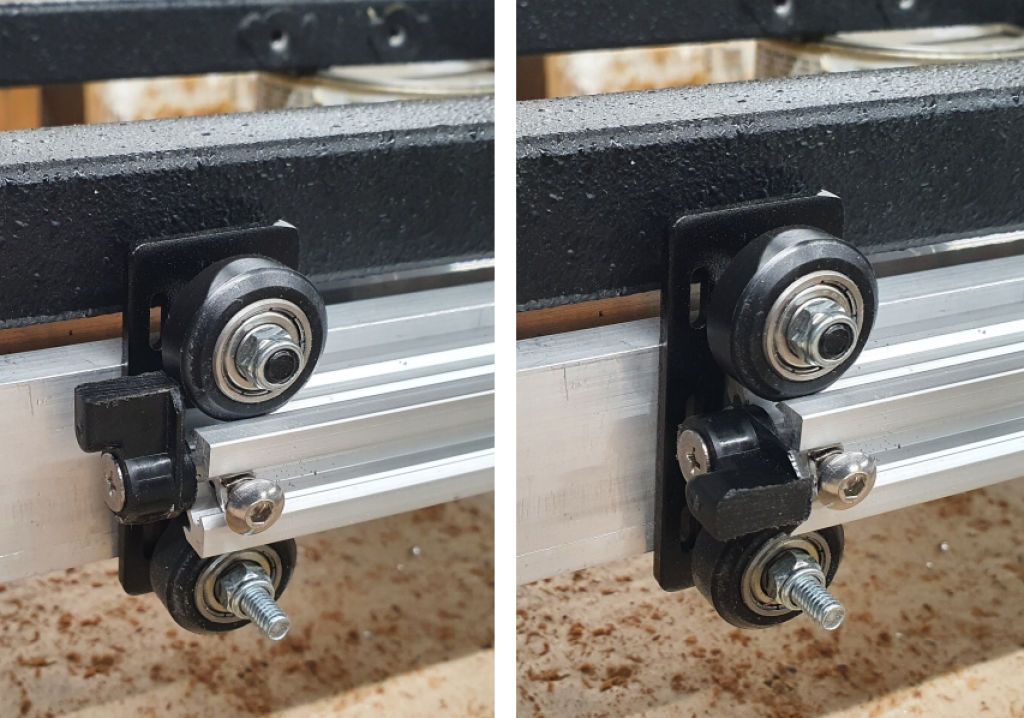
The machine screw going through the side of the extrusion locks the latch screw in place so it can't loosen.
In the front, I wanted a stop so the panel can't be pushed too far in. Using some v-slot nuts, I attached short pieces cut from aluminum angle (viewed from below in this photo):
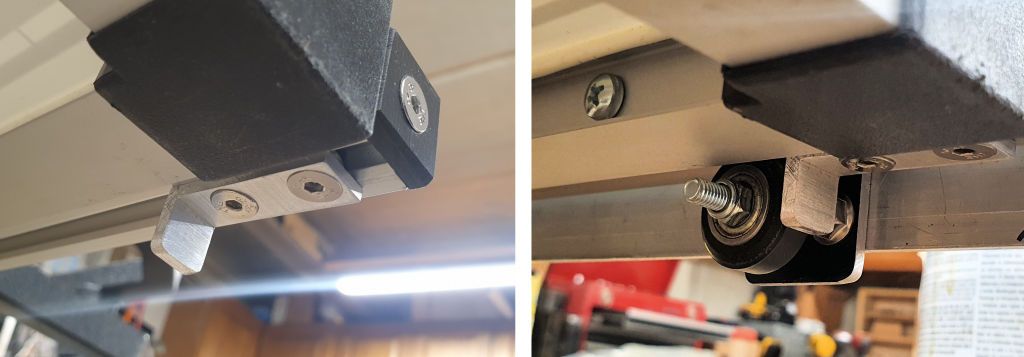
The nice thing about attaching these stops to the v-slots is that they can be adjusted anywhere along the extrusion so I can adjust exactly where the slide stops going in.
There are still a few details to take care of, more to come.
In the back, I installed window latches from the marine space, used for boat windows. In the vertical position, they won't go through the rollers; facing inward horizontally they go right through so the panel can be removed.

The machine screw going through the side of the extrusion locks the latch screw in place so it can't loosen.
In the front, I wanted a stop so the panel can't be pushed too far in. Using some v-slot nuts, I attached short pieces cut from aluminum angle (viewed from below in this photo):

The nice thing about attaching these stops to the v-slots is that they can be adjusted anywhere along the extrusion so I can adjust exactly where the slide stops going in.
There are still a few details to take care of, more to come.
jscherb
Expedition Leader
I had been waiting for some additional rollers to finish the v-slot slide; they arrived yesterday so I added two more sets of wheels to the slide mechanism.
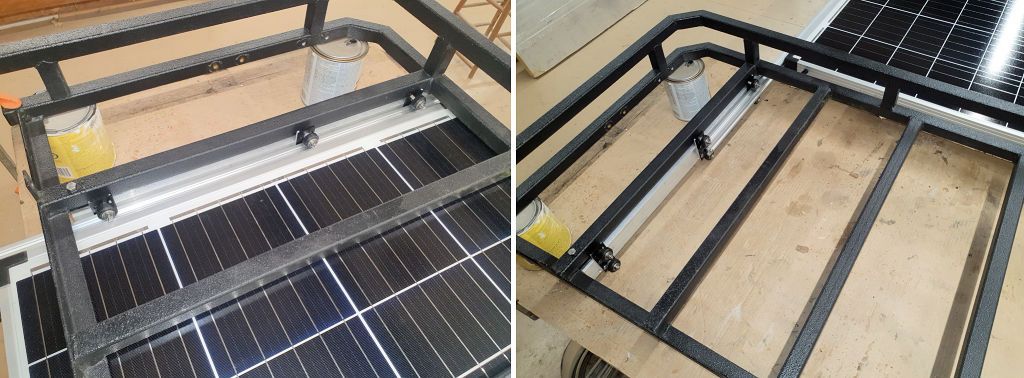
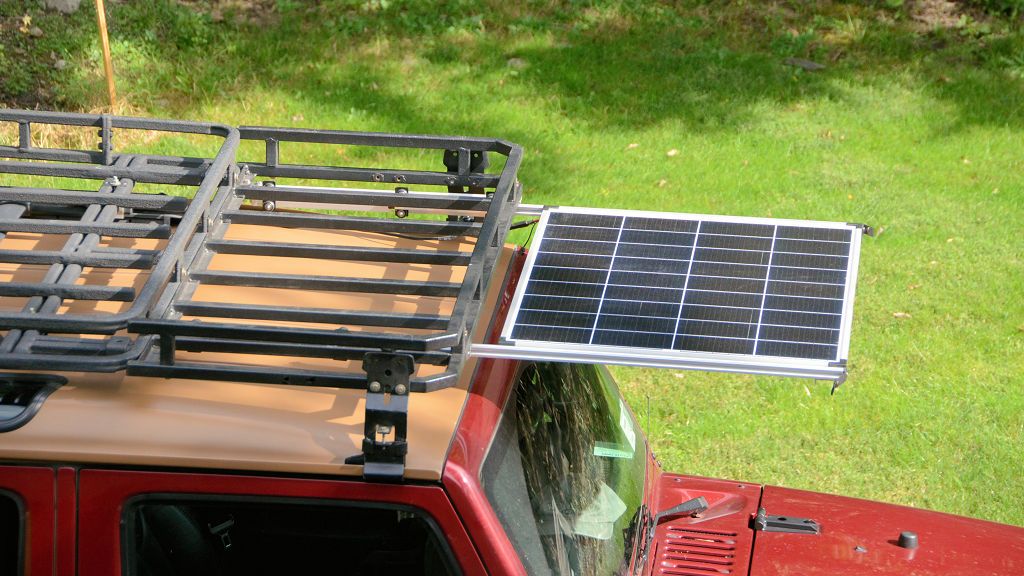
When the solar panel is pulled out, the v-slot extrusions come out of the rear set of rollers, this is by design. The front sets of rollers are plenty to support the panel when it is deployed; the rear set is to prevent the panel from vibrating/flexing when it's stowed.
And speaking of being stowed, I added snap straps to keep the panel in place when it's stowed:
It's now ready for installation on top of the Jeep, I hope to get to that in the next day or two.

When the solar panel is pulled out, the v-slot extrusions come out of the rear set of rollers, this is by design. The front sets of rollers are plenty to support the panel when it is deployed; the rear set is to prevent the panel from vibrating/flexing when it's stowed.
And speaking of being stowed, I added snap straps to keep the panel in place when it's stowed:

It's now ready for installation on top of the Jeep, I hope to get to that in the next day or two.
jscherb
Expedition Leader
To connect the solar panel to the controller I made up a 12' extension cord - the extension will be used both when the panel is on the slide and deployed and when the panel is removed from the slide and placed on the ground somewhere to catch the sun better.
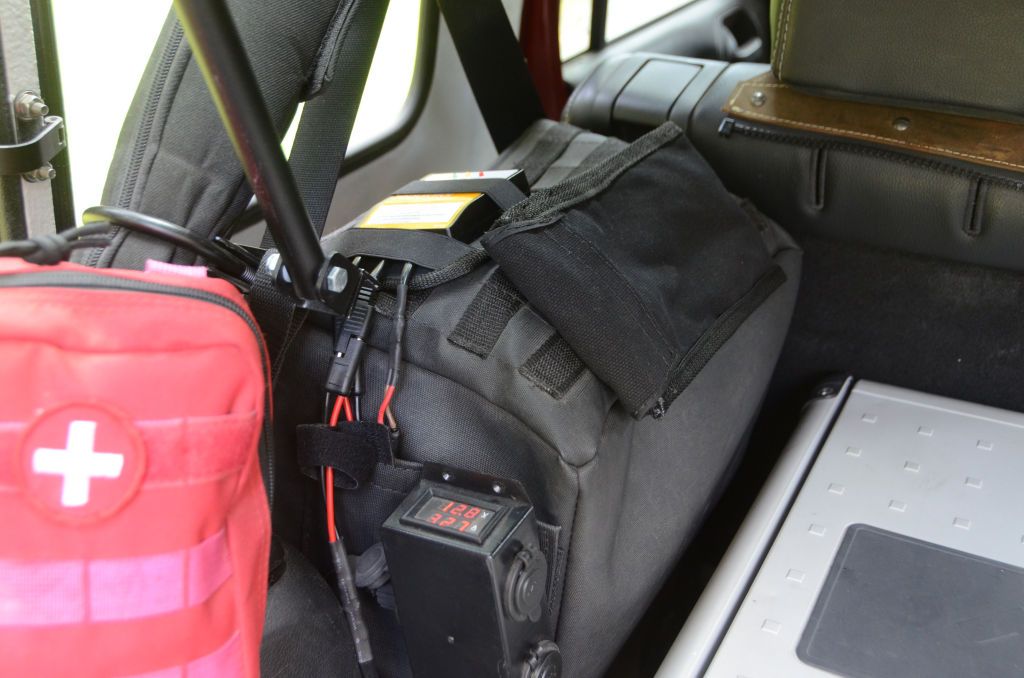
Two weeks ago I sewed and posted photos of a MOLLE holder for the HF solar controller; it attaches to the PALS grid on top of the battery cover:
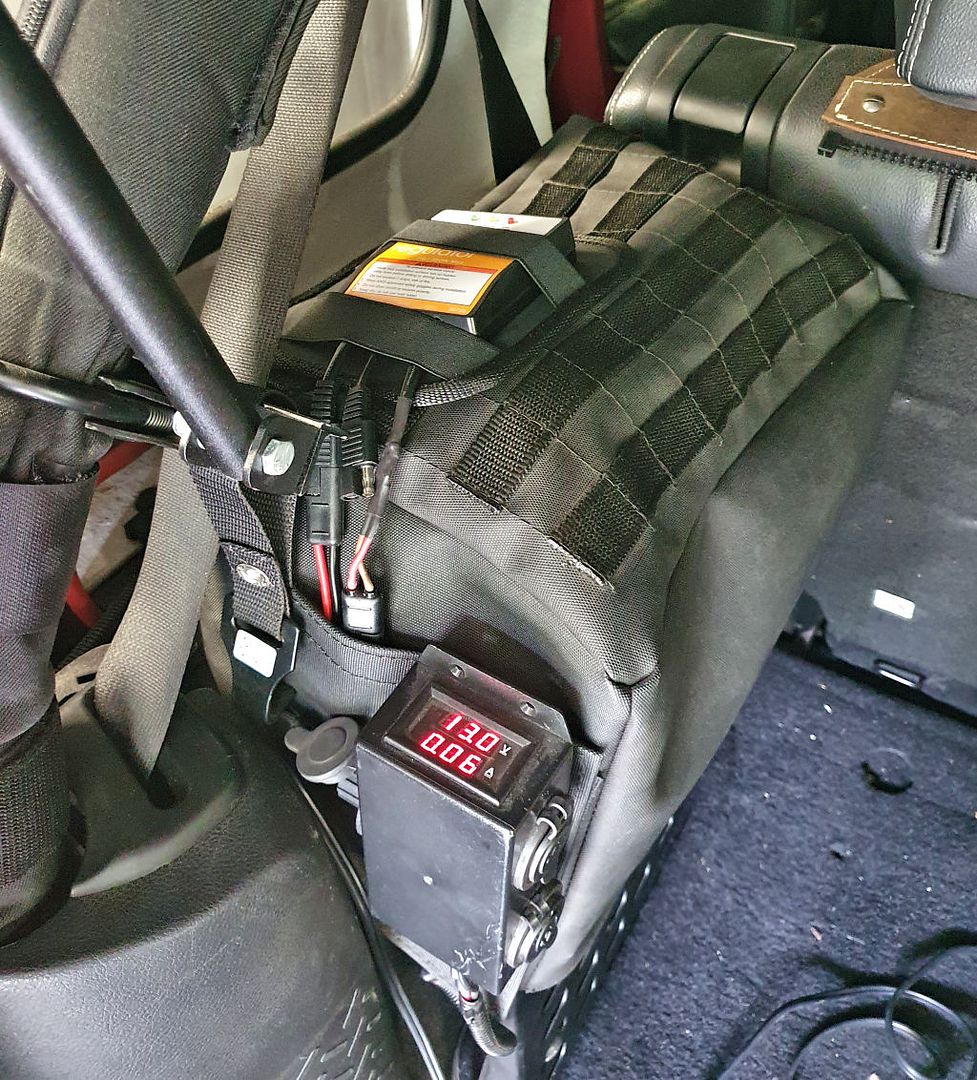
To store the extension in a place convenient for use, today I sewed a pouch for it; it also will live on top of the battery cover. It's possible to keep one end connected to the solar controller when the extension is stowed in the pouch, so all that's needed to get the solar up and running is to slide the panel out from under the roof rack, pull the extension out of the pouch and connect the loose end to the panel.
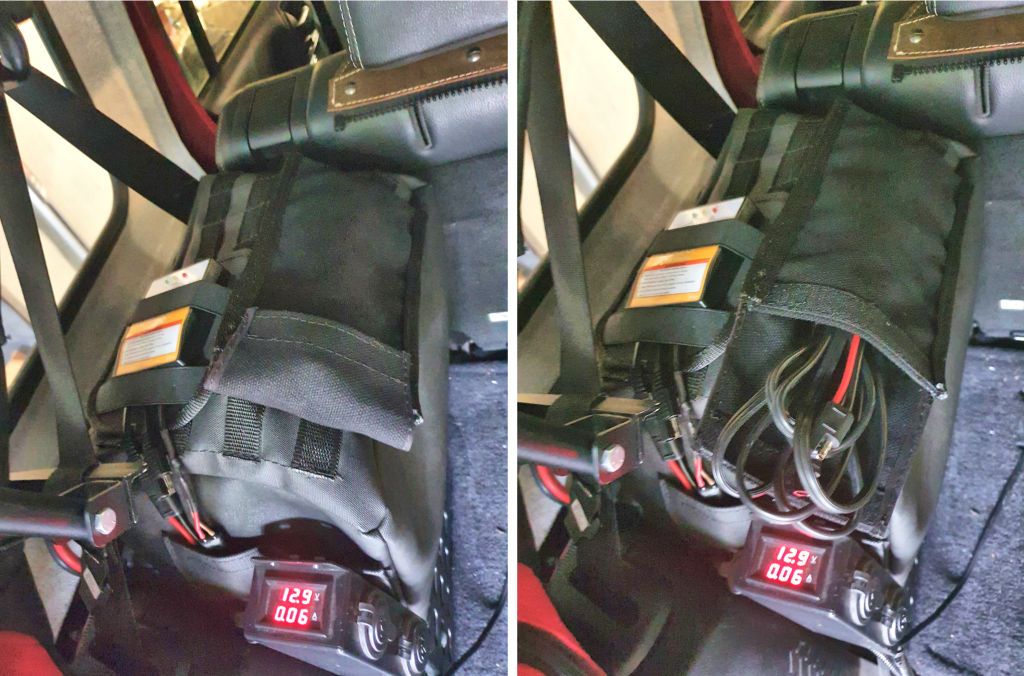
The slide/panel assembly is ready to install on the Jeep but it was raining today so I focused on indoor projects like this pouch.
Two weeks ago I sewed and posted photos of a MOLLE holder for the HF solar controller; it attaches to the PALS grid on top of the battery cover:

To store the extension in a place convenient for use, today I sewed a pouch for it; it also will live on top of the battery cover. It's possible to keep one end connected to the solar controller when the extension is stowed in the pouch, so all that's needed to get the solar up and running is to slide the panel out from under the roof rack, pull the extension out of the pouch and connect the loose end to the panel.

The slide/panel assembly is ready to install on the Jeep but it was raining today so I focused on indoor projects like this pouch.
jscherb
Expedition Leader
About a month ago I posted about removing the custom parts from Robert's JK - flat fenders, JL-style grille, modular hardtop, because in his new location he won't be needing a vehicle anymore. Today he sold the Jeep...
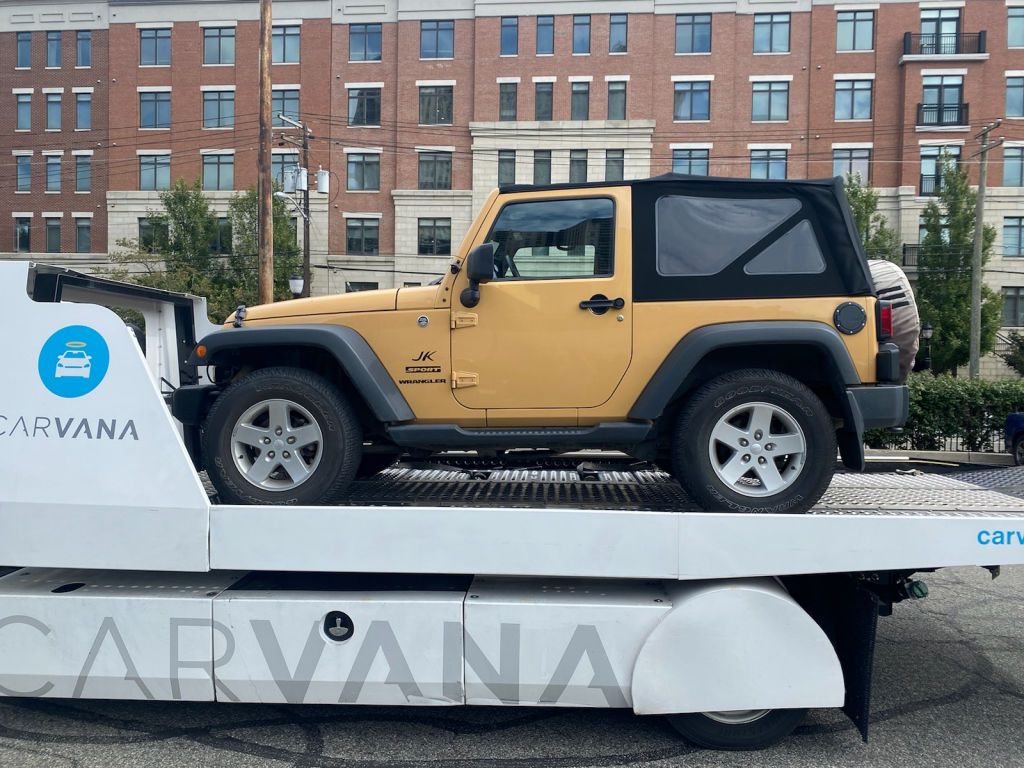
The good news (if you're a seller) is that because the global chip shortage has resulted in a shortage of new vehicles, that's increased demand for used vehicles, so Carvana paid Robert quite a bit more than he paid for the Jeep 2 years ago.
And Robert sold the flat fenders he made for the Jeep, so he made some money on that too .
.

The good news (if you're a seller) is that because the global chip shortage has resulted in a shortage of new vehicles, that's increased demand for used vehicles, so Carvana paid Robert quite a bit more than he paid for the Jeep 2 years ago.
And Robert sold the flat fenders he made for the Jeep, so he made some money on that too
jscherb
Expedition Leader
I was asked how difficult it is to remove the solar panel, for example if you need to place it on the ground to catch the sun because you can't position the vehicle properly for the sun to hit the panel. The panel is very easy to remove, just turn the rear stop levers to allow the panel to slip completely out of the rollers.
Also in the video I show how the panel can go in upside down. Why would you want to do this? What if the panel is installed on a flip-top trailer camper? When the lid is closed, you'd want the panel to face up so it might charge the trailer battery while driving. When the lid is flipped 180 degrees open, the panel would be facing the ground, but the way I designed these slides the panel can be slid out and put back in the other way. (This was a design requirement from the trailer company that might pick up this design ).
).
Also in the video I show how the panel can go in upside down. Why would you want to do this? What if the panel is installed on a flip-top trailer camper? When the lid is closed, you'd want the panel to face up so it might charge the trailer battery while driving. When the lid is flipped 180 degrees open, the panel would be facing the ground, but the way I designed these slides the panel can be slid out and put back in the other way. (This was a design requirement from the trailer company that might pick up this design
jscherb
Expedition Leader
I had to stop by the Jeep dealer the other day so I brought along one of the new "Roll Bar Buddies" to check out in a JL. The local dealer helps me a lot with my design activities and I'm welcome to test stuff like this in their Jeeps any time. In the JL:
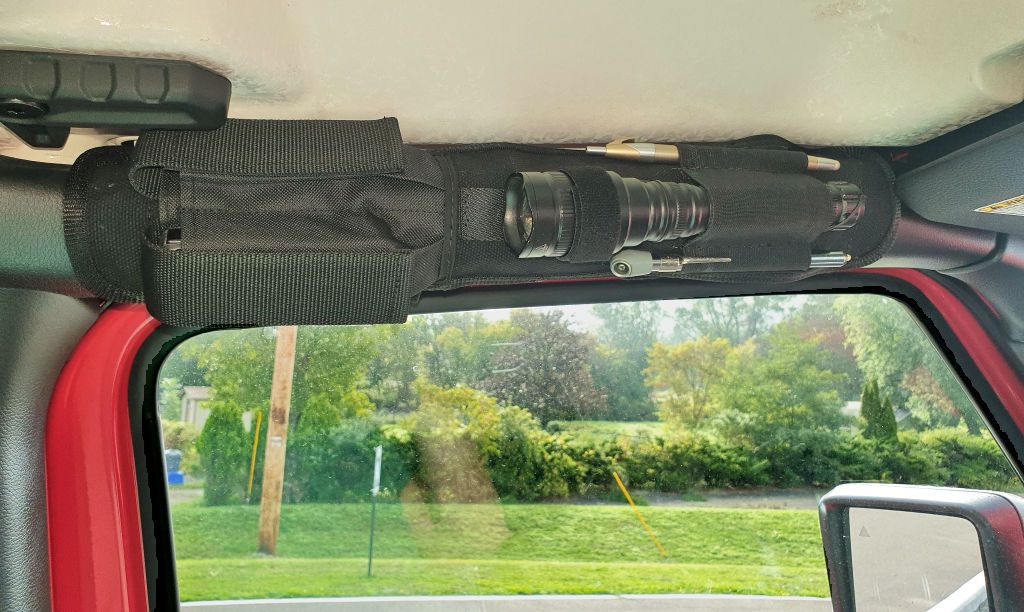
When I got home I also tried it in my LJ (fits great there too) and I was going to leave it in the LJ for my upcoming trip to Boston this weekend, but I had to pull it out - OO asked me to send them the design but I don't have time right now to do drawings so I just sent them the two prototypes.
BTW if anyone has a better idea for a name than "Roll Bar Buddy", let me know and I'll pass it along to OO. I just made up that name to have something to call it for now but maybe there's a better name that that.
jscherb
Expedition Leader
Early in the solar project I sewed a bag to protect the panel during storage or transport: https://expeditionportal.com/forum/...factory-hardtops.127687/page-322#post-2943154:
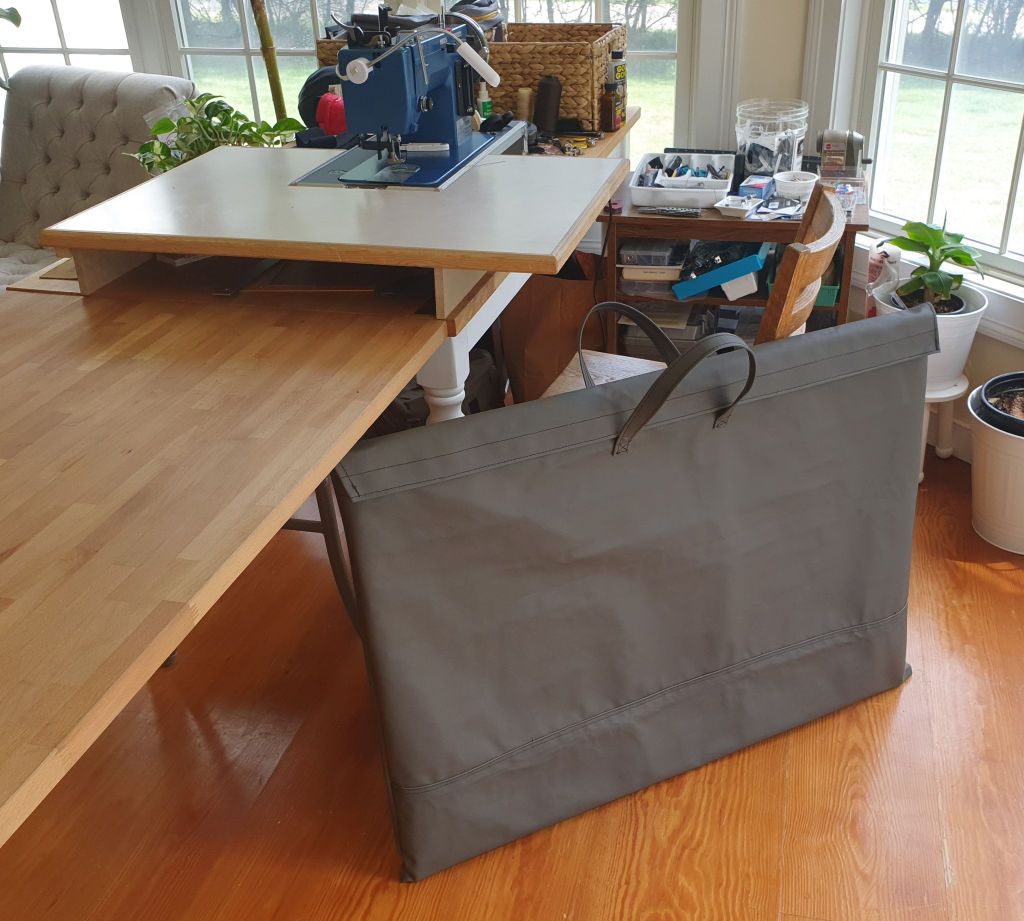
I'm sure you've heard of "letting out" your pants if you gain weight? Well the panel got a little larger with the v-slot extrusions bolted to it so I had to "let it out". It was a fairly quick tailoring job:
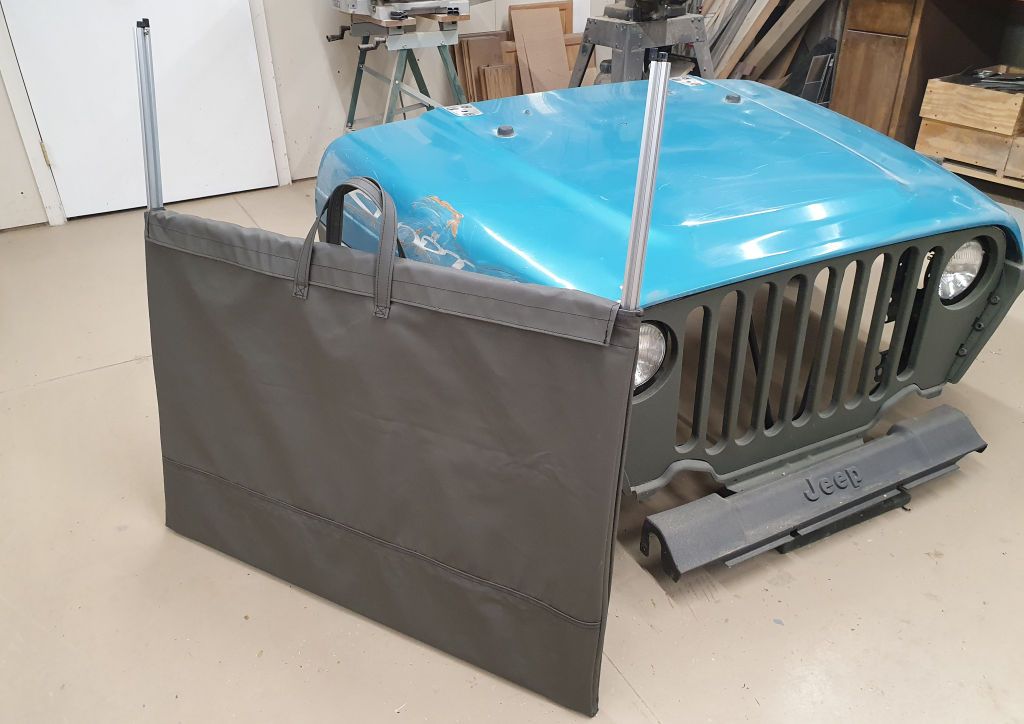
I may sew sleeves to slide over the extra length of the extrusions, but that's not a priority at the moment because the panel will be transported on top of the Jeep in the slide, not inside the Jeep. The bag will only be used when the panel is off the Jeep and waiting in the garage for the next expedition.
Tomorrow I hope to have time to install the slide and solar panel on the Jeep, photos to come.

I'm sure you've heard of "letting out" your pants if you gain weight? Well the panel got a little larger with the v-slot extrusions bolted to it so I had to "let it out". It was a fairly quick tailoring job:

I may sew sleeves to slide over the extra length of the extrusions, but that's not a priority at the moment because the panel will be transported on top of the Jeep in the slide, not inside the Jeep. The bag will only be used when the panel is off the Jeep and waiting in the garage for the next expedition.
Tomorrow I hope to have time to install the slide and solar panel on the Jeep, photos to come.
jscherb
Expedition Leader
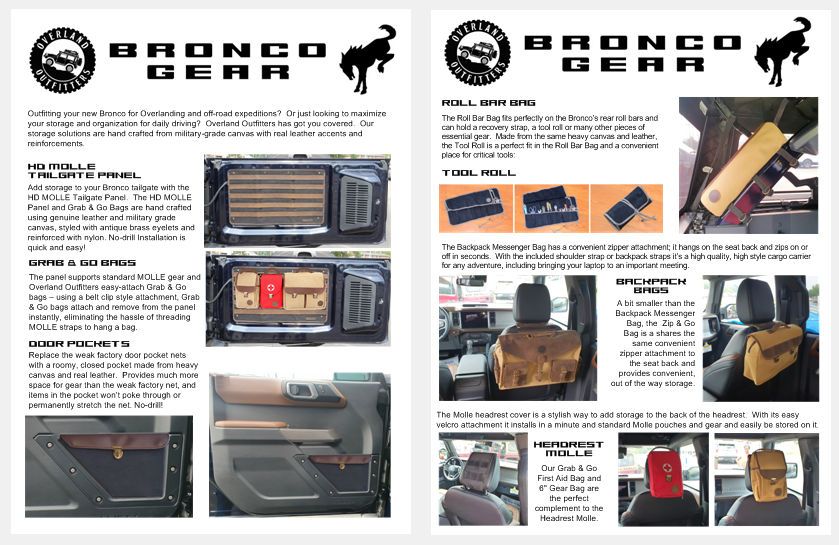
If MORryde got me one, I do have some hardware ideas for it. I have been doing some Bronco work for Overland Outfitters already... the HD MOLLE Panel on the tailgate and the door pocket on the left page below are new for the Bronco; the right page are existing OO products that work well in the Bronco too...Caution. Slight derail ahead.
I stopped by the MORryde booth at OEX west this weekend.
Asked them when they were going to buy you a Bronco so you could develop accessories for it.
I tried.
Similar threads
- Replies
- 7
- Views
- 3K
- Replies
- 2
- Views
- 2K
- Replies
- 1
- Views
- 2K
- Replies
- 2
- Views
- 2K

