Barn Door for JK factory hardtops

jscherb

Expedition Leader
Your door pocket design(s) should have been at least a factory option from the start.
Let’s hope someone at Jeep monitors your threads, if they don’t they are missing the boat.

Jeep needs to continue to step up their game in light of the recent completion from the Bronco.
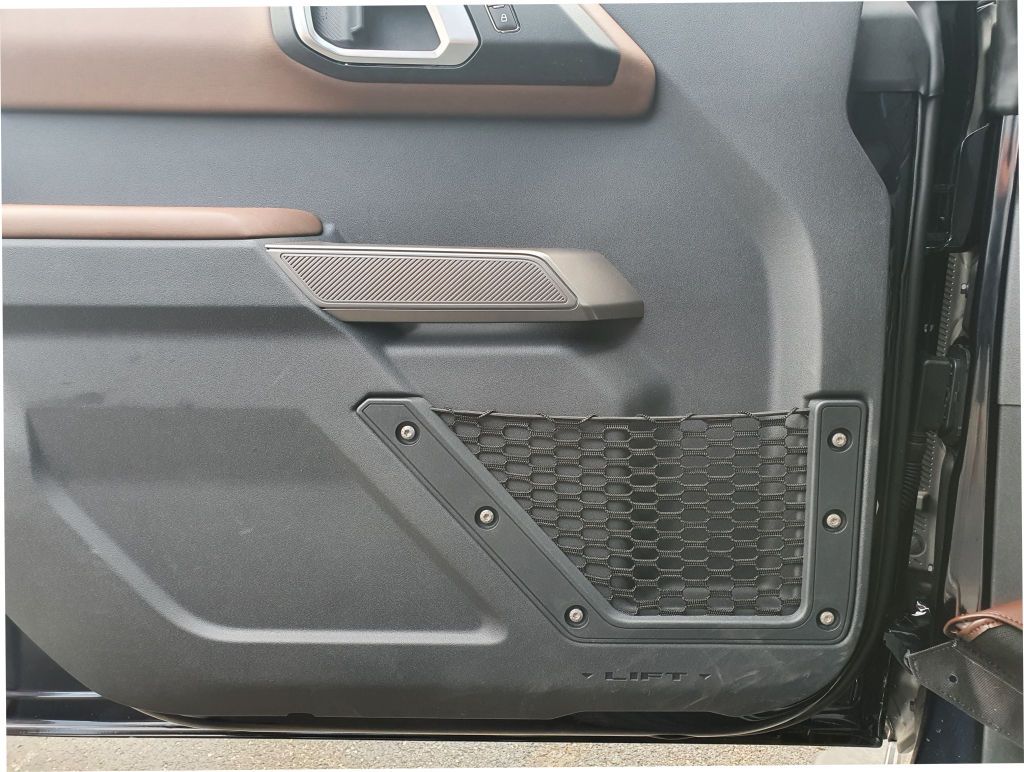
I agree Jeep needs to step up their game and I also believe Ford learned a lot from the shortcomings of the Wrangler when they designed the new Bronco. But one thing they didn't learn from Jeep is not to use stretchy nets in the door pockets. This is the driver door of a new Bronco:

BroncoDoorPanel.jpg


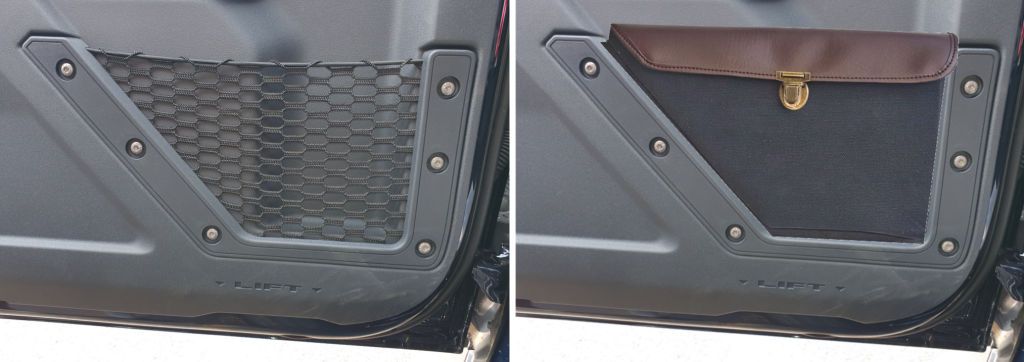
But one thing they did do better is how the net is attached to the door - on the Wrangler it's heat welded in place but on the Bronco it can be removed with screws. As soon as I saw the nets in a Bronco at the local Ford dealer I took some measurements and did this:

BroncoDoorPocketPrototype1SimEdit.jpg


BroncoDoorPocketPrototype1a.jpg


That's one of several Bronco-specific things I did when the first new Bronco showed up at the local dealer. No matter how nicely and thoroughly something is designed, there's always room for enhancement :).
 

jscherb

Expedition Leader
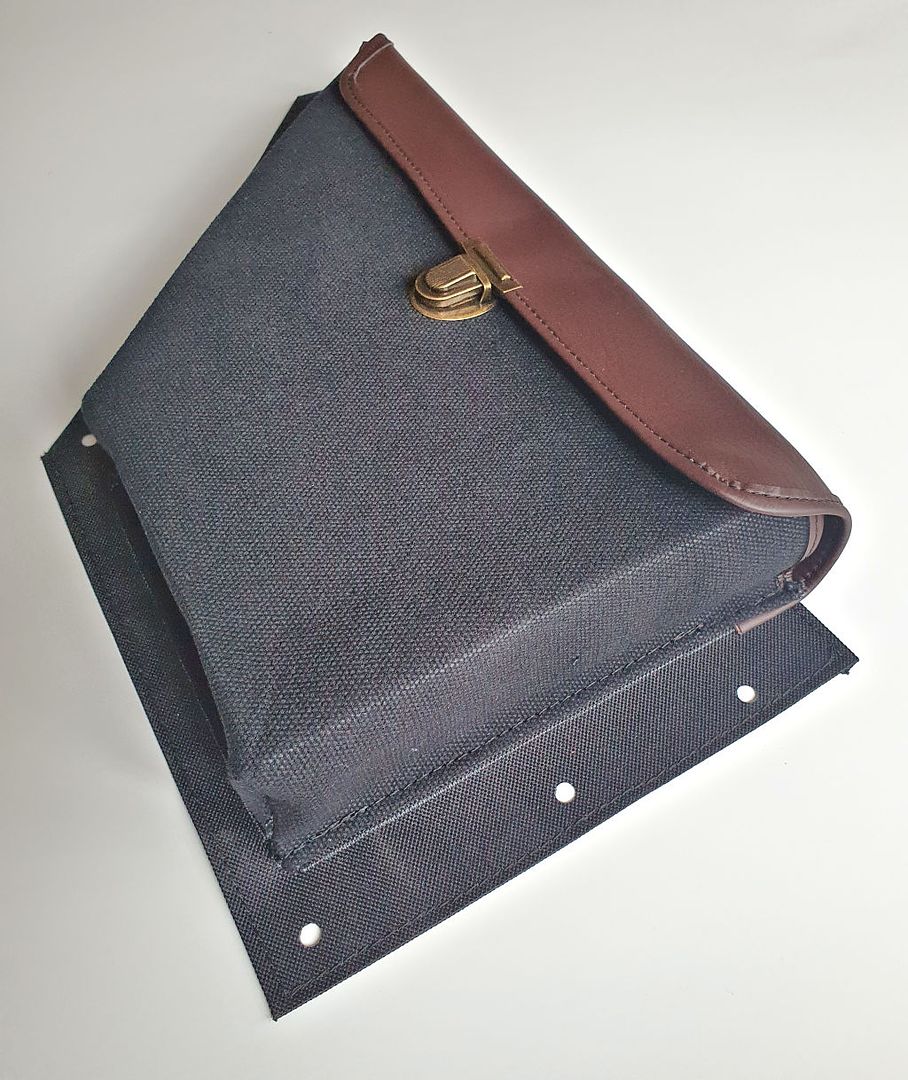
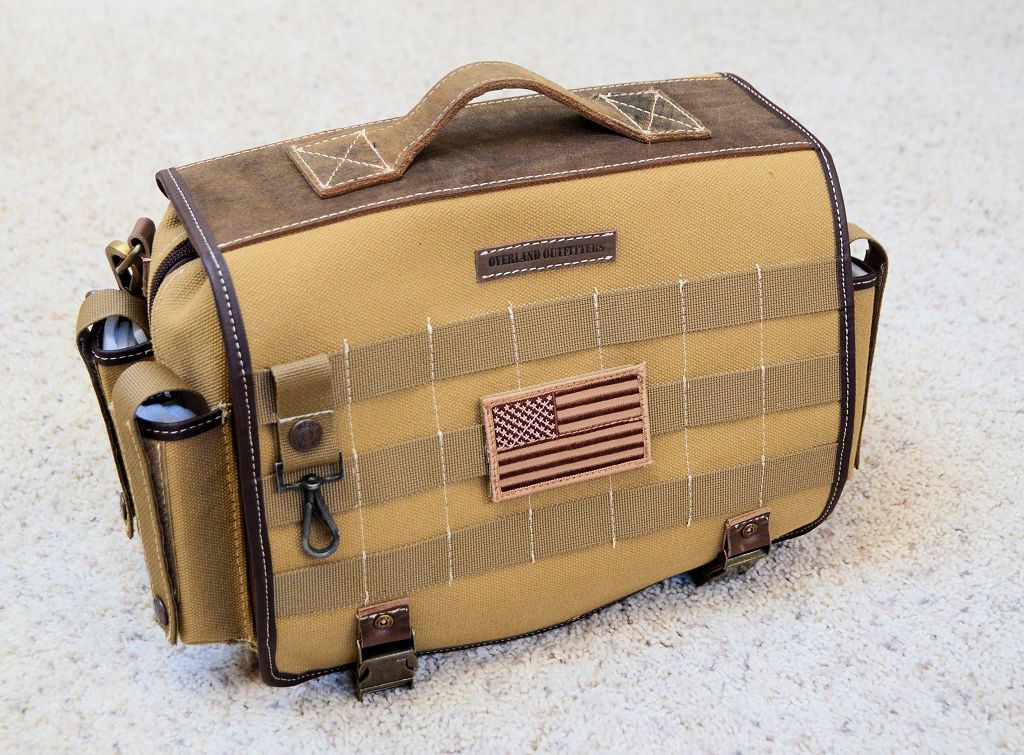
In early February I posted about a new design I was working on for a Tactical Gear/Tool Bag: https://expeditionportal.com/forum/...factory-hardtops.127687/page-332#post-2995944

I posted these images at the time:

TacticalGearBagProto1a.jpg


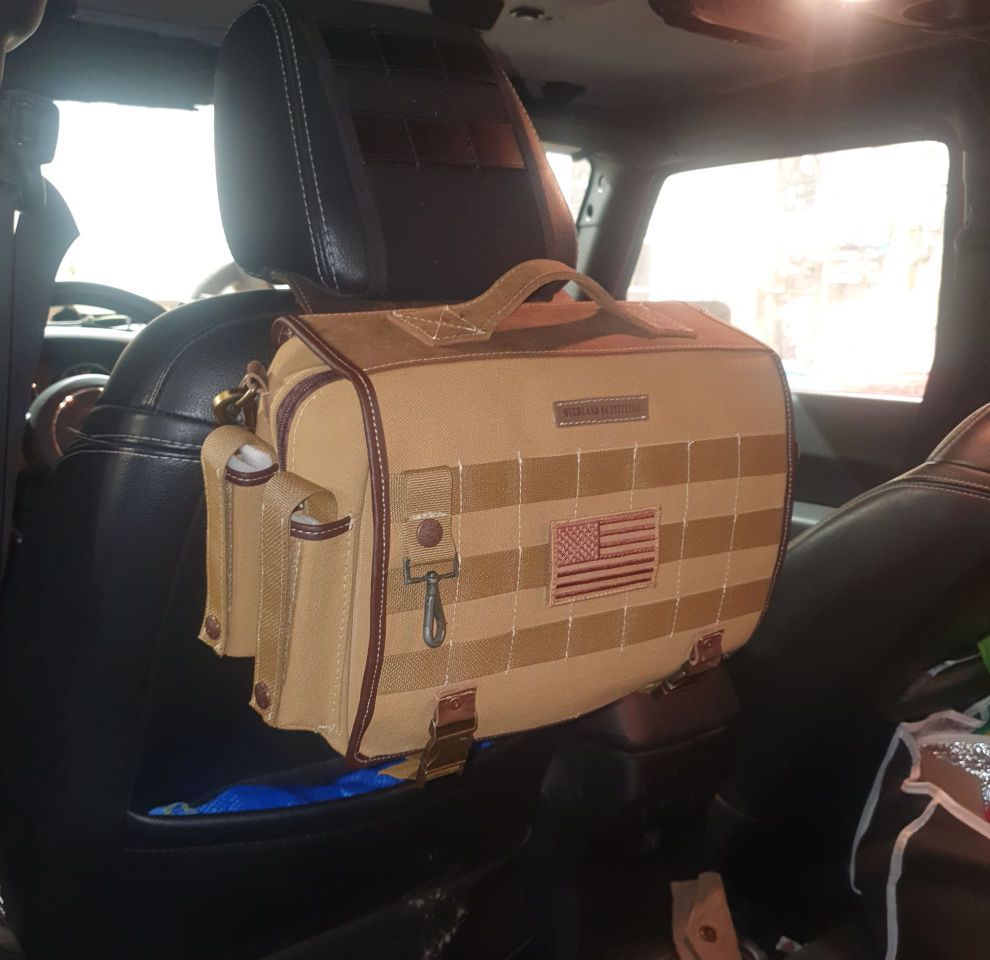
The bag has a Zip & Go interface so it can easily hang on a seat back:

TacticalGearBagProto1f.jpg


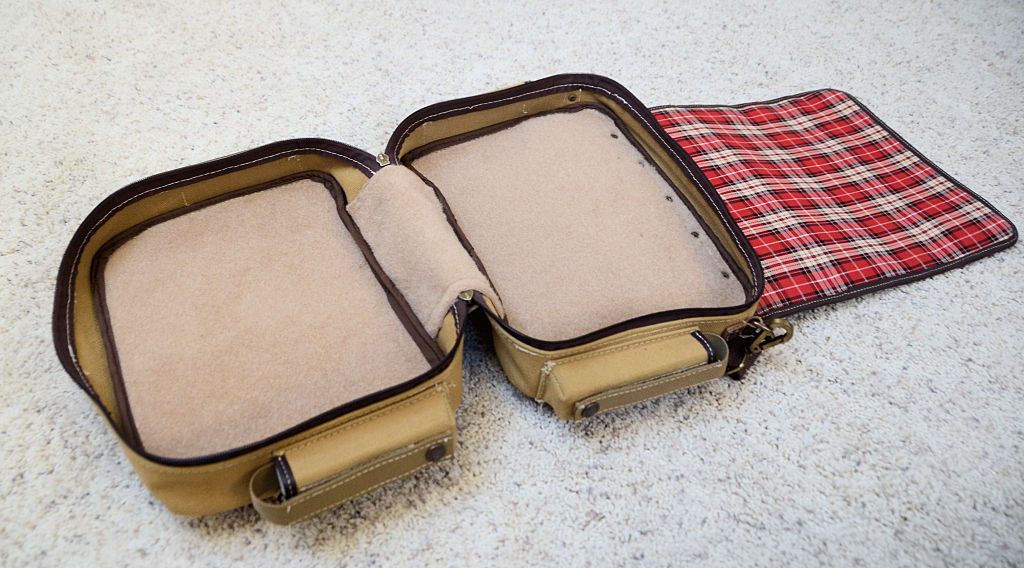
And the interior is lined with Velcro loop so different configurations are possible for different types of gear and supplies.

TacticalGearBagProto1e.jpg


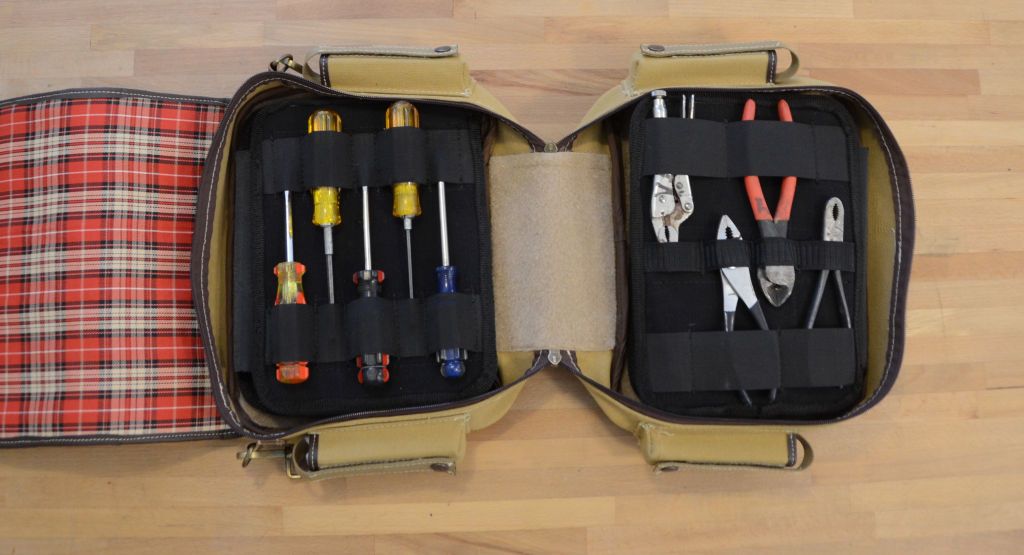
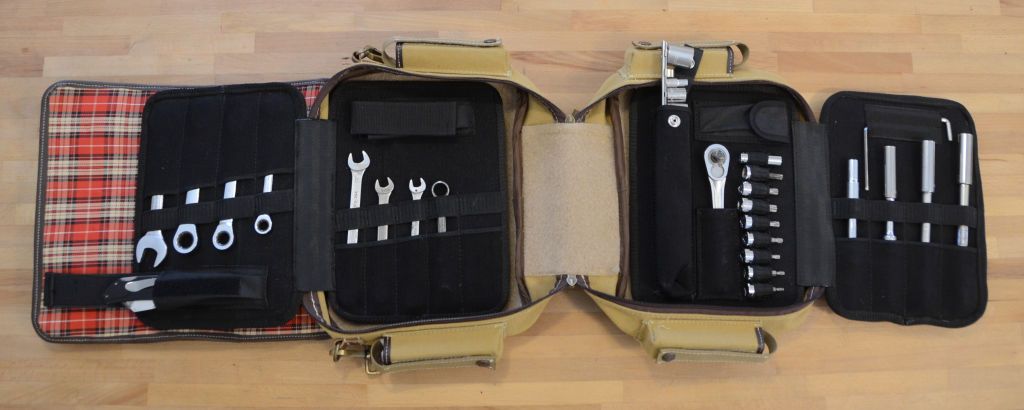
Today I finished sewing a tool insert for the bag:


TacticalToolBag1.jpg


TacticalToolBag2.jpg


I'll be putting this to use in the Jeep right away.
 

jscherb

Expedition Leader
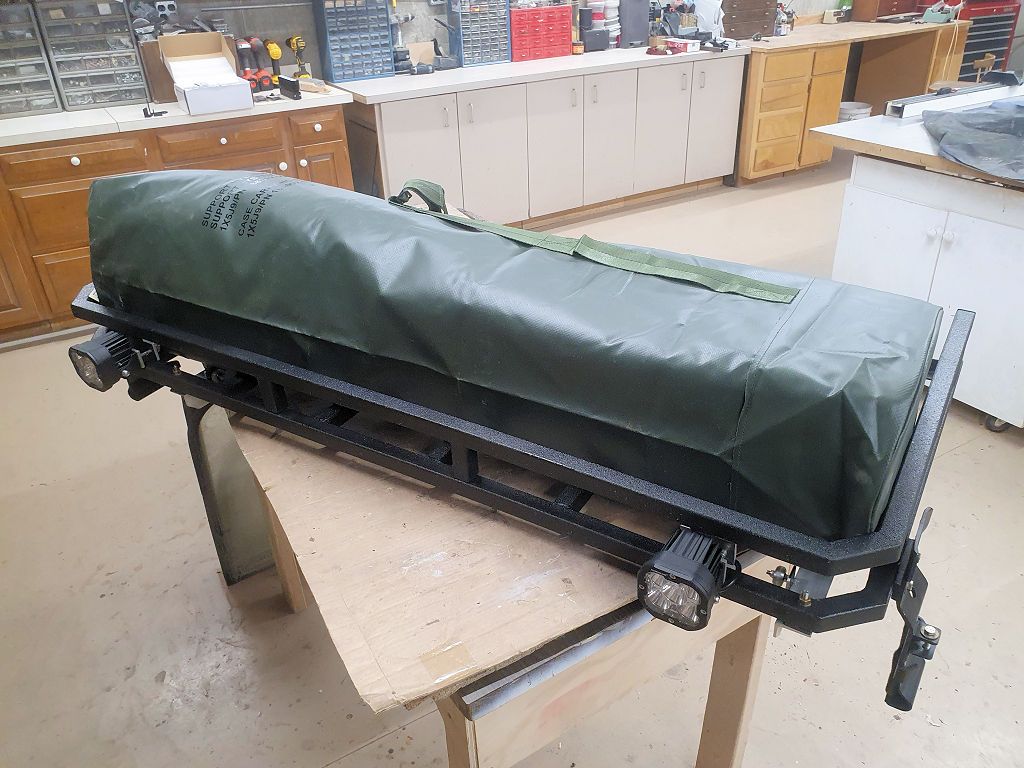
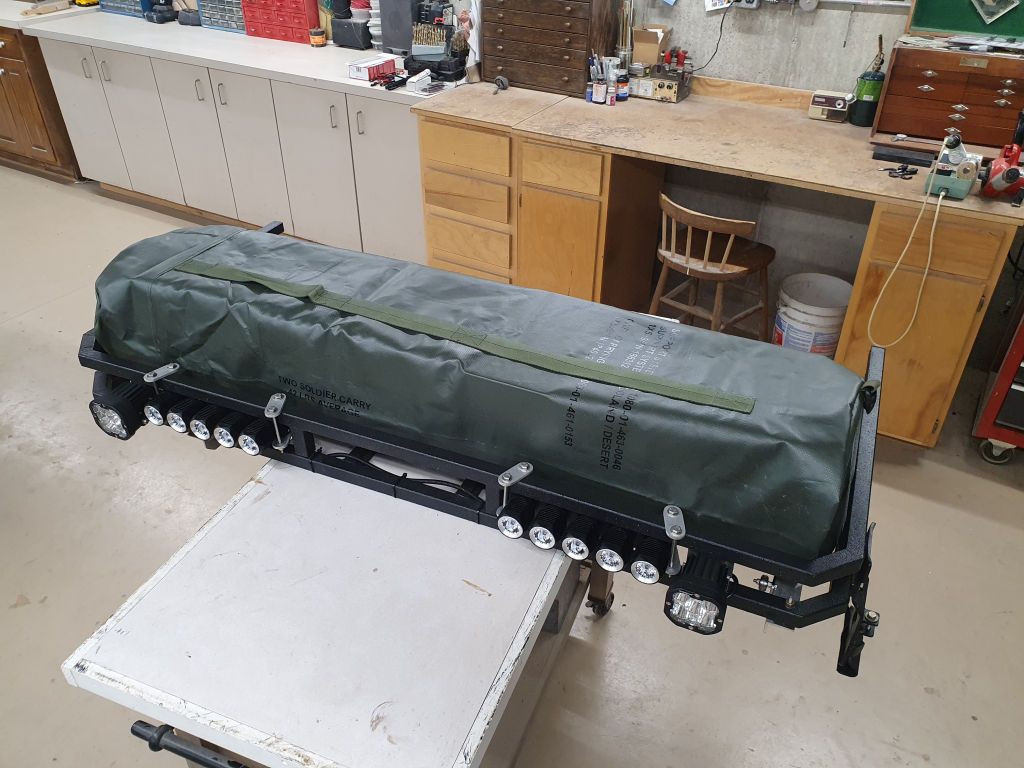
A couple of weeks ago I posted about a military surplus bag I found in a surplus store:

SuplusBag1.jpg


For only $12, it seemed like it might be useful for extra gear on the roof rack, but it had a problem - the open end of the bag had a drawstring closure, which wouldn't be weatherproof.

SuplusBag2.jpg


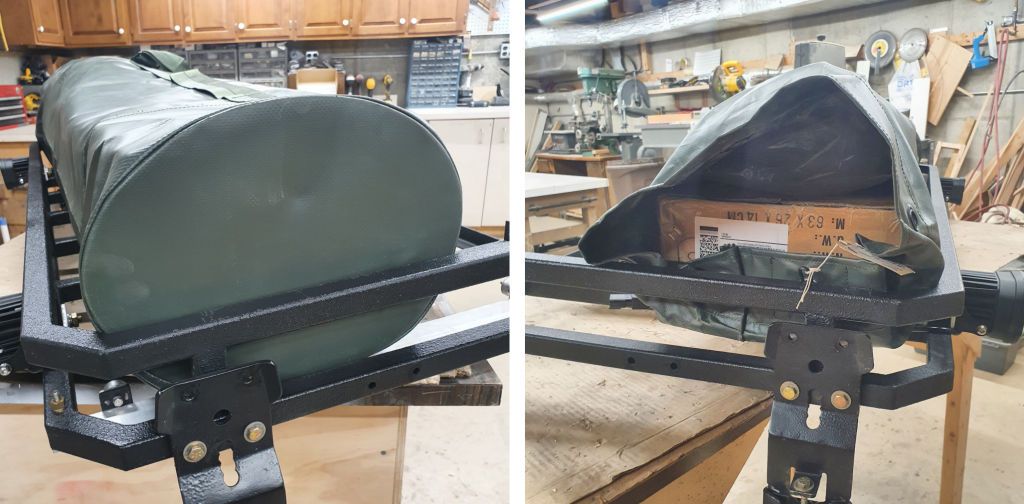
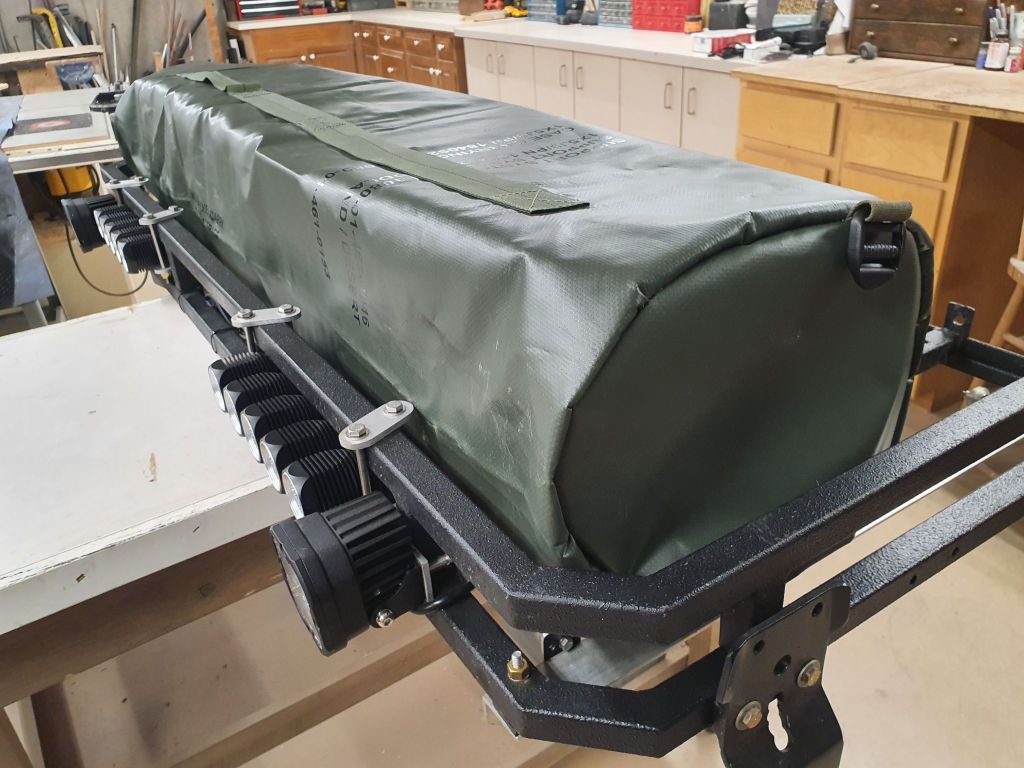
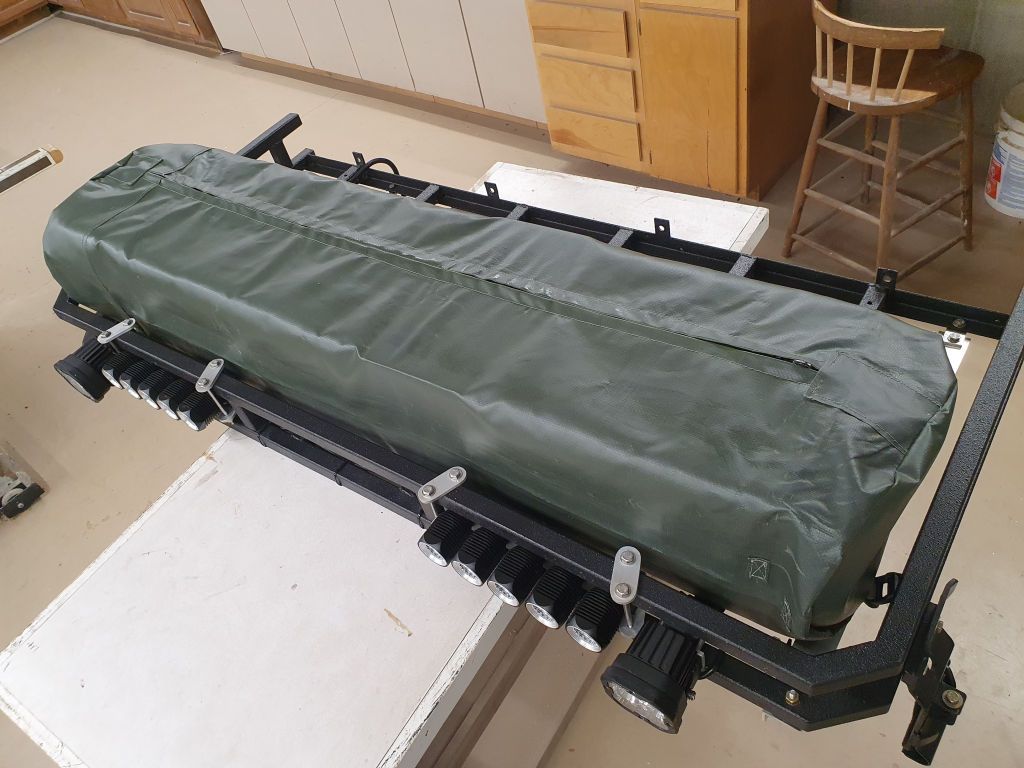
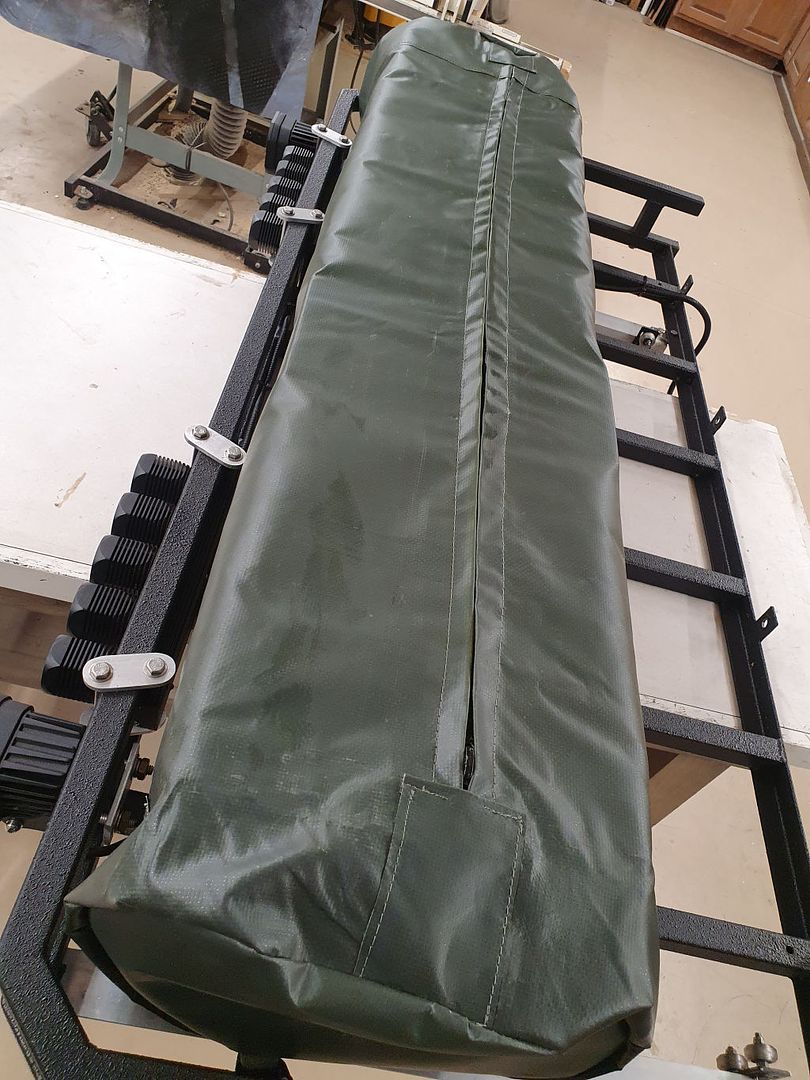
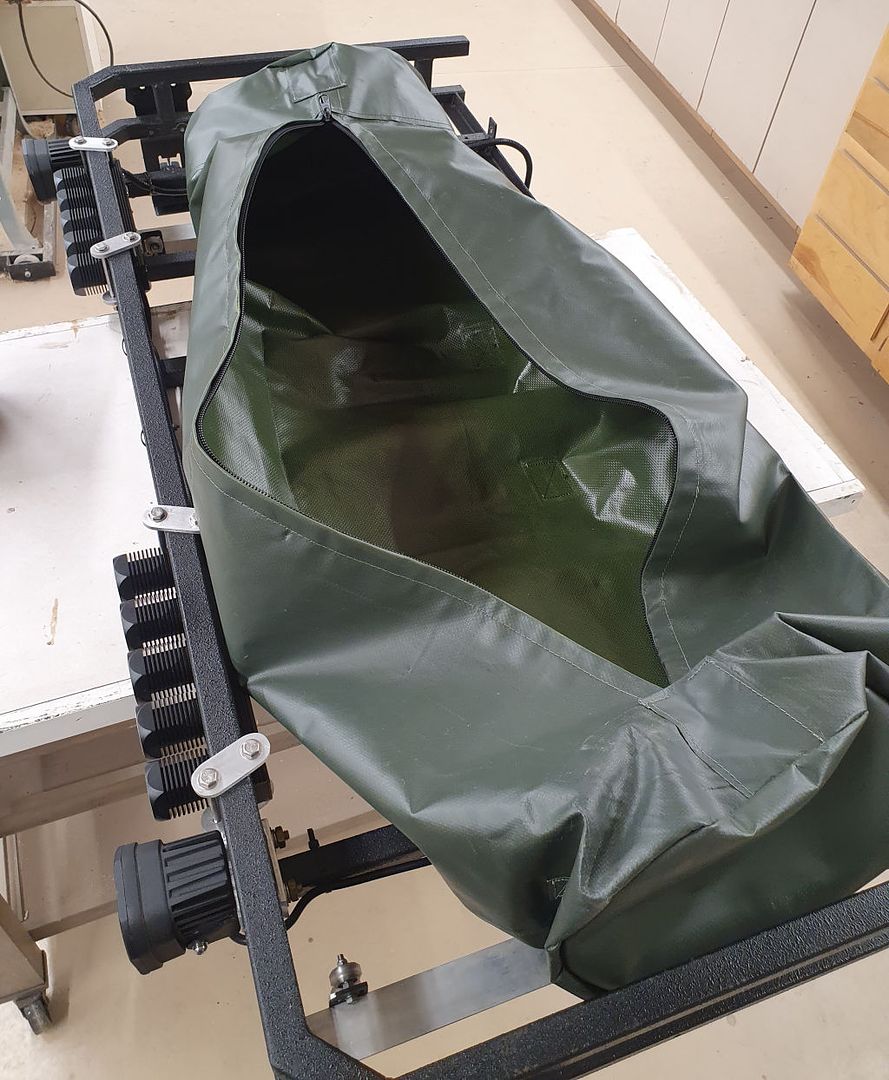
I did a little resewing to solve that problem. I got lucky with the fabric - the original closed end of the bag was an oval shape, and was made from two layers of fabric with a plastic stiffener in between so I unsewed that end, separated the two oval pieces of fabric, threw out the stiffener because it wasn't necessary and then I had two correct size ovals, one for each end of the bag. I added a zipper that runs the length of the bag which I salvaged from a scrap factory soft top.

DryBag1.jpg


DryBag2.jpg


DryBagZipper.jpg


DryBagZipper2.jpg


DryBagInside.jpg


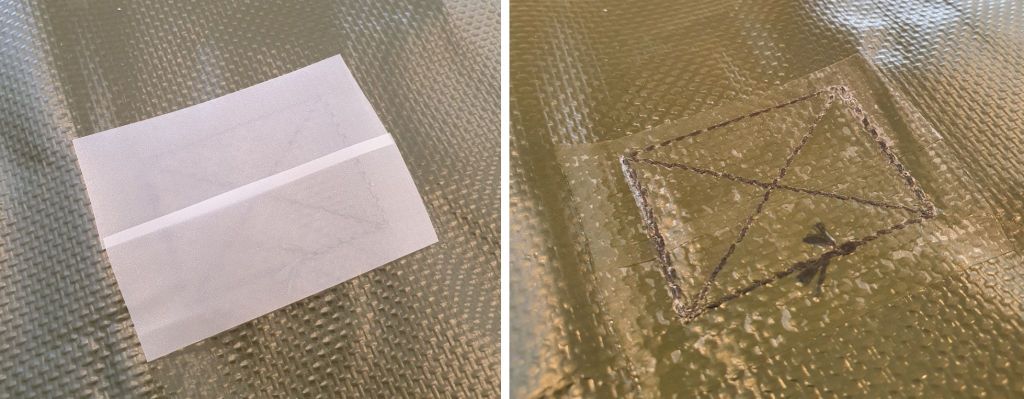
Even though the bag is made from waterproof material, as made for the government it could leak through the needle holes the stitching goes through so I sealed all of the original seams with iron-on seam sealing tape. For example, where the webbing strap is sewed to the bag, I sealed the stitching on the inside. Before and after photos:

SeamSealing.jpg


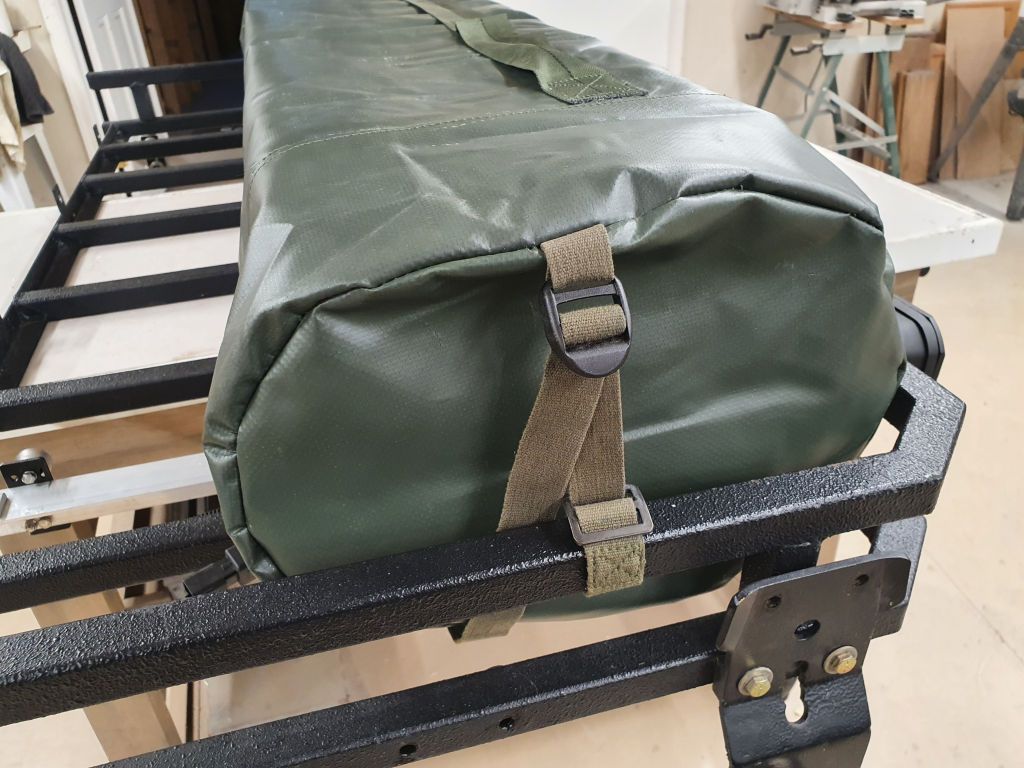
I added rings for tie-down straps, which are on the opposite side of the bag from the zipper, the idea being the tie-downs will be on top and the zipper will be facing down to prevent water ingress through the zipper.

DryBagStrap.jpg


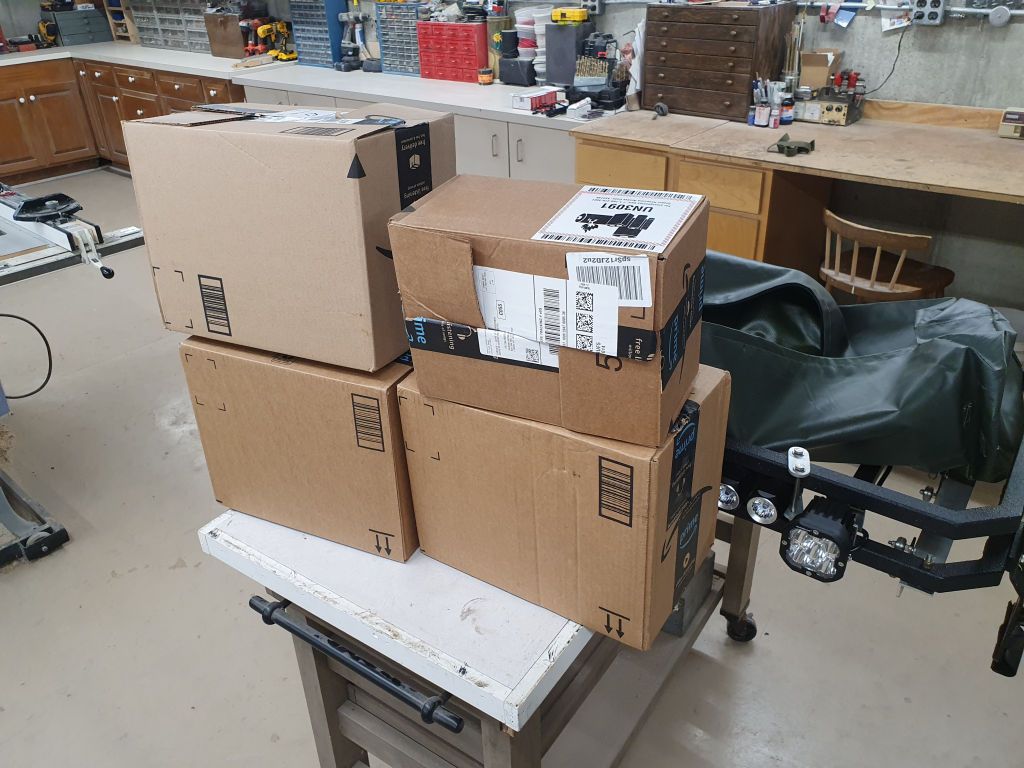
For $12 and a little sewing time this should add useful storage for longer expeditions. In most of the photos above, all of these boxes were inside the bag.

DryBagBoxes.jpg
 
Last edited:

jscherb

Expedition Leader
Not specifically a Jeep project but I'll make it a Jeep project...

I've been thinking for a while about adding remote-viewable security cameras to the house - it would be nice to check on things while I'm away. I've done some casual searching to see what's on the market but hadn't gotten too serious about it - until last week. I was contacted by a company that makes smart cameras and smart lighting and they asked if I might be interested in testing/reviewing some of their products. The company is called Lumary Smart Home (https://lumarysmart.com/) and I found this on their web site:

LumarySecurityCam(1).jpg


It's capable of issuing alerts to a smart phone if it detects motion in its field of view; it has an SD card slot to record video as well as a live video feed to a smart phone. It has a microphone and speaker so you can communicate on a smartphone with a person in the field of view of the camera, and it works in color at night and also has an infrared mode. Seems like it's packed with all the important features. The product web page: https://lumarysmart.com/collections...am-color-night-vision-outdoor-ip66-waterproof.

After checking the features and specs I agreed to test one; the said they'd send me one and it arrived today:

LumarySecurityCamOpenBox(1).jpg


I decided that for an initial test period I'll install the camera in the garage with a view of the inside of the garage (which makes this a Jeep project because three Jeeps live in the garage? :)). Doing a test period in the garage is a bit easier than a full installation outside - I don't have to run power to an outside-mounted camera and I don't have to mount the camera to the somewhere on the outside of the house. If the garage test proves successful then I can make plans for a multiple-camera outside installation.

Might be a week before I get to installing this, I'll post details when I do.
 

jscherb

Expedition Leader
Even if you've got a bag that's made from waterproof material, it can still leak - at the stitching. I showed in my post about the bag yesterday how I use iron-on tape to waterproof simple seams, but some seams are more complex and that tape won't work. for example, the seams where the ends of the bag are sewed to the sides - they're not flat seams so the tape can't be ironed over them. So here's some more detail for anyone needing to waterproof a bag.

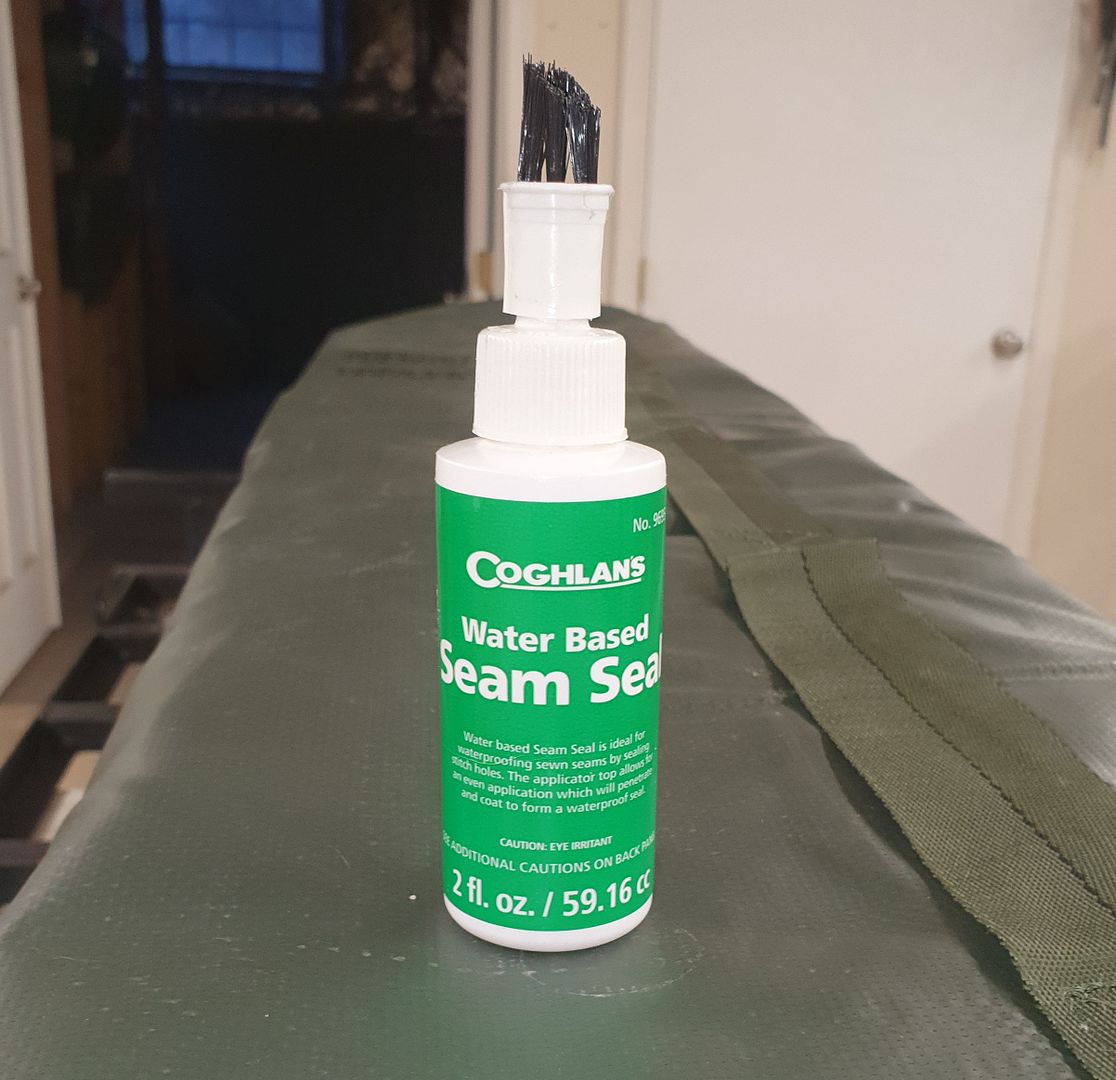
I use Coughlan's Water-Based Seam Sealer. It's available in most Walmart sporting goods departments and many other stores.

CoughlansSeamSeal1.jpg


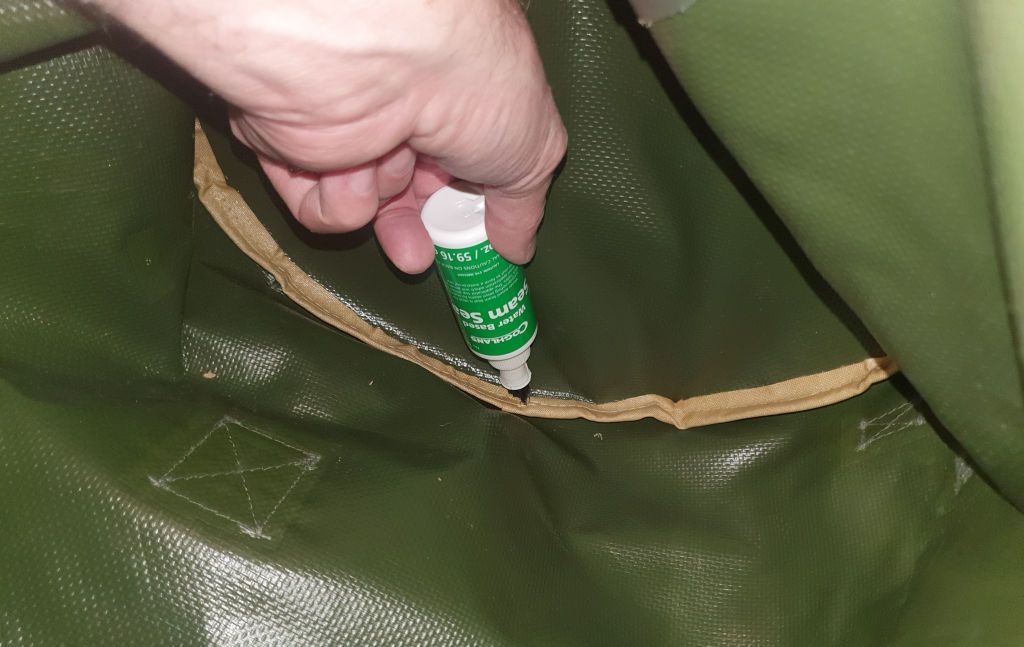
To waterproof a standing seam like the end seams of this bag, I first bind the seam with a waterproof binding. In this case I bound the seam with a strip of coated Cordura nylon fabric (tan). Once that was sewed in place, I used the applicator on the Coughlan's bottle to soak the stitching. This is a posed photo after the bag was done, I applied the seam sealer when the bag was inside-out right after sewing because access to the seam was easy then.

CoughlansSeamSeal2.jpg


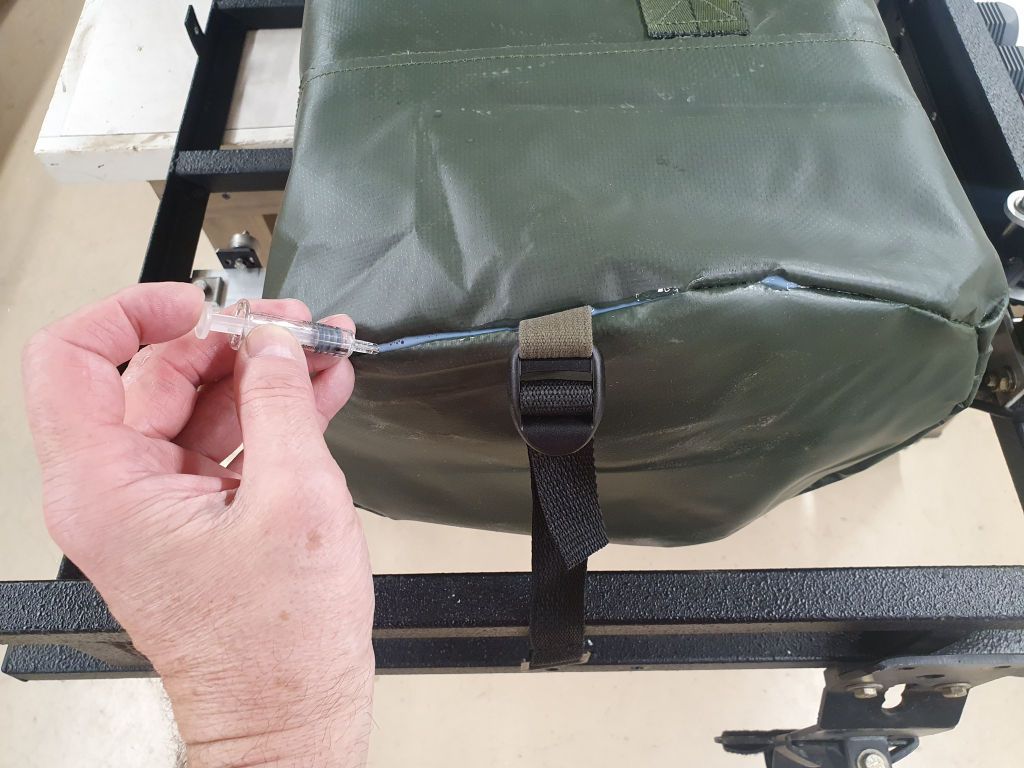
After that was dry and I turned the bag rightside-out, I applied Coughlan's to the outside of the seam. I did this using a glue syringe, but a small paintbrush would work fine too.

CoughlansSeamSeal3.jpg


With the iron-on tape on the flat stitching and the binding/seam sealer on the standing seams, the only place this bag could possibly now leak is at the zipper, which will be facing down when the bag is in use on the rack. Gravity will prevent water ingress there.

FWIW to anyone sewing a dry bag or trying to weatherproof one.
 

jscherb

Expedition Leader
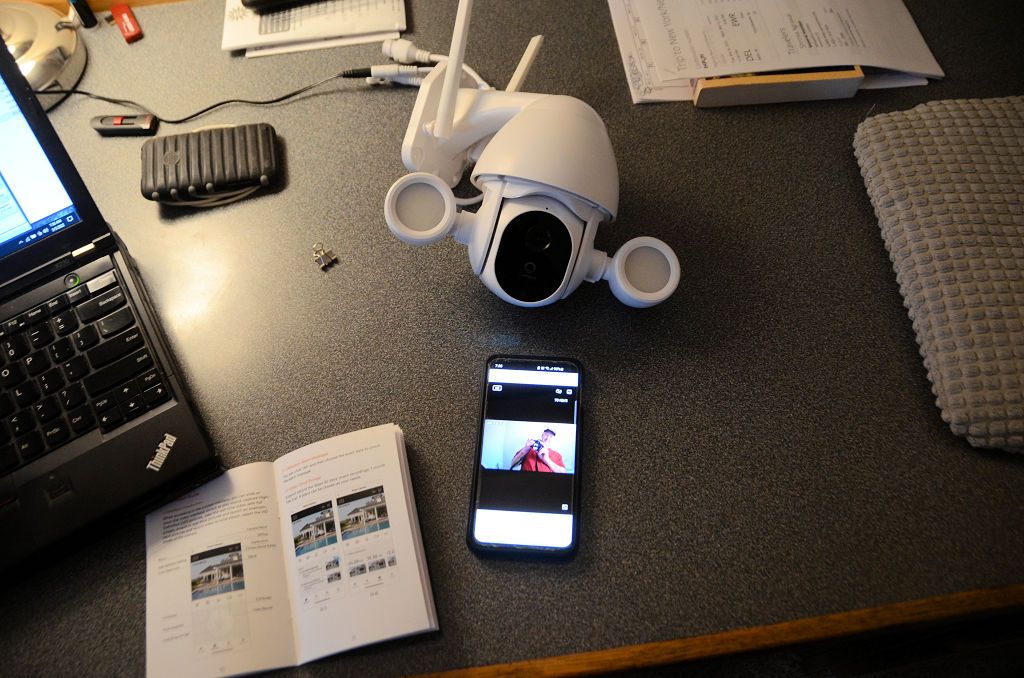
This morning I did a quick desk-check of the Lumary camera. Setup was simple and only took a few minutes, I'll cover that in detail when I do a formal review. In this photo the camera is on my desk; the image on the phone is me taking the photo with my DSLR. The wifi on my phone is off, so the image is going from the Lumary camera to their online server and then to my cell phone, simulating how it will work when I'm not home. Control of the camera is easy - dragging left, right, up or down on the camera image on the phone aims the camera.

LumaryDeskCheck.jpg


So far I'm impressed. Hopefully I'll get a few minutes tomorrow to mount the camera in the garage and give it a real test.

Neat stuff! I've wired some sideview/rearview cams on the Cherokee to a mini DVR for dashcam purposes (on top of splitting the output to a 4ch monitor).
IIRC the dvr also had some form of network capability... so, if you rigged up constant power and a permanent hotspot in the Jeep you could make it a fully (albeit excessive) jeep item.

But using it to watch the jeeps in the garage sounds more practical. Also, that camera control feature is nifty!
 

jscherb

Expedition Leader
Neat stuff! I've wired some sideview/rearview cams on the Cherokee to a mini DVR for dashcam purposes (on top of splitting the output to a 4ch monitor).
IIRC the dvr also had some form of network capability... so, if you rigged up constant power and a permanent hotspot in the Jeep you could make it a fully (albeit excessive) jeep item.

But using it to watch the jeeps in the garage sounds more practical. Also, that camera control feature is nifty!
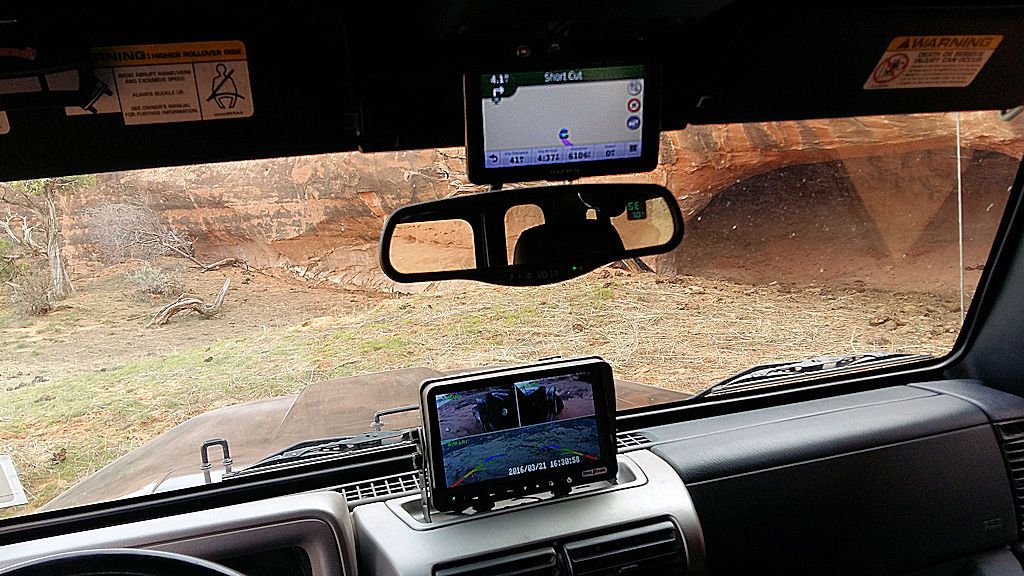
Back in 2016 I put together a camera/DVR system that Retrofit Offroad marketed for a while, it was called TrailVision. It had a dash mounted monitor/DVR and up to 4 cameras. This photo was taken near Moab, it shows the TrailVision system on the dash of the LJ with a split screen view of the trail ahead.

MonitorAndGPS_zpsbzpzzvoa.jpg


The system turned out to be very useful navigating close clearances on the trail and I still use it regularly when I'm on the trail with the LJ.

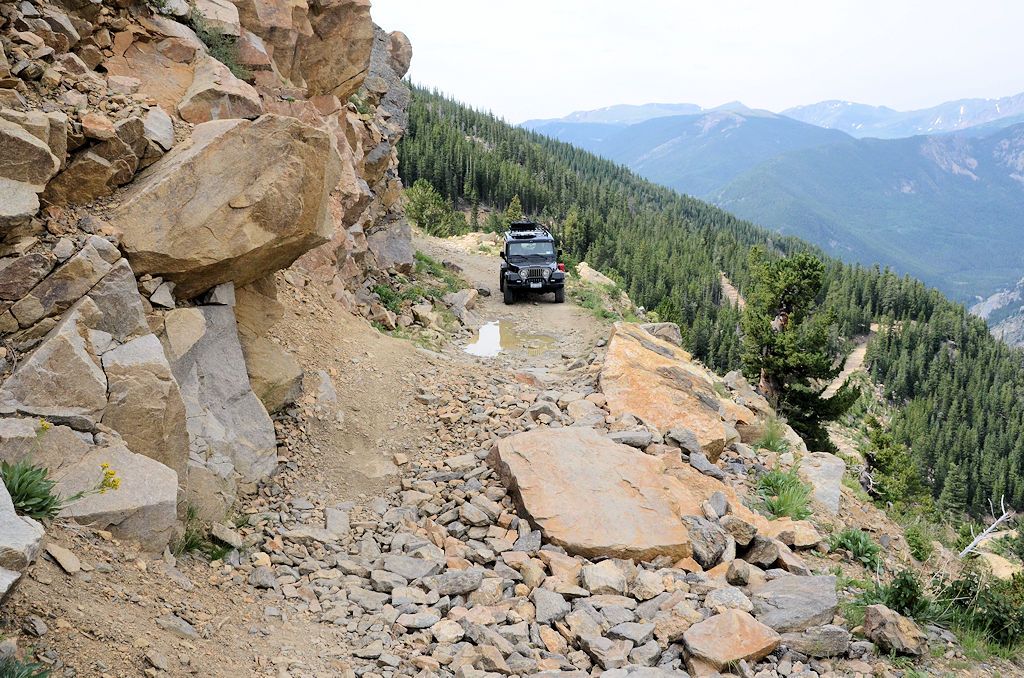
I took these photos and videos ascending Saxon Mountain just south of Georgetown in Colorado...

A rockslide is partially blocking the trail at this point. The clearance over the slide is fairly narrow, on the driver's side there are several large boulders, and on the passenger side there's a large overhanging rock. You can see a white spot on the projecting corner of that rock, apparently other vehicles have hit it. After studying the situation for a few minutes, I decided the best line would be to hug the rocks on the driver's side, and then come down from the slide with the driver's side tires on the large rock that's slanting down.

SaxonRockslide_zpshtnzewkb.jpg


I set up a tripod and took this video with my Nikon. At one point you can see the left turn signal flash briefly, that's when I used the turn signal to switch the camera view to the left side camera - I didn't want to take my hands off the wheel too much, and since my TrailVision system is wired into the turn signals I could switch cameras with my hands on the wheel.


Here's the TrailVision version of the same action. It starts with the windshield view, and then switches to the left camera view to check the dropoff at the edge of the road. Next I switched to the right camera, I wanted to come as close to a rock there as possible to stay away from the edge of the road. Then back to the left camera (this is the turn signal flash seen in the video above), I needed to stay as close to the rocks on the driver's side as possible to stay away from the high rocks on the passenger side. Then at about 22 seconds in, in the left camera I guide the wheel onto the rock that slopes back down to the trail. I need to be on this rock or else I'll scrape the roof on an overhanging rock. Towards the end I switch back to the windshield view.


This next video was taken on the ascent up from Devil's Punchbowl heading towards Crested Butte in Colorado. The trail is a narrow ledge most of the way, with a sharp dropoff into the canyon on one side and tight clearance on the other side so I'm using split screen to monitor both sides.


Almost seven years later, the system is still in the LJ and gets used regularly. All of the wiring stays in place and the monitor/DVR and cameras are stored in an ammo can over the inner fender; when I'm on an expedition the gear comes out of the ammo can and installed; it takes about 10 minutes to install the cameras and monitor.

EJSTestLJ_zpsoh4ffi2r.jpg


Actually the TrailVision ammo can is now stored on the passenger side because the tray in the photo above is used for the Trail Kitchen battery.

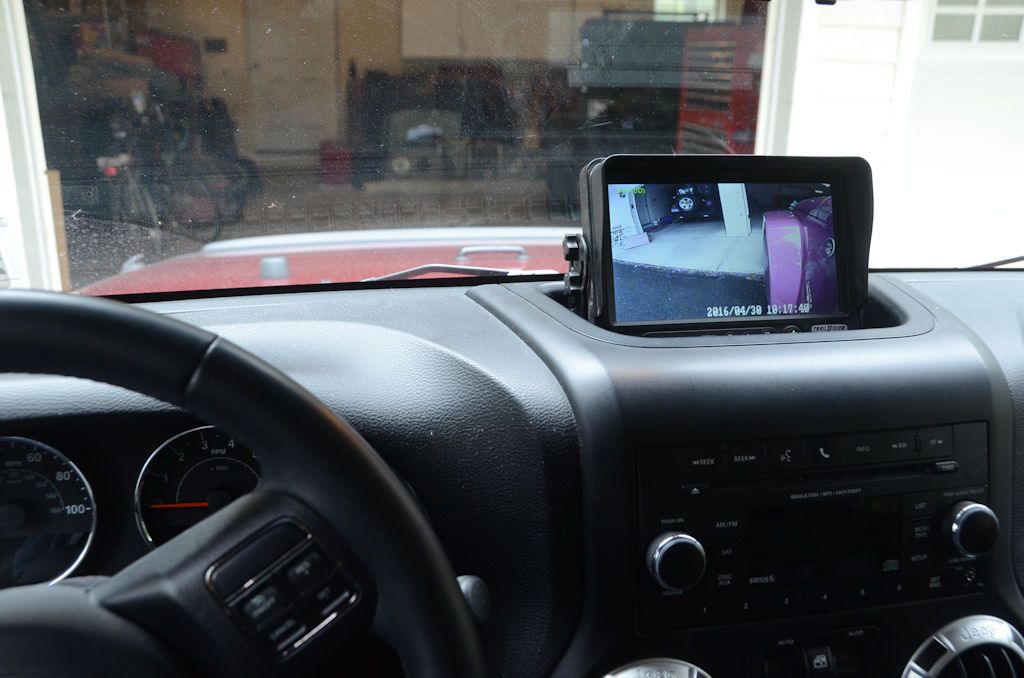
I did also install the TrailVision system in the JKU but since the LJ is my primary trail Jeep I don't have any good videos of the system in use there. This is a driveway view of the monitor/DVR in the JKU and the image on the screen is a camera mounted facing forward on the driver's side rear view mirror.
MonitorInstalled_zps1ir31wfm.jpg
 

Zeep

Adventurer
Where exactly do you interface with the turn signal harness?
I eventually want to add a 2 DIN receiver to my dash. A 2 camera input would work for front and rear views.
You say, Trailvision is no longer available?
 
Last edited:

jscherb

Expedition Leader
Where exactly do you interface with the turn signal harness?
I eventually want to add a 2 DIN receiver to my dash. A 2 camera input would work for front and rear views.
You say, Trailvision is no longer available?
The system is still listed on the Retrofit Offroad web site (https://www.retrofitoffroad.com/trailvision-off-road-jeep-camera-system/) but the page doesn't appear to allow ordering the product so I'm assuming it's not longer available, but you could ask them. Maybe they still have some in stock.

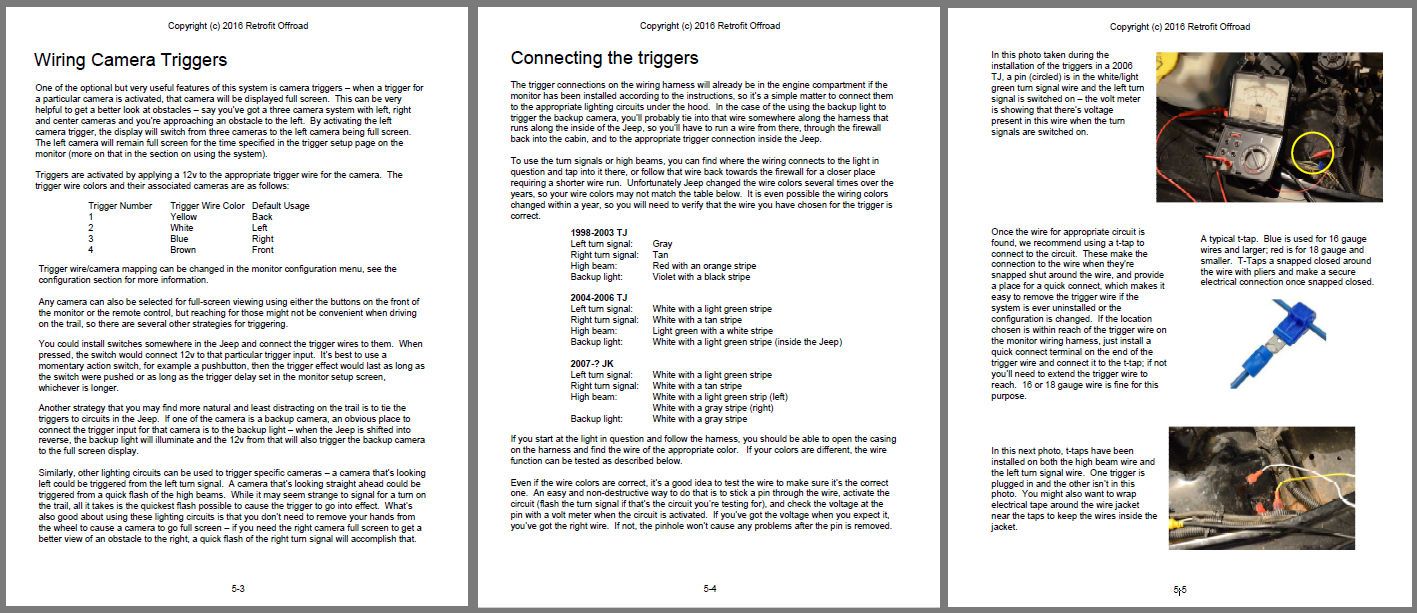
When I put the product together for Retrofit, I wrote a very detailed 46-page instruction manual that covered pretty much everything one would need to know to install the system - mounting cameras, routing wires into the cabin, operating the DVR, etc. These are the pages devoted to wiring the triggers to turn signals - I recommended doing it using t-taps on the wires leading to the front turn signals as described here (I think if you zoom this image in it will be easily readable):

TrailVisionTriggers.jpg


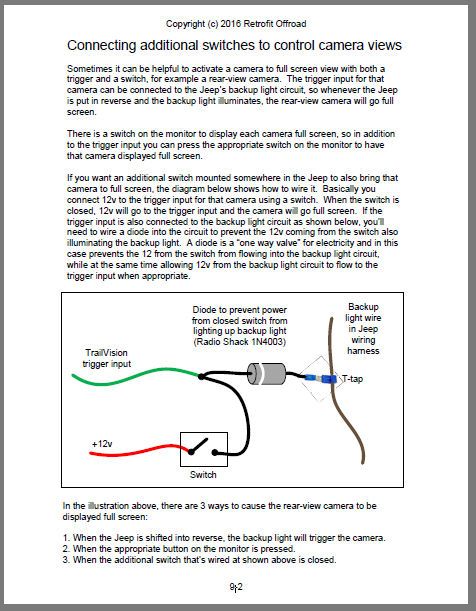
The manual also included a page on how to control camera views with switches:

TriggerSwitches.jpg
 

TripLeader

Explorer
Sir,

You are living, inventing, thinking, and operating on a level far superior to the rest of us. I am in awe of what you do and the way you freely share it here.

Thank you.
 

jscherb

Expedition Leader
Sir,

You are living, inventing, thinking, and operating on a level far superior to the rest of us. I am in awe of what you do and the way you freely share it here.

Thank you.
Thank you very much. Mostly I just have enough free time to think up new things and the wherewithal to try them out :).

I do spend a lot of time documenting things so people who are interested in implementing my ideas can do so. I really hope I've inspired people to do some of these projects themselves and I'm always available to answer questions and provide guidance.
 

jscherb

Expedition Leader
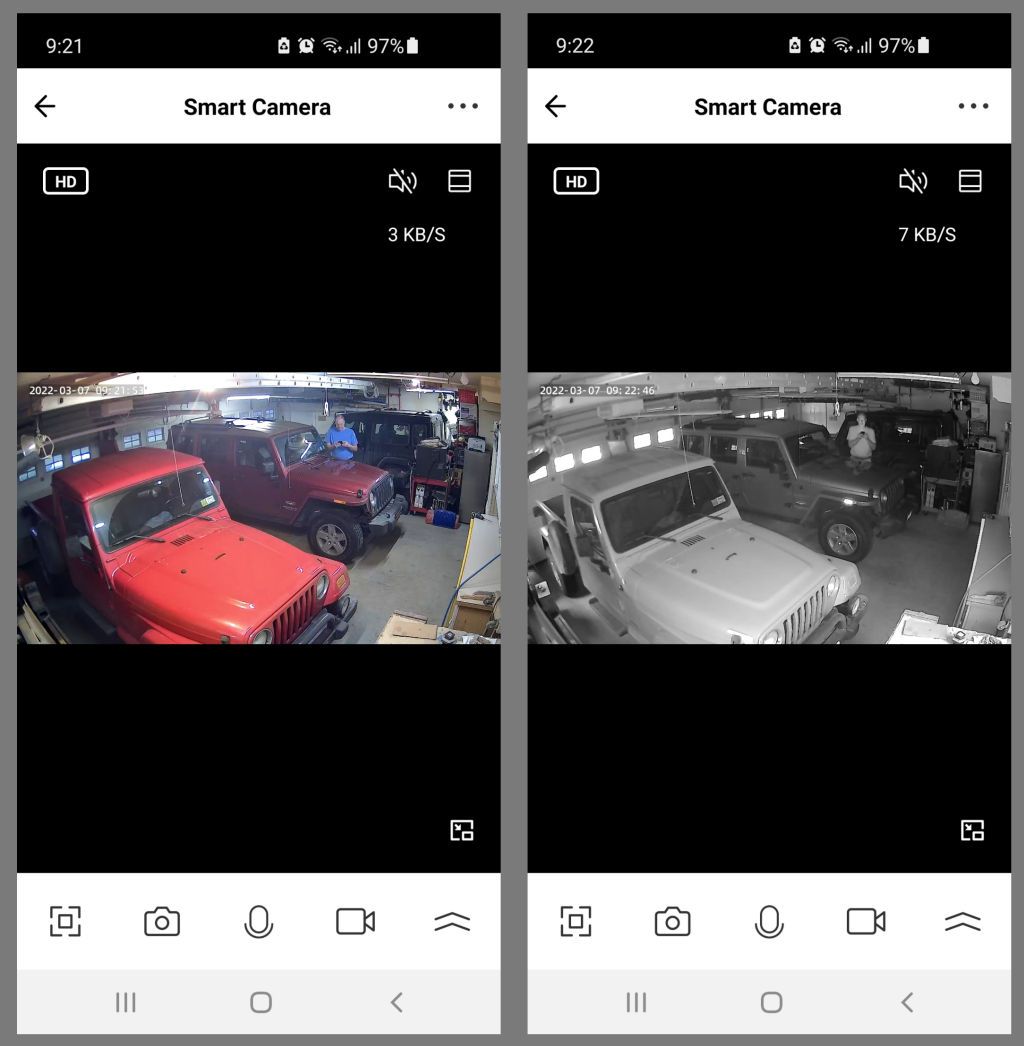
I installed the security camera in the garage this morning. All it involved was attaching the mounting bracket to the wall; the camera was already operational with my WIFI and tested on my desktop so once the bracket was installed all I had to do was slip the camera into the bracket and plug it into a nearby outlet for power. These are two screenshots from my phone, in them you can see me standing in the garage and I just finished using the app to aim the camera. The color photo was taken with the garage lights on; in the b&w photo the camera automatically switched to infrared night mode because I turned the garage lights off and it's a very dark rainy day so very little light in the garage.

InitialInstallTest.jpg


After I've tested all the features I'll post a complete review; it might be a week or so before I have time to really give the camera a workout.
 

jscherb

Expedition Leader
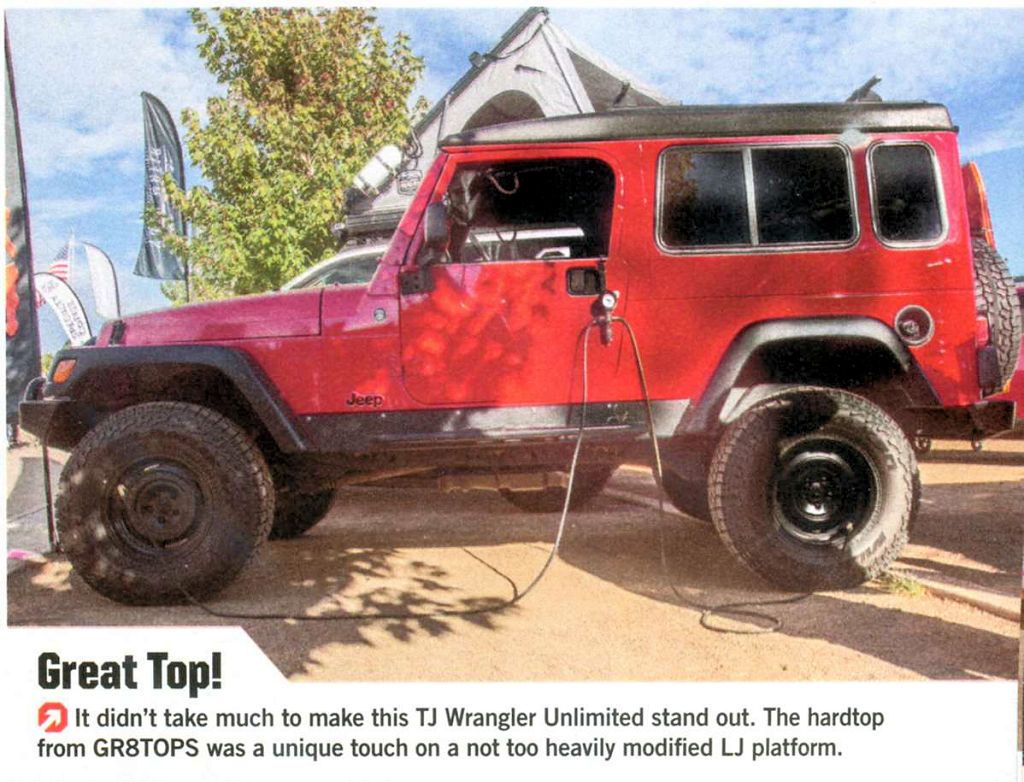
One of the fun things about my design hobby is coming across things I've designed "out in the wild". For example, I regularly see JKs with MORryde's HD tailgate hinges out on the road (there are over 10,000 pairs of them out there, so spotting them isn't too uncommon). The other day the April issue of Four Wheeler arrived and this was in an article about last year's Overland West event:

FourWheelerApr22.jpg


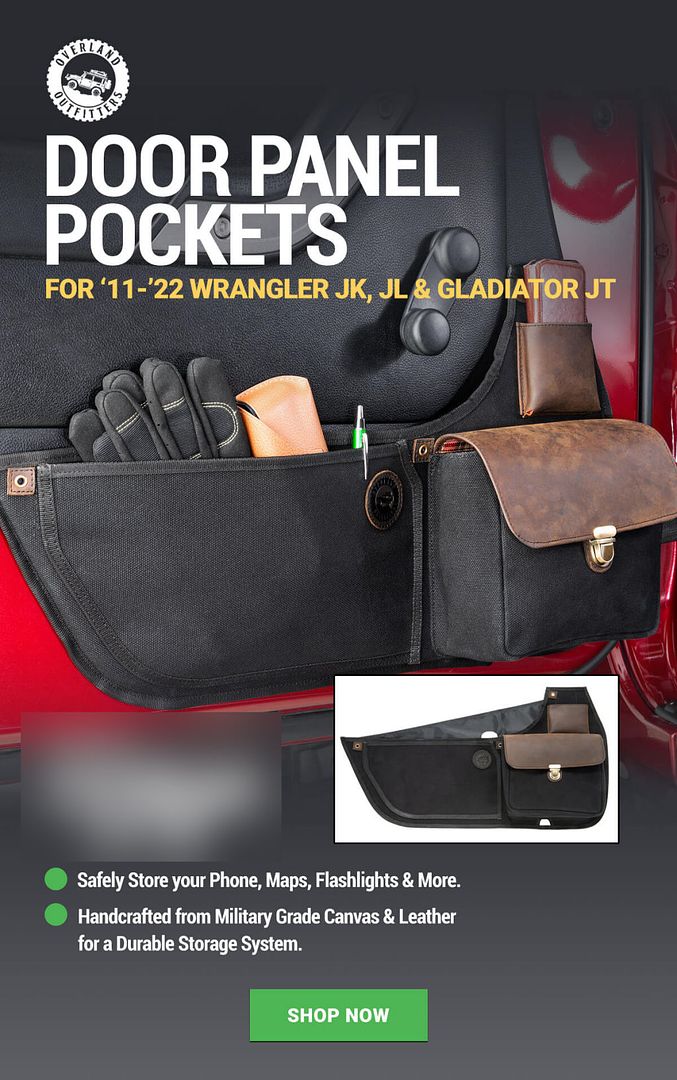
And the Quadratec email that came in this morning featured this (I've blurred the price because I'm not suggesting that anyone buy these):

QTDoorPockets.jpg


It's rewarding seeing my hobby having a life of its own :).
 

Forum statistics

Threads
188,297
Messages
2,905,110
Members
229,959
Latest member
bdpkauai
Top