Barn Door for JK factory hardtops

jscherb

Expedition Leader
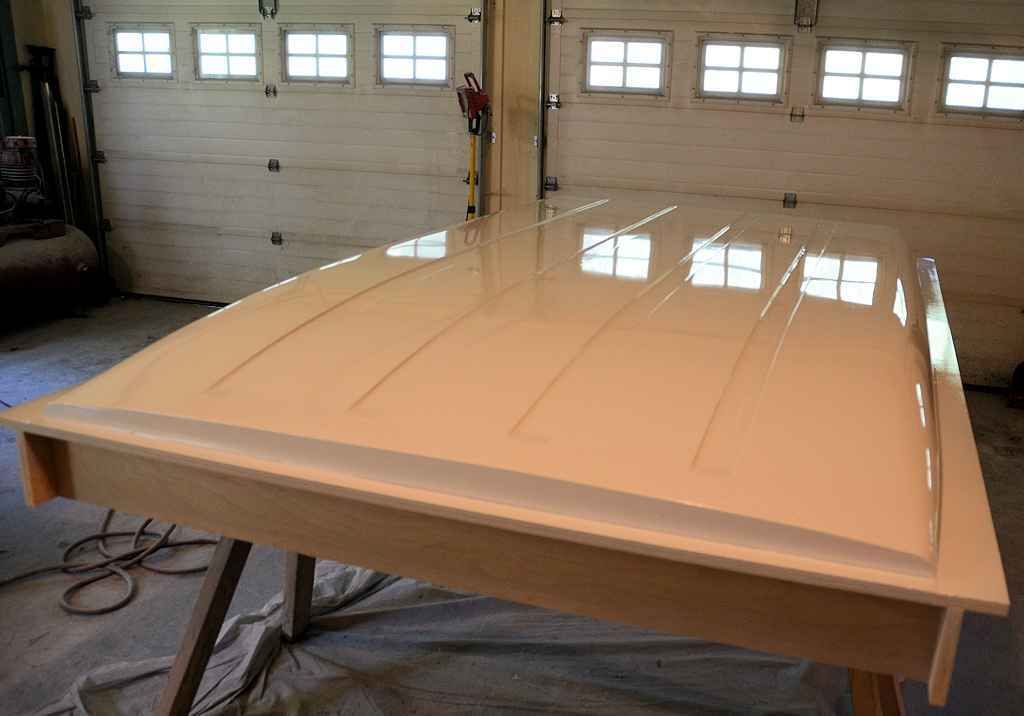
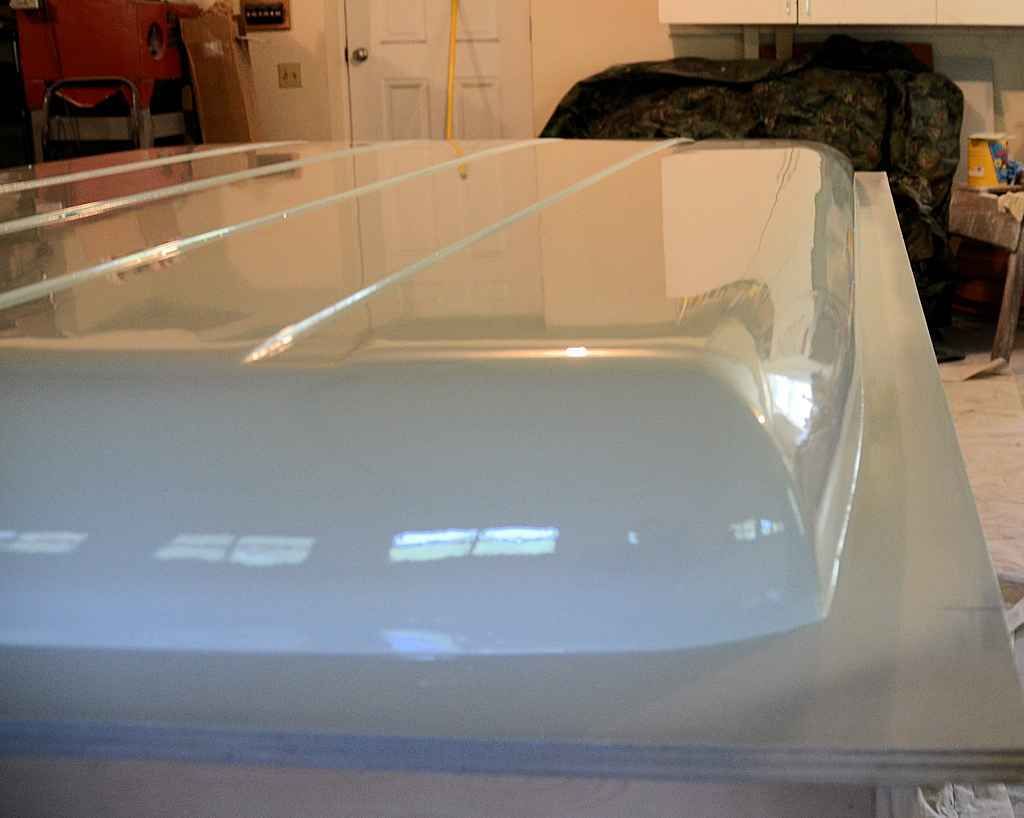
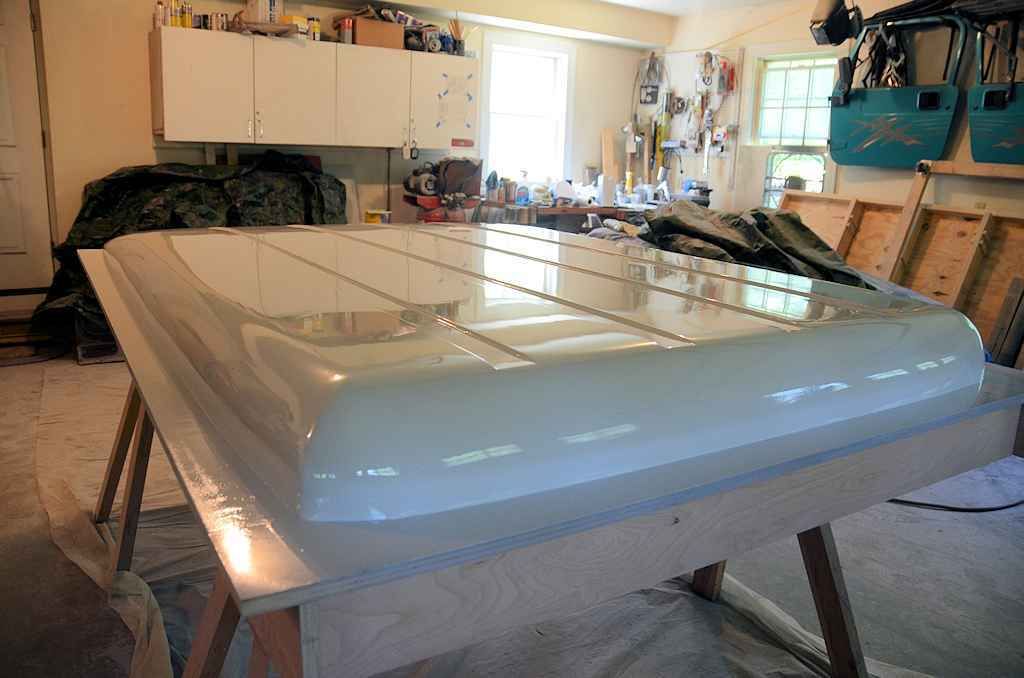
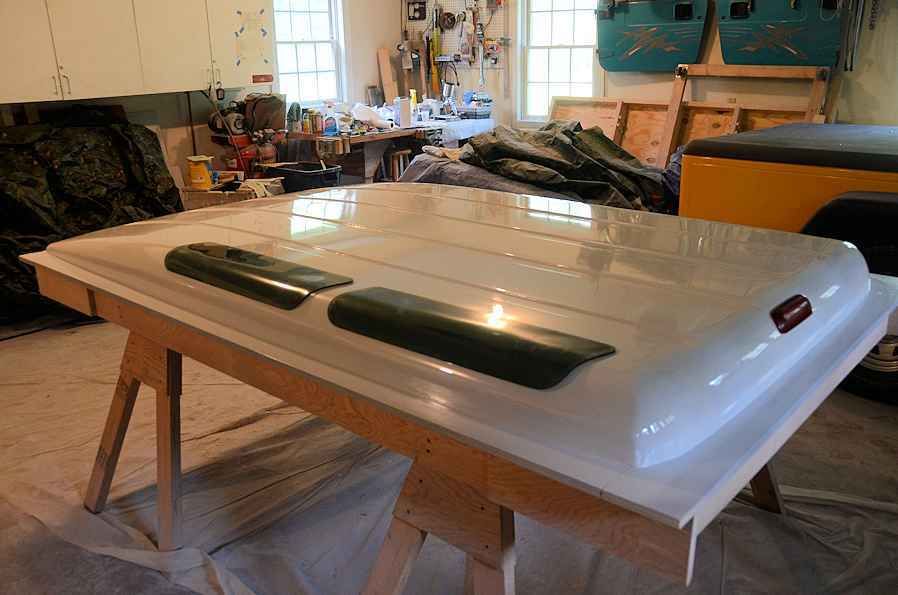
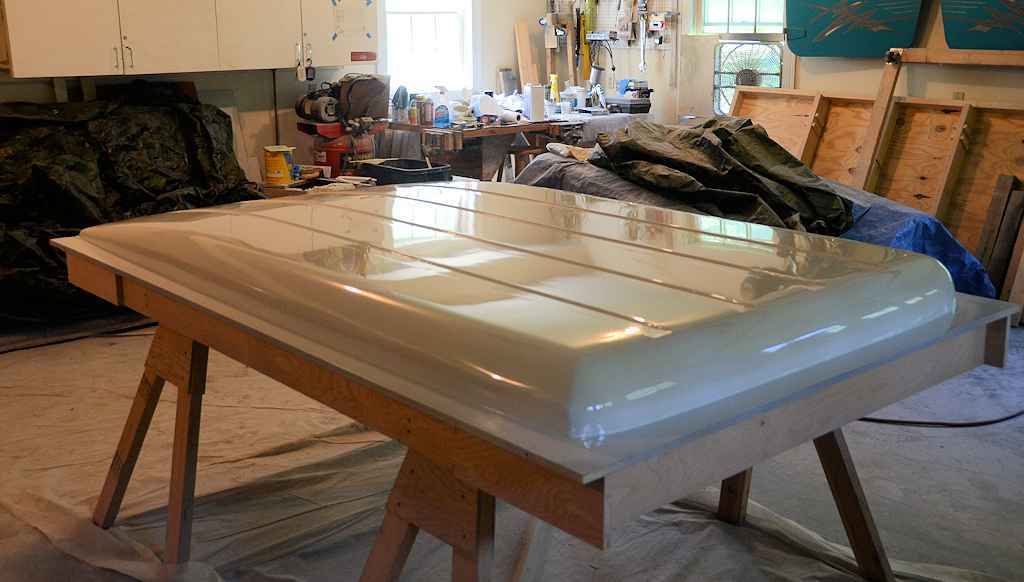
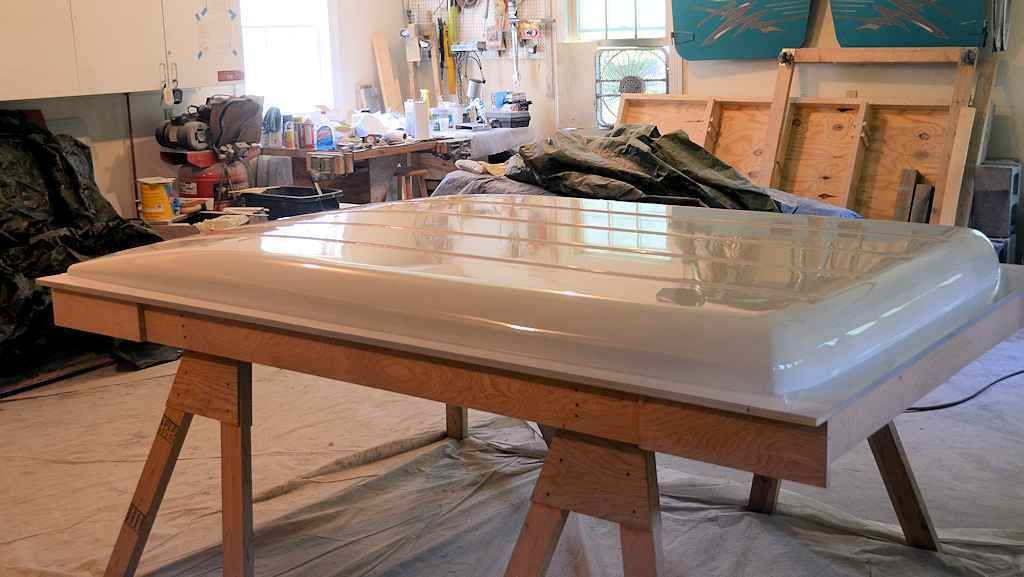
I block sanded the high-build primer yesterday and no additional imperfections were revealed, so this morning I shot two coats of epoxy primer to seal the high-build followed by several coats of clear. I'll let the clear harden up a few days and then the master will be ready to have the mold made from it.

So here's how the wooden master turned out - looking at the reflections in the gloss will give you an idea how the block sanding and finishing worked out...
RoofMasterClearCoat1_zpsvn6ktumt.jpg


RoofMasterClearCoat2_zps3nyv50hc.jpg


RoofMasterClearCoat3_zpsmml86txc.jpg


RoofMasterClearCoat4_zpsgevwvr1c.jpg


RoofMasterClearCoat5_zpsxebpuumc.jpg


Once the mold is made, the parts I make in that mold will look exactly like the photos above, except the parts will be fiberglass instead of wood :).
 
Last edited:

Jorsn

Adventurer
I've molded two sets of side panels so far, with the idea that the set to be used on a daily basis would have the kick-out vent windows installed, and the other set I'll use to experiment with different window/storage compartment options. Since I've already got the proper size hatches, I will do a test install of them on the Jeep, and based on how that feels I'll decide if I want to go ahead and make a mold for the storage compartment that would go on the inside. It's very easy to swap side panels, so I can experiment with a bunch of different ideas.

Right now I'm just focused on getting the roof mold done so I can mold a roof and begin fitting the entire hardtop on the Jeep. Once I get the basic hardtop fitted, I'll play around with options like the storage compartment windows, soft side panels, a soft barn door, maybe configure a roof to be a tilt-up camper, etc.... I've got lots of ideas and options to play with once I get the basic hardtop fitted.

I'm impressed with your work thus far and looking forward to seeing it all come together!
 

jscherb

Expedition Leader
The next step in the JK Safari Cab project is to make the roof mold, but I'm waiting for a few fiberglass supplies to arrive, which are due Tuesday.

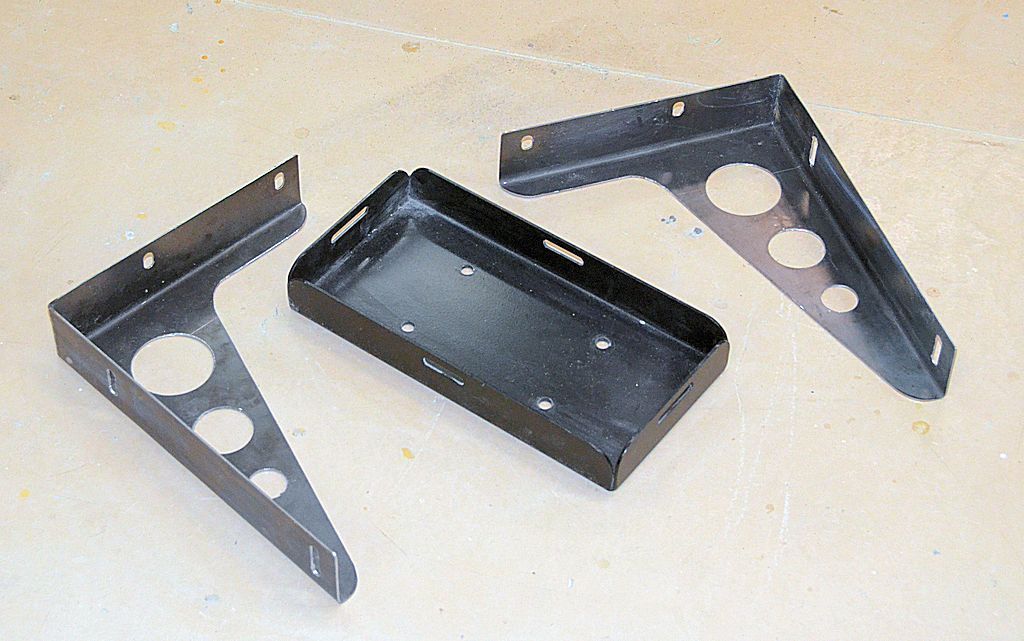
While I've been waiting for the supplies, I built a jerry can carrier that mounts to the tailgate hinges. It consists of two brackets plus a can tray; the can tray is a production item and the brackets I fabricated from sheet steel. Haven't painted the brackets yet:

HingeMountJerry10_zpsoa4ed5cj.jpg


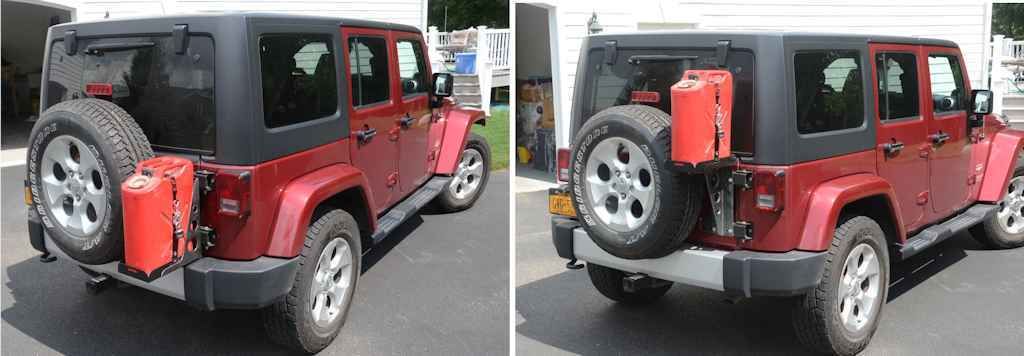
The brackets are reversible, so the parts can be installed to mount the can low or high:

HingeMountJerry20_zpsngpmc2mt.jpg


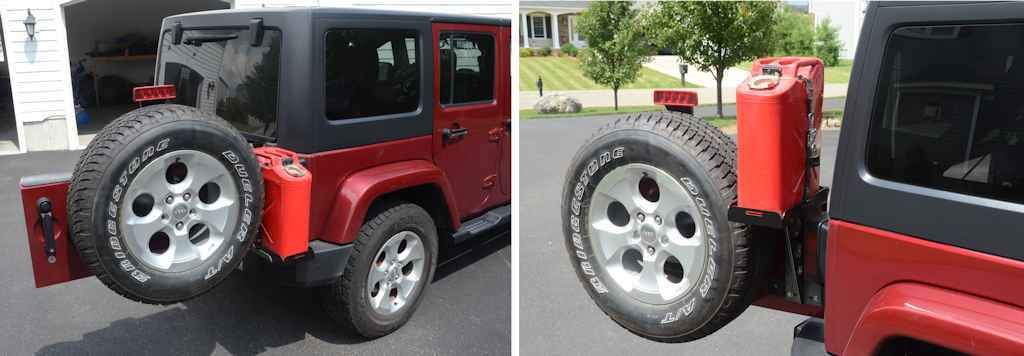
For the low mounting position there really isn't enough room between the spare and the tail light when the tailgate is open, so stops are necessary in the hinges to prevent the tailgate opening more than 90 degrees. In the high mounting position, the tailgate swings open the full 110 degrees:

HingeMountJerry21_zpsqag5hxda.jpg
 

jscherb

Expedition Leader
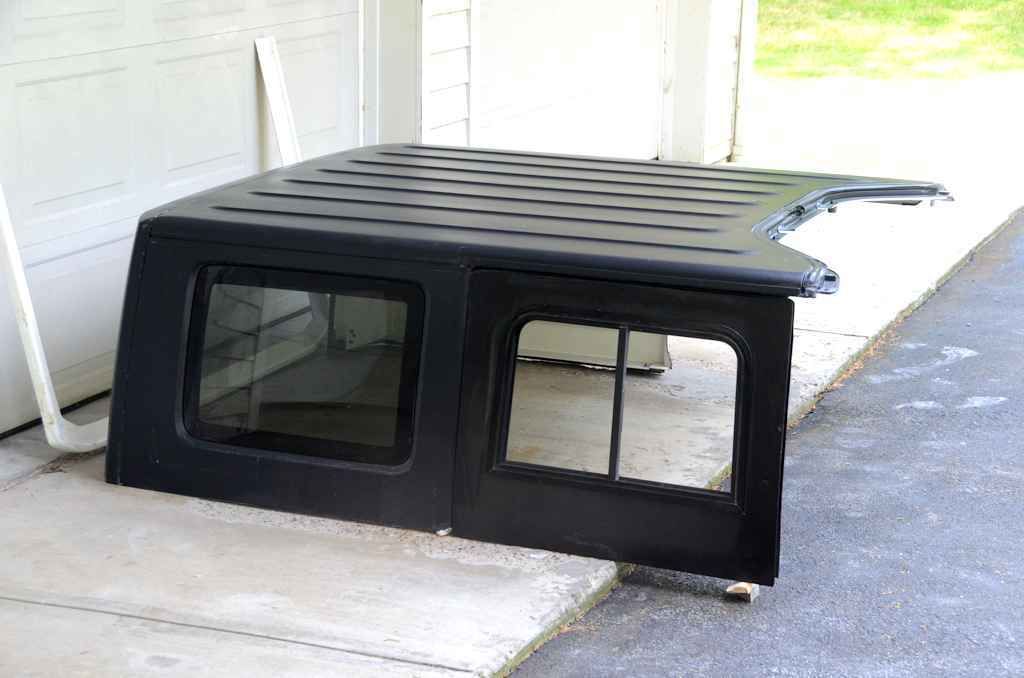
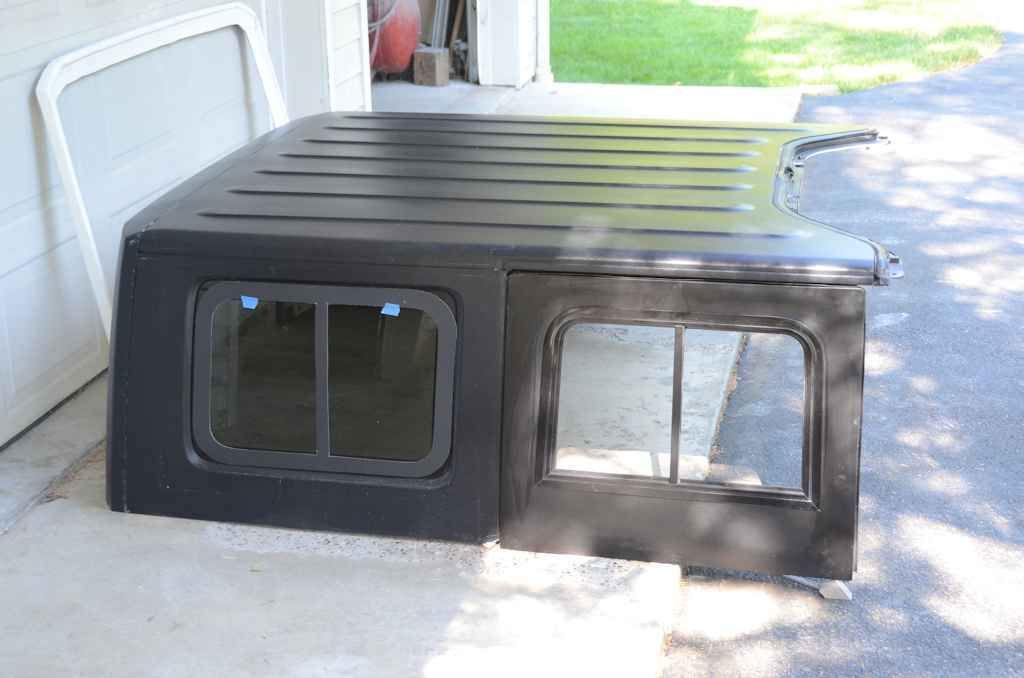
I had to move the spare hardtop out of the garage to make room for the roof mold fiberglassing work, and with it out and the dust washed off it I decided to see what the prototype fiberglass half-door upper looks like with it. The window glass area turns out to be a pretty good match for the glass area in the hardtop. There's no glass in the slider yet but the window company has a tint that's a pretty decent match for the tint of the hardtop windows. The upper has just a quickie rattle can paint job and it's not too bad a match for test purposes, just a little dark. But it's not the final finish anyway - might be better to paint the uppers to match the body instead of the hardtop?

SliderAndHardtop1_zpsjxsjfb0o.jpg
 

thechadwick

New member
What an inspiring thread. I can't wait to see the final product! These projects really have changed what I thought was possible for the DIY enthusiast. I've rebuilt engines and done some poor bondo work before but your attention to detail and follow through to see your vision materialize is simply inspiring. Despite having to reiterate almost every post that you're not in it for the financial gain you continue to create some of the most beautiful and utility increasing projects I've seen. I for one would absolutely love to see more on your rhino grill designs. I'm resourcing a 4bt swap into a waggy and if your grill comes to fruition I may be in the market for a JK instead. Out of curiosity do you 3d print your 1/10th size models? I assume you're working with solidworks or an equivalent cad program and was wondering if there's enough fidelity in a 3d print to build a mold master if finished properly and of course in a large enough printer. Sorry if you've answered these questions before I did try and pay attention to the previous posts but might have missed it.
 

jscherb

Expedition Leader
What an inspiring thread. I can't wait to see the final product! These projects really have changed what I thought was possible for the DIY enthusiast. I've rebuilt engines and done some poor bondo work before but your attention to detail and follow through to see your vision materialize is simply inspiring. Despite having to reiterate almost every post that you're not in it for the financial gain you continue to create some of the most beautiful and utility increasing projects I've seen. I for one would absolutely love to see more on your rhino grill designs. I'm resourcing a 4bt swap into a waggy and if your grill comes to fruition I may be in the market for a JK instead. Out of curiosity do you 3d print your 1/10th size models? I assume you're working with solidworks or an equivalent cad program and was wondering if there's enough fidelity in a 3d print to build a mold master if finished properly and of course in a large enough printer. Sorry if you've answered these questions before I did try and pay attention to the previous posts but might have missed it.

Thank you very much :).

No, I don't use CAD software or 3D printing - all I've got is an old 2-d drawing program (Microsoft Visio 2007) and a paint program (Paint Shop Pro) and I use them to do all of my concept drawings and design drawings. I build my mold masters by hand, no computer assistance needed :). Hopefully I've posted enough photos of the steps for people to follow along, but if there's anything I haven't explained well enough, please ask and I'll be happy to go into more detail.

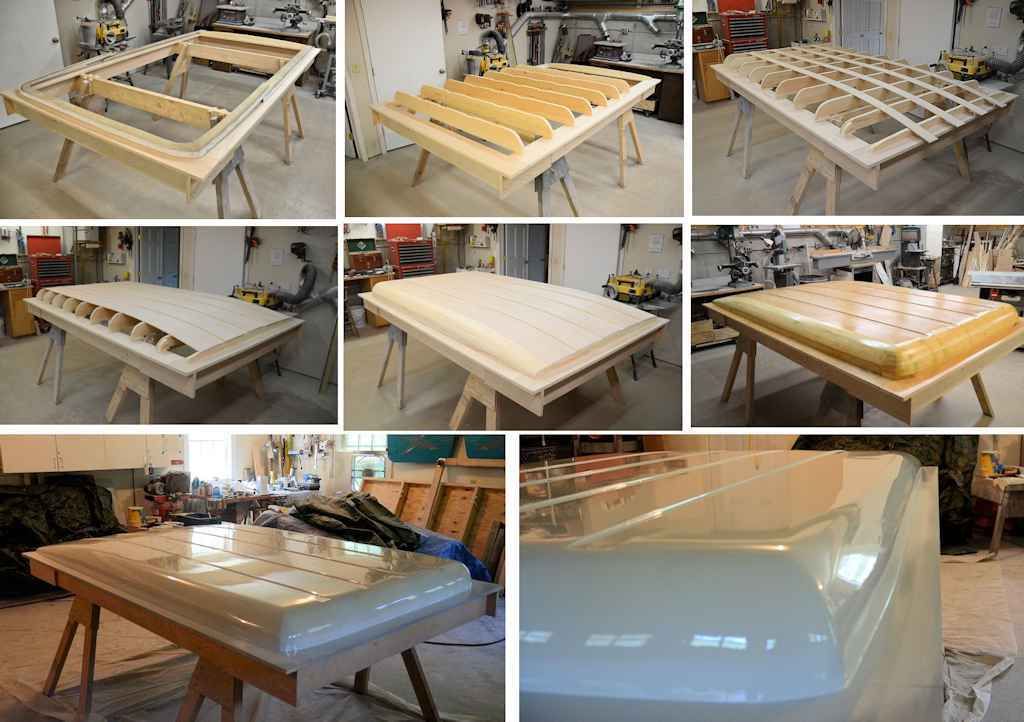
I think I've posted all of these photos individually over the past few weeks, but here's a sequence showing the steps in construction of the roof mold master. Mostly basic woodworking, with some auto body and paint techniques thrown in towards the end...

RoofSequence_zpsfojgulqx.jpg


The JK Rhino grill is a background project for me, I'll probably get into it more seriously towards the end of this year. I'll probably do the mold masters for some of the components before then, like a scaled down Rhino center grill, but I've got a few other things I want to finish before I start serious work on the larger pieces of that kit.
 

jscherb

Expedition Leader
Another shot with the half door slider mocked up, this one also shows a template for the slider frame for retrofitting sliders into the hardtop. I'll be meeting with the window company within the next week about the hardtop retrofit sliders; I also expect to have a manufacturing cost estimate for the retrofit kit parts by then (the retrofit kit adapts the flat window to the curved window mounting surface of the hardtop).

SliderTemplateJKUEarly_zpsk6bnuqwo.jpg
 

jscherb

Expedition Leader
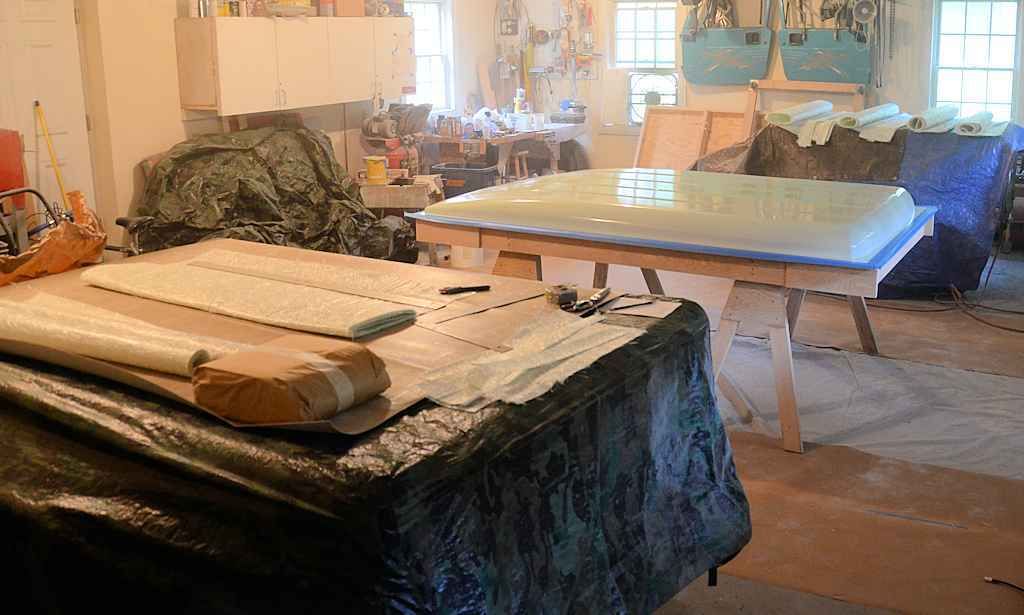
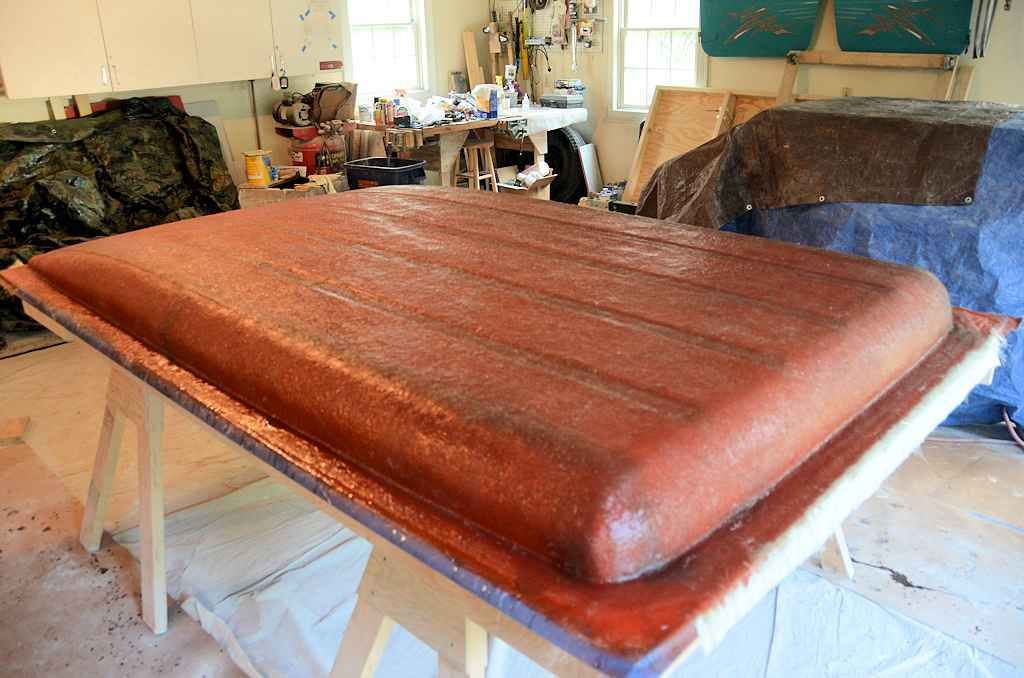
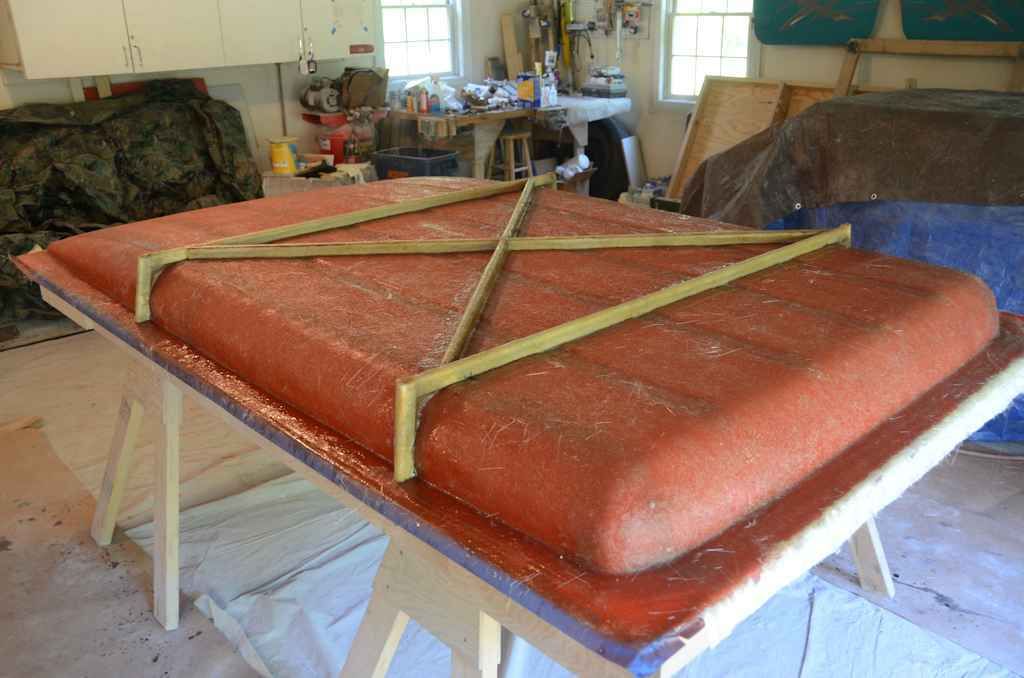
I'm making the roof mold today. Here's a photo of the setup. In the near bay is my cutting table (it's my Jeep-tub trailer, which has a hard cover and makes a great worktable). I do all of my fiberglass cutting on a large piece of linoleum and the cutting is done with a roller cutter. All of the fiberglass necessary to make the mold is cut beforehand, and laid out in sequence so it's easy to pick up the next piece when I'm in the middle of the messy work. In the far bay, my military trailer, which also has a hard cover, is serving as the fiberglass table - all of the parts I cut are laid out in sequence there. In the middle bay is the mold master, looking slightly green in this photo as a result of the several coats of mold release wax followed by several sprayed coats of PVA (polyvinyl acetate) mold release. PVA is a water-soluable mold release that will wash off the master and the mold later. The garage floor is covered with plastic and paper; fiberglass is a very messy affair.

When this photo was taken I had just sprayed the last coat of PVA on the master and I'm waiting for it to dry. The next step is to spray gelcoat on the mold. More photos of the process to come.

MoldMaking1_zpsvybm85qt.jpg
 

jscherb

Expedition Leader
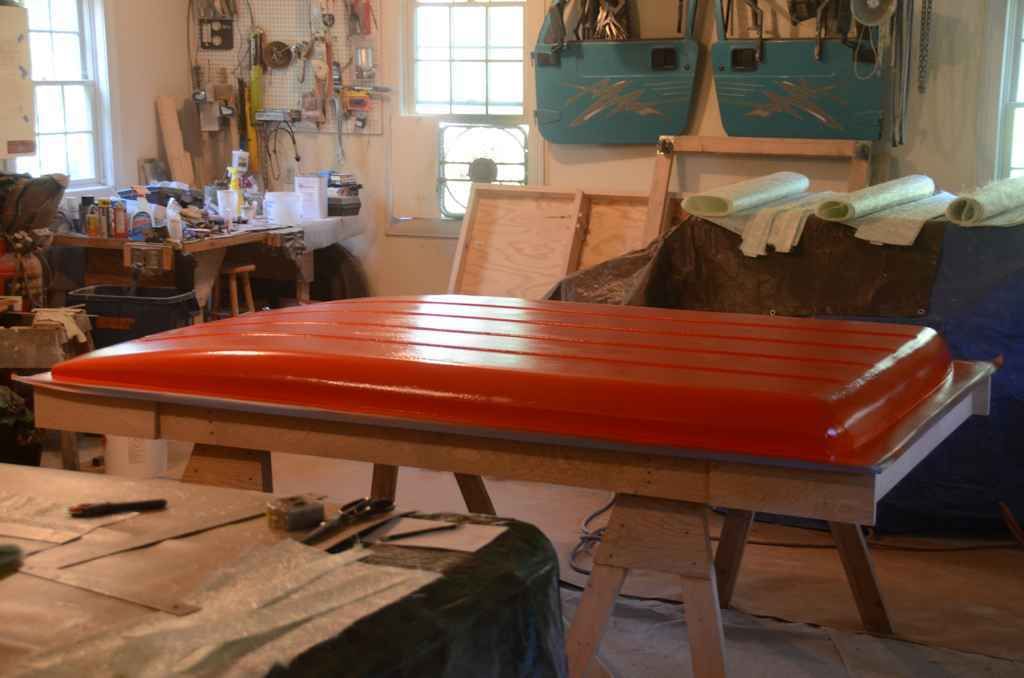
Once the PVA mold release dries, the next step is to spray the mold master with gelcoat. Gelcoat forms the working surface of the mold; it's a special resin formulated to make a very smooth and tough surface. It's orange because it's tooling gelcoat, which generally comes in orange and black and is forumlated for making molds. The color is so it will contrast with the color of the gelcoat that will be sprayed in the mold when making a part; the contrast helps you see when you've got an appropriate thickness of white (for example) gelcoat built up when making a part. Tooling gelcoat cures much harder than ordinary gelcoat, and it's very heat resistant to stand up to repeated cycles of parts being made in a mold and generating heat when they cure.

Gelcoat generally takes about 2 hours to cure to the point where the fiberglass layup can begin, so the next phase of the mold making work will happen right after lunch.

MoldMaking2_zps3joc0lgd.jpg
 

jscherb

Expedition Leader
3 1/2 gallons of resin later... the first phase of the fiberglass layup of the mold is complete. I've applied 4 layers of fiberglass mat which will result in a mold thickness of about 3/16". That differs from a production mold, which might be 3/8" thick or more to stand up to the repeated and long-term use of molding parts, but for my use this thickness is fine, I'll be able to make all the roofs I ever want to make in this mold.

The mold isn't complete yet, tomorrow morning I'll add bracing to reinforce it. It's a good idea to do the bracing after the main part of the mold has cured - if you added the bracing before the main fiberglass had cured, the extra thickness of fiberglass where the bracing is would generate extra heat when curing and would "print through" to the surface - you'd be able to see a very faint outline of the bracing on smooth inside surface of the mold, and that outline would show up in any parts made in the mold. By waiting until the main mold has cured to add the bracing, that distortion doesn't happen. More photos tomorrow when the bracing has been added.

MoldMaking3_zpsyiaxhcgk.jpg
 

tarditi

Explorer
I'm looking at the idea of a small LED third brake light mounted either on the top of the barn door, or on the hardtop above the door. Haven't decided what might work best yet, but it's definitely a good idea to remove the factory third brake light to increase visibility. I did that with my LJ Safari Cab, see the photos in the first post.

Interesting idea about the inside latch, I'll look into it.


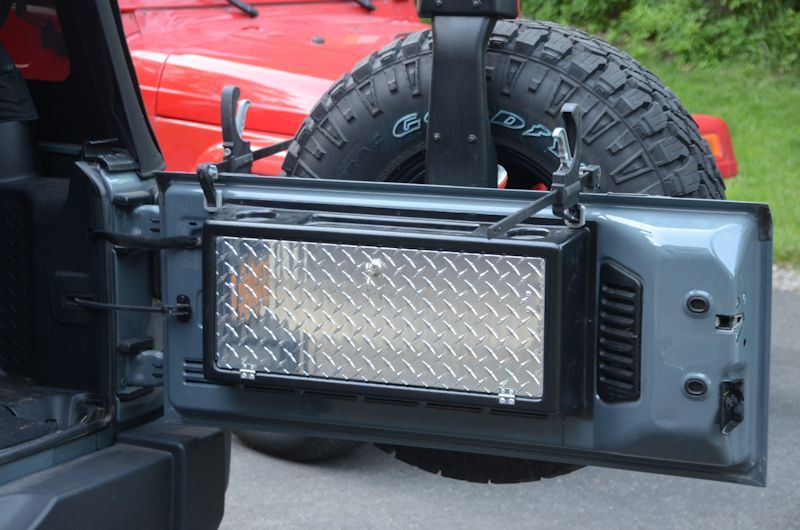
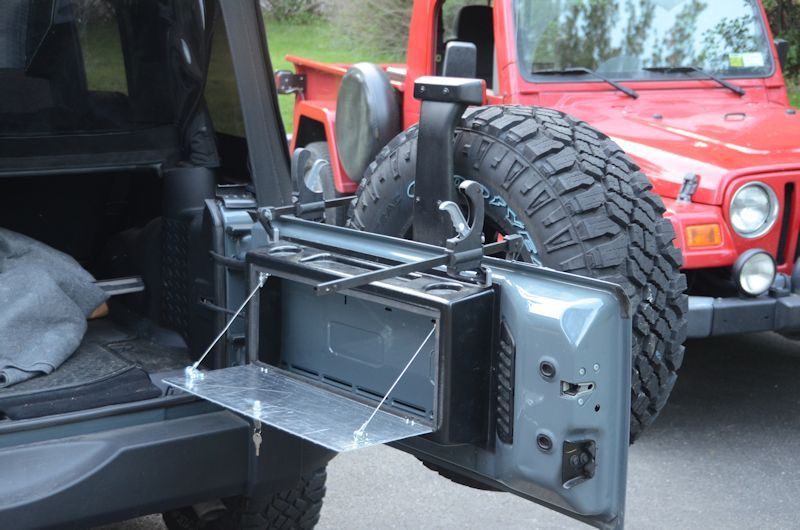
About the fold-down table, and a little storage, how about this?

StoreGateJK1_zps73e67f22.jpg


StoreGateJK2_zpsf35ce9d4.jpg


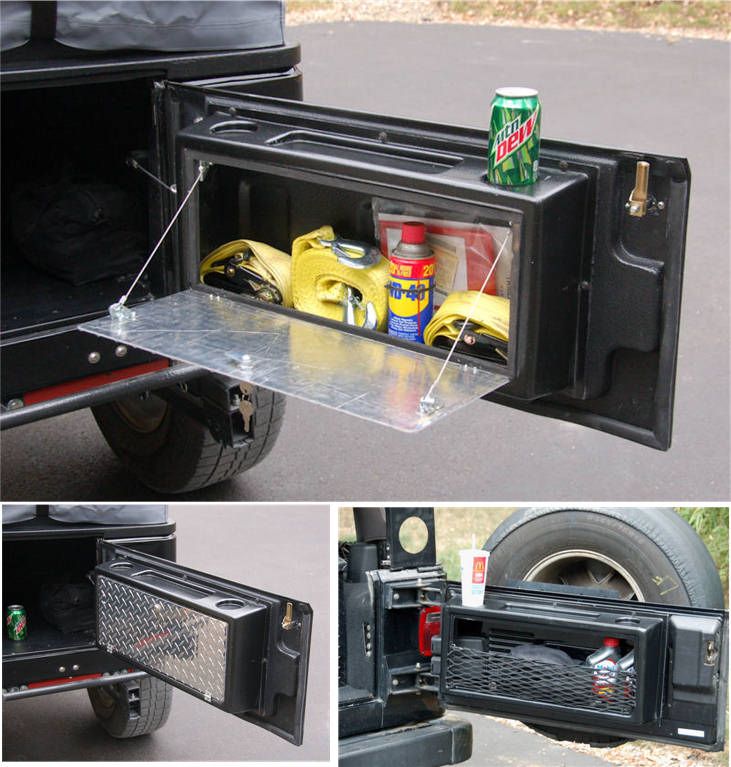
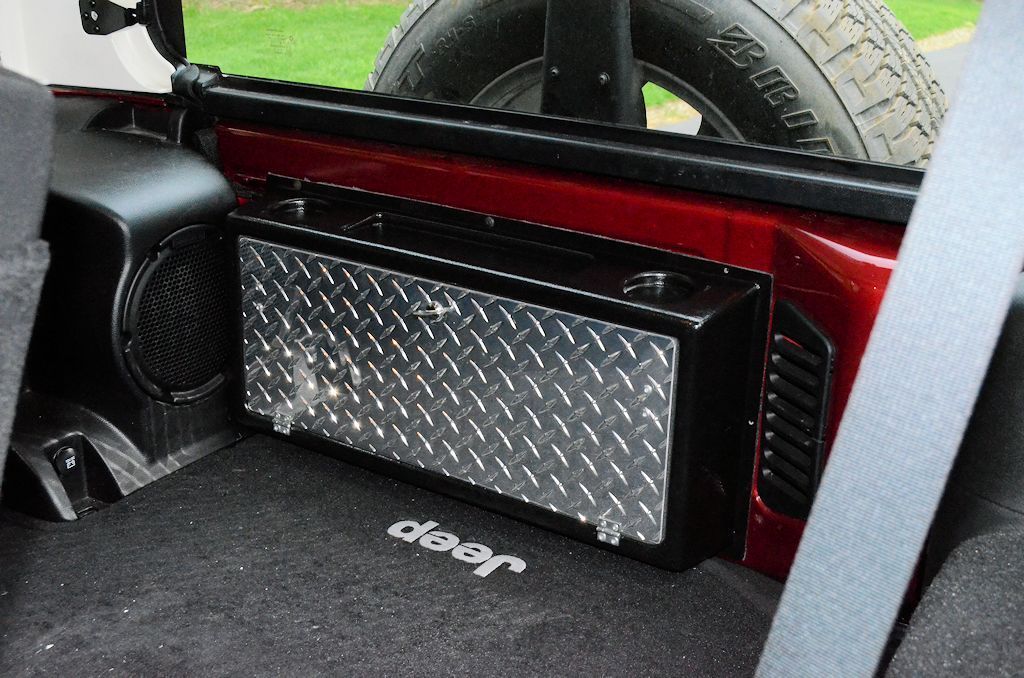
It's a previous project of mine, I call it the StoreGate. In the above photo I'm test fitting it on a JK tailgate. I've got two different versions, on my Jeep-tub trailer I mounted a locking storage/fold-down table version, and on my LJ I've got one with a bungee net to hold the cargo in place:

P_StoreGate_zps54a0a8c8.jpg

I like the idea of a storegate, but need to be careful that my ARB50qt will still fit behind the rear seats (laterally) - I think this may take up too much precious space in the cargo area. I would prefer a simple fold-down table that my cook stove could fit on.
 

jscherb

Expedition Leader
I finished up the work on the roof mold this morning, adding a few braces to ensure the mold doesn't flex when molding a part in it. I'll let everything cure overnight, and tomorrow morning I'll pop the mold off the master, trim the edges, and the mold will be ready to make parts.

MoldMaking4_zps4j6uny3o.jpg
 

jscherb

Expedition Leader
I like the idea of a storegate, but need to be careful that my ARB50qt will still fit behind the rear seats (laterally) - I think this may take up too much precious space in the cargo area. I would prefer a simple fold-down table that my cook stove could fit on.

I installed one in my wife's JKU a while back, here's a photo of it with the tailgate closed. It sticks out about an inch and a half further than the latch housing of the tailgate. But depending on what you need to carry in the cargo area, a StoreGate may be too big. It works out great for us.

StoreGateJK4_zpshi2pse7r.jpg
 

Forum statistics

Threads
188,340
Messages
2,905,762
Members
229,959
Latest member
bdpkauai
Top