Barn Door for JK factory hardtops

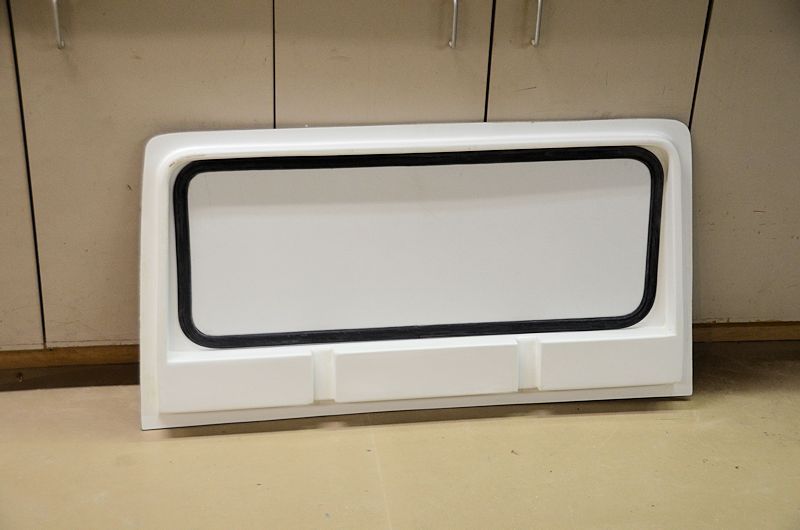
I got the "window" installed this morning. Actually it's a piece of 1/4" plywood painted white. I installed plywood for two reasons - since this unit will be used for the initial wiper installation, there's no need to subject a piece of glass to any risk from the work that will happen during that installation, and second, the plywood will be a perfect pattern for the glass shop. I can take the plywood to the shop and ask for a piece of safety glass that exact size, and I'll know everything will go together perfectly.
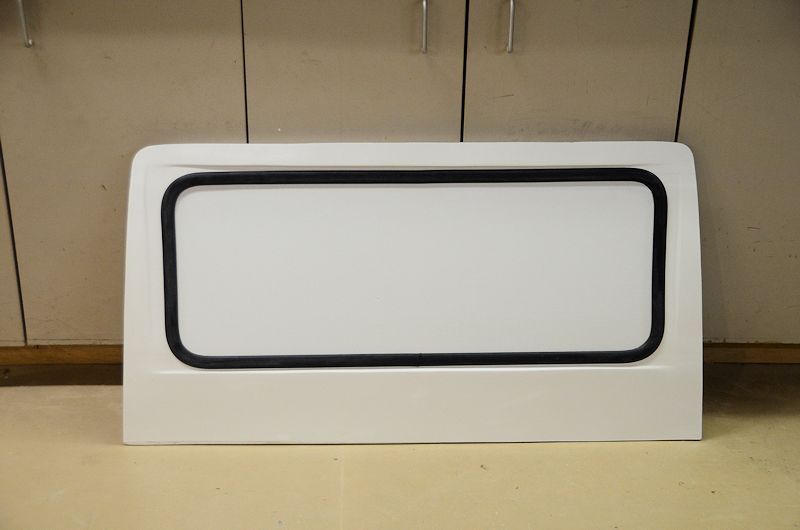
WoodWindow1_zps77759d41.jpg


WoodWindow2_zps13152ab5.jpg


A production barn door could use either a gasket+glass type window like I'm doing on this prototype, or an aluminum-framed RV window.

Next for this unit will be the wiper installation.

Hi Jeff - I am slowly making progress on this project; I finally have the fiberglass mold of the factory rear window completed. I have a few questions about the glass. I understand from your post that the glass is basically 1/4" safety glass. From what I could tell safety glass is typically used for windshields, and tempered glass is used elsewhere (side windows, etc.). Is there a reason to choose safety over tempered? I am also unclear on how the glass is seated with the gasket, or how it installs. Is it as simple as the gaskets lips wrapping around the edges of the panel and the edges of the window? No glue or any fasteners? Also, how did you source the gasket and glass - are there any online retailers you can recommend?

As I always, I very much appreciate your insight.
 

jscherb

Expedition Leader
Hi Jeff - I am slowly making progress on this project; I finally have the fiberglass mold of the factory rear window completed. I have a few questions about the glass. I understand from your post that the glass is basically 1/4" safety glass. From what I could tell safety glass is typically used for windshields, and tempered glass is used elsewhere (side windows, etc.). Is there a reason to choose safety over tempered? I am also unclear on how the glass is seated with the gasket, or how it installs. Is it as simple as the gaskets lips wrapping around the edges of the panel and the edges of the window? No glue or any fasteners? Also, how did you source the gasket and glass - are there any online retailers you can recommend?

As I always, I very much appreciate your insight.
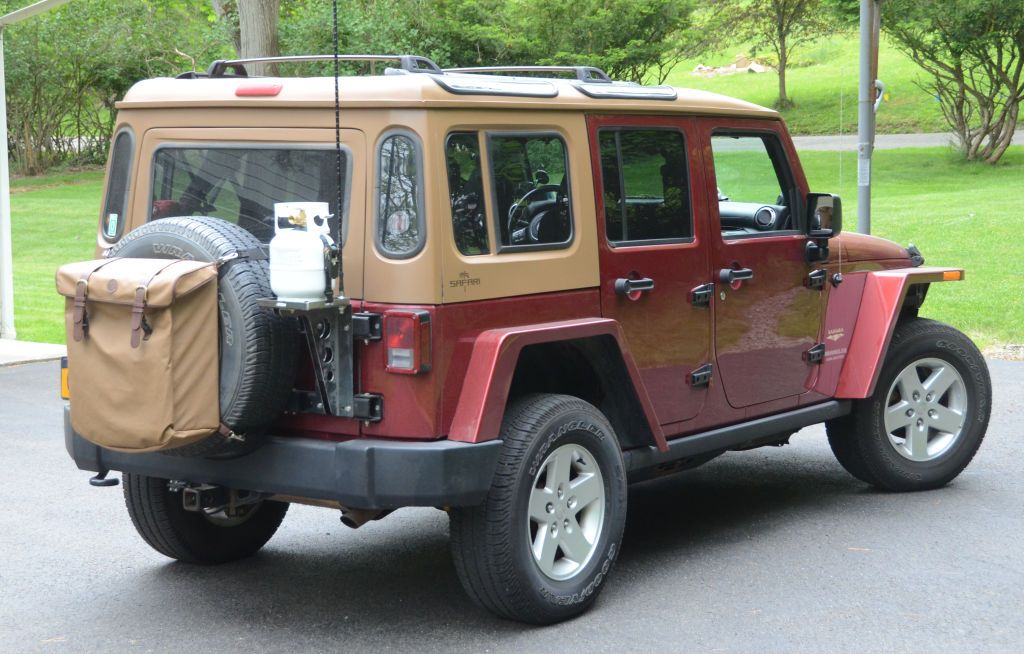
I've used laminated safety glass on some of the barn doors I've made and tempered glass in others. Safety glass can be cut by almost any glass shop so it's easy to source, but it only comes in one color (slight green tint). Finding a source for tempered glass is a little harder, many glass places can't do the tempering, which has to be done after the glass is cut. The current windows in the JKU Safari Cab are all tempered glass because I wanted a specific tint for those. I've sourced both types from local glass shops, although only one of the local shops can do tempered glass.

Glass is installed with a locking gasket; there are two types - integrated lock strip and separate lock strip. I generally use the separate lock strip type, I find that it seals better. Here are videos from lock strip suppliers on installing both types:

Separate lock strip:
Integrated lock strip:
 
Jeff - this is great information; thank you kindly (as always)! I assume it is appropriate to have the body side lip be close in (or exactly) the same width as the glass (in your case, 1/4"). About how much space do you leave between the body lip and the glass? I would assume very little, but maybe some as to allow the glass to flex within the gasket under any stress (without contacting the body lip...?
 

jscherb

Expedition Leader
Jeff - this is great information; thank you kindly (as always)! I assume it is appropriate to have the body side lip be close in (or exactly) the same width as the glass (in your case, 1/4"). About how much space do you leave between the body lip and the glass? I would assume very little, but maybe some as to allow the glass to flex within the gasket under any stress (without contacting the body lip...?
Glass gasket is available to fit a range of both glass thickness and body thickness, so you can pick one that fits your application. My barn doors have an inner and outer skin, so with both laid up to 1/8" thickness and bonded together the resulting edge where the glass gets inserted is 1/4" thick, but you may do it differently. The gasket is "H" shaped, with a thin divider between the glass and the body, so there's no contact between the glass and the body. Only a little bit of clearance is necessary, about 1/8" all around will do it.
 
Glass gasket is available to fit a range of both glass thickness and body thickness, so you can pick one that fits your application. My barn doors have an inner and outer skin, so with both laid up to 1/8" thickness and bonded together the resulting edge where the glass gets inserted is 1/4" thick, but you may do it differently. The gasket is "H" shaped, with a thin divider between the glass and the body, so there's no contact between the glass and the body. Only a little bit of clearance is necessary, about 1/8" all around will do it.

Thanks Jeff - makes sense.
 

jscherb

Expedition Leader
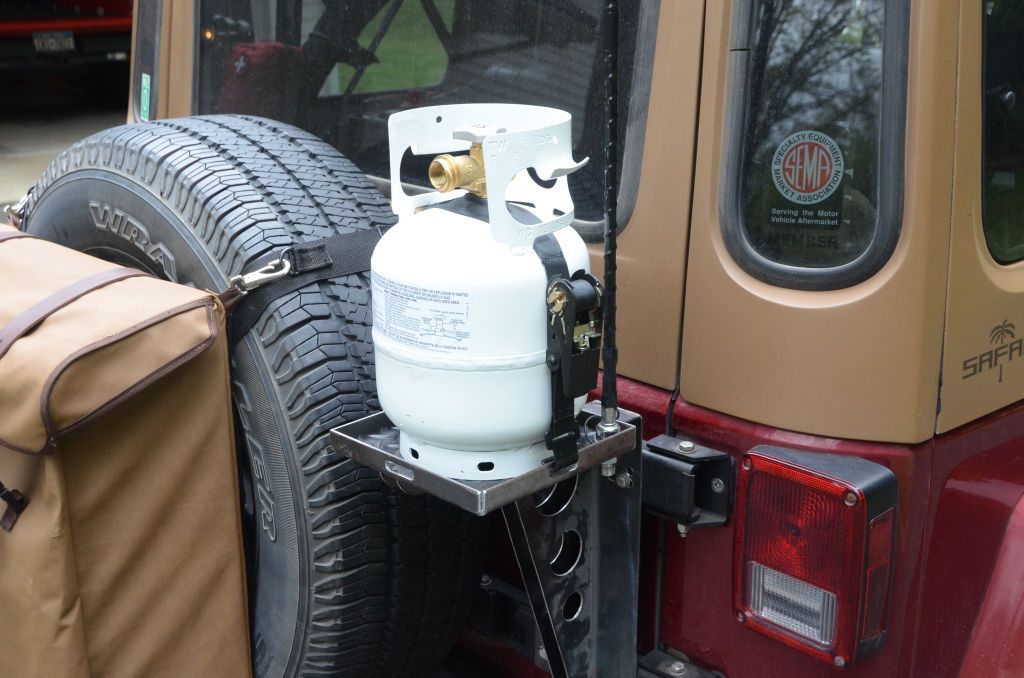
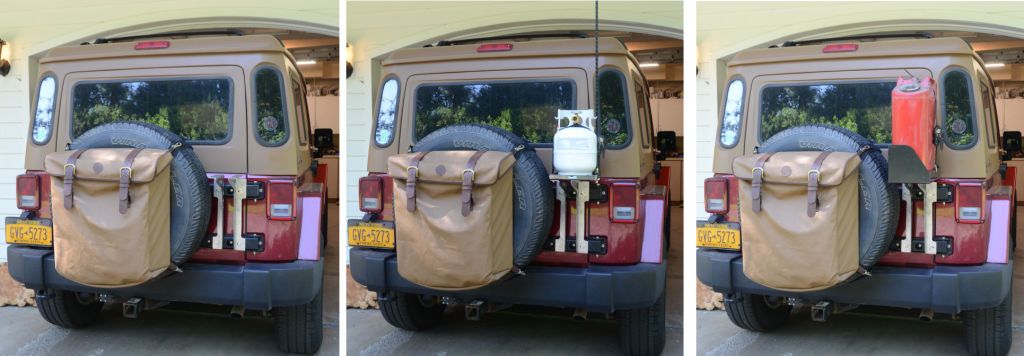
I mounted the propane tank on the JKU this morning.

PropaneJK2_zpsvgifoacb.jpg


PropaneJK3_zpshfd51sz3.jpg


I've got a little work to do to finalize the mounting brackets, but it works well so far.
 

jscherb

Expedition Leader
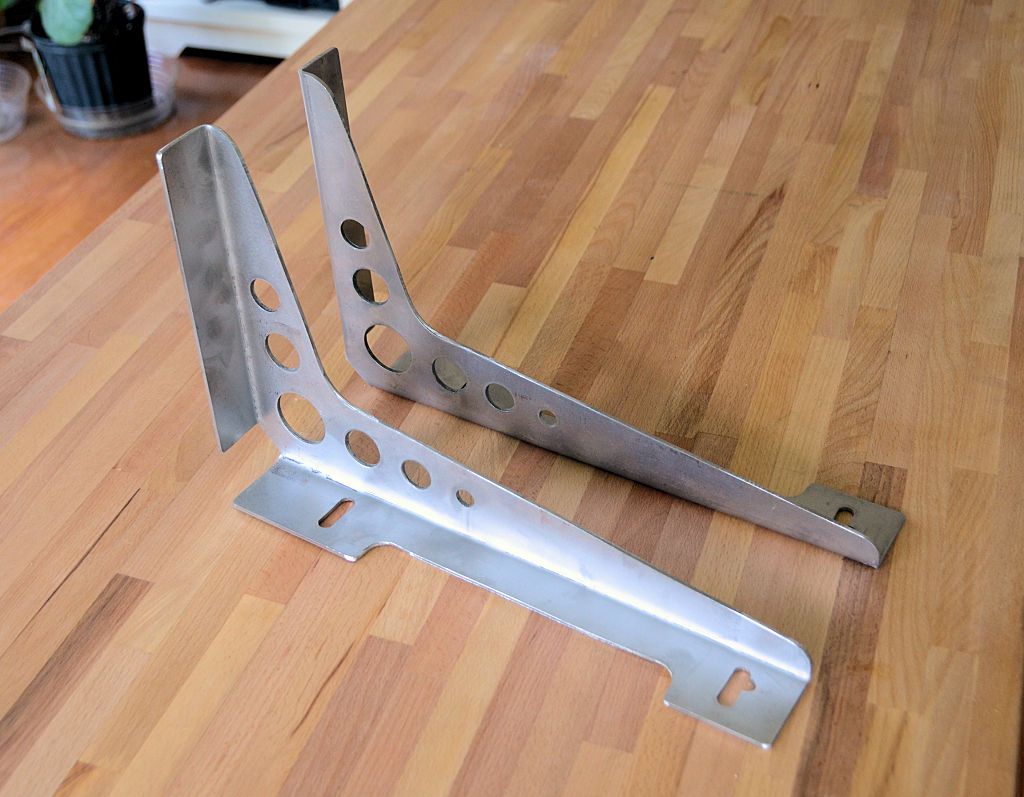
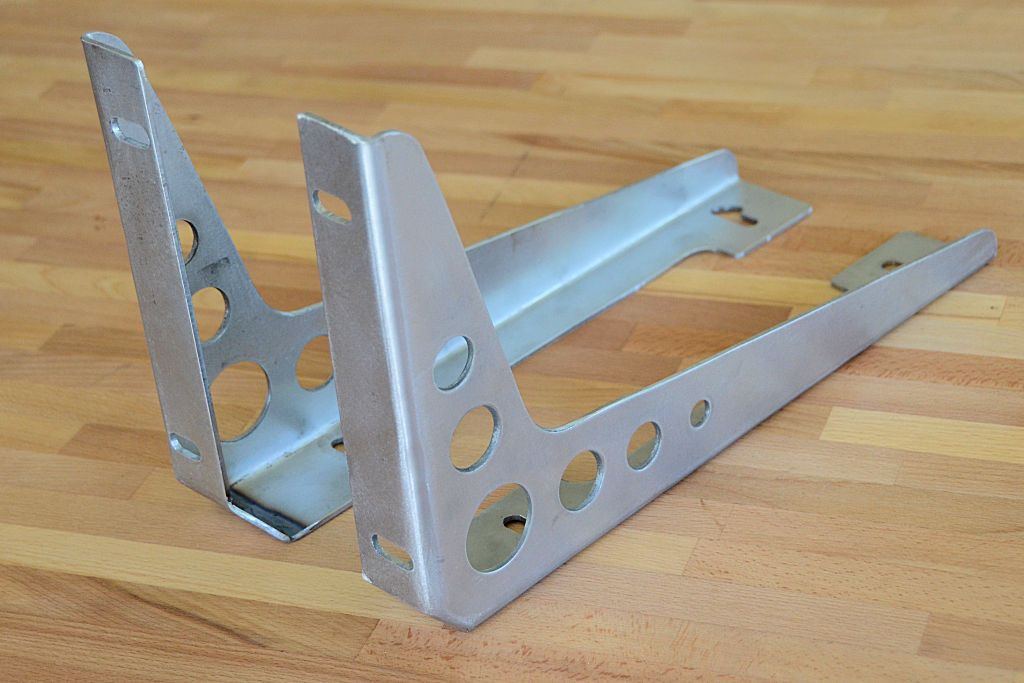
I finalized the design of the brackets for hinge mounted accessories like the propane tank carrier and jerry can carrier and made a set today. These brackets fit both the TJ/LJ and the JK/JKU and accessories like a jerry can tray or the propane tank tray I made the other day bolt to them.

TailgateHingeBrackets_zpsefphowr7.jpg


I'll install them on both the JKU and the LJ tomorrow to verify the fit, once that's done I'll paint them and call them done.
 

jscherb

Expedition Leader
I like the lightening holes.

Did you bend these at home or need to use your friends brake?
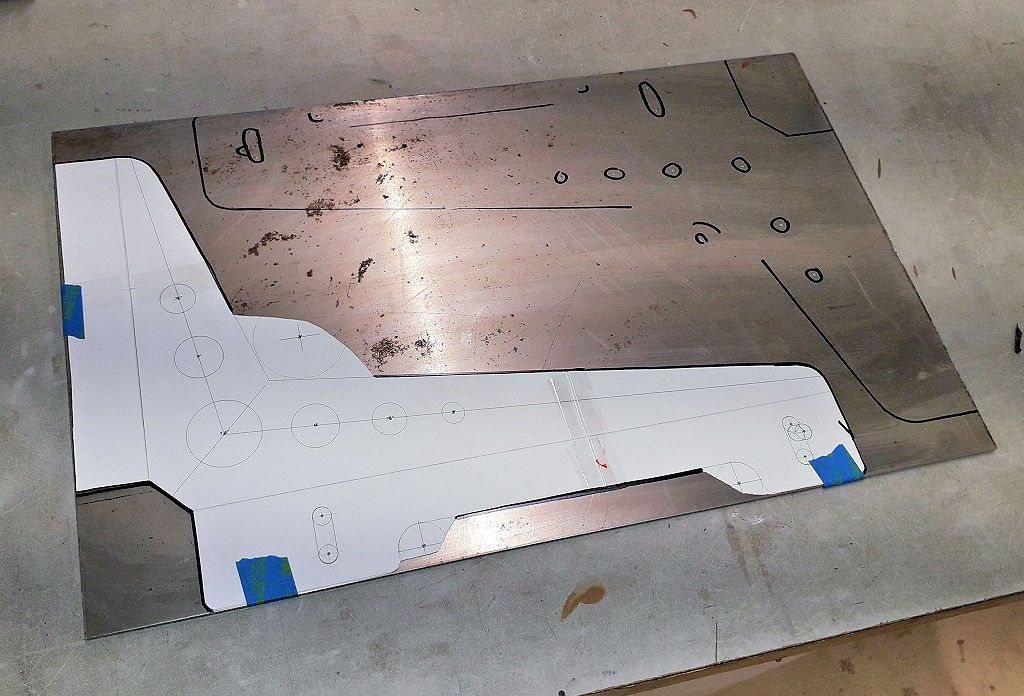
They're completely made in my home workshop... except for the bending because my home-made bending brake can't handle 1/8"-thick steel. I started with a design drawing, printed a full-size template and used it to center-punch the holes and mark the edges, cut it out, drilled it, and then put the flat blanks in my bicycle saddlebags and pedaled down to the fab shop to use his bending brake.

TailgateHingeBracketsLayout_zpsutom1edg.jpg


The holes aren't really to make it lighter - without the holes these are just functional brackets, with the holes they're art :). Well maybe most people wouldn't think of them as art, but I like to add some style to the things I do.

TailgateHingeBrackets2_zpsrrvnzu9g.jpg
 

jscherb

Expedition Leader
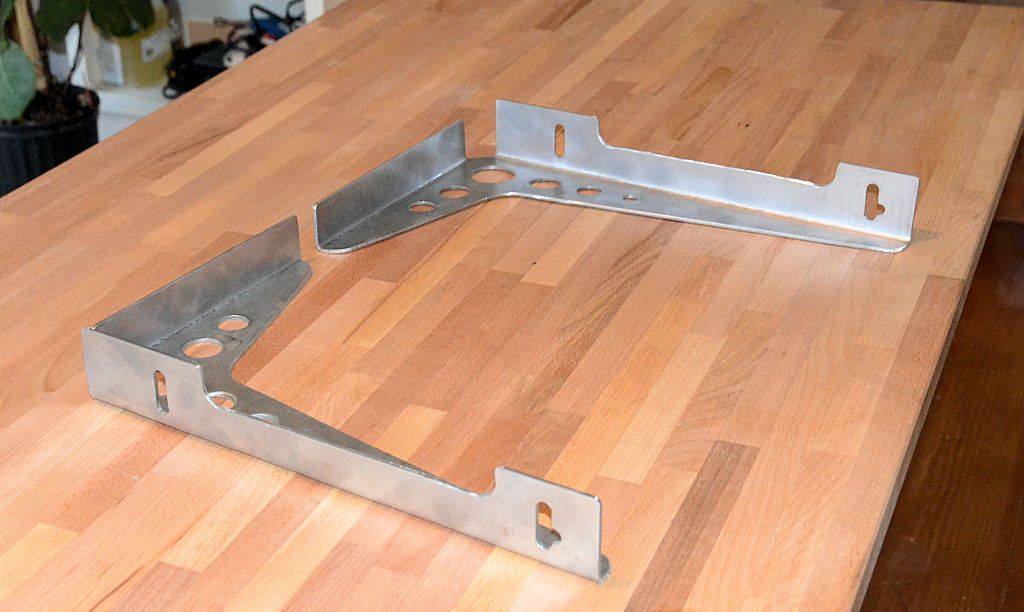
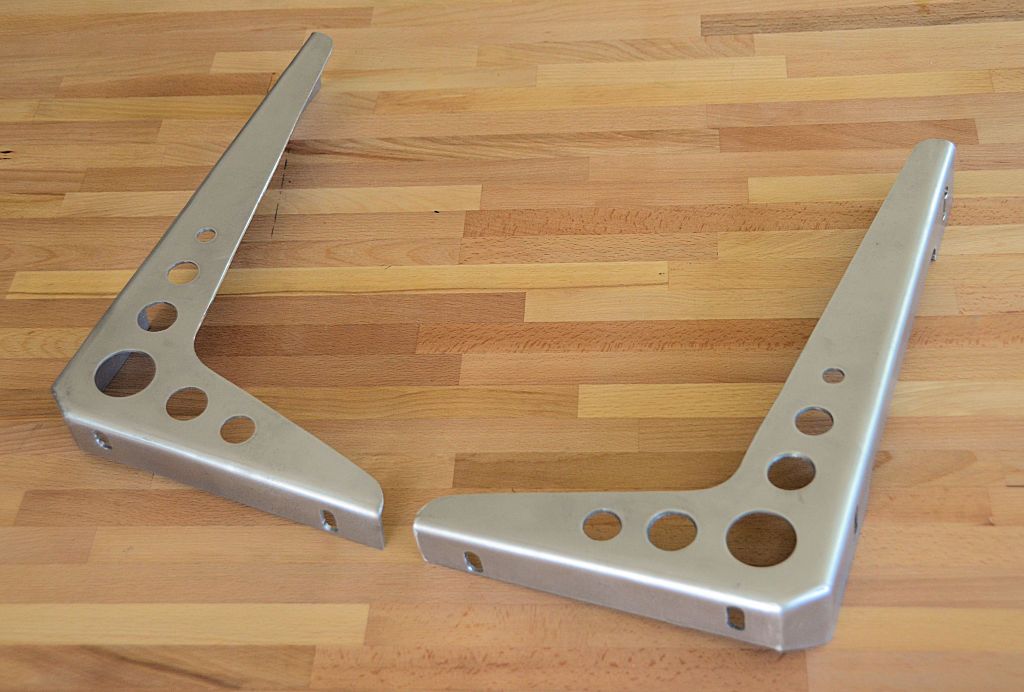
I made one last change to the brackets to strengthen them, the design called for a gusset at the top corner but I omitted that initially to see if they'd be rigid enough without that extra bend/weld step (always thinking of production cost :)). They are pretty sturdy without the gusset but I decided they'd be better with it, so here are the final brackets.

BracketsDone1_zpsym4qyafz.jpg


BracketsDone2_zpspznw8lfu.jpg


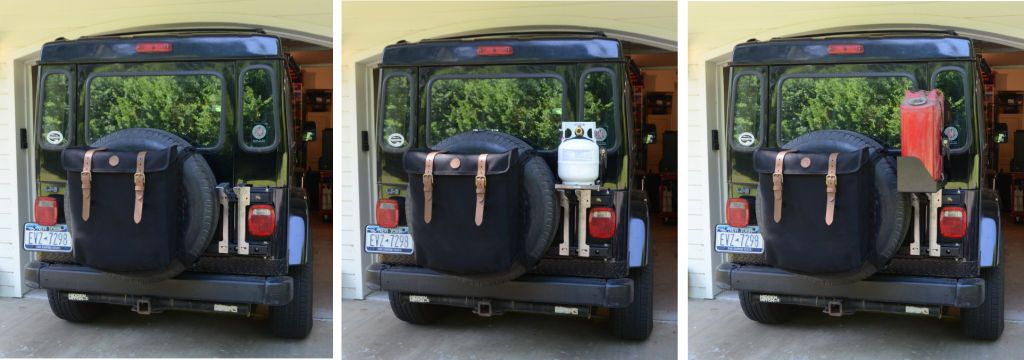
The brackets fit on the Exogate/MORryde hinges on the TJ/LJ and the JK/JKU and so far I've mounted a propane tank tray and a jerry can/ammo can tray to them and tested the fit on both Jeeps.

BracketsOnJKU_zpssspixuu0.jpg


BracketsOnLJ_zpsdj0sqgp1.jpg


Haven't decided if I'll paint or powder coat these prototypes, but other than that this project is done.
 

jscherb

Expedition Leader
Magnetic Molle...

I configure my Jeep specifically for each expedition and I often have different needs for gear and supplies on different trips. Molle is handy for reconfiguring things but maybe a Molle panel isn't needed all the time so here's a design for removable Molle. If you've got a sewing machine it's an easy DIY sewing project.

About a year ago Harbor Freight had coupons for free magnetic tool holders (https://www.harborfreight.com/18-in-magnetic-tool-holder-60433.html), so I picked up a few, figuring there had to be a Jeep accessory hiding somewhere in them. They've been stuck on the side of my toolbox since then, staring at me every time I grab for a tool, teasing me because I hadn't found the hidden Jeep use for them yet. Until now :).

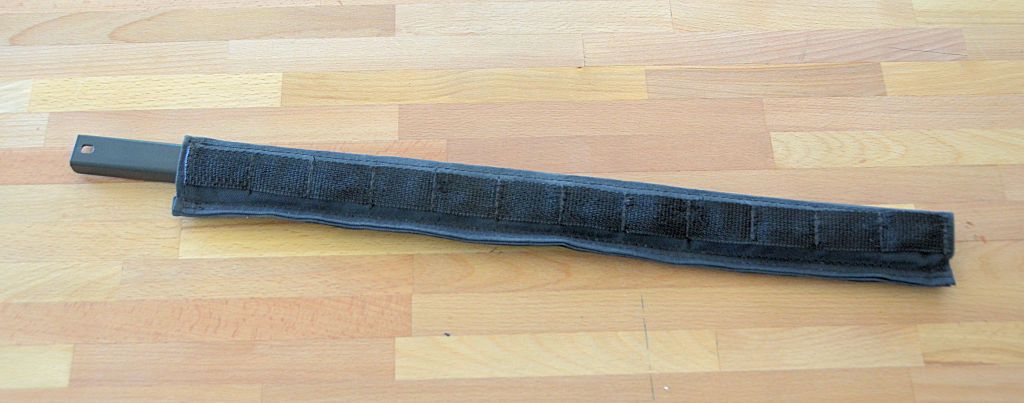
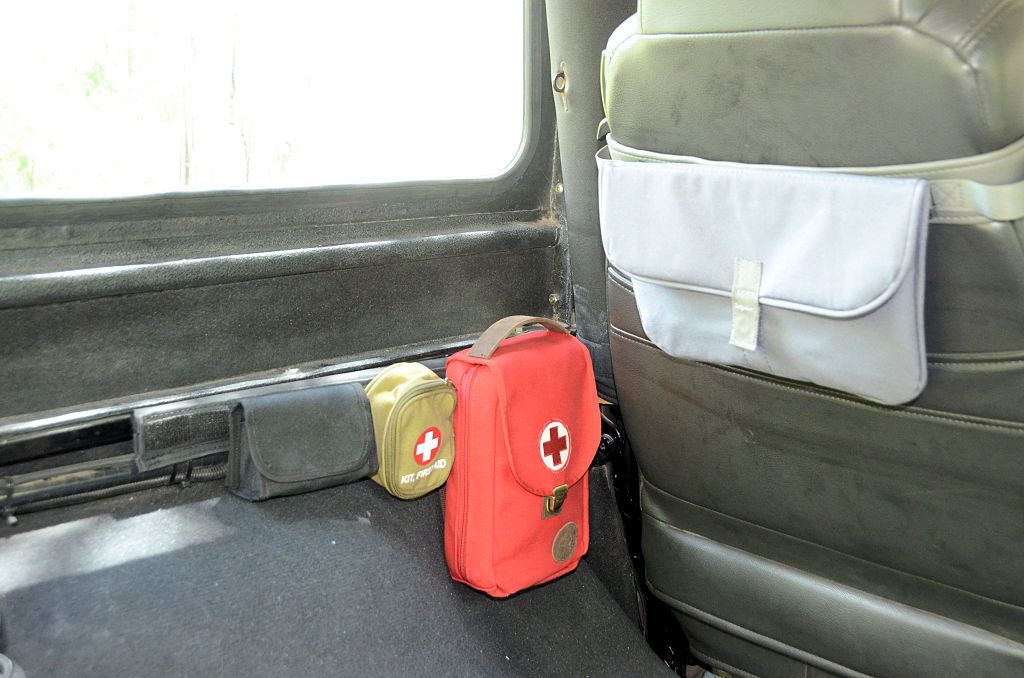
This first example is a Molle strip, it's basically a sleeve that the magnetic bar slips inside so it easily attaches to the any flat metal surface, such as a Jeep tailgate. The magnet won't scratch the paint because it's inside a fabric sleeve. In this photo the magnet bar is partially out of the sleeve for illustration purposes.

MagneMolleStripFront_zpshgqg1akz.jpg


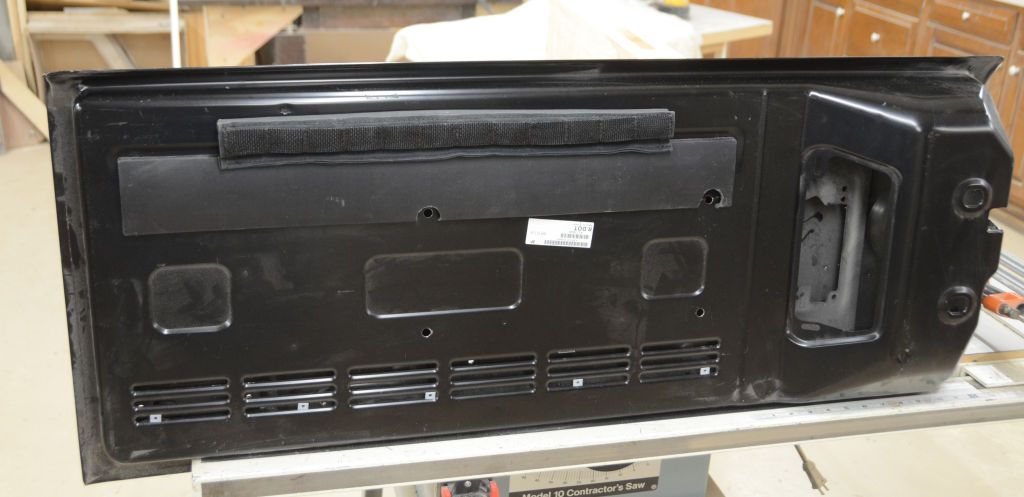
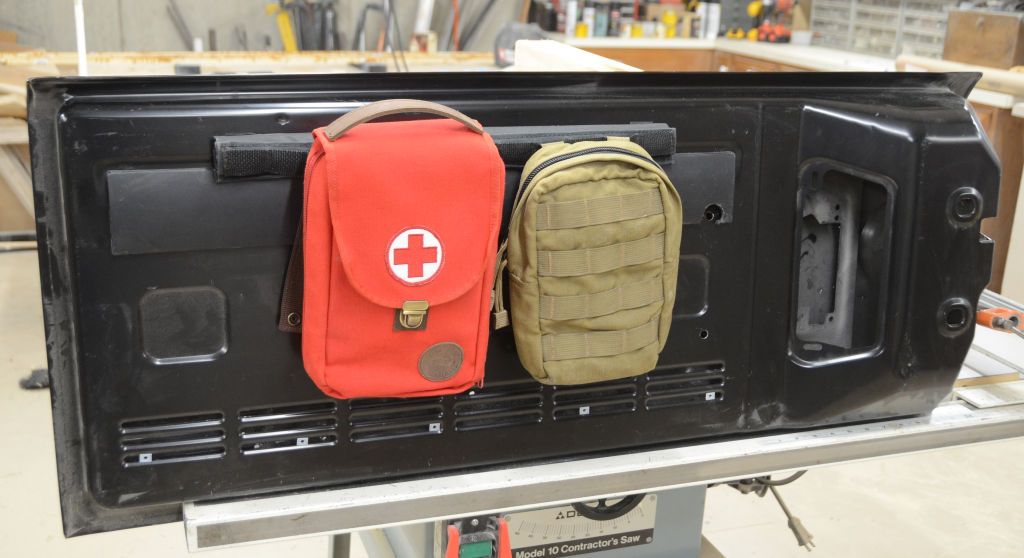
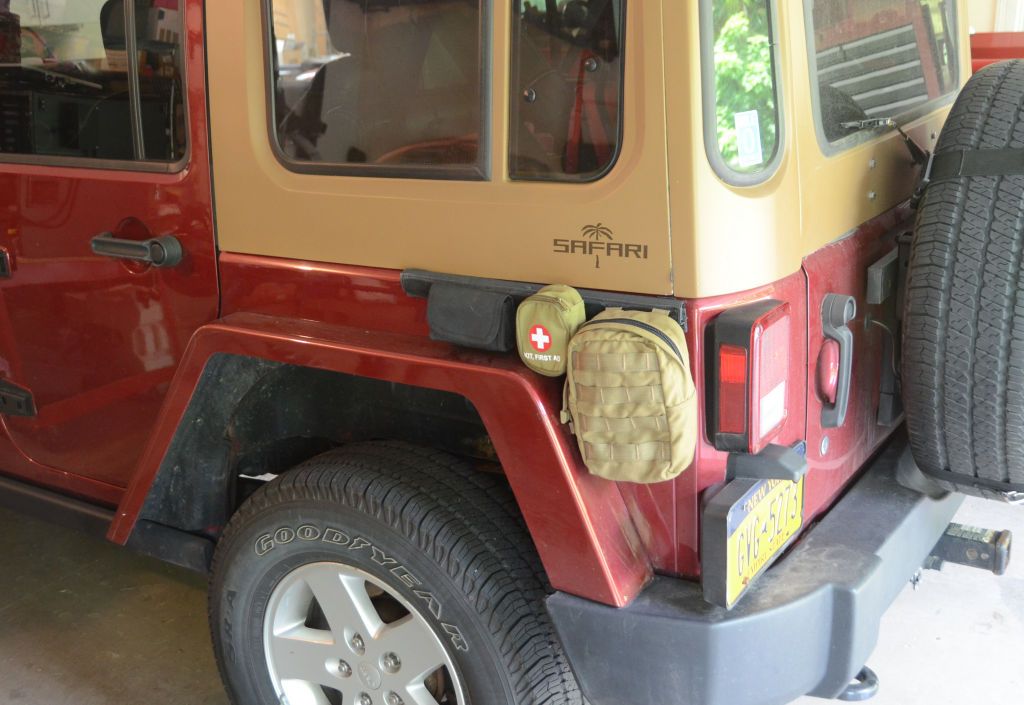
Mounted on a test tailgate in my workshop:

MagneMolleStripJK1_zps5cq4bixe.jpg


MagneMolleStripJK2_zpsqgpbph9f.jpg


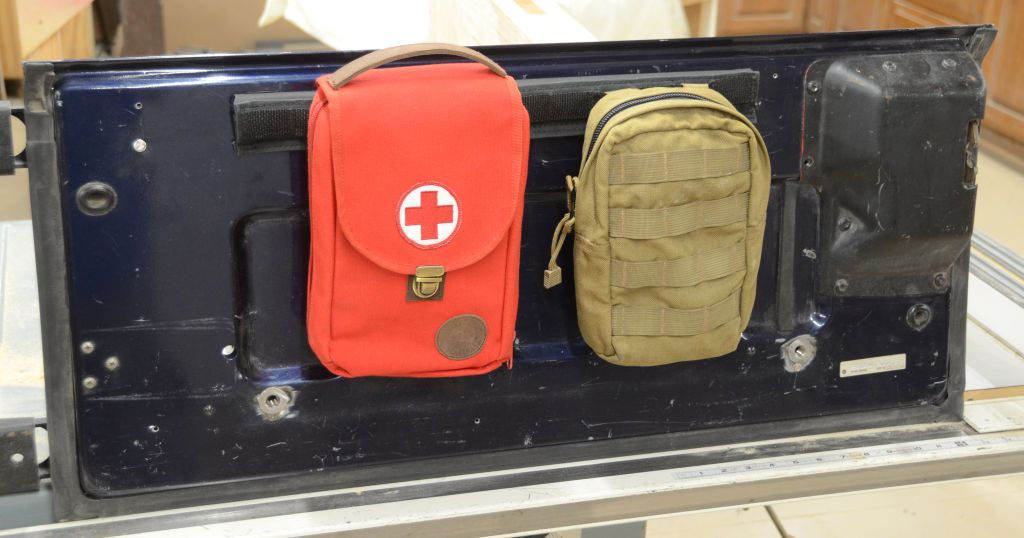
On a TJ tailgate:

MagneMolleStripTJ2_zpskfuyxw9p.jpg


It can also go other places, like on the inside edge of the tub of my LJ:

MagneMolleStripTJ3_zpssdqbt24b.jpg


And at the campsite, maybe what's in the Molle pouches could be useful outside the Jeep and moved to the body somewhere...

MagneMolleStripJKFender1_zpswtmx8ddf.jpg


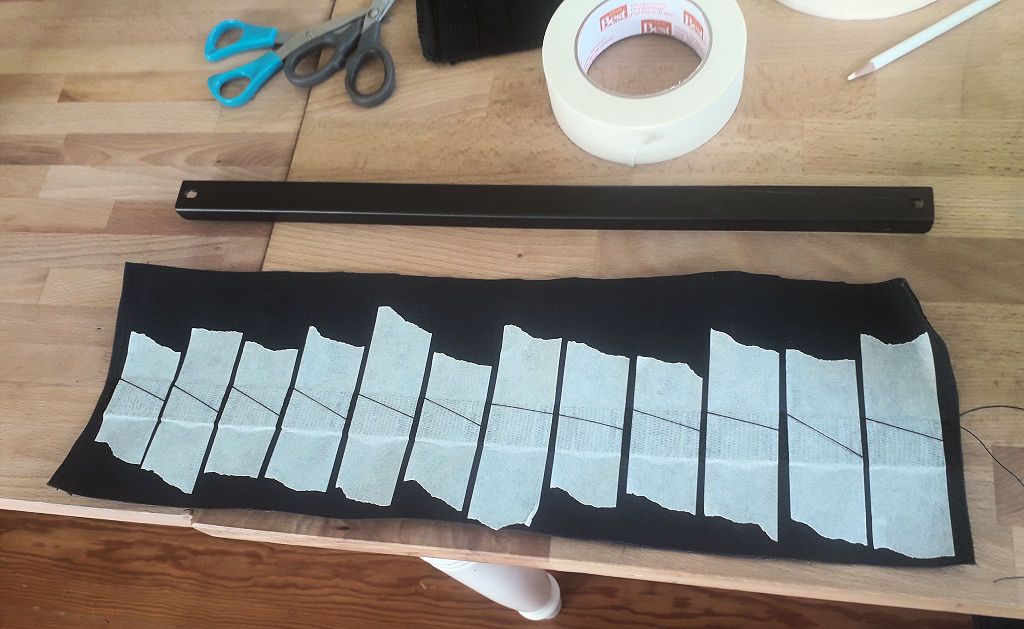
This is a very simple job for a sewing machine (my second favorite power tool for making Jeep accessories) - a piece of fabric to form a tube to slip over the magnet bar and a piece of 1" webbing sewed to the fabric with lines of stitching every 1.5". Since the fabric between the magnet and the Jeep body could lead to slipping, I added patches of Prince Dura Tac grip tape (intended for tennis rackets) at each end on the back. BTW a simple way to lay out the Molle stitching is with 1.5" masking tape, just sew between the tape:

MagneMolleStripSewing_zps6owgvvxy.jpg


When sewing, sew one line of stitching, move the work under the needle to the next line and sew that one and so on, then clip the threads joining each line of stitching and remove the tape.
 

jscherb

Expedition Leader
More Magnetic Molle...

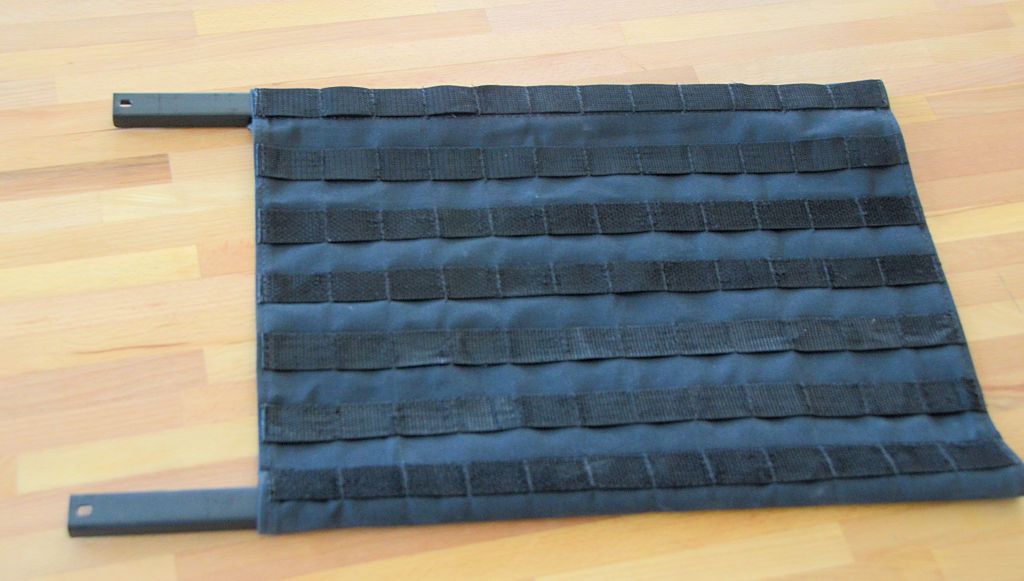
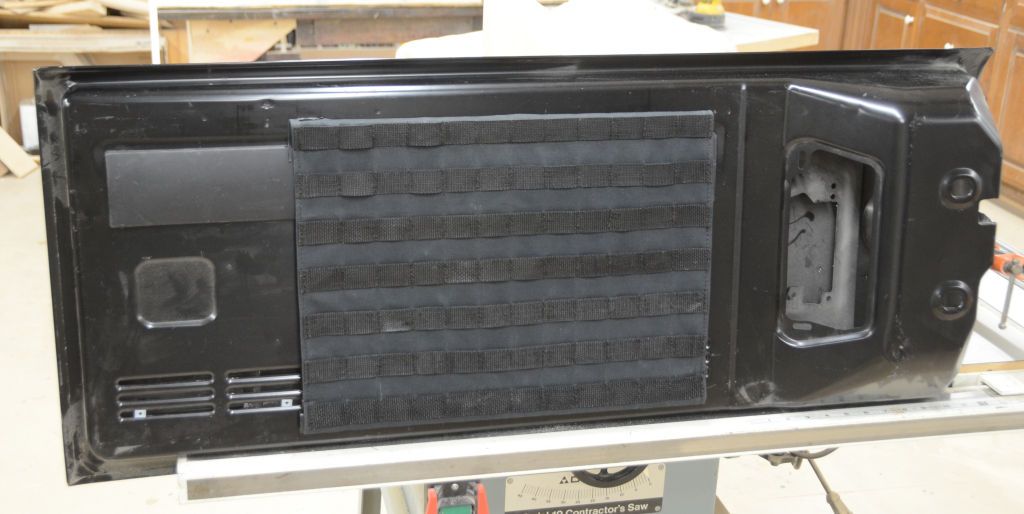
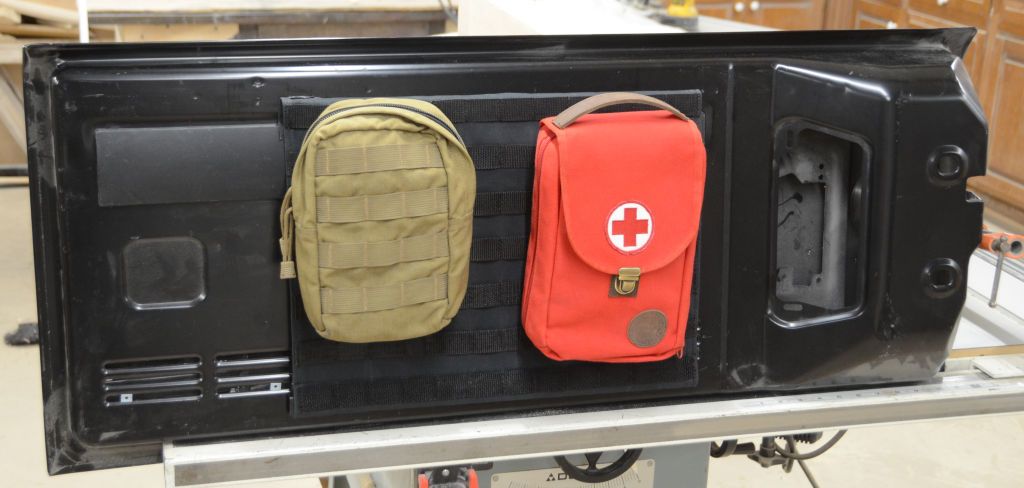
This next one is a full Molle panel, it's got magnetic bars at the top and bottom.

MagneMollePanel_zpstksysx24.jpg


MagneMollePanelJK1_zpsckzxpjde.jpg


MagneMollePanelJK2_zpsg138myrt.jpg


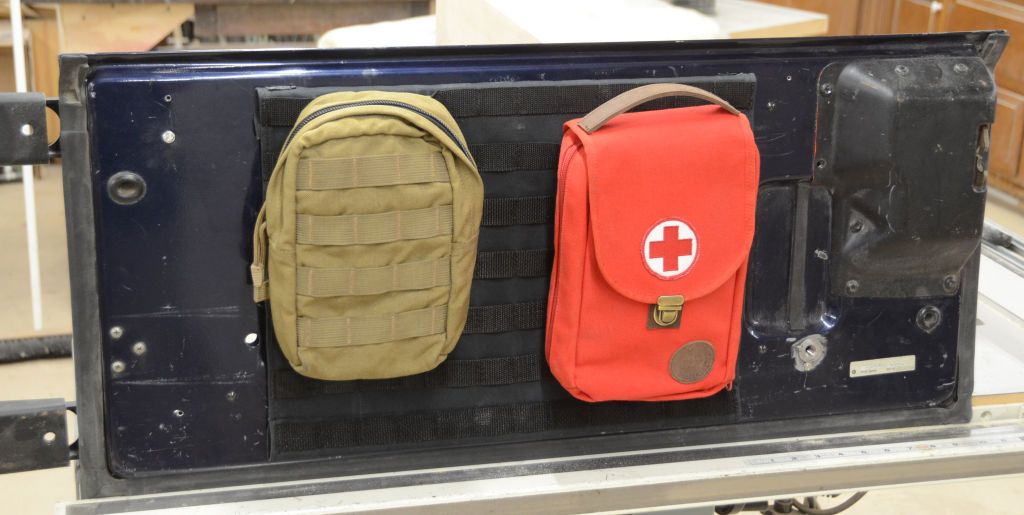
And on a TJ:

MagneMollePanelTJ2_zpsscmo2xcj.jpg


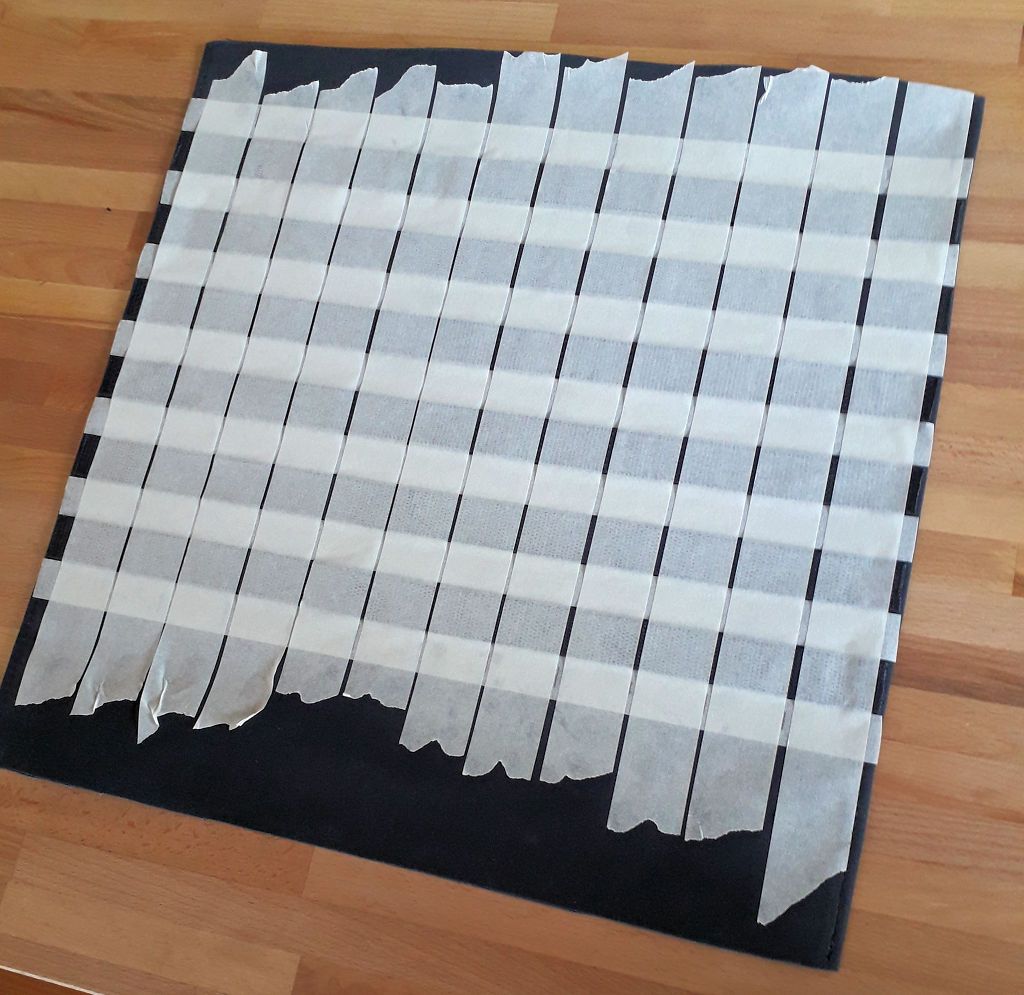
A tip for sewing - it can be hard to get the Molle grid perfect as the webbing tends to squirm under the sewing machine foot and can move when being sewed, so I use rows of 1" masking tape to define the spacing between rows, and columns of 1.5" masking tape to define where the stitching goes to hold the webbing to the panel. This is the panel before sewing the webbing in place, I sewed wherever the webbing showed through the tape and then pulled the tape off:

MagneMollePanelSewing_zpszl6bx3n5.jpg
 

14JKURX

Observer
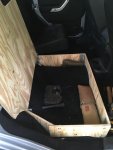
Following Jscherb lead I thought I would try to build a platform on the 60% side of the rear seat.
I still need to redo one of the brackets but this is what I came up with.
 

Attachments

  • FEC48A7D-58AA-4EFD-B455-7001E0E83CB6.jpeg
    FEC48A7D-58AA-4EFD-B455-7001E0E83CB6.jpeg
    650.3 KB · Views: 48
  • F4412D38-308E-45CC-962B-140466C2863F.jpeg
    F4412D38-308E-45CC-962B-140466C2863F.jpeg
    678.4 KB · Views: 47
Last edited:

Forum statistics

Threads
188,020
Messages
2,901,224
Members
229,411
Latest member
IvaBru

Members online

Top