Battleship Jones: 2015 Tacoma DCLB Build Thread

Adventurous

Explorer
Red braided sheathing came in today, so it was back to work I went. Luckily all I had to do was pull the power cables, trim the sheathing to length, and heat shrink the ends. Everything is nice and clean now.

20150126-P1010310 by Tim Souza, on Flickr
 
Last edited:

Adventurous

Explorer
To give the proper credit where it's due, I must mention that I was inspired to do this by the fella who sells the Anti-Dark kit for the Tacoma. If you want something already put together and simple, he sells a nice neat package.

Given that I have been working a lot under the hood recently in the dark I got a bit tired of wearing a head lamp or holding a flashlight in my mouth. Since I happened to have all the materials on hand to do an under hood LED strip, I took the time tonight to get everything wired up. Somehow it ended up being a bit of a frustrating process as the first time I tried to bend the strip around a curve and came to the realization that it wasn't going to happen. No bueno. Had to scrap out the wiring harness I had made for that configuration and start again. It is a fairly straight forward install, extend the wires so one of them reaches power and the other to a hood pin switch. You open the hood, it goes on. You shut the hood, it goes off.

Unfortunately I ran out of butt connectors mid way through the install so I looped the wires together for illustrative purposes.

20150127-P1010315 by Tim Souza, on Flickr

I ran the wires down behind one of the hood supports and out through a hole at the bottom of the hood. Connected everything up to the power block (pardon the mess, I was test fitting the CB radio wires and coax cable and have a bit of spaghetti wiring at the moment) and the other end up to the hood switch. I don't have any pictures of the hood switch at the moment but will take some in the next couple of days and update the thread.

20150127-P1010317 by Tim Souza, on Flickr

And a little up picture! It does a great job at illuminating under the hood. Definitely enough light to see and work on stuff.

20150127-P1010314 by Tim Souza, on Flickr

Now to get the coax cable through the firewall. The last time I purchased a cable the connector wasn't attached to the wire and had to be soldered on. This time it is connected and makes the whole assembly a 1/2" proposition. Any suggestions?
 
Last edited:

Adventurous

Explorer
So I got around to installing the CB radio this weekend. The goal going into it was to mount it in a place that did not impact comfort, visibility, or safety, and still allowed the radio to be easily viewed by the driver. I evaluated mounting it a few places, inside the center console, on the dash, separating the face plate from the body of the radio to do a remote mount, but in the end, mounting it in the little cubby forward of the cup holders. Mock up mounting had it like so

20150131-P1010320 by Tim Souza, on Flickr

Now of course this leads to a particular problem of you know, the dash being in the way. Although a bit intimidating to start hacking up pieces of the center console, it made for a seamless install that I ended up being happy with, so in the end it worked out well.

Anyway, step one was to disassemble the center console stack. There are two bolts in the center console hidden under the rug that need to be removed.

20150131-P1010325 by Tim Souza, on Flickr

Remove the rubber part of the cup holders then pry up the plastic try. It is held on by a couple of spring clips that should release with a good tug.

20150131-P1010326 by Tim Souza, on Flickr

Now you can remove the shifter bezel. There is not enough clearance to maneuver it off with the shifter in Park, so I put on the e-brake to shift it into Neutral and that gave me enough roam to coax it off.

20150131-P1010327 by Tim Souza, on Flickr

Lastly, remove the four screws holding the two pieces of the center console together, and the shifter to the center console. You should be able to remove it as an assembly, or, disconnect the front half from the back half and remove just that part by itself. The front section will disengage from the center cluster by tugging backwards to disengage the snap clips.

After laying out the position of the radio in the dash I transferred the profile of the back of the radio to the back wall of the cubby and went to town with a Dremel, a cut off wheel, and a file.

The CB mounting bracket was attached to the vehicle using a couple of self drilling sheet metal screws into the plastic. The radio and it's wires were threaded through the space I made and I reversed the steps to re-install all of the trim pieces. All wires were tucked up behind the center console and run across to the main firewall grommet and through to the fuse block. The final install looks like so.

20150131-P1010328 by Tim Souza, on Flickr

The final thing I got accomplished was to hook up the Hellas on the front bumper. Despite having owned these for about a year, I have never had them wired up at all. The wiring was pretty straight forward, connect to the protruding wires from the back of the lights, run them to the fuse block and relay then wire to the in-cab switch.

I had to do several wire merges to get everything into a single cable for ease.

20150131-P1010321 by Tim Souza, on Flickr

I got a Carling style switch similar to what comes stock with the ARB stuffs. Once again I had to trim away some of the dash to fit the switch in there. I mounted in the upper holes this time to get all of the light related stuff on a single row. In order to get everything wired up right I had to make my own wiring harness. Using some marine quick disconnects and wire that I had laying around I came up with the following.
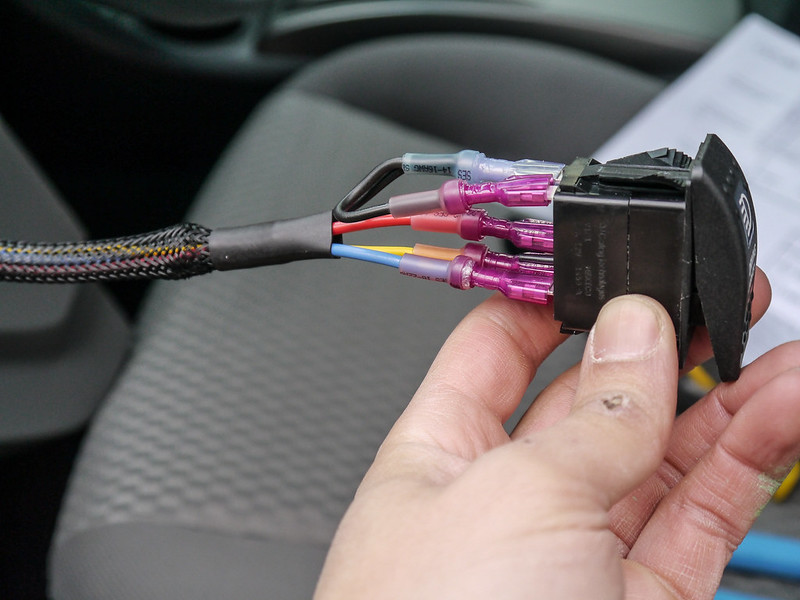
20150131-P1010322 by Tim Souza, on Flickr

And the switch in the dash. Nice and clean. Although it looks like it would be close to interfering with the top lip of the dash (it is) when activated, it does clear.

20150131-P1010323 by Tim Souza, on Flickr

I spent probably 6 or so hours out there getting everything wired, connected, tucked away, and yada yada. Seems like a long time for what I accomplished, but everything is together again. The final payoff was hitting that light switch and seeing that I had indeed done everything correctly.

20150131-P1010329 by Tim Souza, on Flickr

I still have to get them aimed properly and tuck the rest of the wires into looms for neatness sake, but I'm pretty pleased.
 
Last edited:

Adventurous

Explorer
I got tired of looking at the blank fog light spot in the ARB bumper and decided to do something about it. I didn't feel like paying the $90 for the ARB fog light kit, so I ordered up a pair of the following from Amazon to see if I can get them to fit in there. Copious amounts of silicone sealant will be used upon arrival in an attempt to waterproof them as I don't buy their IP67 rating for a second.

71hk0A0JYBL._SL1000_.jpg


Anyone else mounted a set of non-ARB fogs in their ARB bumper? Or for that matter found a connector to wire up to a set of fog lights that plays nicely with the stock plug? I don't really want to hack up the factory fog light harness, so I'm looking for something that will mate up seamlessly.

Would the following work out as a simple plug and play if I snip the fog light side of the connector off?

http://www.buyheadlightbulbs.com/H11-Heavy-Duty-Wiring-Harness-p/cir-9108.htm
 
Last edited:

SWITAWI

Doesn't Get Out Enough
Anyone else mounted a set of non-ARB fogs in their ARB bumper? Or for that matter found a connector to wire up to a set of fog lights that plays nicely with the stock plug? I don't really want to hack up the factory fog light harness, so I'm looking for something that will mate up seamlessly.

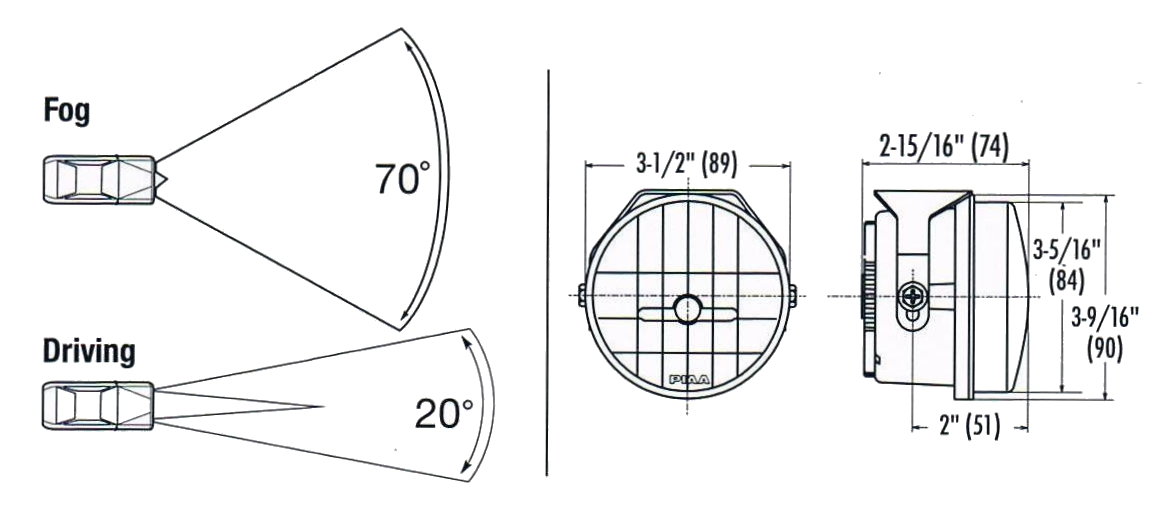
I think I read somewhere that one of the FJC forum members got PIAA LP530s (LED/3.5"dia) to fit the ARB foglight location. Can't find a link though...

Not sure about finding an OE-style connector, but the gang at http://trdparts4u.toyotaofdallas.com/Scripts/default.asp will know.

And here's the PIAA 530 for reference...
piaa530dim2.jpg

PIAA-530-LED-Fog-Lamp-Kit-01-large.jpg
 

Adventurous

Explorer
I went with these because I have the correct crimpers. If you don't have the crimpers, go with something like this. You will still need to splice theses into the pigtail on the fogs, but you won't have to touch the stock wiring.

Gotcha. Kinda what I was thinking with the pigtail splicing. What are the correct crimpers by chance? I have a hard time turning down the opportunity to buy a new tool. :sombrero:
 

Adventurous

Explorer
In other news, I have a small Friday update to make. As someone who is a big fan of lights and seeing in the dark, I decided to upgrade the dome light and map lights to LED. Nothing ground breaking, but a pleasing change none the less. Install is pretty straight forward, so unless someone wants to see the steps I'll skip to the good stuff.

Put in these little guys.

20150205-P1010332 by Tim Souza, on Flickr

A comparison of an LED next to stock.

20150205-P1010333 by Tim Souza, on Flickr

And a shot of the interior from outside.

20150205-P1010334 by Tim Souza, on Flickr
 
Last edited:

Adventurous

Explorer
Well, the attempted LED fog light showed up today and I don't think it's worth the trouble to try and make this particular one work. For starters, it is slightly too large for the opening in the bezel so I would have to modify the bezel a bunch to try and make it work. Two, it is a pretty hefty light, no way it would mount solely to the plastic bezel without additional support. Granted I could fabricate a bracket to mount the light to the bumper, but given that I'd be $50 into it plus fab time, it's not worth it to me to continue with this one. I ordered up the ARB fogs and will enjoy the satisfaction of plug and play.
 

Adventurous

Explorer
Looks like my hand was just forced. After emailing BFG to ask about the removal of the 255/85R16 Mud-Terrain KM2 from their website I was told that it has been discontinued and will not be re-released. Full size spare tire ordered!
 

Adventurous

Explorer
And another expensive day. Ordered up a set of All-Pro Heavy Duty rock sliders. They had a good deal on a set for the DCLB that I just couldn't pass up.
 

Forum statistics

Threads
188,345
Messages
2,905,905
Members
229,959
Latest member
bdpkauai
Top