Glad you found a supplier otherwise then. It worked handy for me since they had 1/8" thick 2" wide 9/16" leg channels worked perfect with my wall thickness. I also got a 1/8" 1"box tube that I ripped into strips and bedded into the channel with epoxy/chopped glass to make the main part of the channel 1/4" thick to really stiffen things up.
You are using an out of date browser. It may not display this or other websites correctly.
You should upgrade or use an alternative browser.
You should upgrade or use an alternative browser.
billboards hauler: homebuilt fiberlgass composite popup for flatbed tundra
- Thread starter bphang10
- Start date
bajajoaquin
Adventurer
One of the issues the Supercamper guys had was the surface finish on the Nidacore. The small dimples made it hard to sand. What's your opinion on the surface finish? Can you use it as-is, sandblast? Other?
One of the issues the Supercamper guys had was the surface finish on the Nidacore. The small dimples made it hard to sand. What's your opinion on the surface finish? Can you use it as-is, sandblast? Other?
yep, that has required alot of time and effort. i studied the supercamper build thoroughly and was still surprised at how hard the surface is to prepare. my method was to thoroughly sand all the panels flat on the sawbucks before laminating them in place. i takes alot of elbow grease and i would not want to have to sand on vertical surfaces. i did most of my sanding with 40 grit on a variable speed polisher/sander at med -high speed. then a pass with 60grit, then 80 on a small pad sander. the pad sander seemed to get down in the dimples pretty well. i'll still go over it by had with paper and /or scotchbrite before painting. i also hand sand each edge to be laminated with 40g and make sure all "shinies" are gone. as i understand, how deep the dimples are is variable and depends on how it comes off the mold. my panels were consistently deep. 4 x 8 panels are available pre sanded, which i'd say is the way to go if that size panel suits you. i chose to order very large panels so i had no joints within the walls, and that was too big for their sander. the surface is amazingly hard and i was surprised at how 40grit seemed to barely scratch it. i bet i spent 40-60 hrs sanding before putting up my 1st wall, and i still have to sand the panel for the roof.
i thought of using the panels as is on the inside, but realized that when laminating joints, it's not realistic to prepare and finish the joints without also getting into the rest of the panel. might be possible to use the panels if you join them with fiberglass structural shapes. that would be the fastest way to construct, but i'm not sure about availability of corner shapes.
I also got a 1/8" 1"box tube that I ripped into strips and bedded into the channel with epoxy/chopped glass to make the main part of the channel 1/4" thick to really stiffen things up.
never thought of ripping down box tube. i could have done that to get 1" channel. i'm pleasantly surprised at how easy the fiberglass angles work with standard woodworking tools(carbide blades)....cuts and sands easily.
To get an adhesion profile etched in on alot of work a sandblaster would be where its at. Skim it with a micro balloon slurry at use something like a 7" angle sander to take that smooth in a hurry.
Yeah shapes cut easy but stink. However most your work being in polyester likely smells similar I suspect so nothing new for you.
Yeah shapes cut easy but stink. However most your work being in polyester likely smells similar I suspect so nothing new for you.
jrfromafar, (does the "jr" refer to a certain right point up north?)
i followed the "huf adventure camper build". pretty cool. i think that one turned out nice and light and has been in action for awhile now. mine will have canvas popup, not hard side. it's time for me to start thinking about the canvas.
DanoT,
i see you have a custom pheonix camper. i've contacted them about possibly having them make the canvas for me. how do you like yours? i'm deciding between having one made locally by someone who's never done a camper canvas, but have the ability to have it fitted in place, or have one made by the pro's, having it shipped to me and running the risk of it not fitting perfect. and i'm not getting a sewing machine and sewing it myself. i picture wavy seems and bloody fingers sewn in place if i were to give that a go.
anyone out there had one made? recommendations?
came across a good price on what looks to be a very good solar panel and ordered it today. it will be powering a nova kool 12v fridge, 1 or 2 fantastic fans, a few led's and occasionally an inverter. inverter will be primarily to run a coffee grinder every other day and charge cordless tool batteries occasionally. planning on a 135 amp hr 12v deep cycle battery.
here's the link to the panel in case anyone's interested:
http://www.solarpanelstore.com/solar-power.large-solar-panels.carmanah_modules.cti_160.info.1.html
the footprint is considerably smaller than the 180 watt panels i was looking at, it's 15 lbs lighter, and it's maximum power current is 9.14 amps, which seems very high, and is said to be very efficient. also, in the specs pdf, it's shown on the xp camper, which from what i see tends to use high end gear.
A bit more per watt that some other offerings but yeah that footprint is more compact for the wattage. What'd they hit you up for on shipping?
at online checkout it was $88. however, i received a call from the shop owner a few hours later saying that was high and actual shipping was $43! not bad at all.
jrfromafar
Adventurer
jrfromafar, (does the "jr" refer to a certain right point up north?)
i followed the "huf adventure camper build". pretty cool. i think that one turned out nice and light and has been in action for awhile now. mine will have canvas popup, not hard side. it's time for me to start thinking about the canvas.
No place up north - it's my initials - 'fromafar' has to do with a my website 'thingsfromafar' dot com.
Am serious as a heart attack about doing a similar build - but no way am I going to sand for half my life - gloss would be the ideal but I could settle on a powder coat effect exterior. Also, was thinking about the possibility of beefing up corners with a 2" aluminum angle iron.
Anticipating your progress
jrfromafar, (does the "jr" refer to a certain right point up north?)
i followed the "huf adventure camper build". pretty cool. i think that one turned out nice and light and has been in action for awhile now. mine will have canvas popup, not hard side. it's time for me to start thinking about the canvas.
DanoT,
i see you have a custom pheonix camper. i've contacted them about possibly having them make the canvas for me. how do you like yours? i'm deciding between having one made locally by someone who's never done a camper canvas, but have the ability to have it fitted in place, or have one made by the pro's, having it shipped to me and running the risk of it not fitting perfect. and i'm not getting a sewing machine and sewing it myself. i picture wavy seems and bloody fingers sewn in place if i were to give that a go.
anyone out there had one made? recommendations?
Most fabric pop-up tops are available as a 3 layer arctic pack. My Phoenix pop-up arctic pack from Coyote RV comes with 2 layers of a Thinsolate knock off sandwiched between 2 layers of fabric, so it is 4 layers thick and thus ideal for winter ski area use. Installing it yourself without previous experience might be a problem but Robby at Coyote might be able to provide some guidance/instruction/tips.
Am serious as a heart attack about doing a similar build - but no way am I going to sand for half my life - gloss would be the ideal but I could settle on a powder coat effect exterior. Also, was thinking about the possibility of beefing up corners with a 2" aluminum angle iron.
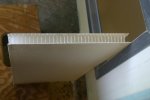
i've used a 1/8" thick x 1 1/2" frp angle on the top edge of the bottom portion of the shell to stiffen the wall just a bit and also add a clean trim. it's hard to find 1/8" in frp, most is thicker and stiffer. i tested a piece of 3/16" and it was considerable stiffer than the 1/8" that i ended up using. as far as the corners go, i can't imagine them being any stronger than they are. in retrospect, i might have done one side in thick, 2" frp angle and lay up the other side, primarily for the ease of construction. i personally would prefer fiberglass angles to aluminum, i believe the bond is better. i have used an epoxy glue, fasco 110, and it seems damn strong. i also used it to bond an aluminum ledger strip in place and it seemed to bond well.
i've spent alot of time sanding and filling the corner joints in the last week and they're pretty much done and feeling smooth. a few corners were easy, and others were more of a problem. i stepped the lam on the corners, using 6" fiberglass tape 1st then 4", then 3". the issue is the edge of the tape (which is really just a narrow roll) has a seam on each edge. for some reason the seam is insignificant on one side and thicker and bead-like on the other. so after lamination it leaves raised edges. my solution was to feather the edges with a 4" grinder and 40 grit, doing my best not to hit the weave of the rest of the cloth. in surfboard construction, this is called grinding the laps. then i decided to add another layer of 8" over the whole joint. this worked well to even out the corners and make a better blend into the wall. it also added some strength and provided a buffer when sanding and filling. oh yeah, and a bit more work.
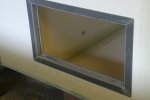
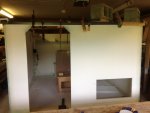
i got the frp up on the top and trimmed the door and board box hatch. i also bonded in an inside edge to provide a seal for the hatch.


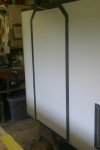
this is the hatch door, i've routed (1/4" deep) the core out of the nida-core and will fill that with a fiberglass reinforced mix, then laminate the edge. the hatch will hold up to 6 surfboards and i want it to be pretty secure. thinking about putting the hinge on the bottom or the door so it naturally falls out of the way....do you think there will be any drainage issues due to that? most hatches seem to be hinged on top or side. also decidng on what kind of hinges to use on door and hatch. leaning towards piano hinge, anyone had any experience with that?

i need to paint the board hatch so that i can laminate the top, which also serves as a couch/2nd bed in place. the hatch will also house my battery and be sealed from the inside, accessed only from the outside. in my current camper i keep boards inside. in mex, each time i prepare to move, any boards and gear that were left outside have to checked for scorpions and other critters before putting them inside for travel or storage. it will also help keep sand and moisture out of living space. here's the hatch prepped for paint. being out of site, this will also serve as a test for 2 different primers and paint. i'm trying a 2 part epoxy high build primer and a 1 part part primer. i plan on using the 1 part on the inside of the camper, and possibly the 2 part on the outside for a more waterproof seal, though i'm not sure that's necessary. final coat will be a marine topside paint. i've never had much luck painting and hope i can pull this off.


Similar threads
- Replies
- 25
- Views
- 2K
- Replies
- 16
- Views
- 4K
- Replies
- 1
- Views
- 639

