Blender, My LX450/FZJ80 + FJ45esk + GM + Land Rover crazy concoction

Metcalf

Expedition Leader
Time to mess with something new!
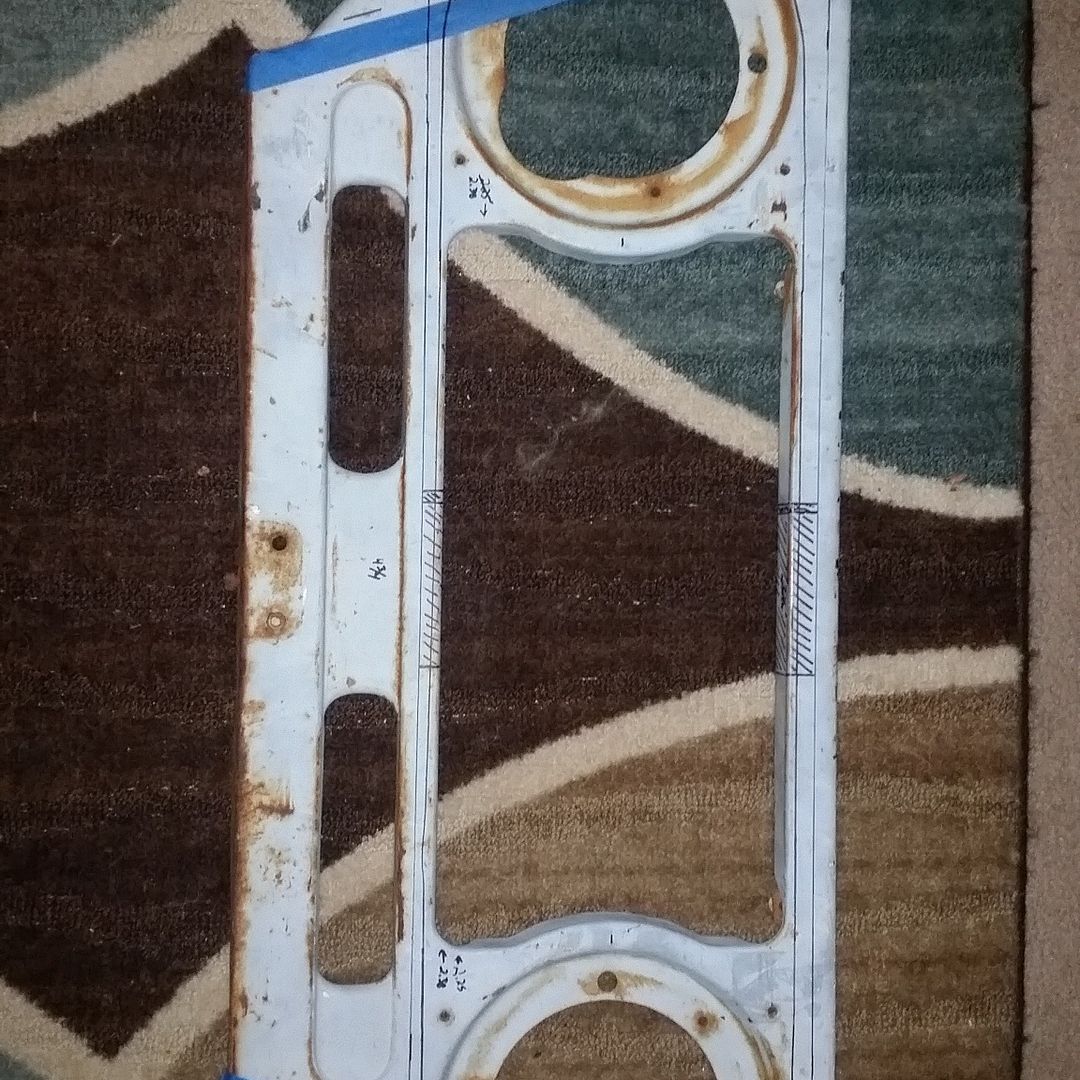


I am going to need to remake the shape of the grill.....why not....

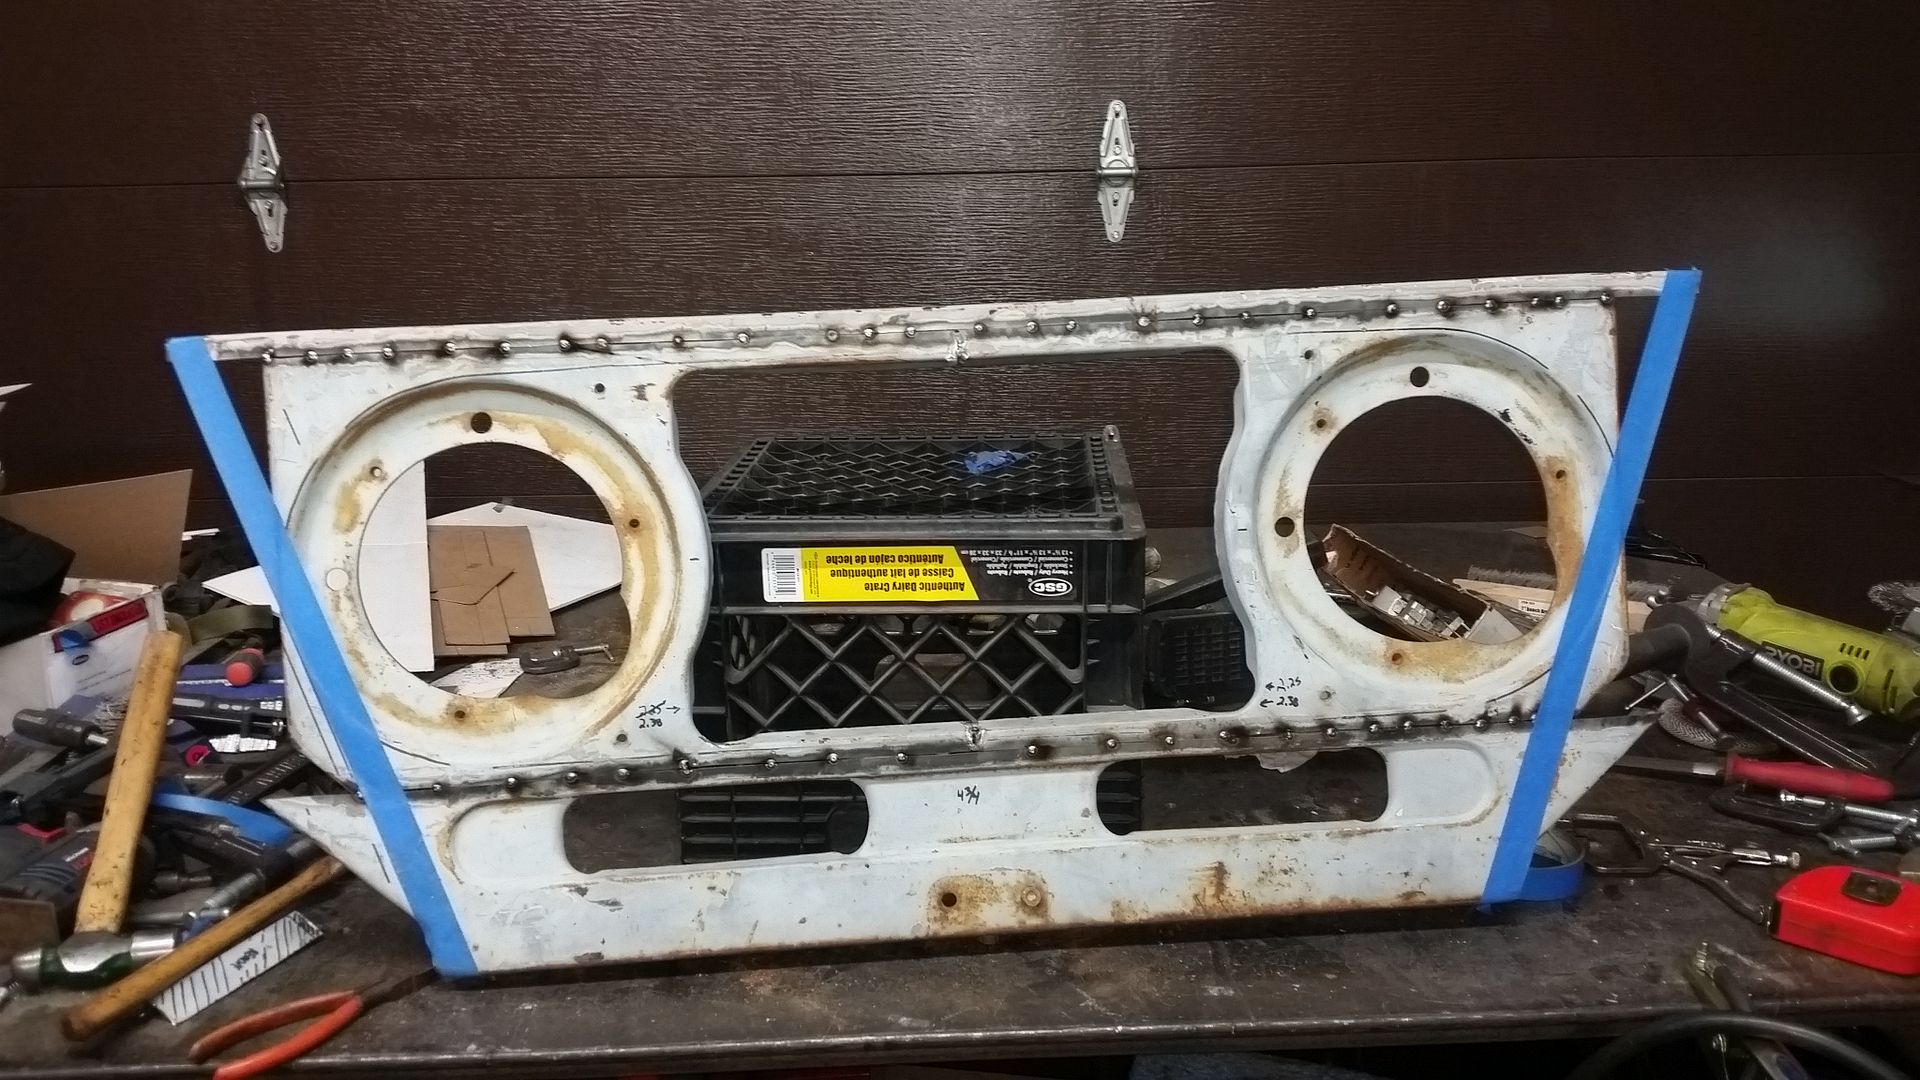
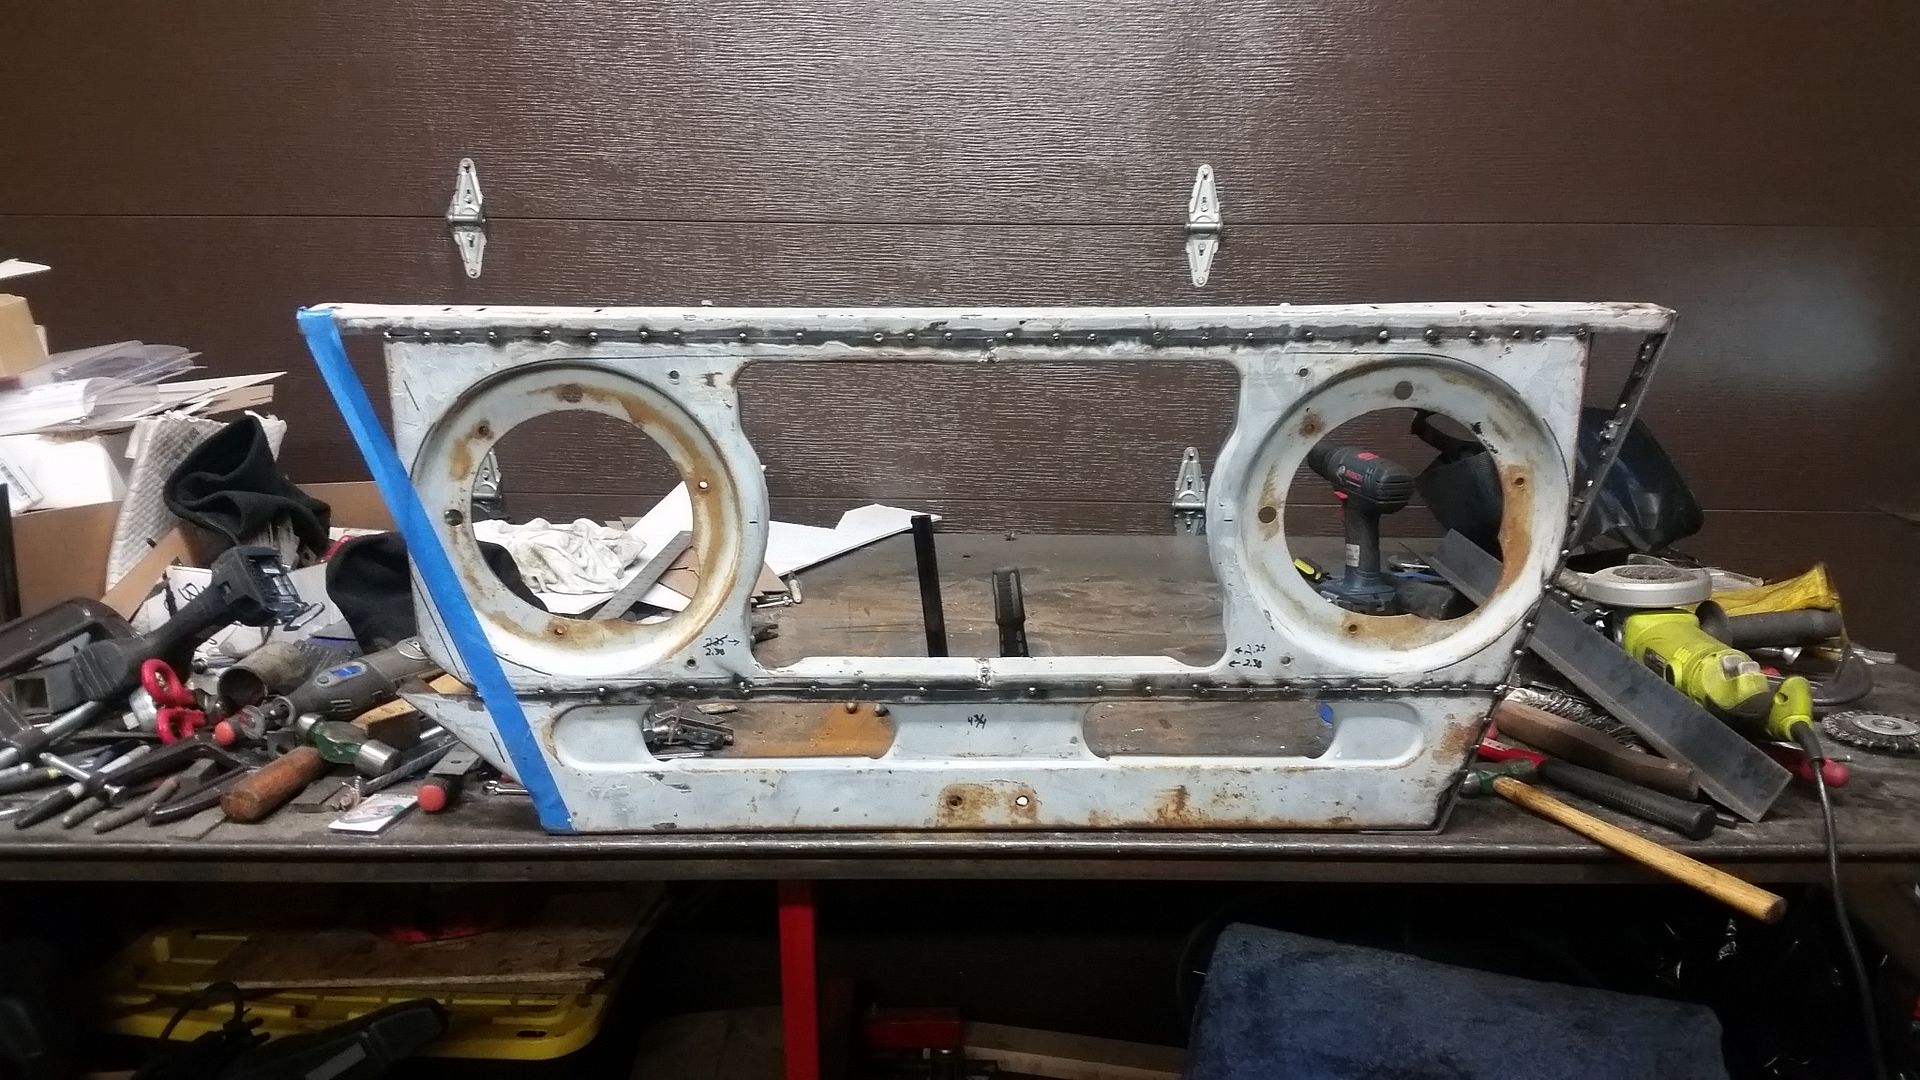
Generally, I want to eliminate the 'corners' below the headlights by moving them in about 4.38" and changing the shape to a trapezoid. This will leave the top and the bottom of the grill the same width as stock. The top matches the hood. The bottom matches the width of the 80-series frame pretty well.
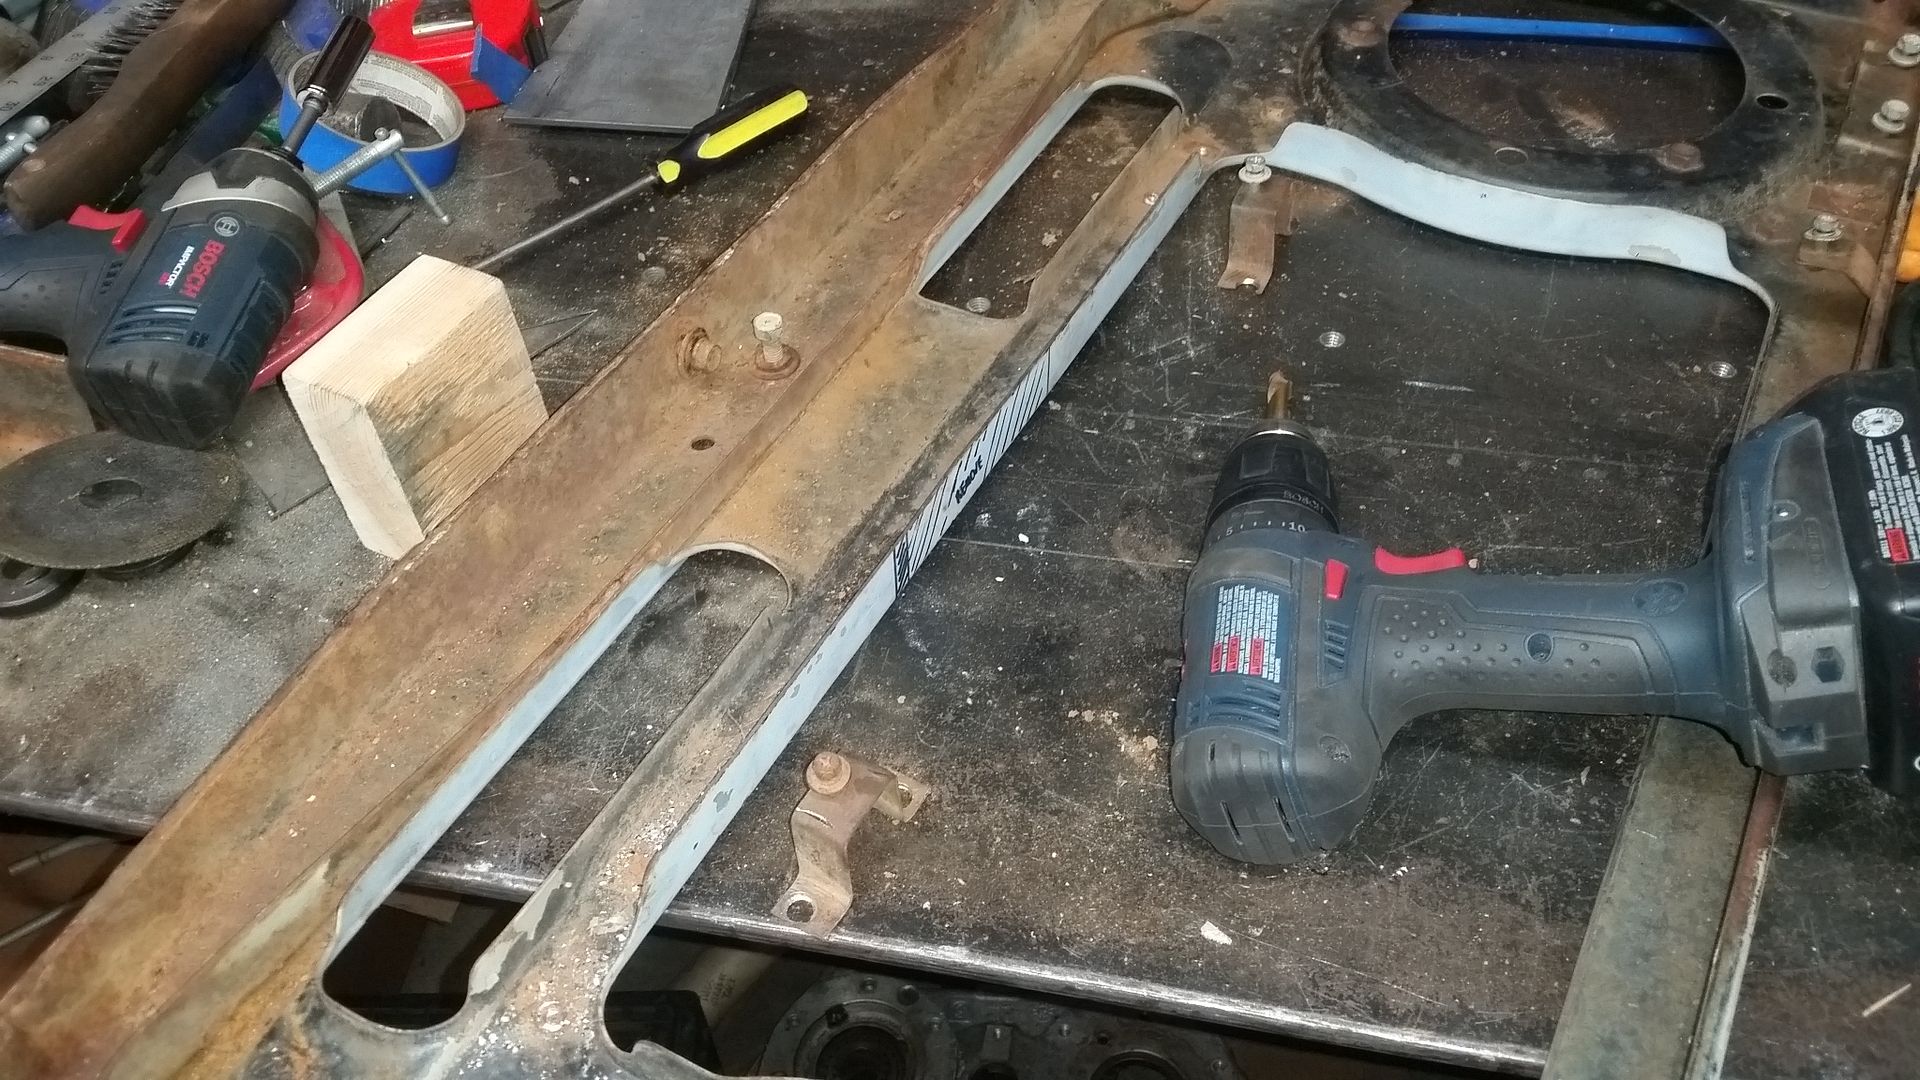
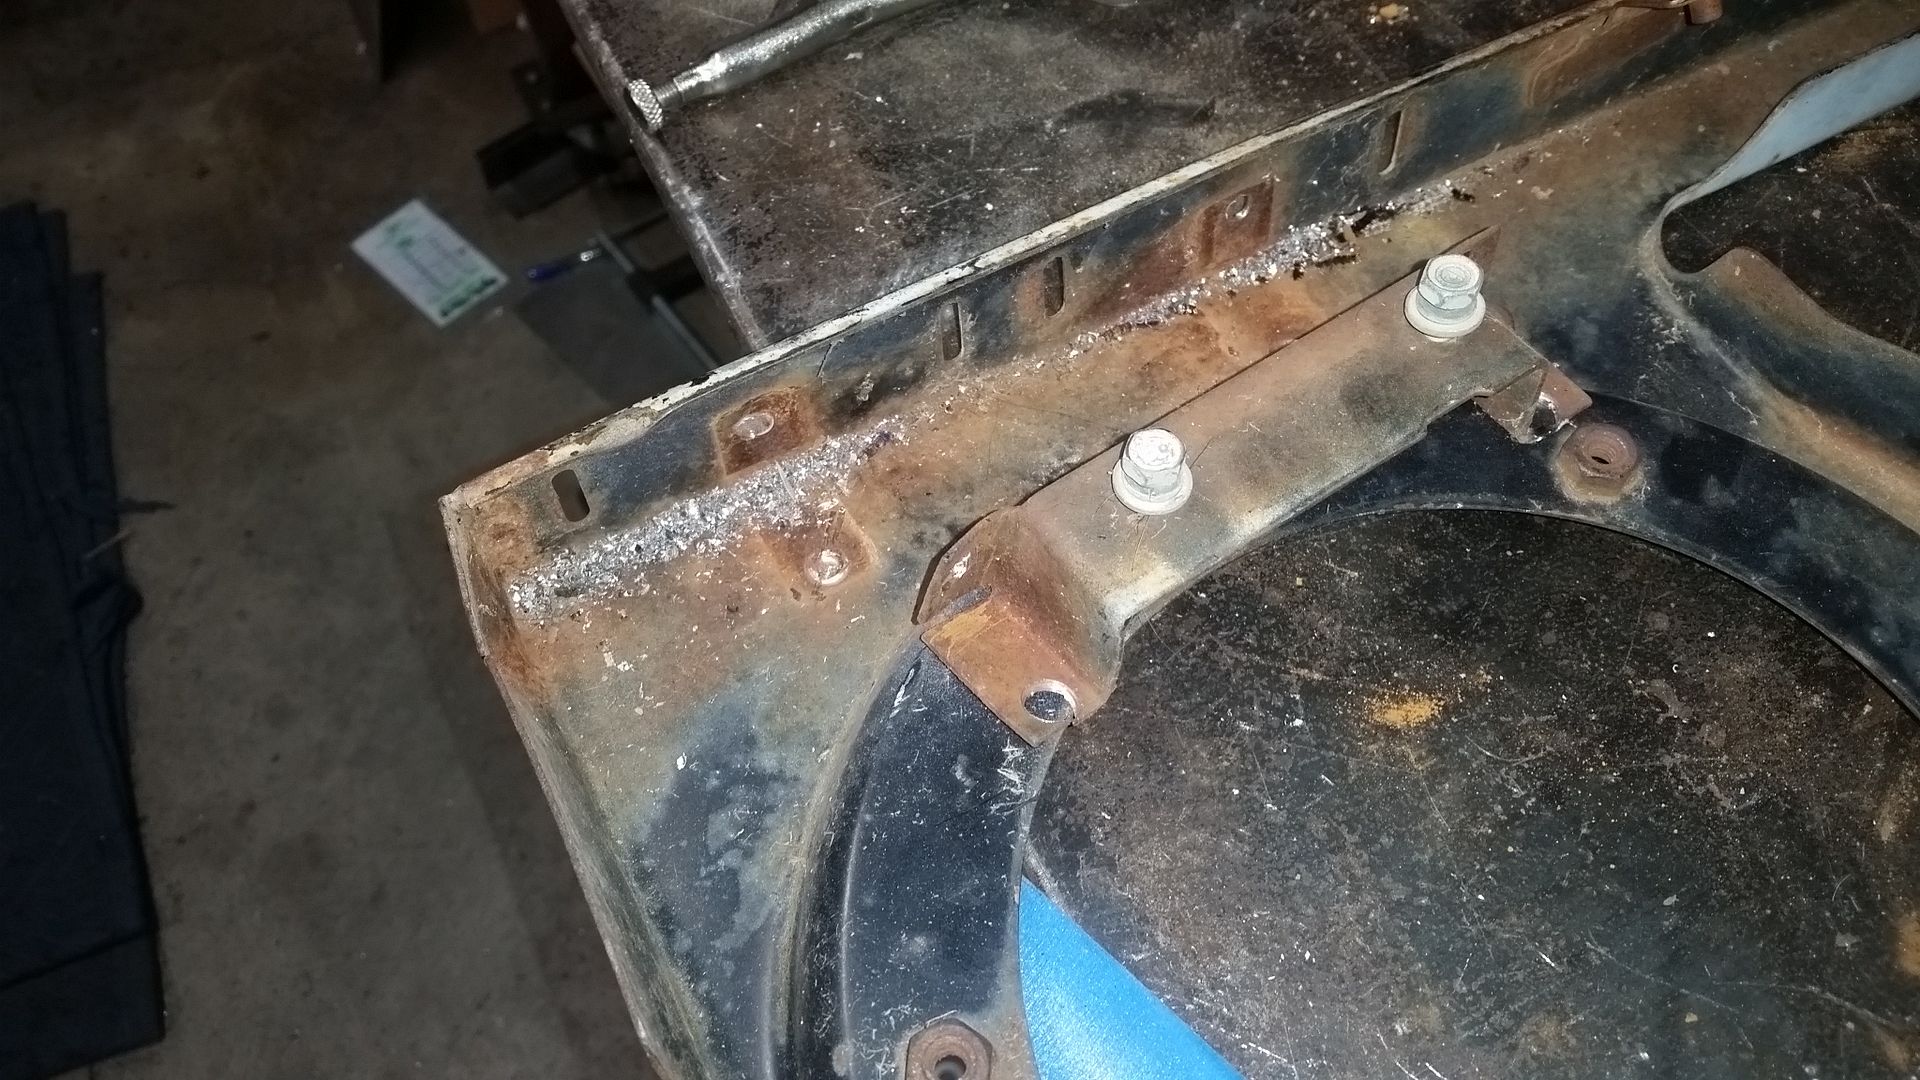


The shell needed a bit of prep in order to provide room for the jig saw blade. I was actually able to keep all the brackets useable. I think the little ones hold the metal screen for the main grill opening. I have no idea what the one of the drivers upper corner does? Some kind of latch mount maybe? I don't think I will need to retain that one....
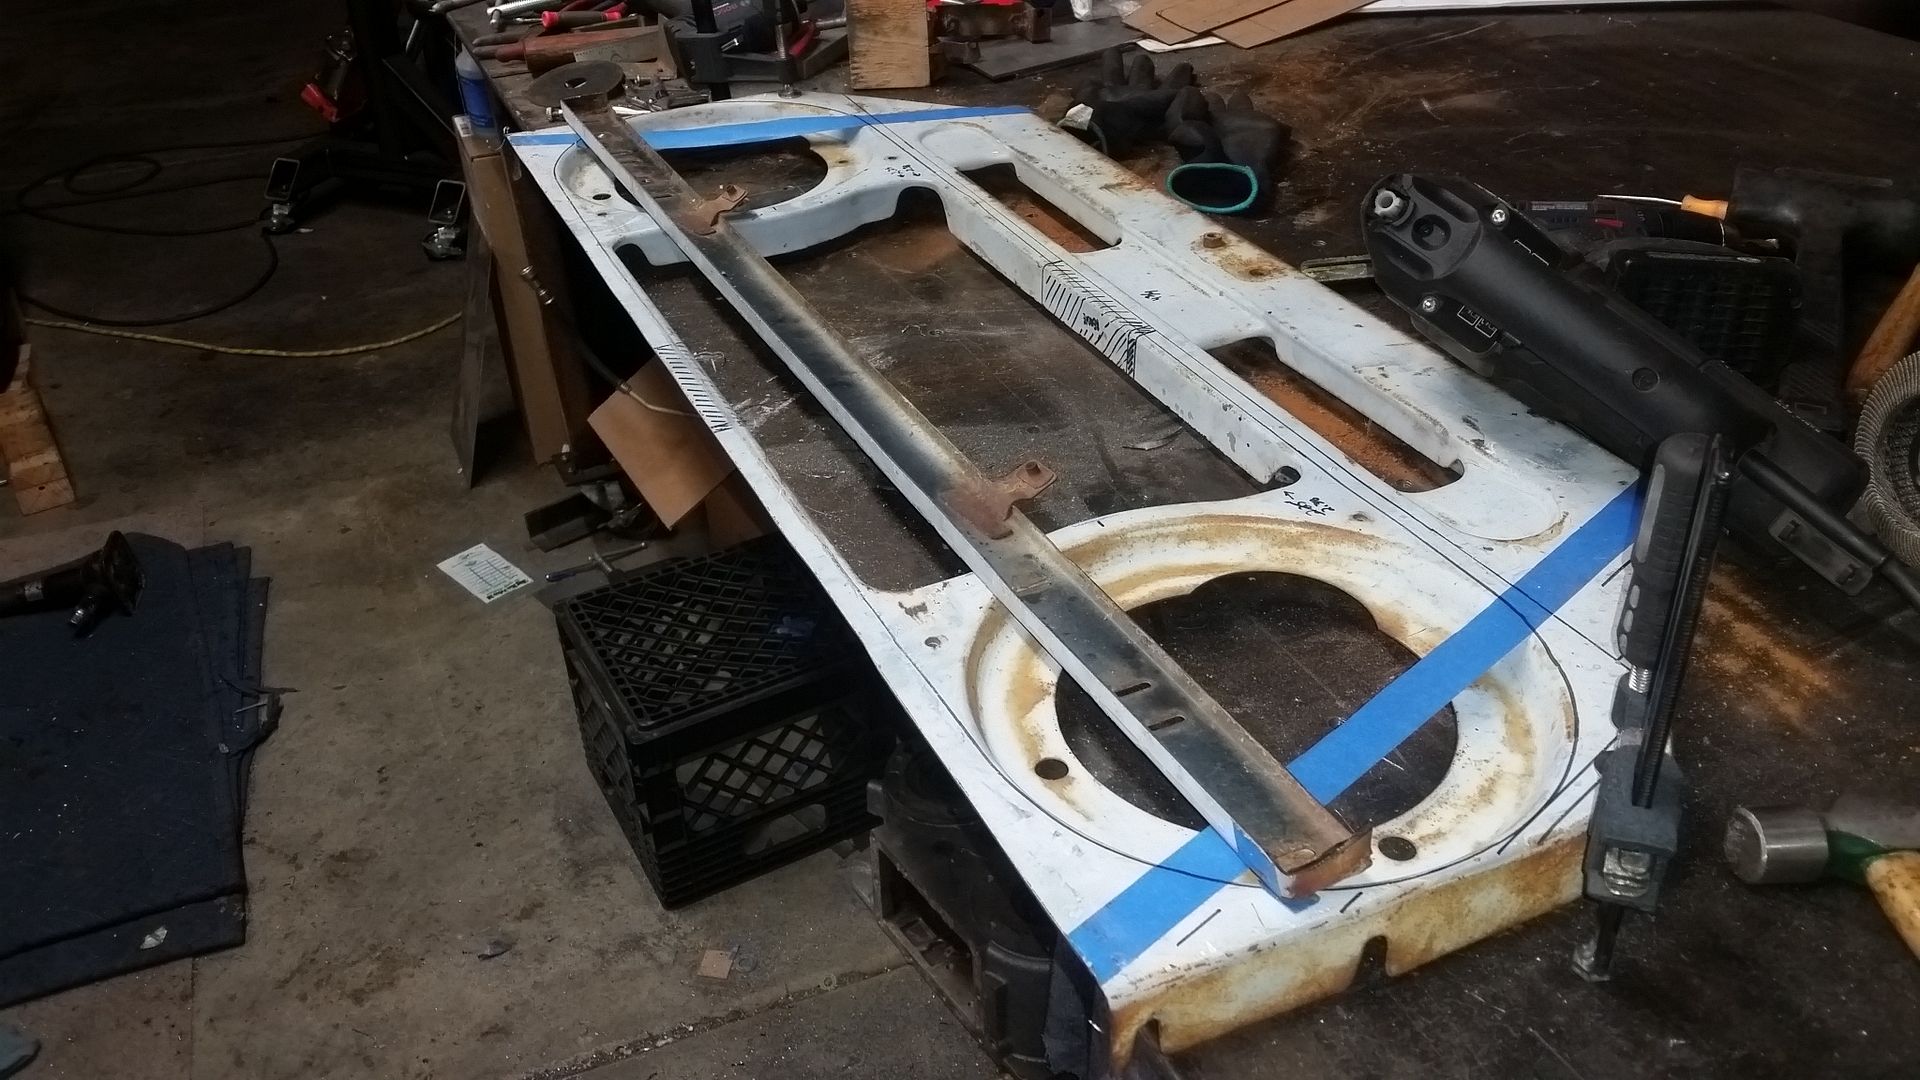
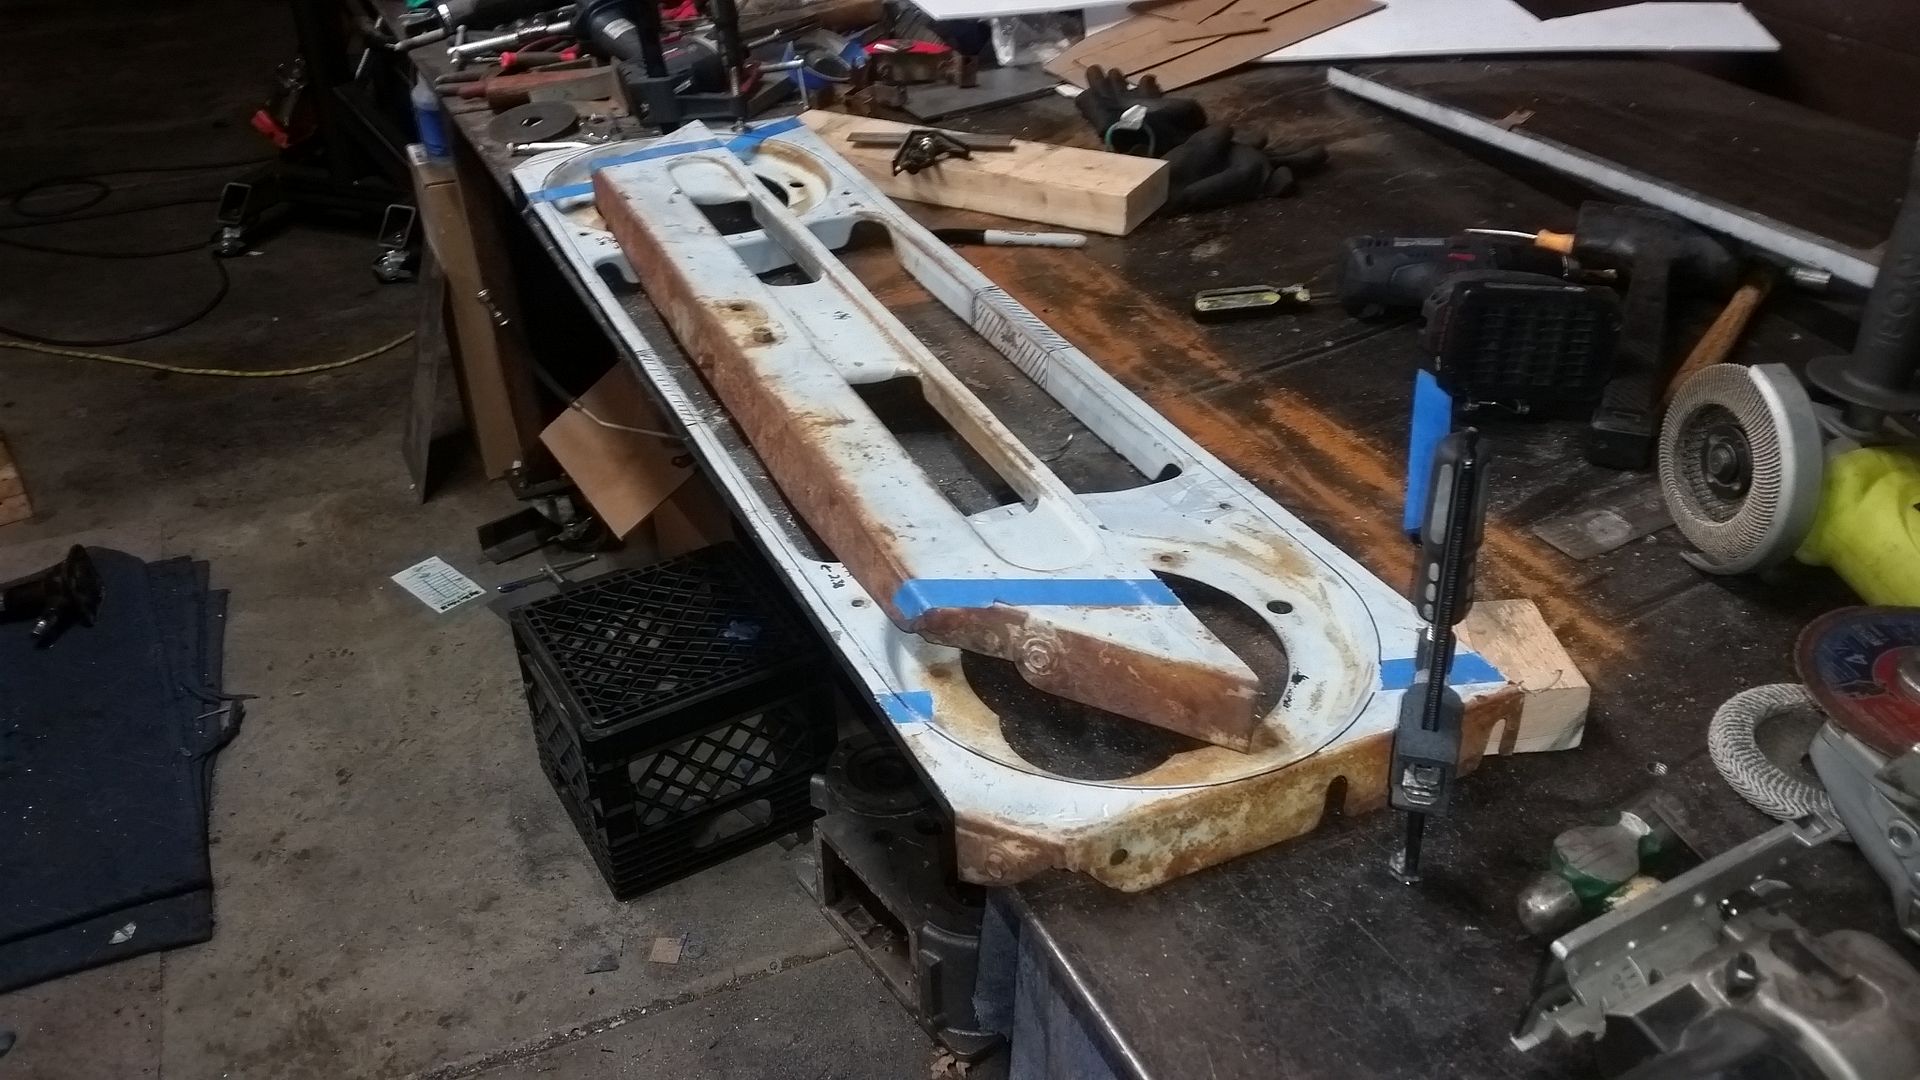
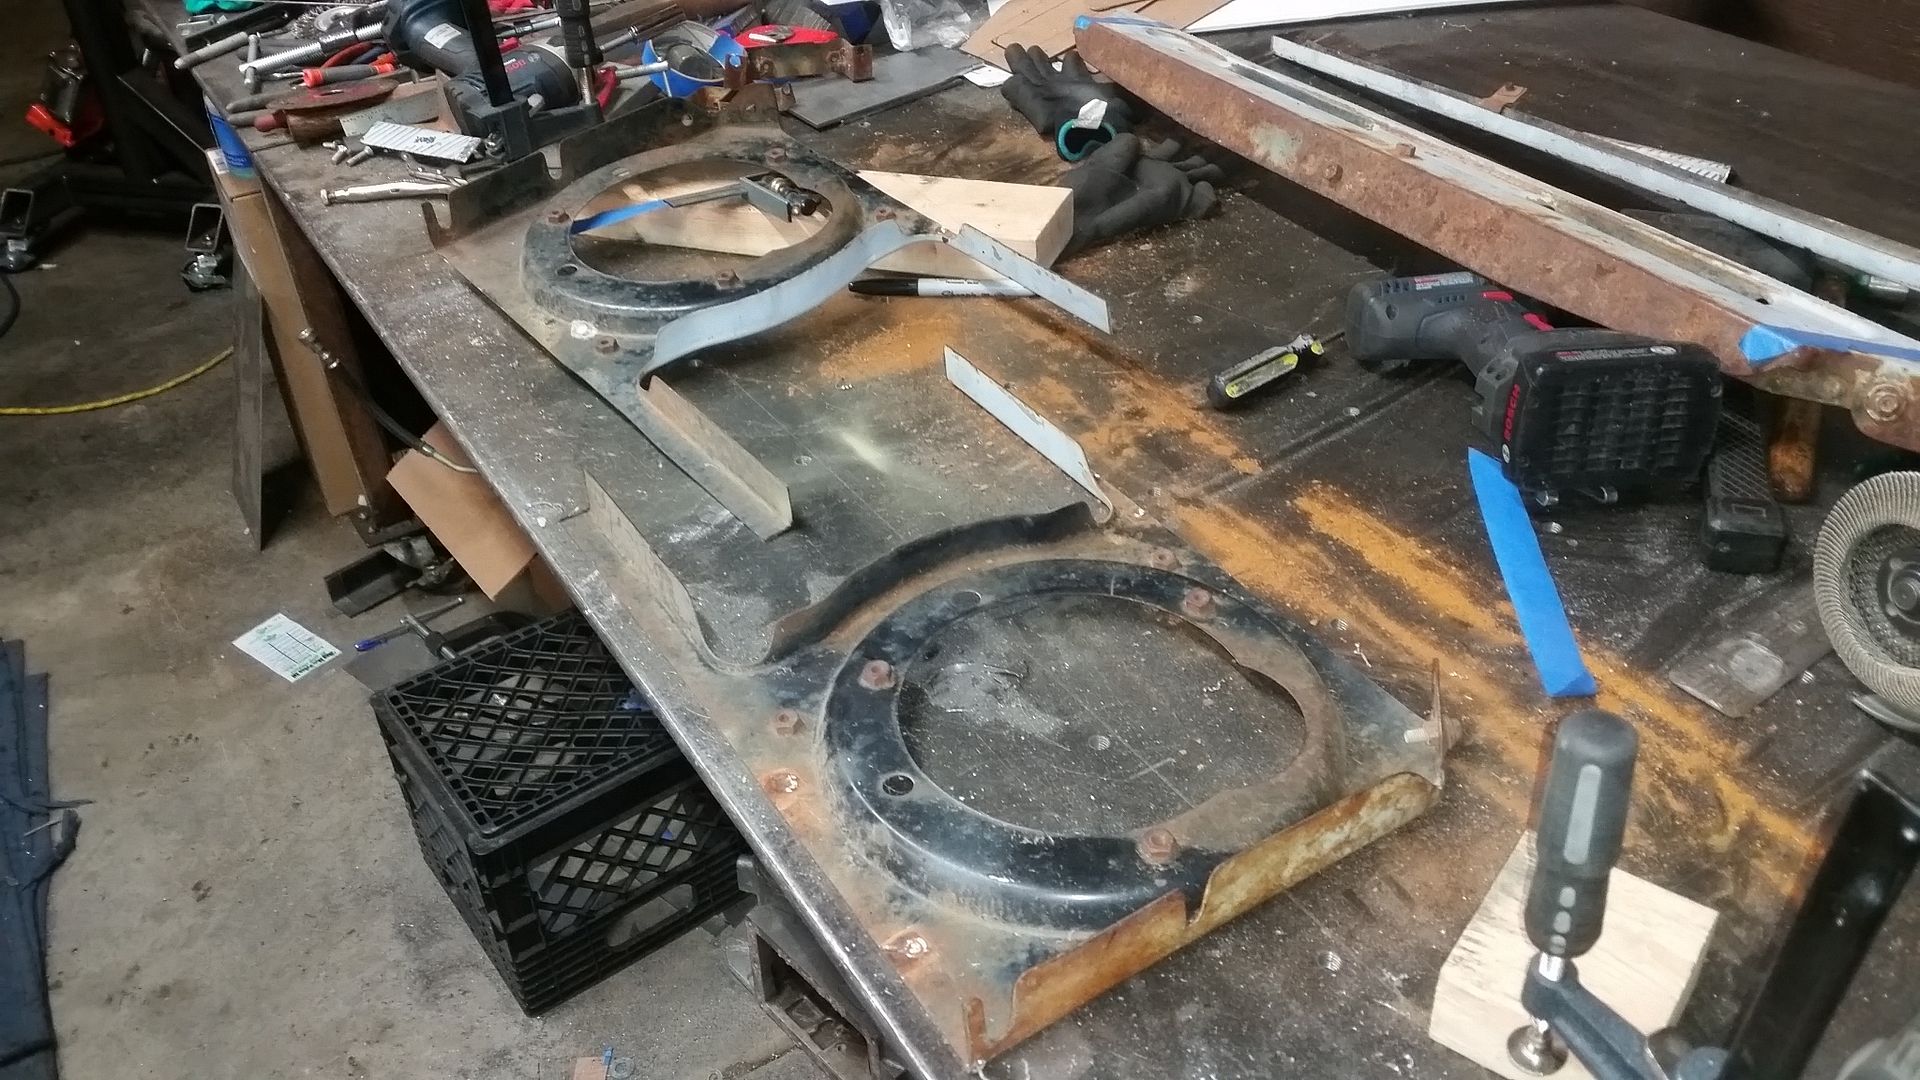


Cutting up into lots of pieces was fun.

This metal is pretty thin. I think it is 22 gauge or something. I need to look at picking up a small sheet for the areas I will need to add to make the new shape.

Once the edges where cut I cleaned them up with a file, dremel, flap wheel, a few swear words, and a little hammer work....
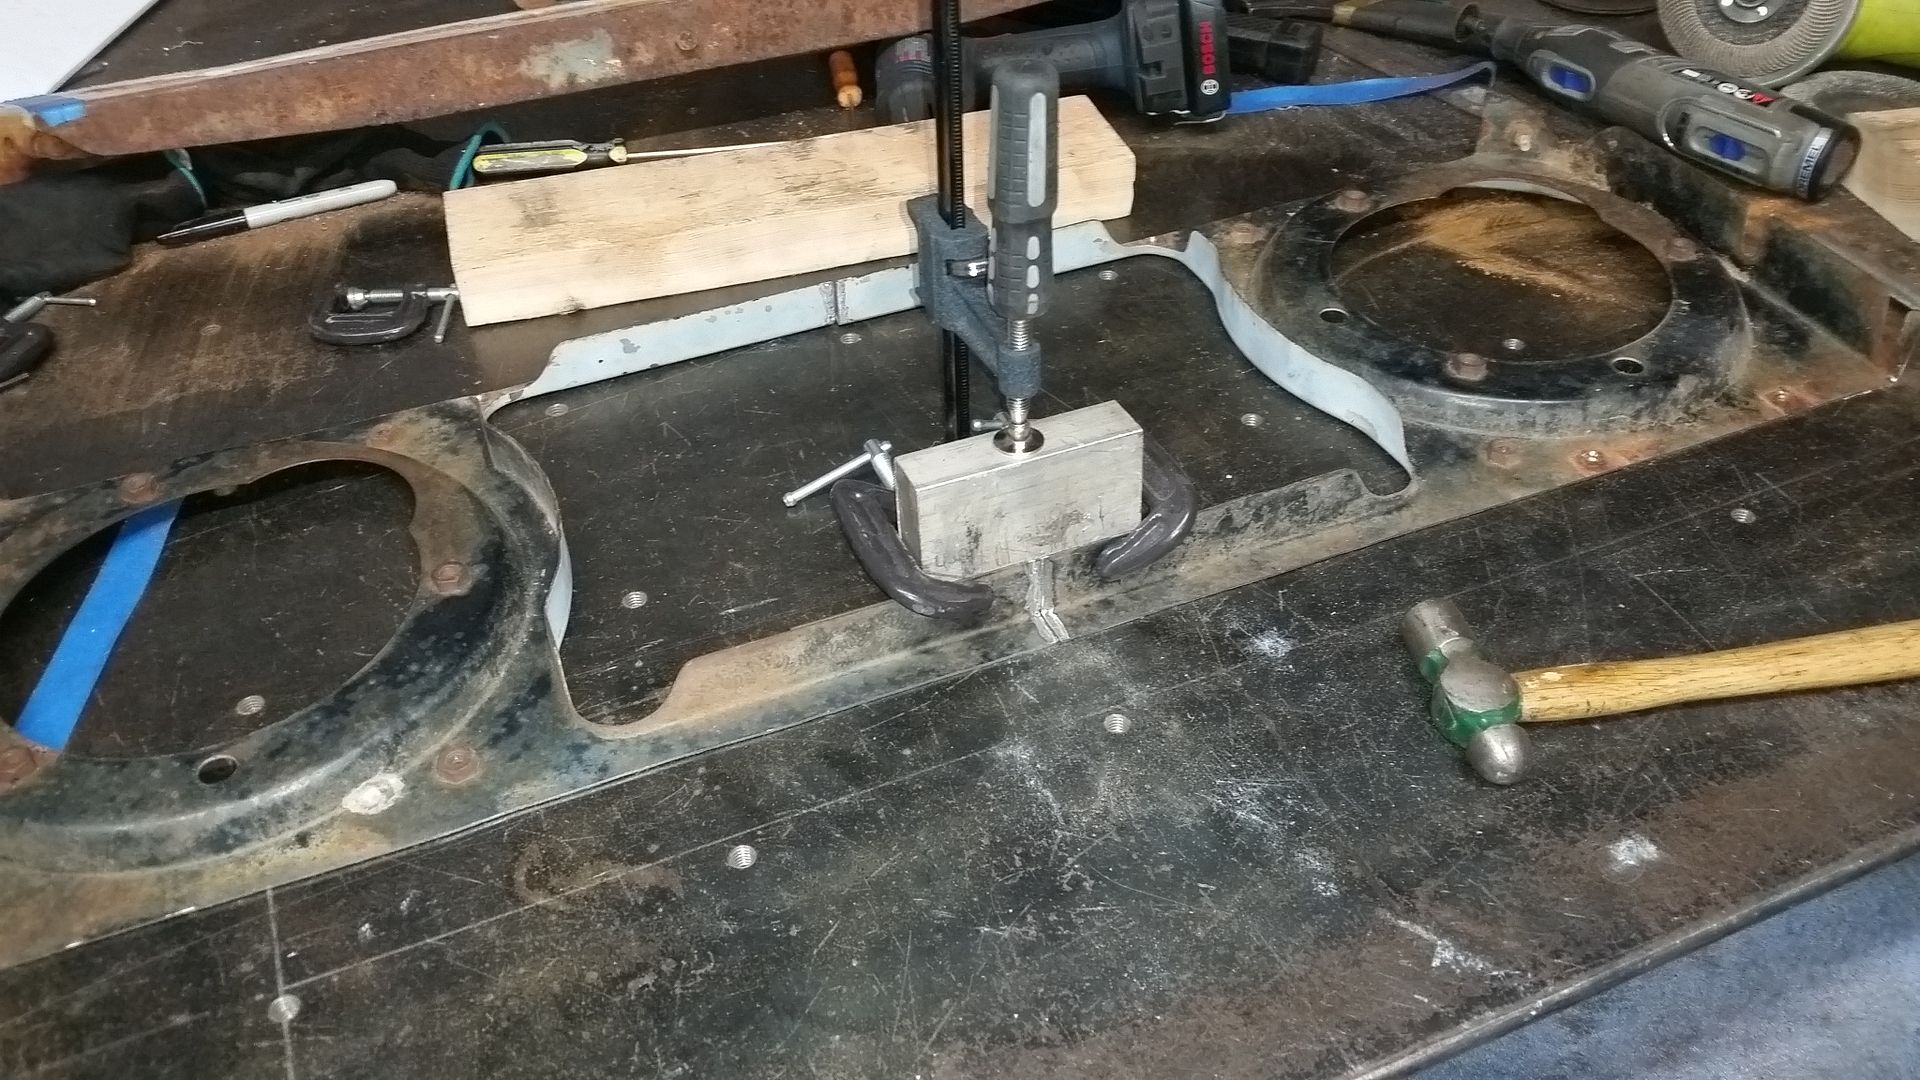
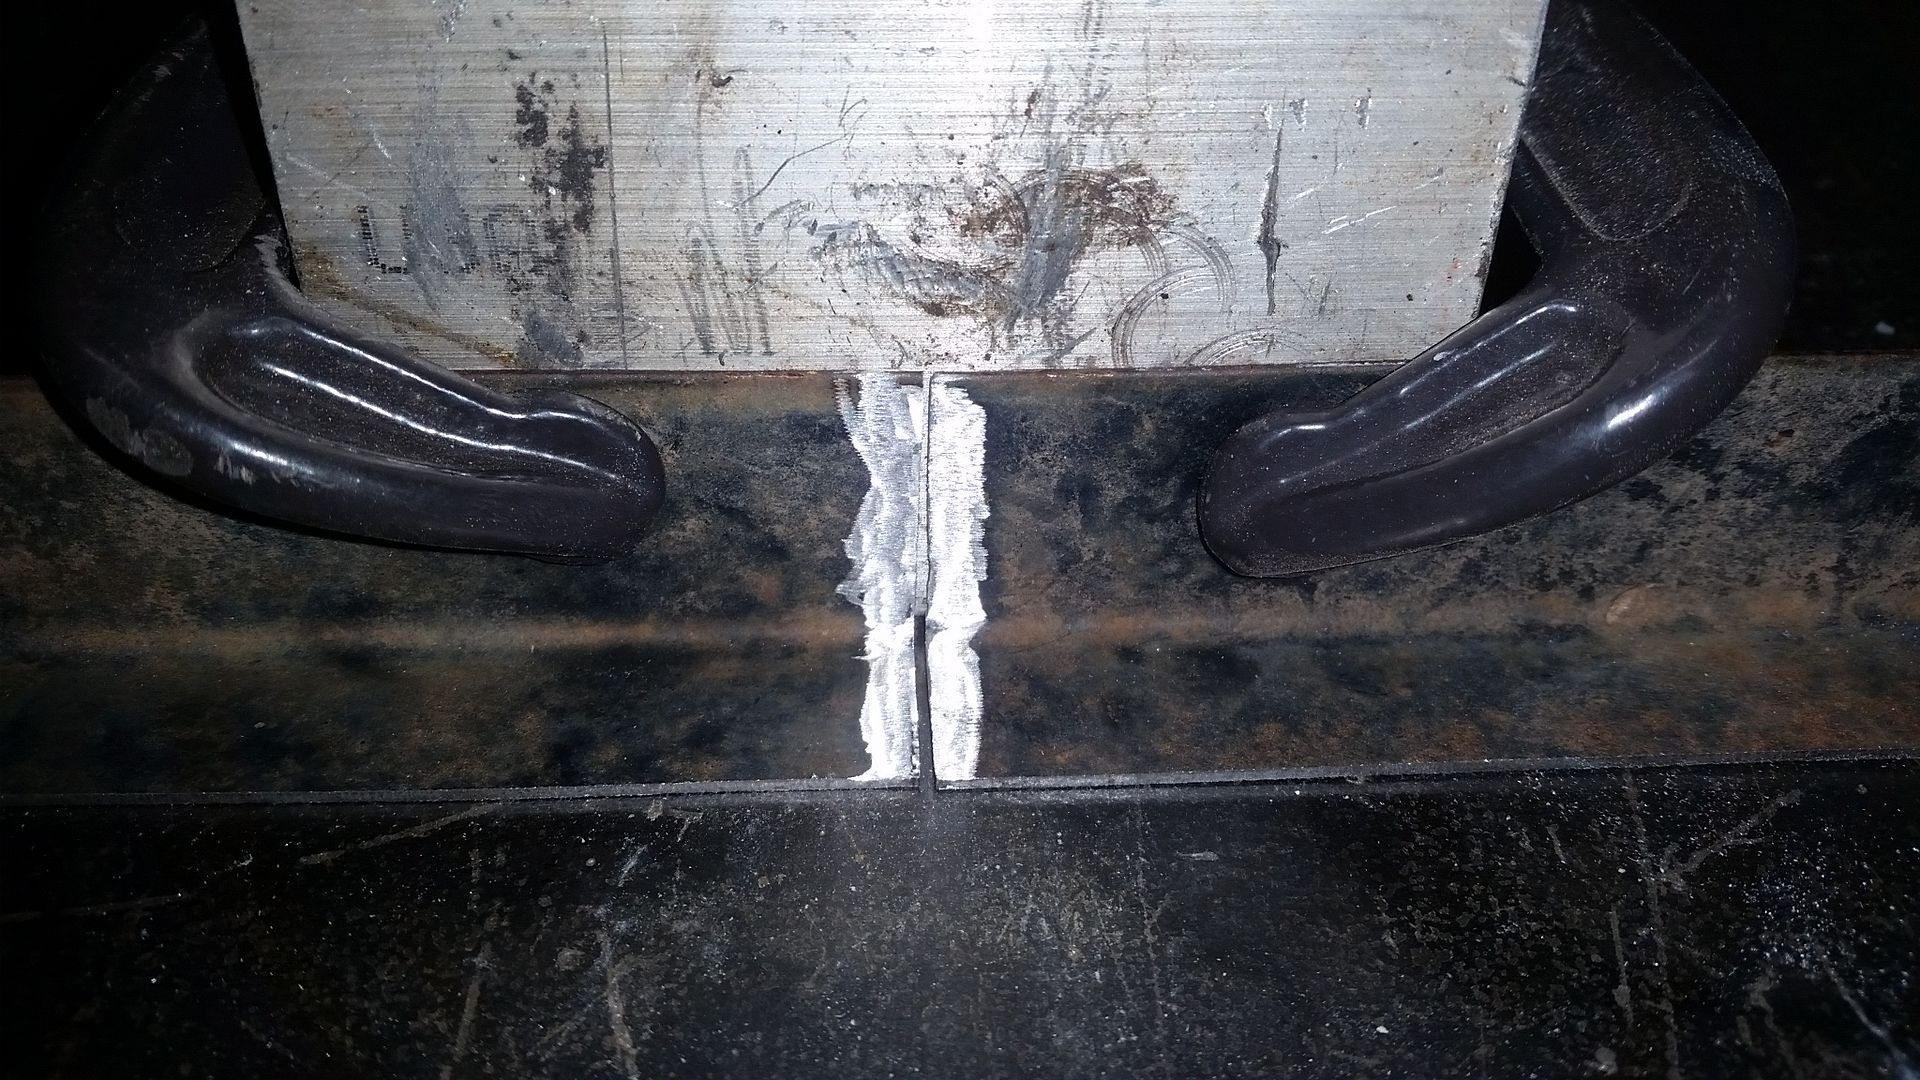


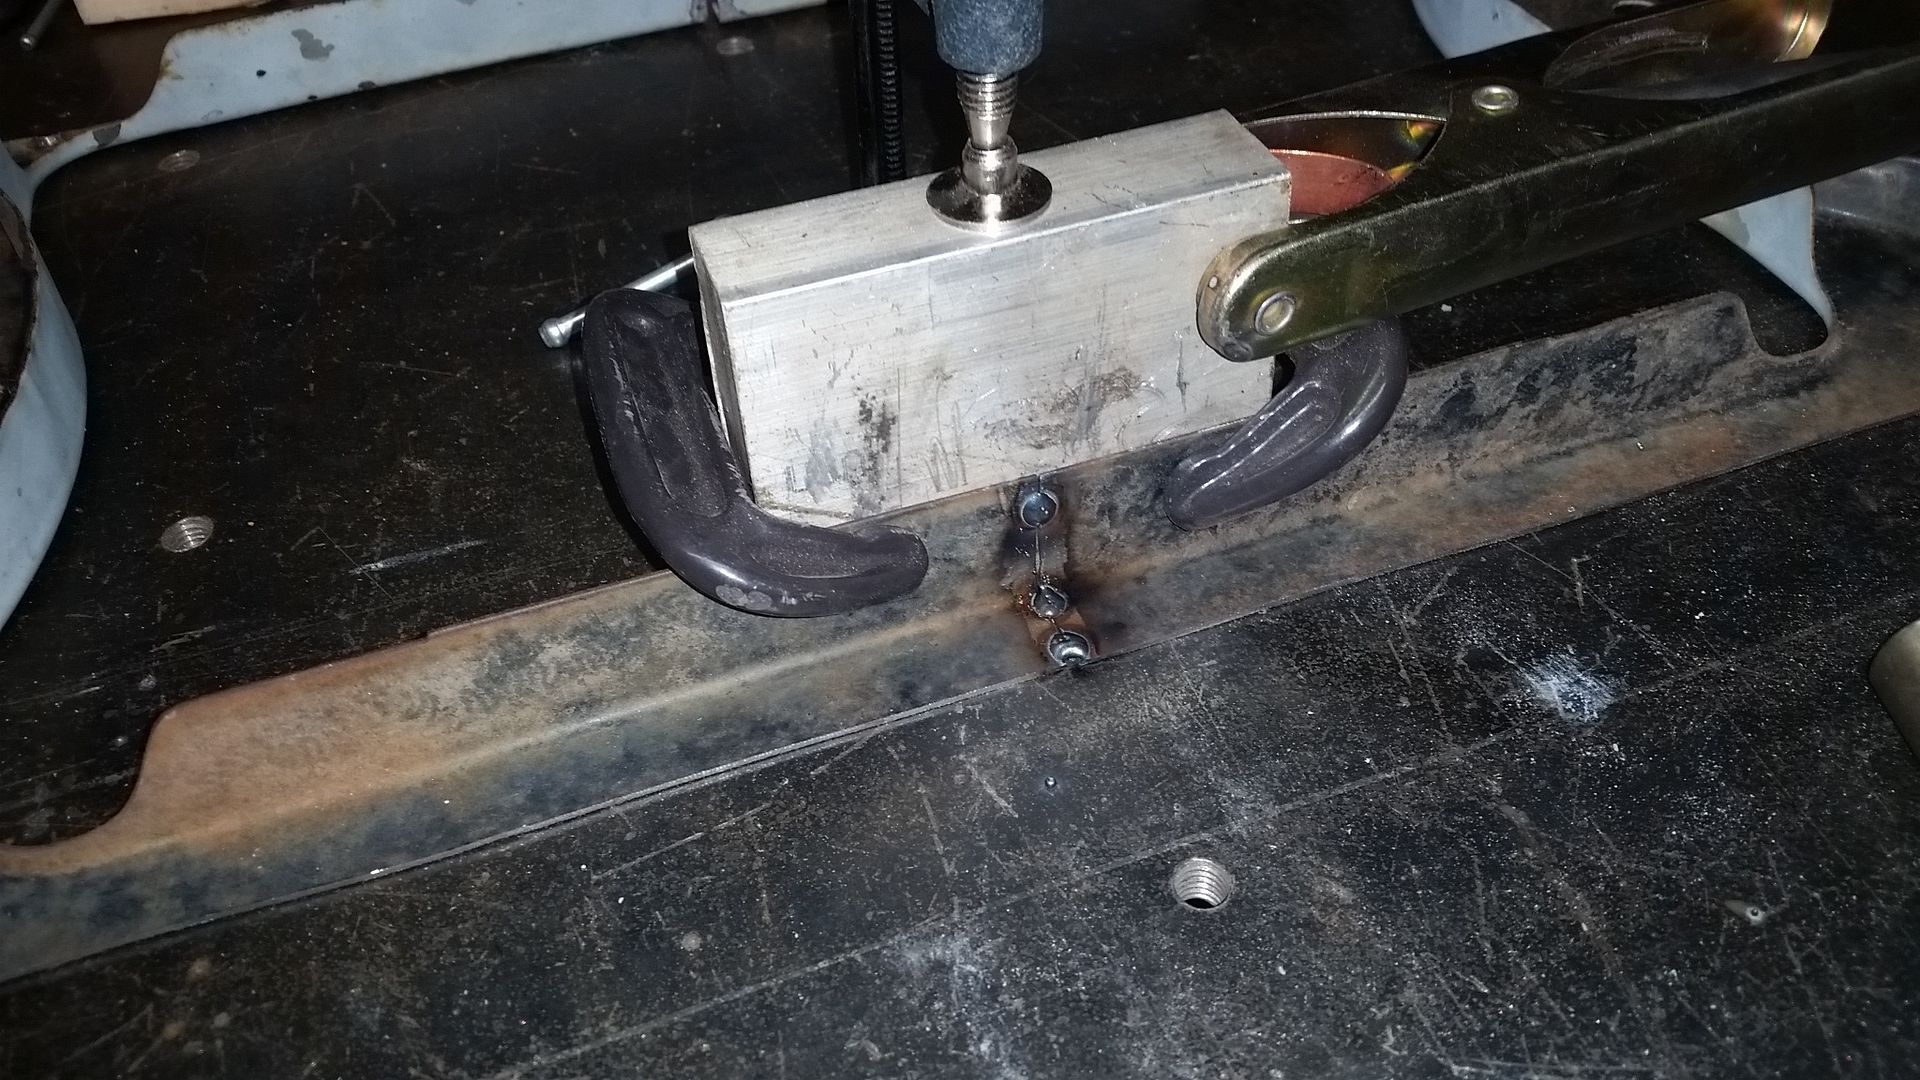
Here is the little jig I made for sticking the middle section back together after I removed the 4.38" from the middle.....

I need food. To be continued.
 

Metcalf

Expedition Leader
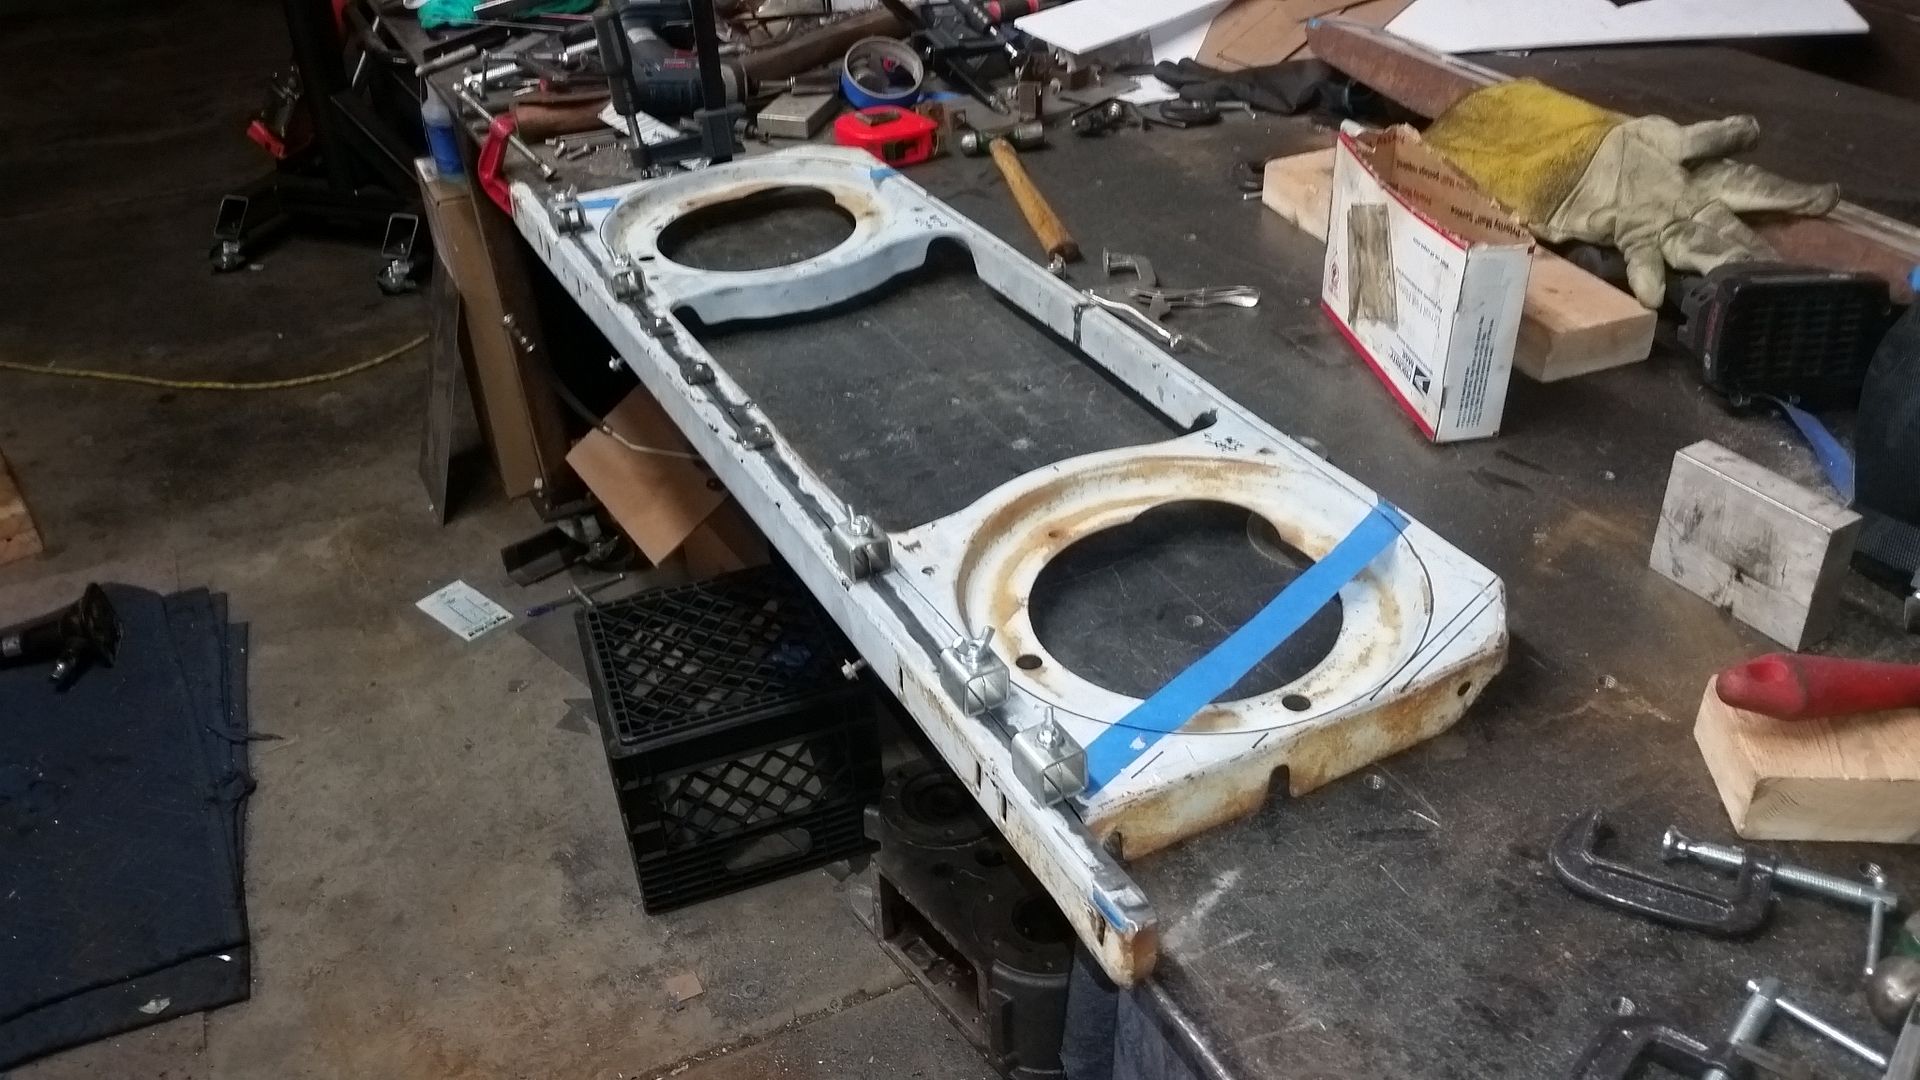
Ok.....time to start sticking the parts of the grill back together....


Here is where I had to stop for the evening.

I was able to get all the big parts back together again. The outside of the blue tape is going to be the new shape. Next I need to trim down the extra bits. Then I will start on making the new heavy duty side plates for the grill. That will be the main mounting flange for the grill in my application in combination with the fender mounts and some of the cooling system support.
 

Metcalf

Expedition Leader
Lets see....where did I leave off....


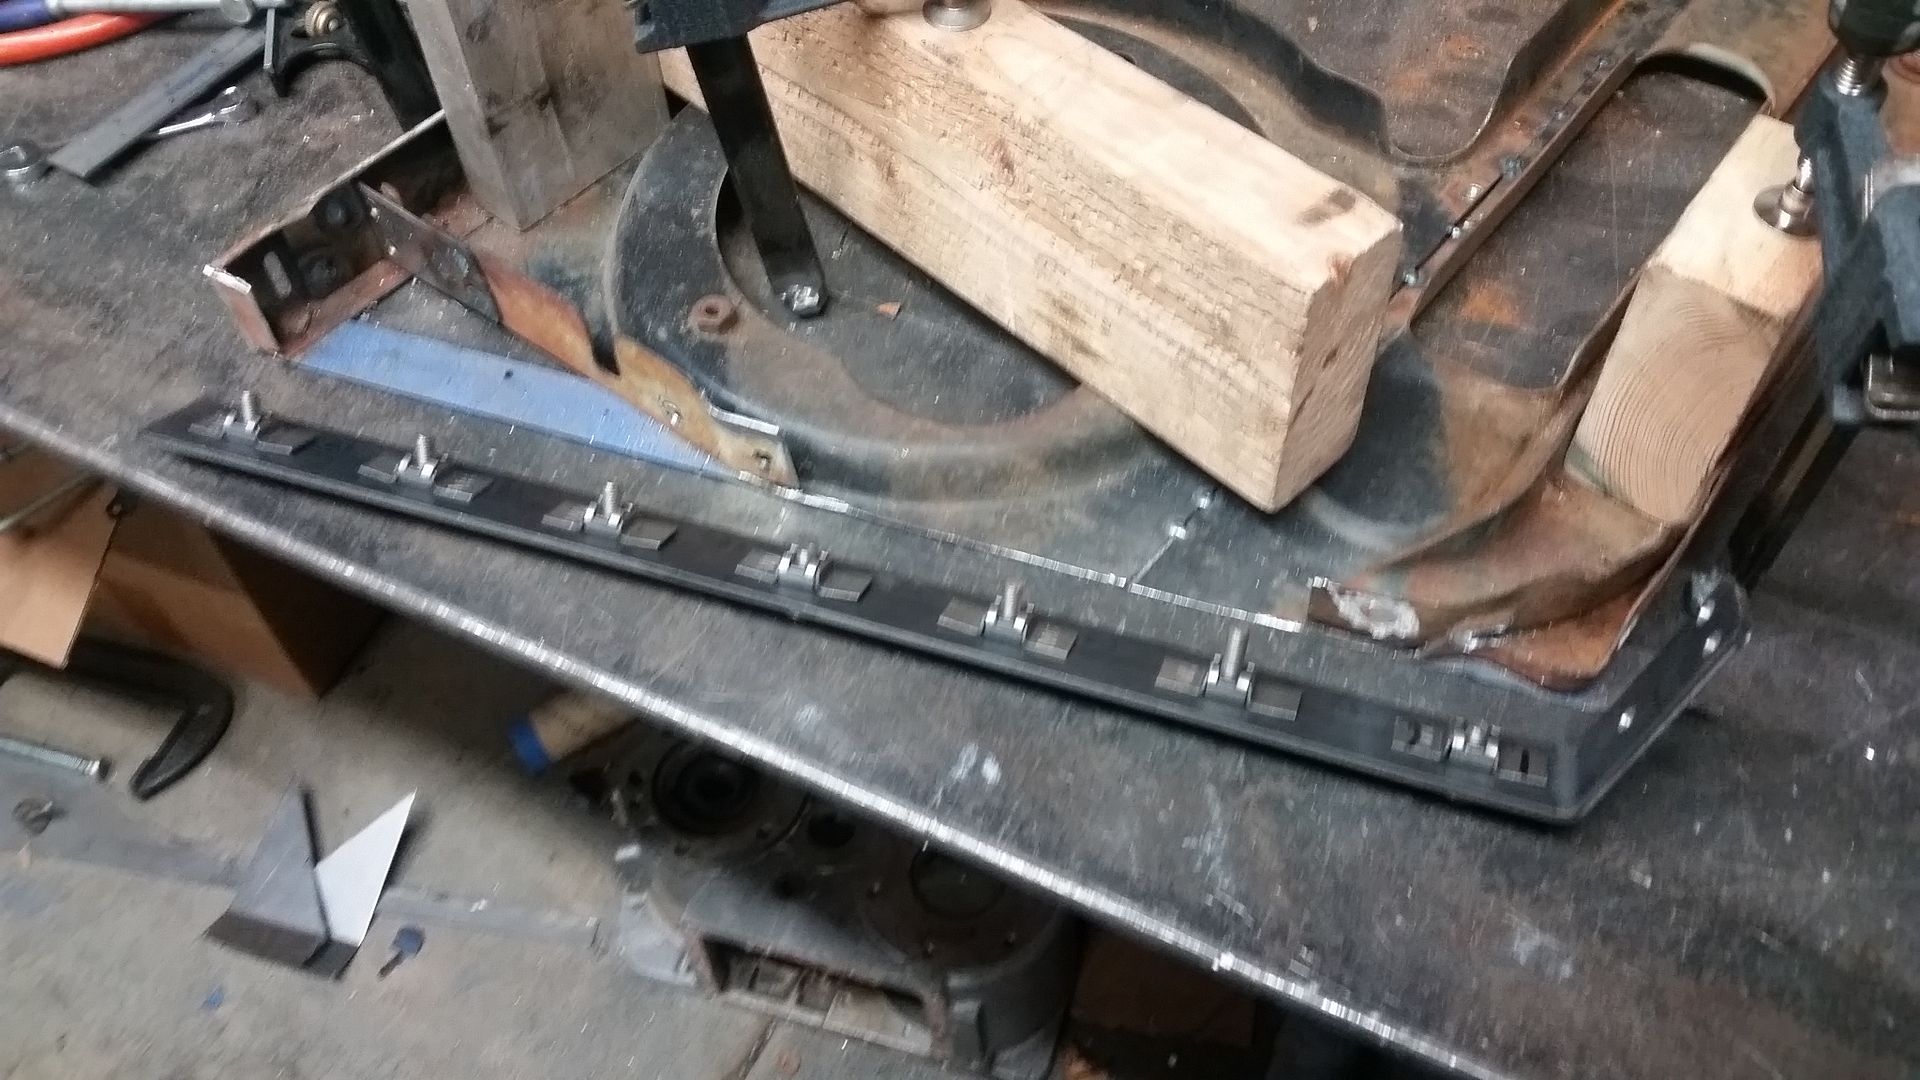
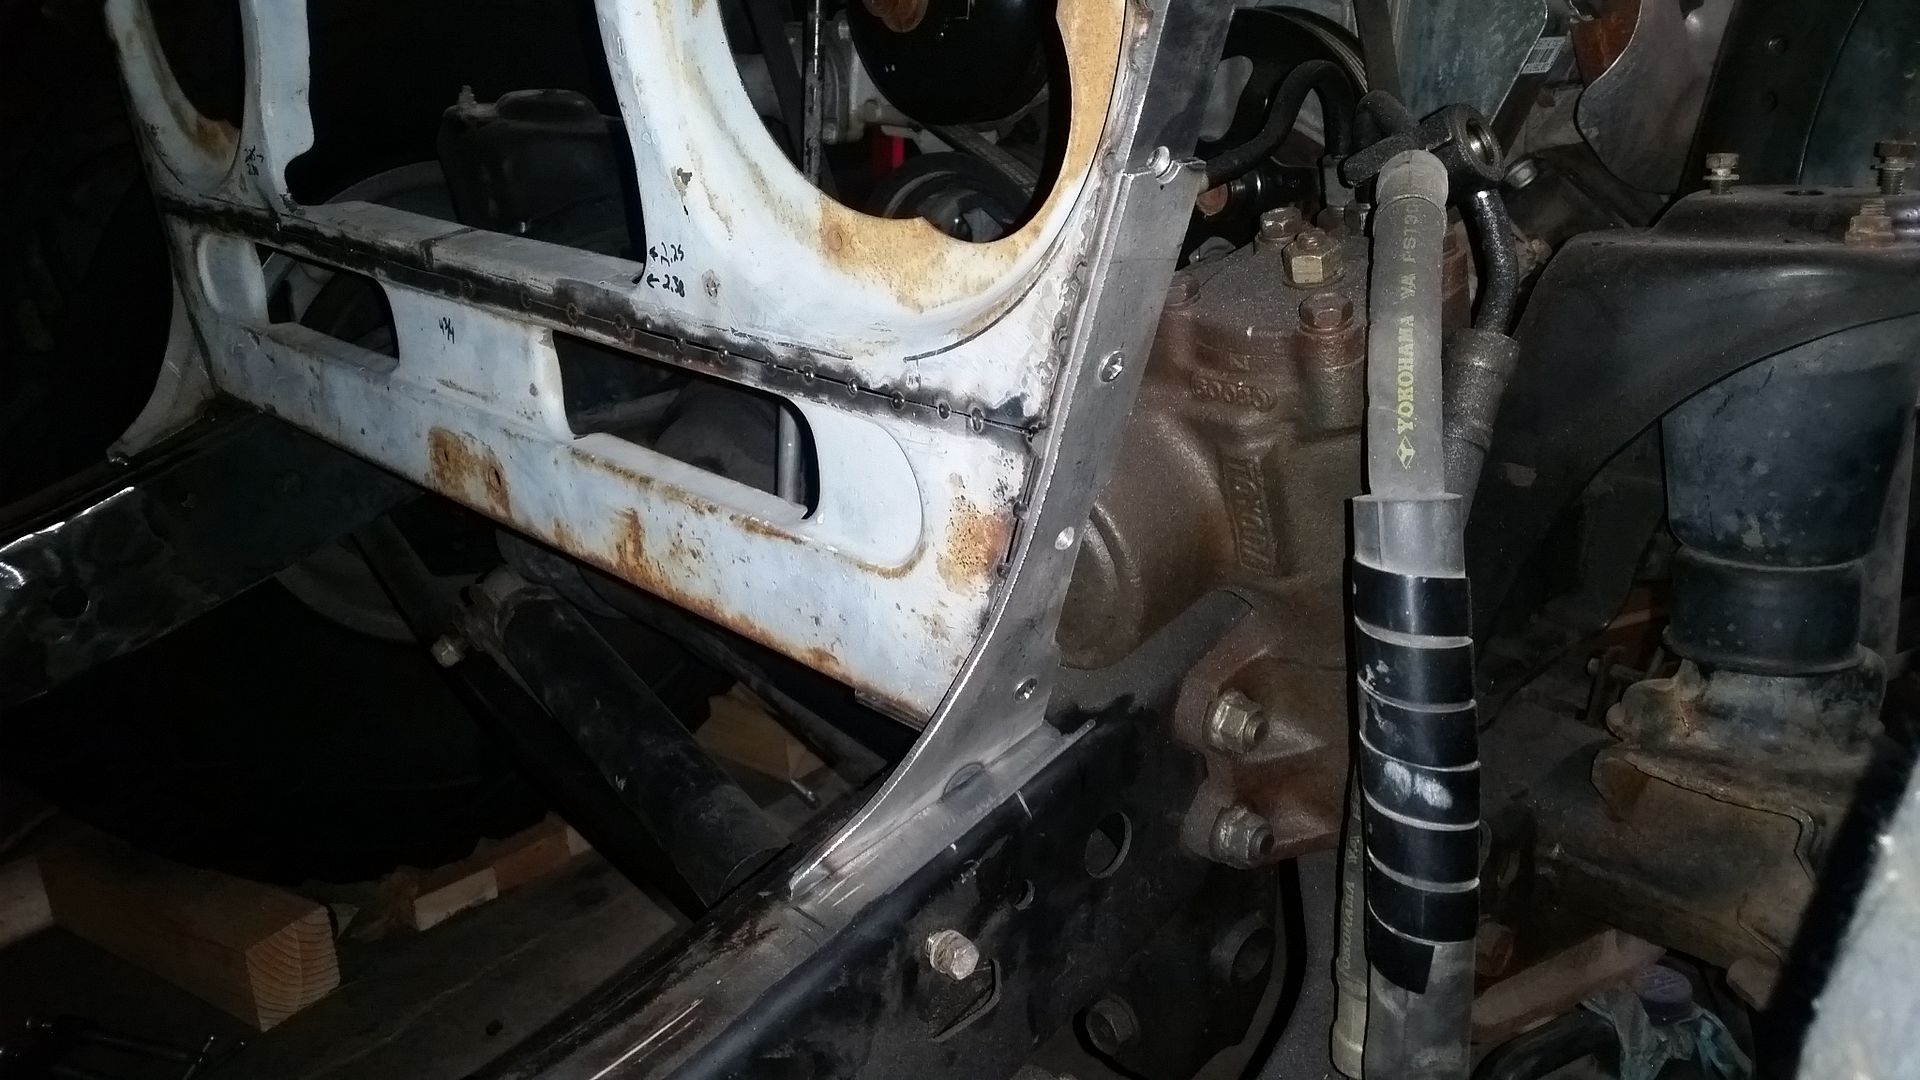
After trimming the ends to the proposed shape of the new grille I made the new end caps. These are 1.25" x 1/8" flat bar. I decided to use some weld in captured nuts to secure everything. This should mean that everything can be disassembled from one side without having to reach into a tight corner. These fastener locations are going to provide the mounting to the shell to the frame and also the inner fender to the shell in a sandwich/laminated fashion.


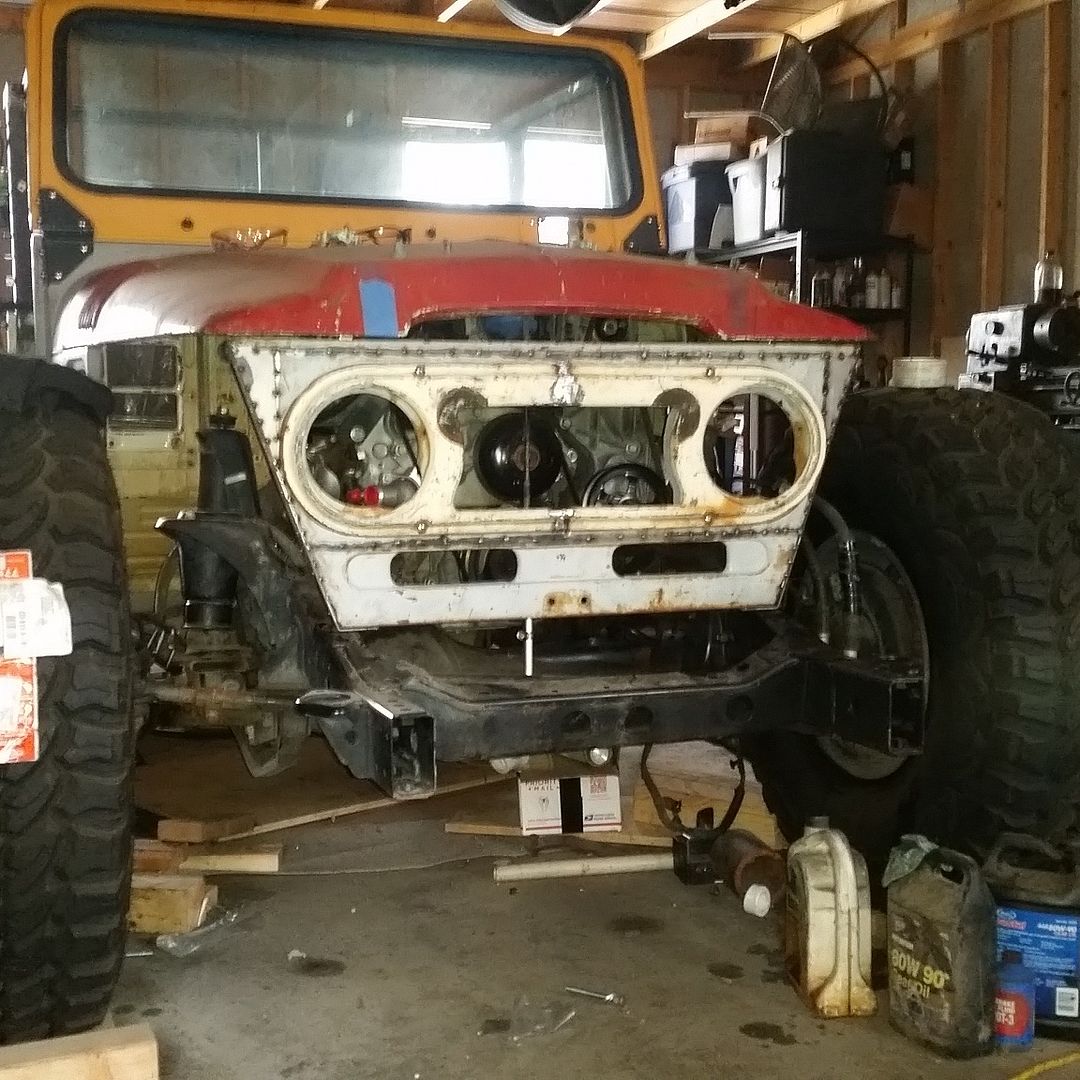
Here is what the grill shape looks like pretty much. I still have to add the fill panel in the upper corner. I will finish off the 2nd side tomorrow.....
 

94Discovery

Adventurer
Lets see....where did I leave off....


After trimming the ends to the proposed shape of the new grille I made the new end caps. These are 1.25" x 1/8" flat bar. I decided to use some weld in captured nuts to secure everything. This should mean that everything can be disassembled from one side without having to reach into a tight corner. These fastener locations are going to provide the mounting to the shell to the frame and also the inner fender to the shell in a sandwich/laminated fashion.


Here is what the grill shape looks like pretty much. I still have to add the fill panel in the upper corner. I will finish off the 2nd side tomorrow.....
Why are you trimming this much fron the front grill it is loosing a part of the identity of the FJ40 i know it your build,but removing this much imho it will loose it appeale and become another buggy .
I Love the build all the mechanical mismatch all the fab work it is amazing but this part killing the hard work ��
 

Metcalf

Expedition Leader
Why are you trimming this much fron the front grill it is loosing a part of the identity of the FJ40 i know it your build,but removing this much imho it will loose it appeale and become another buggy .
I Love the build all the mechanical mismatch all the fab work it is amazing but this part killing the hard work ��

I had to reshape the grill in order to have clearance for the tires at full lock. With the 40" tires on a 63" wide axle, the tire swings right into the area where the OE grill shape had a corner below the headlight. That corner is basically there to adapt to the stock bib and fender design. In order to clear the tires at full bump I will be raising the fender line to the bottom of the hood also....and making them myself. Overall, the corner just didn't blend into the overall package that well.

I could have just chopped the entire grill down enough to solve the clearance issue, but then the top and bottom of the grill would have been very narrow compared to the OE hood width and the frame rail width of the 80-series frame ( which thankfully is pretty narrow already )

Other people have certain things that push their buttons, and I respect that ( I have mine too!), but that I why I enjoy building things like this. My hope is that I can implement an idea that is on the fringe of acceptable well enough that people may change their mind. I believe that one of the signature features of the grille on an FJ40 is the headlight bezel shape. If I can keep that mostly intact, though I will be narrowing it also, it will pull the look of the grille back towards something that is easily recognizable. Keeping it a clean contrasting classic color will help in the end also to pull the eye back to the focal point.

It may start too look a bit too 'buggy' for some people, but that it ok. I can't make everyone happy all the time. When I posted a picture of me cutting a good clean FJ40 tub in half, a few people where less than pleased.

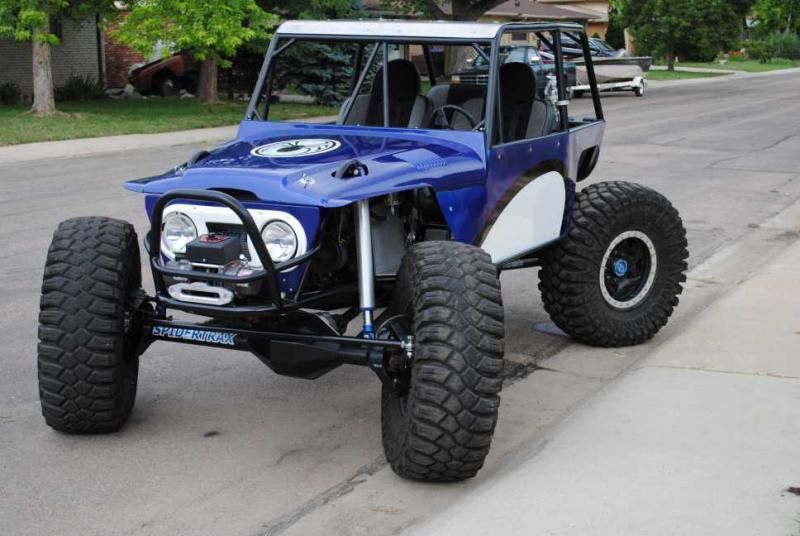
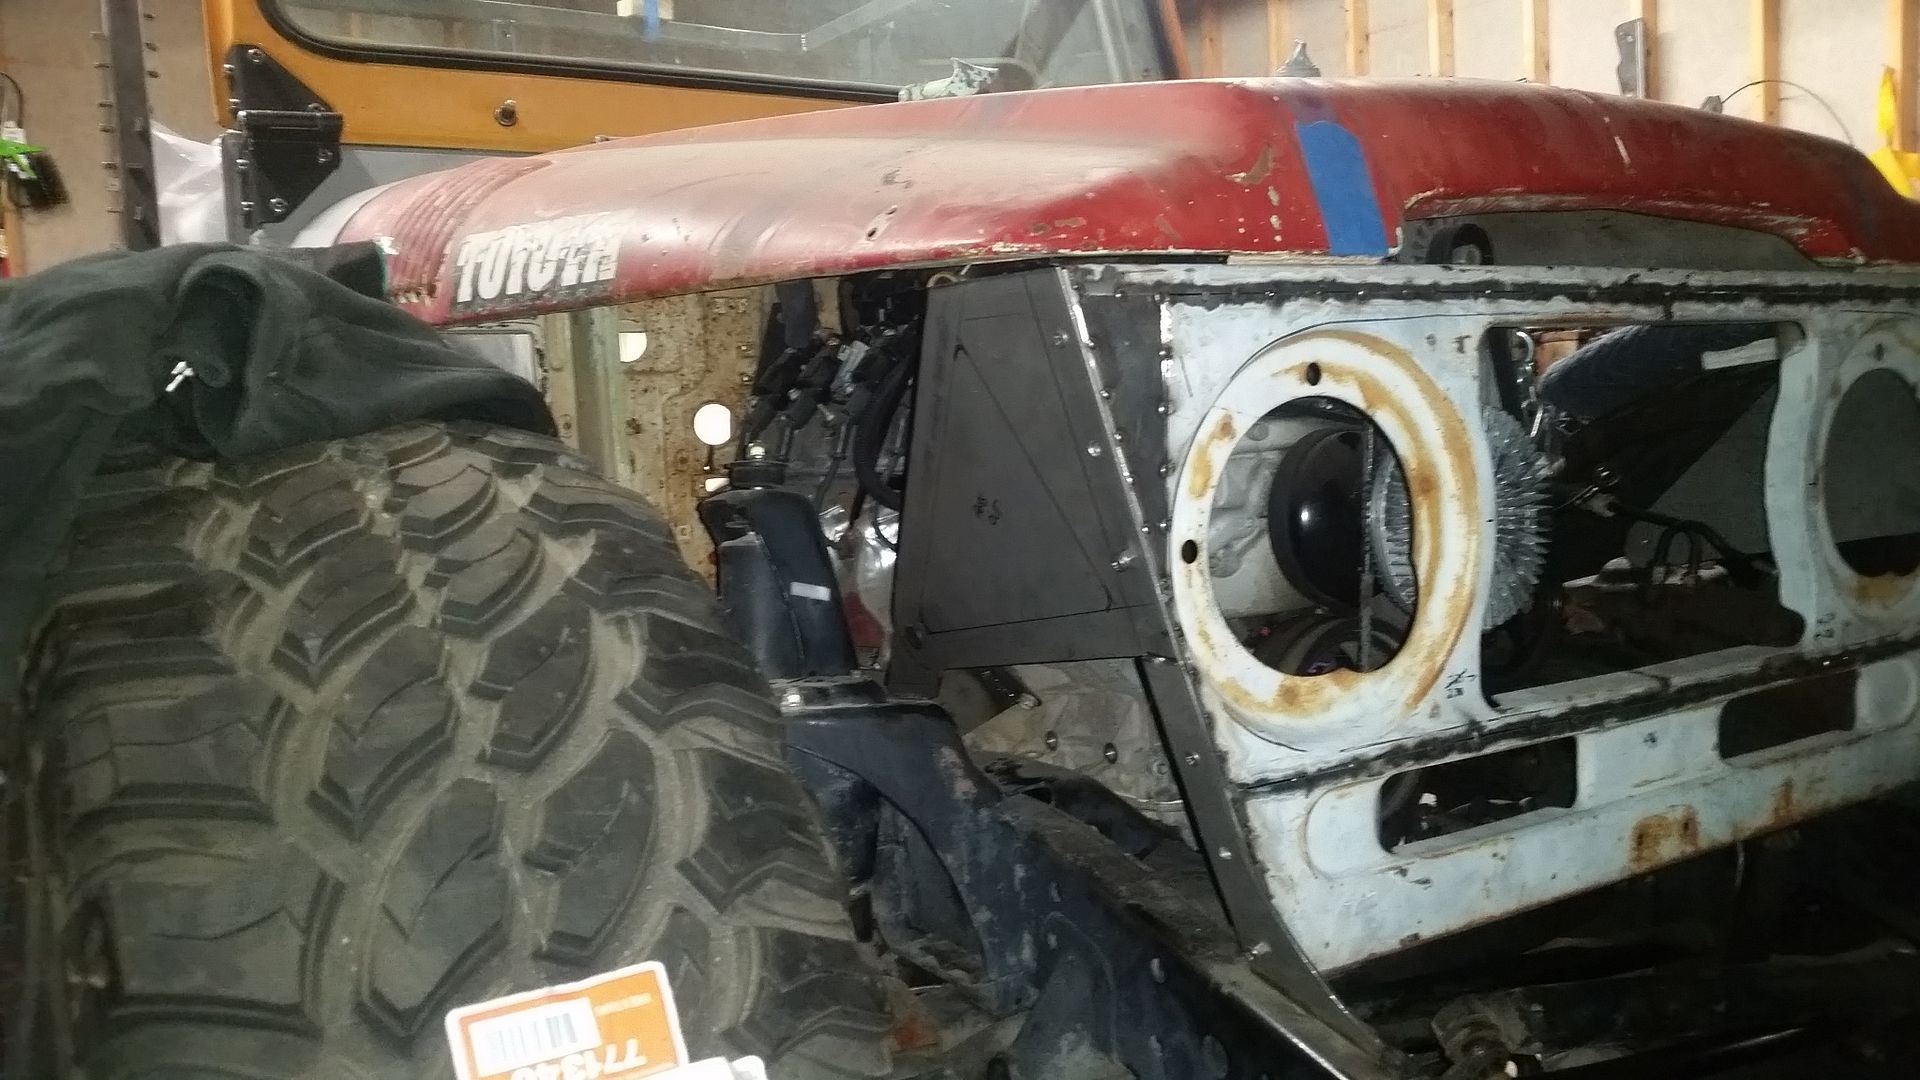
I know using a buggy example isn't the best argument....but this is basically what the grill will look like when I am done....


My fenders will not be molded into the hood however, they will be a separate part that bolts to the grille and cowl panel. They will be rather small units, perhaps with some taper to follow the hood shape to help keep the nose of the vehicle smaller. With the tires turned hard lock I don't want anything sticking out bast the outside edge of the tire. For the trail work I do, having complete tire coverage just isn't practical really. In this state we also don't have tire coverage restrictions so it isn't a big deal to road drive something set up like that.

Thank you for the comment. I realize that I am pushing the boundaries of turning this thing into what some would call a 'buggy'.
 

Metcalf

Expedition Leader
After a few more hours today, this is what I ended up with....


All the mockup work on the new grille re-shape is done. I was also able to get the passenger side trimming and flange done. I also narrowed down headlight bezel to fit the new grille.

The medal for the bezel is THIN. Oh boy that was a pain to weld. I had this wild thought about having a new one waterjet cut out of some aluminum plate. Then have all the edges shaped with a router. That would make a nice durable part that wasn't as fragile as the stock part.

Helpful shop tips....


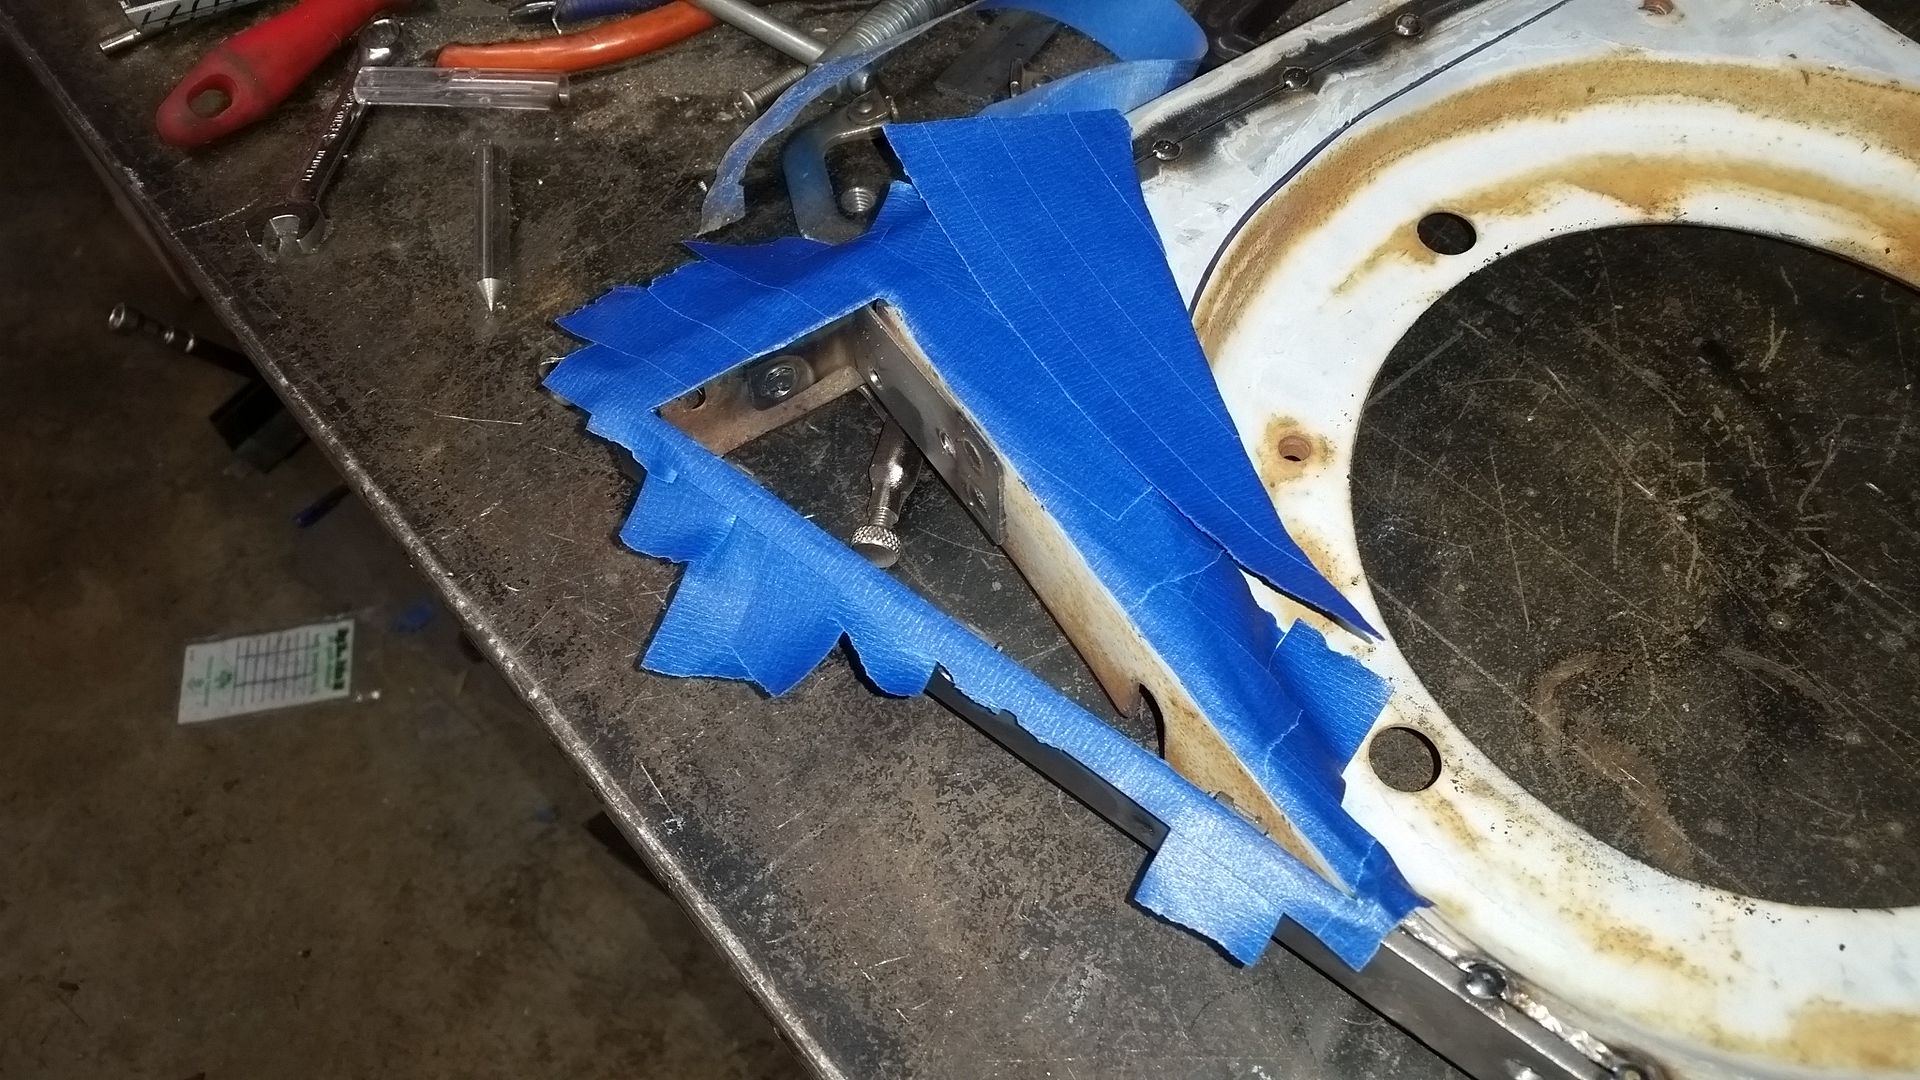
If you need to make a template for a fill panel just coat the panel in two opposing layers of masking tape. Then cut the shape out with a razor knife. Stick the template on the metal you need. Cut out the panel. The trimming to fit will be pretty minimal generally.


If you need to hold a patch panel for test fitting, use a magnet to make a little handle. I love these strong little square magnets. They seem to have a ton of uses. I also used a handful of them to hold the panel in place once I got the fitment like I wanted.

The next project will be making the mounting tabs for grille shell. The grille will mount directly to the frame I believe. In order to do that, I need to remove the front frame crossmember. To keep things from moving around when that is removed, I should probably brace the front frame horns in the area that will be getting trimmed off. That should keep me busy next week.

I need to start thinking about getting all the misc stuff for the cooling system and front bumper rounded up also!
 
I ran into the same problem with my 40 build last year. The 42" tires on a 65" wide axle hit the upper fender/hood sides and grill area. My hands were tied as the customer was on a tight budget (budget truggy?) and we did have to compromise with limited uptravle on the front end. It worked out ok and the truck wheels pretty darn well, but cutting and reshaping the front metal work would have resulted in more wheel travel.


Keep up the progress. It's looking good.
 

Metcalf

Expedition Leader
I am curious what you're going to do with the front driveshaft. Are you able to fit a one piece shaft in that chassis, with enough clearance around the lower links?

Yes. A normal 2 inch tube front driveshaft clears everything at full bump. The biggest issue was the starter pocket on the bellhousing. I had to trim and smooth off a factory boss. The front is just the oem radius arms. They sure do package nice. The high pinion front diff on the passenger side isn't ideal with a gm engine starter location. I made sure everything clears at metal to metal bump. With the factory bumpstops in place I doubt it could get this compressed....
 
Oh, that's right. You're using the radius arm setup.

I've seen bellhousings with driver side starters and even rear mounted starters, but a simpler solution is always best. What's a little grinding anyway...?
 

Metcalf

Expedition Leader
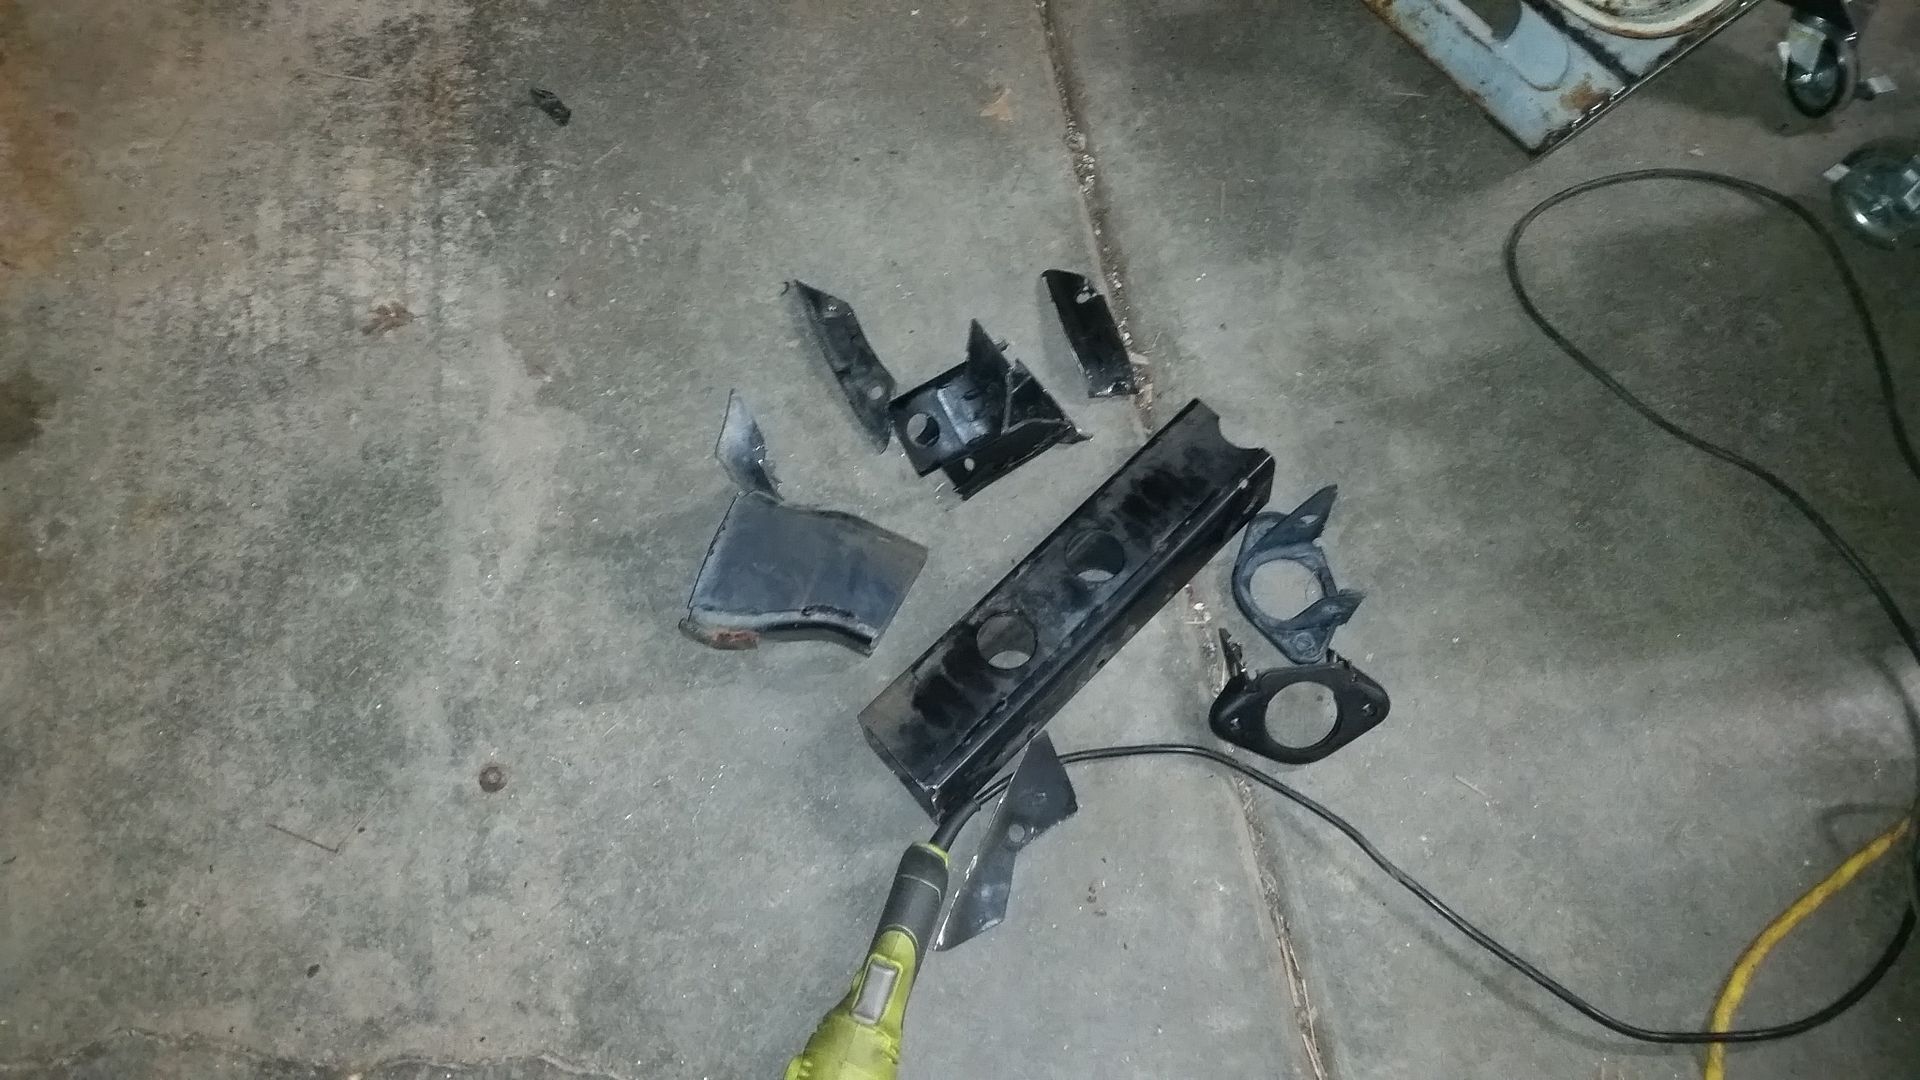
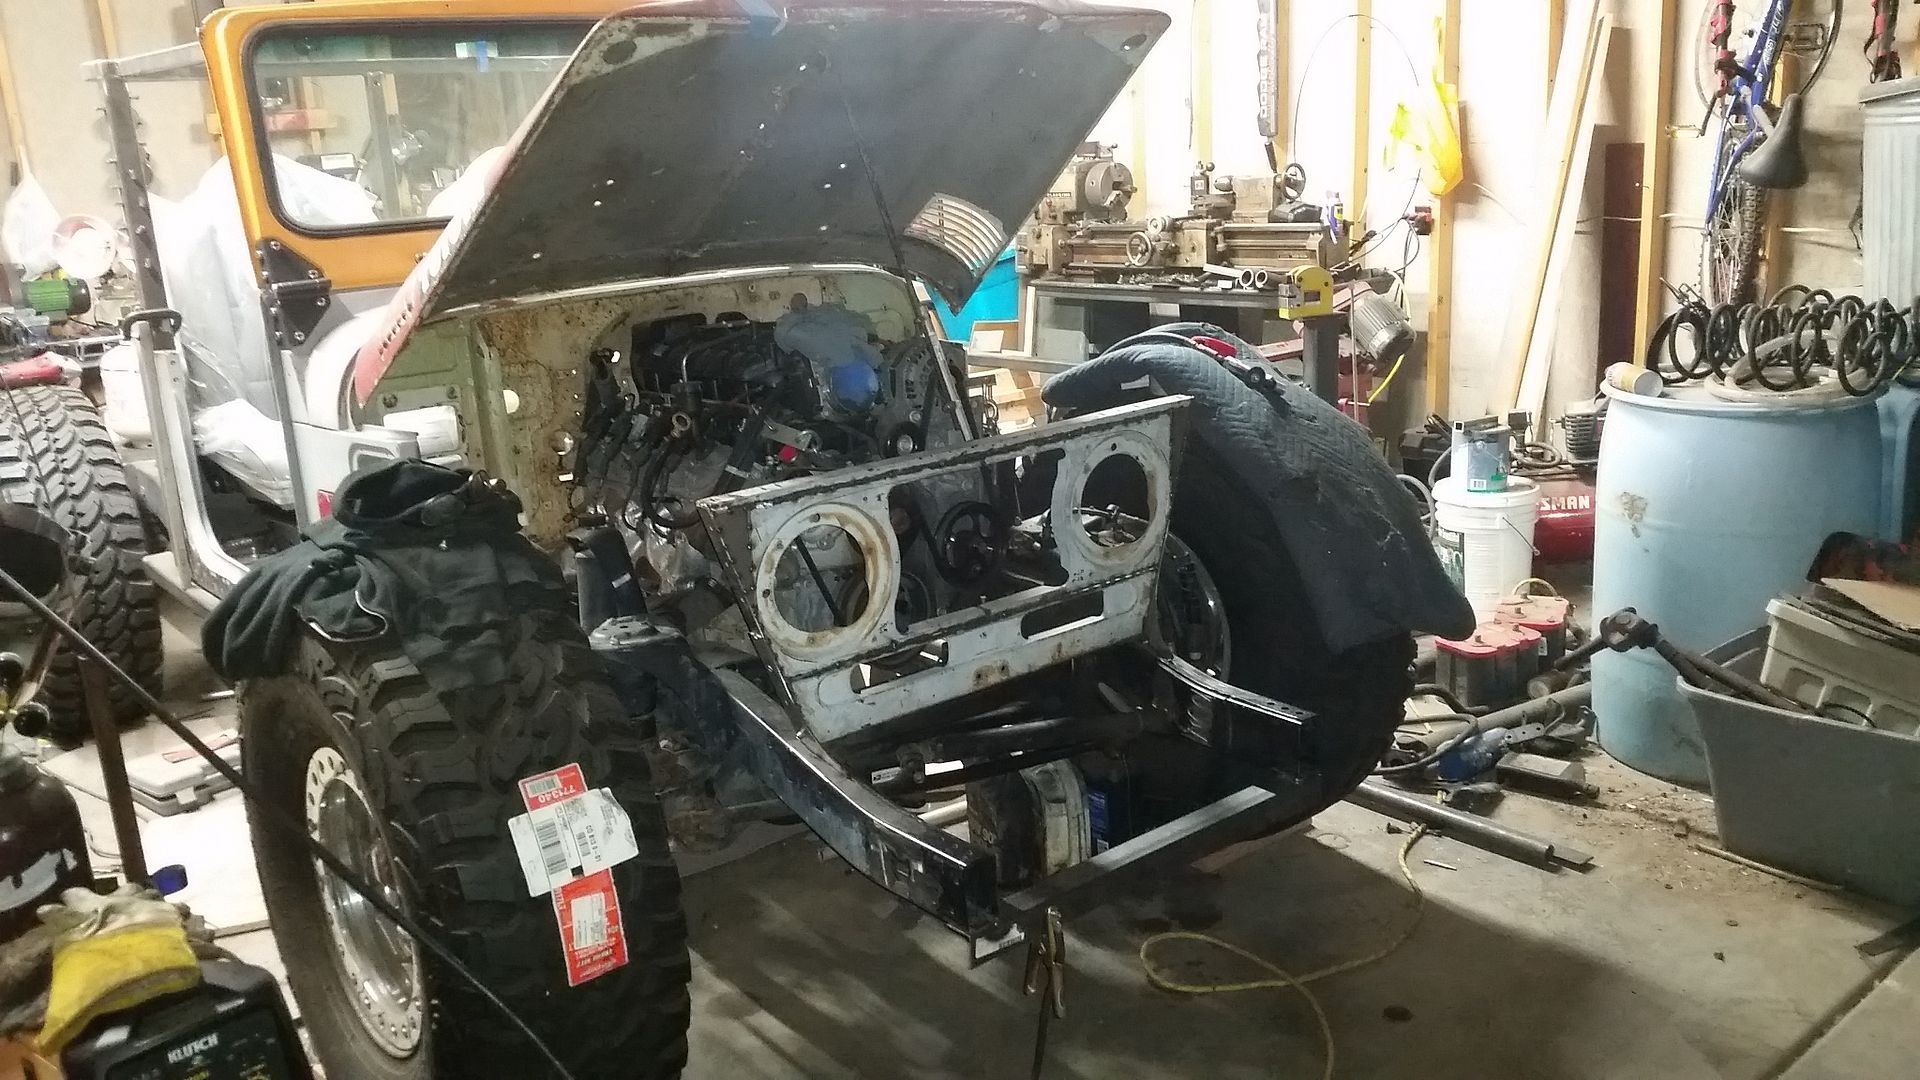
Sometimes to create something, first you need to destroy something....


It didn't go so well for the OEM crossmember....


Now I have all the space I need to mount a bunch of junk.....

Grille mounts
Radiator
Shroud
Fan/Clutch
Transmission cooler
Power steering cooler
Hydro assist ram
LED Headlights in adjustable buckets
Front bumper
Recovery points
Warn 8274 winch
winch mount

......it should probably all fit.....
 

Metcalf

Expedition Leader
Sometimes the littlest things make me happy...


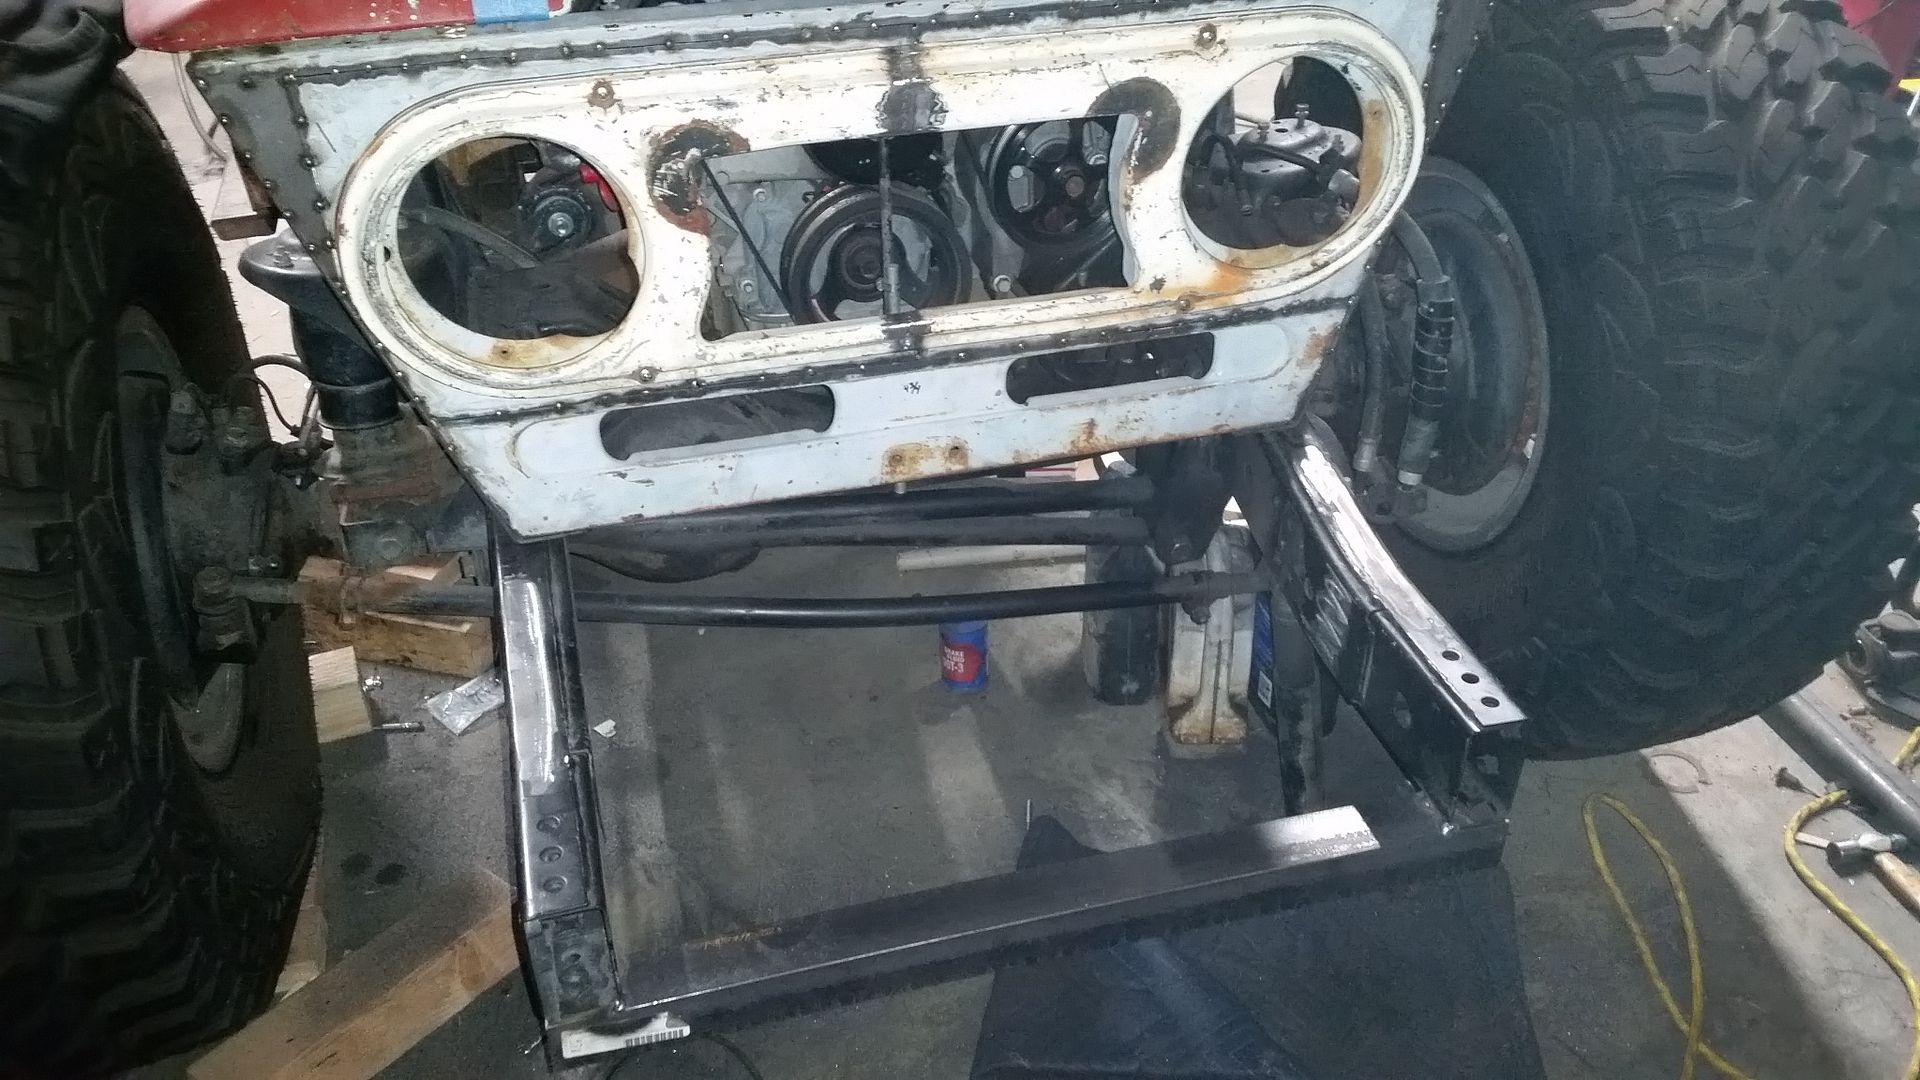
The grille now holds itself in place! I don't know why that makes me so happy, but it does.


These are the lower grille mounts. I decided to mount the grille directly to the frame. As far as I can tell, the FJ40 was mounted like this from the factory. My flat fender has also been hard mounted for years.

There will be a companion upper mount that will mount to the top half of the grille ( using another 2 faster locations in the new grille edge ) and mount back at the coil bucket. This will provide some rearward support for the grill independent of the front fenders. I think the upper grill mount will also provide some structure for the radiator mounts.

The upper brackets will also give me a bit of space for mounting stuff NOT on the fenders. I would like to be able to remove the front fenders leaving everything else intact in the engine compartment....no wiring, plumbing, intake, etc mounted to the front fenders.

The fasteners for the grille mounts are counter sunk to provide a flush head. This will allow me to bolt the fenders over the top of the grill mounts using the other 3 mounting holes in the grill shell.

I will start on the upper mounts tomorrow I think. My cooling package stuff should start rolling in later this week....
 

Metcalf

Expedition Leader
Part two of the grille mounts on this installment of what did I cobble up in the garage tonight....


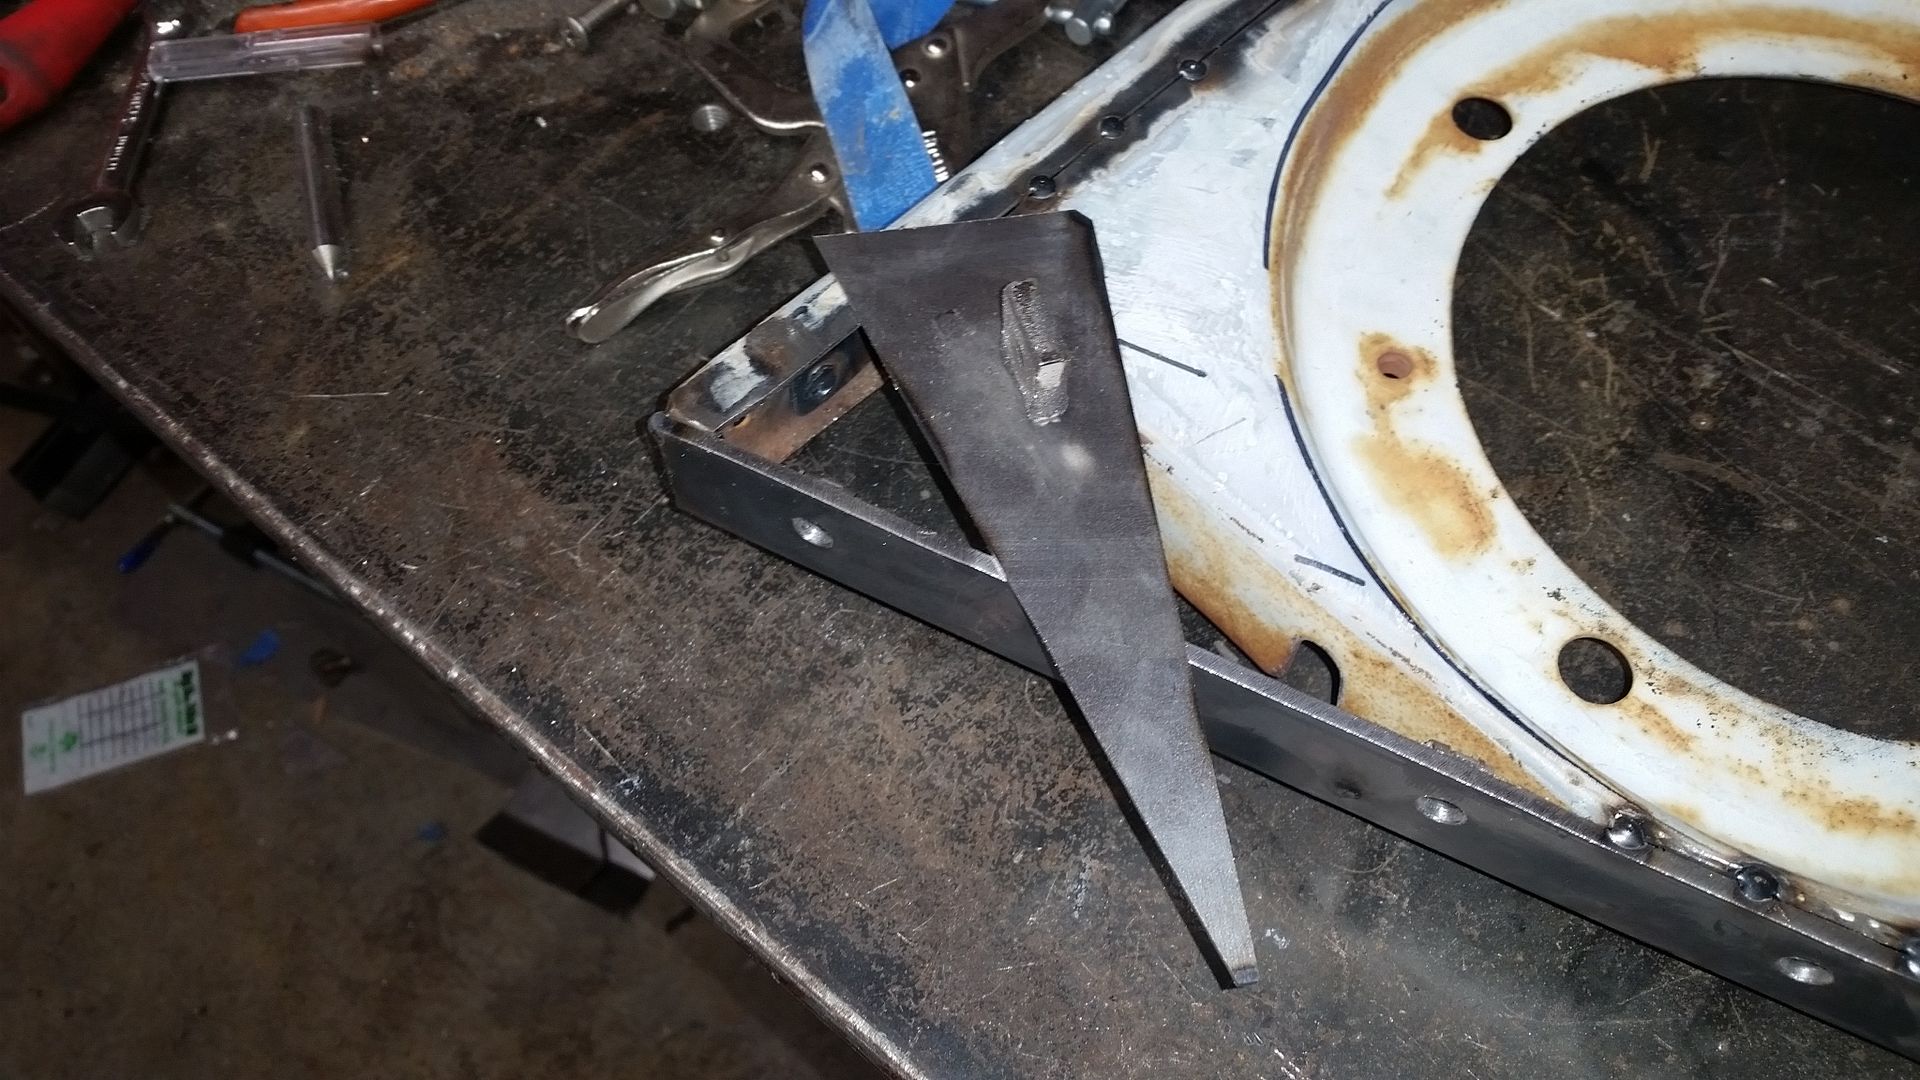
These are the upper grille mounts. They mount to the same structure in the side of the grill as the lower mounts do. They are 'in plane' to the side so that the fender assemblies will bolt over the top. There are three separate fasteners per side in the new mounting band just for the future fenders. The rear of this bracket is bolted to a tab that will be welded to the top of the coil tower. That should provide enough triangulation to the grille structure. I don't think this frame is going to flex much at all so frame mounting these parts isn't a huge concern.

I will likely be trimming out a significant portion of the tail of the bracket. You can just see some preliminary sharpie marks to that effect. I am not 100% sure what the radiator mount will look like just yet so I decided to leave these brackets hole till slightly later.

The mounting tab uses a clip nut so you don't have to have multiple tools.
I forgot to take a picture of that.

Edit: Nope. Wrong part. The 1st part of the cooling system showed up. This is a Hayden 2851 unit. This screws right onto the truck water pump also. My late gen 4 LS, even though it was electric fan from the factory, still had the threaded snout on the water pump. I believe I need a Hayden 2986. I must have gotten some number crossed somewhere. Replacement ordered.

I will be using a 17" reverse rotation metal fan on this clutch. The overall depth of the fan/clutch is very comparable with the Volvo and Taurus electric fans I have used on past builds. Since the nose in this car is pretty small with only room for a 24x19 radiator, I decided to go with the engine driven setup. This should provide very good cooling overall.

Hopefully more cooling parts will continue to roll in soon.

My biggest concern at this point is the fitment of the transmission cooler. I have a feeling that is going to be pretty tight at this point. It is hard to judge the overall scale of so many parts using just pictures sometimes....
 
Last edited:

Forum statistics

Threads
188,275
Messages
2,904,780
Members
229,805
Latest member
Chonker LMTV
Top