Boomer the Quadravan 4x4 Camper

TheBoondocker

New member
Hi Mwilliamshs I have a Dana 60 FF rear, a Dana 44HD front, My water tank is just behind the drivers seat under That jackknife couch, gray + black tanks were empty, it has the rear bath, correct on the fridge, 2 Batts under the hood and for now 1 AGM lifeline Batt on passangers side rear going to be adding 2 more after I do solar on roofand remove the LOL bath tub and install an out door shower just inside the rear door. Boomer has a cast iron transfer case Iam running a 1345 Alum one Hoping to add many more ponies soon
 

spencyg

This Space For Rent
It is time for me to start thinking about preparations for the DRAM 3 trip. I'm not going to get to my roof rack this year but that's ok...no need this late in the season to worry about that. I do need to still fix my range hood roof vent which I ripped off during last years' DRAM event. I'll likely fabricate something from stainless steel which will break an offending tree before it comes off the roof again. The two mods I really want to get done before the trip is the alternator upgrade and an offroad light upgrade. The alternator has already been discussed here and I'm hoping to dig into that toward the end of this week. The lights I currently have up front are old school 6" KC's which just don't work all that well compared to current offerings. I'd like some long distance spots for looking way ahead, and some good flood coverage as well.

I've done all the reading on ExPo and elsewhere on my various options, and I'm going down the road of Knockoff 9" LED units
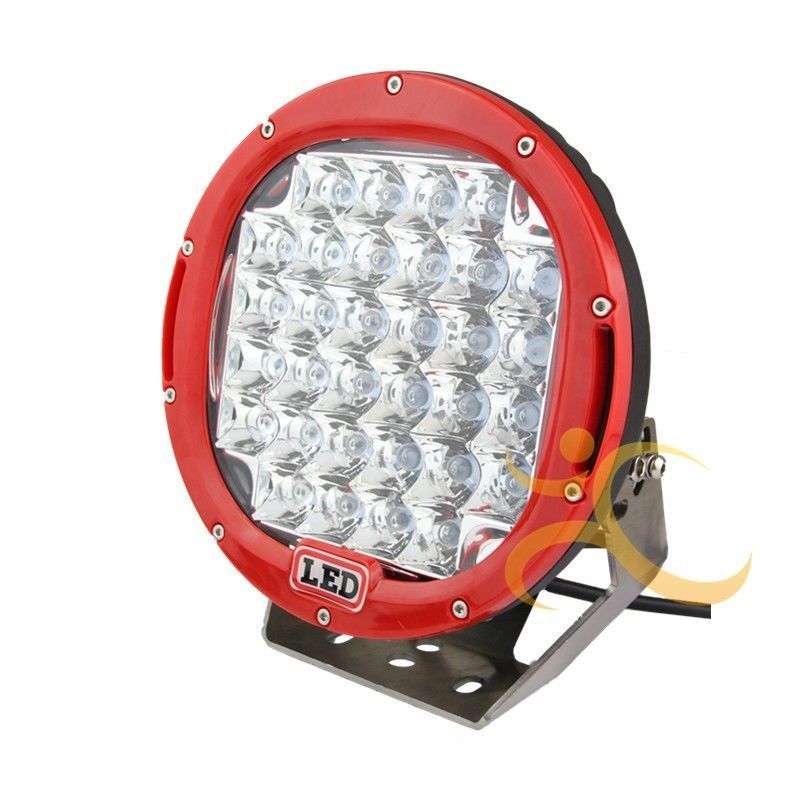


These units will sit in a revised "lip bar" which will hoop over the front winch and be sheltered by the upper hoop from any hard hits. There is enough room there for a pair of 9's and I really like having a ton of light up front, especially when blasting down logging roads.

For flood illumination I'm going to add a pair of 5" LED round units which will be aimed slightly to each side in a manner similar to my existing ditch lights.
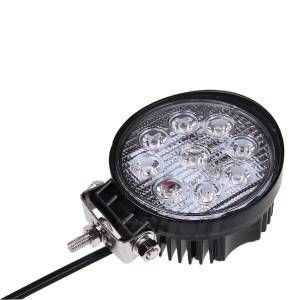


I'd love to replace the ditch lights that are in the bumper already, but they work fine and give enough light for their intended purpose.

Beyond that, I think its time to pull the drive shaft U-Joints to make sure they are all in good shape and generally just do a once-over. No other system mods are necessary for the time being which is actually refreshing.

We just returned from the Vermont Overland Rally which was an interesting experience. Boomer succumbed (only slightly) to the mud pit of a road which led into the event...too much weight combined with a desire to not spin tires (flinging mud over everything within 100 ft and making for some unfriendly politics) forced a quick MaxTrax session. One setup and we were out....still a tad bit embarrassing though. Boomer doesn't do deep mud all that well. We basically just set up camp for the weekend and observed the comings and goings of the massive field of Jeeps and Toyotas. I had the opportunity to meet Mr. Scott Brady which was very cool, and also had some great discussion with Jason from Mountain State Overland. There were some cool vendors and great talks/seminars. Overall the weekend was lots of fun, and had I not been engulfed in keeping my family entertained it would have been really great to get out as a passenger with some of the other rigs who were trying out sections of the VOT.

Maybe next time.

OK. I have work to do.

SG
 

dingus

Observer
I love the Bumpers you custom made and haveing a winch in the rear one well why not! thats a great idea which im gona try and do as well when i weld up my road armor kit bumper.
My Question is not about bumpers but air bags. can you show how the rear Air bags top mounting plate was put in ontop of your rear end ?
I see only one picture showing the one bag sitting on the axle. but i cant see the top what you did there.
If theres another thred showing air bag installs on E350s anyone have a link ?
I have a 1 ton 1995 E 350 with a Turbo 7.3 PSD
Looking up at my rear axle i see theres alot of brake lines and crap in the way on the drivers side of the rear axle. like to know what guys do there to. but what does the top of the air bag attach to ?

Love this van build lotsa great ideas on Boomer ! Rolf Harris woulda loved this van LOL
 

spencyg

This Space For Rent
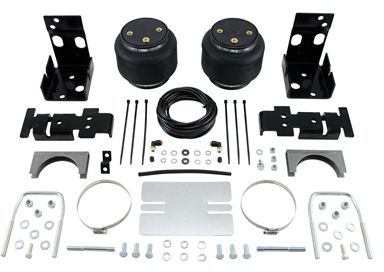
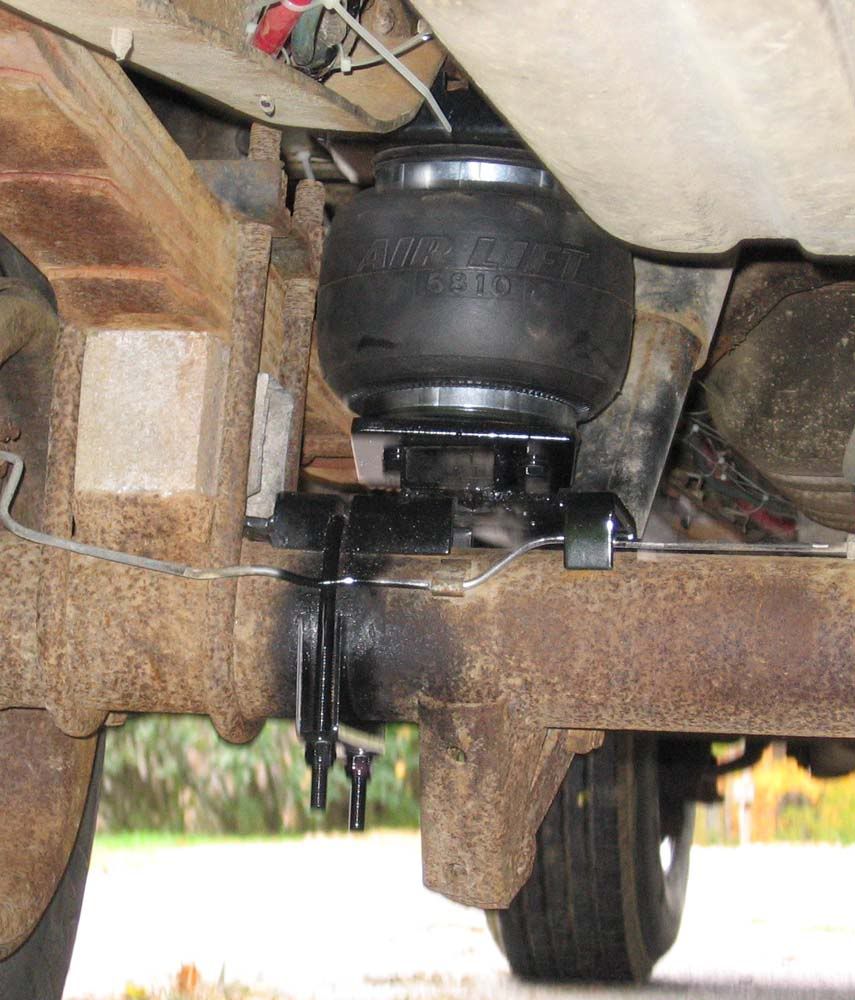
The air bag mounting is really nothing special. I bought the appropriate Airlift Brand kit, in my case 57138, and installed it. I didn't have any issues but did have to add a block under the rear axle mount on each side because Boomer started off higher than the kit was necessarily designed for.


So what what you're seeing in this picture was the stock mount on the axle, with a steel rectangular tube spacer and a top plate welded to that. The airbag was supposed to mount directly to the webbed plate directly on the axle (secured by the U-Bolt) but that wasn't going to work for me. The airbag system has been awesome and I'd recommend it to anybody. I have the original stock firestone bags in there still and there is no sign of checking or other wear. I do carry a spare bag at all times since losing one would be....bad. I gain about 2" of lift when the bags are inflated to 80psi. I'm hoping to get new Heavy duty rear leaf springs next year and I'm expecting them to take some of the load off the bags.

SG
 

Mwilliamshs

Explorer
...but what does the top of the air bag attach to ?...

There are two basic styles of bag setups for the suspensions with leaf springs set outside the frame rails (vs directly under the rails).

What SpencyG has is what I call "bag on axle" vs the other style "bag on spring".

In "bag on axle" there is an axle-side (lower) bracket beneath the bag that converts the round axle to a flat surface and is notched to clear brake lines, etc. There's a frame-side (upper) bracket that basically just makes the frame wider above the bag. The bag is pretty close to centered under the frame rail in this setup. I prefer it because forces are in straight lines, no angle bracketry to twist. The bag simply pushes up on the frame rail's flange and down on the axle.

In "bag on spring" the bag sits above the spring pack with a lower bracket that creates a wide, flat surface above the axle u-bolts and an upper bracket that is offset outside the frame to be centered over the bag. This upper bracket is basically angle-iron bolted to the frame's web. This is not bad per-se but it does require some strong brackets due to the the leverage of the offset and it introduces a twisting motion on the bag mounts that's much greater than what's present in "bag on axle". Here the bag pushes down on the axle as before but pushes up against a bracket that's offset from the frame rail's centerline by a dimension approximately equal to the bag's diameter.

The reverse of all this true when the leaf springs are directly beneath the frame rails. Maybe I should call them "bag under frame" and "offset bag". Hmm
 

dingus

Observer
Ok Got it. i like the bags on springs as that puts the bags farther apart more to the outside of the van so more stable on rocky hills and twisted uneven logging roads. I can beef up the frame brackets if nessasary mine is lifted to being a 4x4 converted van..
Thats great they have E 350 bag kits. almost everything else cool for a van has to be customized off a F 350 truck.
Thanks for the info guys!
 

Mwilliamshs

Explorer
...that puts the bags farther apart more to the outside of the van so more stable on rocky hills and twisted uneven logging roads...

Opposite is true in my experience, actually. This is with linked bags (left and ride sharing a line) and when the body leans the bags exaggerate that by transferring air toward the higher side. Some folks actually do this intentionally to force articulation in stiff IFS rigs like the Isuzu Trooper and Toyota 4Runner. Article about that.

With independent bags (no lines shared) it did feel more stable (less leaning) but articulation was severely diminished by having a stiff, fixed-rate spring (airbag) attached so far outboard on the axle.

I really prefer the bags right under the frame rails and filled independently (no shared lines) but that requires care be exercised to ensure they're filled evenly. Best of both words IMO.

YMMV but I think SpencyG would agree since that's how his are plumbed and where they're mounted. His dual gauge setup is sweeeeet.
 
Last edited:

justbecause

perpetually lost
I am confused.

"Boomer started off higher than the kit was necessarily designed for."

Does that block not add lift, height?
 

spencyg

This Space For Rent
The kit was originally designed for a 2WD E350 van. From the factory, Boomer came with the lift blocks that you see in the picture. The bags weren't tall enough to accommodate the lift block with the stock bracketry, thus the need to raise the height of the lower mounting position so the bags would still prove effective.

And yes...isolated bags are key to accurately leveling your load. I used air pressure regulators on each bag so I can tune the pressure to each side on the fly. When I hit a big bump or find myself articulated, you can hear the air purge from the regulators as the bags over-pressurize beyond the set regulated pressure limit. They immediately fill back up to the right pressure after the load has returned to normal.

SG
 

86cj

Explorer
While traveling east on two lane through NY and VT Sunday the 27th I thought I saw Boomer at a fuel stop, but my rearveiw mirror check was a maybee. We were on our way to find Campsite in NH and watch the eclipse, sorry for being so vague and in a hurry...........

I admit to getting my Northwoods fix reading your posts and admire how little you fear the branches, go Boomer. Your attention to detail is inspiring, overbuilding with marine goodies is something I picked up from a Mainer myself..............
 

spencyg

This Space For Rent
That was likely us if you were on I-89 around 10am. Headed back home from VOR with a kid puking in the back. Fun times.

SG
 

Forum statistics

Threads
188,069
Messages
2,901,844
Members
229,418
Latest member
Sveda
Top