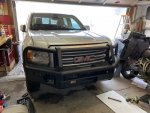
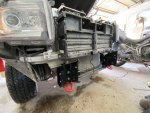
We are putting a bunch more work into Pac over the next few weeks so I’ll post updates as I’m able. We have been meaning to make Pac a more dedicated overland vehicle for some time, and decided to bite the bullet this spring to get it ready.
We are going to replace the cap, get our dual battery/12v and our water system installed, as well as set up our fridge. This will be a bit more robust than what we had in our Jeep — we want this to be set up for comfortable long-range touring, so that means living out of it as if it were home.
I started with building out the back cabinet and fridge slides.
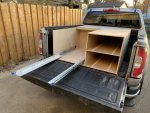
FRIDGE SLIDE (nearly done)
This was pretty simple - I used some HD lockout drawer slides and some aluminum angle iron. It’s 2 inches by 4 inches, so there’s a longer edge. These runners will bolt through the truck bed and also act as an anchor for the entire drawer unit. I wanted a bit of extra height so I could use decent bolts and washers for that part, so I flipped around the angle to (short edge to large edge). I also figure this will give more support to the fridge when it is done.
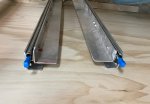
Eventually, these will be tied together at both ends to form a stable rectangle but iI am waiting on material. I wanted to build these first as I wanted to build the rest of the cabinet around where my fridge was located, so with these put together I could account for everything (bolt heads adding width, function of the slides with tailgate, etc.).
DRAWER UNIT
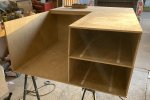
The drawer unit is really the major part of the build for the back. It will house our second battery and a few other things. We wanted a design that would make the space in our truck usable and accessible. We decided to do utilities on one side, drawers on the other.
The entire thing is made of plywood. I used a KREG jig and screws —that is a handy tool if you are going to do something like this. It is both strong and fast to assemble. At least, that’s what the internet told me and my experience today has born that out. I have no idea, I’ve never done this before (I did build a box in my old Jeep that probably would have gotten a failing grade in a high school wood shop class so my carpentry skills are pretty limited.)
Because I’m not big into carpentry, I don’t have a ton of good woodworking tools. I bought the jig mentioned above just for this project (about $130 for the jig and screws), but beyond that I only have a Ryobi 18v circular saw and drill, so It doesn’t require much to bring this together. I found a long 2x4 aluminum stock made an excellent fence for making straight cuts, and a small foam brush was handy for spreading the glue on the boards before squeezing them together. A couple of clamps and a sander round out the tools so far.
I awoke bright and early this morning with 4 sheets of 1/2 inch plywood, and and got to work. I picked 1/2 inch because that seemed to be the most common thickness of wood that others have used for this application, and it was easy on the wallet ($230 for all of it).
For the drawer slides, I’m using 3/4 inch strips of UHMW plastic from Lee Valley. Not cheap ($75) but I wanted something that was very light weight and simple.
I didn’t take many pics of the process, but it’s basically measure, measure, measure, measure, measure, then cut, drill the pocket holes, glue and screw everything together. I watched a lot of YouTube videos in preparation and that’s a far better source than this post for a more detailed “how to”
I’ll hopefully get to building out the drawers later in the week and will update as I go.

