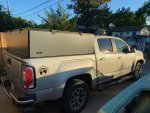
Build Thread: Pachyderm, or "Pac", a 2017 GMC Canyon

ChasingOurTrunks

Well-known member
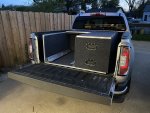
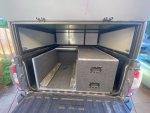
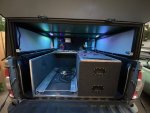
Finished the drawer unit today. The entire thing is coated in outdoor carpet that is glued with spray adhesive and tacked with staples. Trim is aluminum angle iron and c-channel. I’m pretty happy how this turned out — it’s not perfect owing to my lack of carpentry skills but it will do the job nicely.

09E9A4E9-D5D5-4326-9480-7B46E9604FBD.jpeg

E8F8513C-BAB4-437E-8351-3CB74381CBA1.jpeg
The tailgate even closes properly which is a nice thing to be sure about at this stage of the project! I wanted my tailgate to be the “lock” for the drawers which meant it had to fit pretty tightly with narrow tolerances and not a lot of room for error, but I’m happy to say it works great — the drawers are snug up against the inside of the tailgate.
 

ChasingOurTrunks

Well-known member
Finally got my material for my cap, and began construction last weekend. Ended up not feeling the best so didn't get much done, but here's the update all the same. I'll put it in sections so people can skip to the part they are most interested in. This is a partial update - this stage of the project isn't done - and I considered saving this post for when it was finished but I like to show the mistakes along the way to benefit others so if I capture it while it's fresh I have a better chance of doing that.

You write too much, what's the short summary?

I'm about half-way done building a custom truck cap out of 1.5" aluminum extrusions. Skip down to the photos to see it coming together.

Background

It’s a bit of a long story, but I originally built my truck cap by welding aluminum tube, with the goal of eventually boxing it in/waterproofing it. However, as I got back into welding for the first time since starting the original rack a few years back, I was having all kinds of problems. I spent hours trying to figure out why my welder wasn’t working right, before finally ruling out everything except bad shielding gas. And thanks to some…lacking customer service from my welding gas supplier, I was in a bit of a pickle. Time is my most valuable commodity, and so I did a bit of a “reset” on my plan to still do this project affordably, but do so with a bit less of a time commitment than welding from scratch.


The Solution

After a lot of back and forth, I considered my three options.

1) Spend around ~$1100 and finish the rack as I intended, with a risk of needing to invest in a whole new welder if I am wrong about the gas and unable to get mine working ($$$$); that risks doubling or tripling the price of this project. If everything went well, this was by far the most affordable option, but it was also the option with the most cost-volatility with the unknowns on the welder. Plus, this approach would be the most significant investment of my time; getting good fit up and running beads takes a lot of hours. The end result would give me something that was plenty strong but only about 5/10 of what I really wanted because of my limited skills. I’d want to be consistently “stacking dimes” a lot more before committing to this approach.

2) Look to commercial options. I looked at several fibreglass canopies, but they did not have the robustness I wanted and were quite expensive for what they were. I looked to metal ones, but they were very expensive and not the most available items here in Canada. The RSI Smartcap caught my eye as I think that's the best Overland-ready cap on the market, but at nearly $5k that was a bit expensive. However, based on the "time saved" argument alone, I seriously considered the RSI because it had next-day delivery and could be assembled in a few hours. Part of me still wishes I went this route, but the $5k price tag meant missing out on a lot of summer adventures. Similar offerings from Alucab and others were priced similarly.

3) Look to a different material to build the cap. The solution I decided on was in the form of aluminum extrusion. It was the perfect mix of cost, versatility, strength, and speed of construction. I spent a lot of time designing & measuring on my iPad and learning about extrusion construction before pulling the trigger, but eventually I placed my order with a company called Faztek. This is the exact same product as 80/20 extrusions, which is the more popular extrusion company in the USA. As you can see below, I opted for the black anodized material; my thinking at the time was that by ordering black material I would save time and energy on painting and get a more "finished" look.

I will say that Extrusion is an absolute joy to work with, but it requires a different approach to fabrication than I've used in the past. Normally, I have a rough design in mind with a few very rough sketches, but I kind of build it organically -- measure, cut a piece, make sure it fits, repeat until done -- it's very much an iterative "build as you go" approach. Extrusion doesn't lend itself to that. You really do want to have your project fully designed on paper before diving in, down to every single fastener OR have a lot of extra fasteners and extrusions ($$) if you want to build as you go. It's easy to get into the zone of "build as you go", but then you find you've blocked off an extrusion channel that you need a T-slot nut in. Only happened a few times to me :) There are specialized nuts to do this but they just cost more and when I made my initial order, I was so confident that I could take my time and avoid these errors so I didn't buy any. I was wrong about that! I also estimated my fastener counts instead of figuring it out precisely, and so I was short on some other fasteners too.

The biggest barrier to working with extrusion is the shipping costs -- it's not the kind of thing you can run to the local Home Depot if you forgot a nut or a length of extrusion, so getting everything you need all at once will save you money and time. My $100 in extra fasteners has cost me an additional $100 in shipping (so double the price); that would have been easy to include in my initial order and come under the same shipping costs had I done this a bit differently.
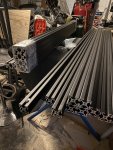

tempImagetyPl2y.jpg

Assembly

When researching this build, I didn't find many people who have made truck caps out of 80/20 or similar extrusions. I did see Ripcord's excellent wedge-camper build that utilized extrusion for the camper, but not for the frame. So, I recognize I was doing things a bit differently on Pac yet again. From what I could glean from our comrades in the Vanlife movement, the downsides of extrusion are primarily making sure you pick a profile that is strong enough for the application, that the cuts are precise, and that there is something that prevents vibration from rattling the fasteners loose.

I'm certain my design is strong enough; I used some engineering calculators to ensure the load-bearing material could support a 1000 lbs point load with less than 1/16th inch of deflection. For extra strength, every piece of extrusion is supported by another piece of extrusion beneath it - in other words, instead of being supported only by a fastener, any load-bearing surface is supported by another solid surface (i.e. a vertical extrusion support) so the weight goes into the truck tub. The fasteners are all 5/16 bolts which have a shear strength north of 2000 lbs, but this gives an extra bit of support. Each fastener is secured with red thread locker, and each fastener and tapped hole is thoroughly cleaned with brake cleaner to make sure the thread locker works. I'm using the JB weld brand of red thread locker, and I'm confident these fasteners will not be coming out -- I realized I made an error (missed a T-nut) about an hour after one assembly and tried to take it apart to put the nut in, and the end result was a broken hex key. The Red JB Weld holds very strongly.

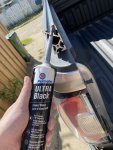
Here's some photos of the canopy coming together:
tempImagelUeI2o.jpg

Every joint is sealed with gasket maker to enhance waterproofness (more on this another day as I have a whole solution for this problem of water/dustproofing).
tempImageYaMrge.jpg

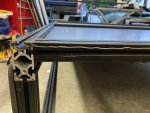
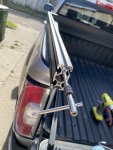
I had to manually tap the extrusion ends. This was a fair bit of work. If you dial in your design and know the exact lengths of the spans you need, you can get Faztek to tap these ends for you for $1.00 each. That's well worth it if you can swing it, because the majority of my time was spent tapping these holes; I decided against having Faztek do the machining because I wanted to trim the spans to a precise length myself (more of that "build as you go" approach, which as I've said, doesn't work well with this material). It's not hard to tap these ends - just takes time! I've also ordered a tool called a "Drill Tap" which is supposed to make this go quicker, but it arrives Saturday so I'll report back then if it's any good.
tempImageKRqGRJ.jpg
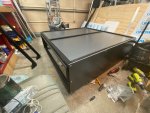
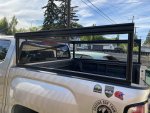
Testing to see if it fits.

tempImagecWxgkk.jpg

This went together fast - from a bundle of extrusion to the assembled frame in the above photo was only about a solid day of work in the garage, and I was going slowly as I've never worked with this material before. I made a few mistakes -- in one case I cut a piece too short, and as I mentioned there are a few extrusion channels that I need to wait for my "drop in" t-nuts to arrive because I blocked them off before installing all the nuts, but overall it was very easy. If I were to build another one, I think I can go from parts to full canopy in a day or less. Now, however, I'm just waiting on parts to arrive in the mail. My roof panels arrive next week, and once Faztek gets me my new order of T-nuts I should be able to finish this up. Stay tuned in about two more weeks for another update.
 
Last edited:

ChasingOurTrunks

Well-known member
Set up the cabling for the electrical today.

I am using 2 AWG welding cable (I think I mentioned that) and waterproof pass through grommets I got off Amazon. I also ran two powered circuits from the box to the front; my hope is that I can run all my cab accessories off the house system rather than the vehicles battery. This way, the stock system stays the way Mr. General Motors intended, and I never risk accidentally leaving my HAM on and draining the battery and stranding myself.

This was a much bigger job than I anticipated because to access the truck’s tub bulkhead I had to actually remove the tub from the frame and shift it back. 6 bolts underneath was enough to shift it.

95AEED4C-0F33-470F-B1E4-C2373D7AAF1E.jpeg
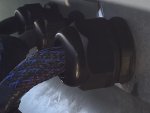
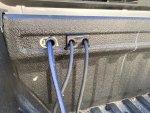
These are the waterproof grommets. One each for positive and negative from the car battery, and one for the two circuits that I want in the cab.

9C0CC62F-32AA-4B3E-BCF4-D581F975839D.jpeg
The left-most hole was already in the tub - for whatever reason when they put bed liner on it they didn’t take out the plastic insert. I drilled it out and used a piece of alloy for a backer plate with some RTV to seal it (that’s why it looks silver). This will be covered by the cabinets but I’ll hit it with some spray on bed liner to protect it anyway.

F12DD1EE-DEC2-4BD3-B699-473C784C1BC8.jpeg
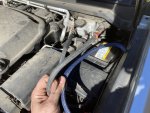
Success! Power is now from under the hood to the box. I have a 60 amp breaker for the positive terminal, so the positive wire will hook to the breaker and the negative right to the battery post. This entire loom is double-wrapped. First the wires are wrapped in that blue poly sheathing. Then, both the power and the circuits, wrapped in blue sheathing, are stuffed into a black split loom. This is tucked underneath the truck running alongside the frame rail as close to the factory loom as I could get it. When it gets to the front of the drivers door, it snakes up inside the wheel well behind the inner fender cover. It’s well secured against abrasion, sticks, or anything else that might cause headaches down the road.

Next is hopefully the doors but I’m waiting on parts so a lot depends on those arriving.
 

ChasingOurTrunks

Well-known member
Any progress on the cap? I'm impressed with what you've done so far.

Indeed there has been! And thank you for the kind words. This project has been more about making it happen and less about documenting as my time is limited, but here's an update on what has happened so far.

Now that the drawers were done and the electrical was run, it was time to finish up the shell of the cap so that I could get started on the electrical.

I sealed all the panels; here is the bead for the front bulkhead:

IMG_0357.jpeg

The roof panels slide into the T-slot; I have gasket material to stop them from rattling and will install that tonight or tomorrow. On the top, more sealant in the cracks to ensure no water can get in.
IMG_0358.jpeg


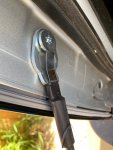
To attach the drawer unit, I used eye bolts with S-hooks and turnbuckles. This then attaches to the factory tie-down. In the below photo, the nut on the right of the pic is part of the cap mounting system. I used a similar system to the Back Racks, which use a bit of angle iron and some threaded rod; the angle iron bolts to the existing eye in the tub, and the threaded rod then comes up out of the bed cap and through a piece of angle iron that runs the length of the bed rail. That is affixed in 4 more places using fender washers, and the cap T-track bolts into it.

IMG_0380.jpeg

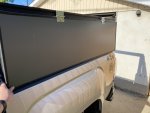
The below photo shows one of the doors. I may modify these doors in the future and have them cover the entire side of the cap; this was the easier way to attach it as the T-track was handy, but I think having doors cover the entire side would look aesthetically a bit better. Also, during this test fit I realized I didn't love the look of the silver hinges so I decided to paint them.

Originally, I used edge trim weather stripping but it proved to be a bit too bulky. Instead I decided to go with double bulb seal stuck to the extrusion itself.

tempImagedARaIk.jpg

Example of the double bulb seal; you can also see the backs of the latches on the side doors. I used the Southco Washdown Latches from McMaster Carr -- a bit of a beast to acquire here in Canada but they are really good quality.
IMG_0382.jpeg

And here it is in it's "Dried in" state. Still a lot more work to do though!

IMG_0381.jpeg
 

ChasingOurTrunks

Well-known member
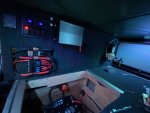
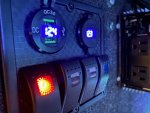
I also had to make up a new electrical panel, but I was able to finish up the wiring so I now have lights, water, a 600w inverter, and my fridge on a switch with one switch to spare.

The fuse panel needs a cover which I have; I just didn't put it on yet. I decided to rebuild my board as my DC to DC charger didn't need to be there, and this allows better access to the switches. The DC to DC was moved down to share the same box as the battery. There's also a master shut-off in the battery box (the red knob) which kills power to the entire house just in case I'm needing to work on accessories.

IMG_0412.jpeg

The LEDs are stick-ons from Amazon and they can change colour from white to orange or red, so depending on the time of day and bug situation, I can still have light without attracting too many critters.
IMG_0410.jpeg

Image 3.gif

Close up of my switch panel. I have no idea why one Voltmeter was reading 12.3 and one was reading 12.4! The switches are red except the far right hand one; that one is blue and activates the water pump.

IMG_0415.jpeg


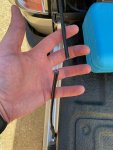
I also had to fix the tailgate. On Colorados/Canyons, the tailgate doesn't open to 90 degrees; it only opens to about 80 degrees fully. That means that I'd need to build my drawer unit higher to pass over it, which I didn't want to do as that wasn't maximizing space. Instead, I decided to modify the tailgate. I initially assumed that my tailgate straps were faulty because honestly it seems like one was just an inch or so short, but when I checked, it would appear that this angled tailgate is by design. So I went shopping. I checked my full size truck to see if they would work, but the full size GMs have shorter tailgate cables than the mid-sizers. The closest replacements I could find are from a mid-1990s Dodge, but the bolts were identical and it threaded in no problem.
I celebrated my success, then realized that the Dodge cables were actually a bit too long. Rather than keep trying to find the appropriate length, I decided to bite the bullet and just modify the dodge ones. I cut them and then crimped them back together, and the tailgate now works at 90 degrees.

IMG_0390.jpeg

The bolts on the GM had different head sizes so the Dodge straps slipped off, but the dodge bolts were the same thread so it was easy to swap them.
IMG_0391.jpeg

The aluminum crimp is then covered with some heat shrink tubing. The heat shrink that fits over the crimp is too big to shrink enough to the wire, so the electrical tape is temporary. Once the summer is over, I'll be taking the crimps off and re-doing them with better shrink wrap.

64619917820__338359A4-112C-495A-9AA4-F4A933A6A401 (1).jpeg

The result:

Image 2.GIF


There were a lot of little jobs that got done over the weekend, including getting the dust prevention system installed and set up and sealing the tub, but I'll do another post just on that once I get some better photos.
 
Last edited:

ChasingOurTrunks

Well-known member
Water & Dust Proofing the Tub

This was my biggest concern with the move from a wagon to a truck. I don't like dust and dirt getting on my gear -- it's a massive pain because once dust gets on stuff, you grab that stuff, and then everything just has a bit of grime and dirt on it and instead of things "being clean" I find it's a constant effort of "chasing clean". I'm no germaphobe either -- but when spending weeks or months at a time travelling, I'd rather not spend half my day wiping things down.

The wisdom of the internet is that it's nearly impossible to properly seal a tub. They just aren't designed for it and the manufacturing process leaves holes all over the place that need to be sealed. Here is the approach that I took:

1) For the roof, I am using Faztek gaskets on the bottom to force the roof panels up against the upper lip of the extrusion slot. Before installing the gasket, my plan is to pump sealant into that upper crease so that when the panel is forced up, it makes a good seal against the extrusion.

2) As you'll see in my previous post, for the doors I used double bulb weather stripping with superglued corners.

3) For the truck bed itself, there were a few steps I took:

  • Seal any holes in the floor with silicone.
  • Pop off the plastic bed rail caps and give a generous coating of Fluid Film underneath. This protects the metal and provides a bit of a seal, as the plastic is clamped down tight onto the edge due to the cap and thus shouldn't leak. I may need to revisit this.
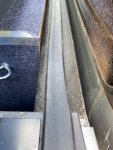
  • I used a bulb seal on the front bulkhead:
  • IMG_0378.jpeg
  • I then used Butyl Tape (came with one of the seals I got) and stuffed it into any big cracks. You can see it in the top right of this photo:
  • IMG_0380.jpeg
  • I then put a generous coat of Gorilla Spray Sealant anywhere that I was worried about; it blends in fairly well with the existing truck bed liner
    IMG_0379.jpeg


With all of that, I'm confident I did as good as anyone on sealing the tub; there may be a need for a bit more but time will tell. But again -- no matter how good a job I do, I'll never be totally water and Dustproof. Why is that?

After much reading and research, the problem appears to be caused by the Venturi effect of driving through the world. The air whipping past the cap on the road causes a pressure differential inside versus outside, and that causes dirt and dust to actually be sucked up into all these nooks and crannies. The solution is to worry less about sealing things, and worry more about addressing this pressure variance. If you can create a situation where the pressure inside the cap is greater than outside, the air will be escaping through the holes instead of being sucked in (along with the dust).

There are a few ways to create such a system. I've heard of some people fitting compressors to keep a positive variance inside a canopy, but these work best on fully sealed units -- i.e. welded Deck and Canopy systems - and since mine isn't that, a compressor solution would be a lot of duty cycles in my case and might not even work; I'd have to figure out CFM necessary to create the variance, power it, etc. and that just seemed not worth the effort. The Aussies often fit passive vents to their canopies, but these parts were expensive and bulky; I couldn't figure a good place to mount one on my canopy that would work. So, I improvised.

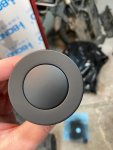
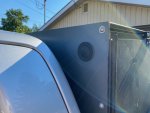
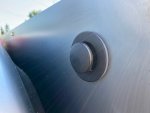
I settled on this device right here -- it's a tub drain, one of the "push to open" style. It's perfect for this - it's already waterproof, after all! When driving in dusty climates, this can be popped open to create positive pressure in the cap. We can also close it if conditions require it.

IMG_0388.jpeg

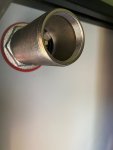
It's installed on the drivers side corner; this should get clean air being rammed right through it from the side of the truck. And, like having a snorkel, this should be high enough up for the air to be relatively dust free. In case it's not, though (as in, in case we get stuck behind someone else), I've also fitted a filter inside; this is just a lawn mower filter from Home Depot.

IMG_0417.jpeg

PPS Open (Positive Pressure System)

IMG_0418.jpeg


The back of the drain is standard plumbing sizes and is threaded inside and out; this should make it fairly easy to adapt virtually any sized filter to it should I need to. In fact, I'd be willing to bet that an oiled Unifilter stuffed in the drain would work perfectly fine.

IMG_0420.jpeg

But this was on sale at HD for just a couple of bucks so I couldn't really say no.
IMG_0419.jpeg


With all of that, I should have a relatively dry and dust-free tub. I'll post back and let you all know how it goes.
 

ChasingOurTrunks

Well-known member
It's been a fun July, and I can safely say that the truck worked out great. Myself, my wife, two German Shepherds, and our 15 month old child just spent the last month touring Canada and living out of this rig. There were definitely some things to improve but overall it worked out great.

In terms of what else I did, the above posts sum it up -- I was in a rush to finish it, though, so I did a bunch of smaller projects in early July and I didn't do a good job photographing as we wanted to hit the road.

First, I made a dog box. I did a rear seat delete of the larger portion of the split rear bench; this left a single seat remaining for the car seat and freed up 2/3rds of the area for my dogs. I used mostly scrap extrusion for this, and it was a simple matter of bolting together a frame and bolting a carpeted piece of wood down on top. A piano hinge allows me access to the storage underneath, and the dogs have plenty of room to lie down in multiple positions. The dog box structure is secured via the bolts that originally held the seat down, so in the event of an accident the box itself will stay put. There is an upright barrier between the dog box and the car seat, so the dogs can inadvertently jump on my child when en route.

Second, I mounted the tent. I made cross bars with some additional extrusions, and mounted both the tent and awning to those pieces.

Third, I added some door supports. I was going to use gas struts, but instead opted for "old fashioned" steel rods.

Fourth, I added a few safety features -- a rear view mirror camera that doubles as a dash cam. This was the best thing I did, because a few hours outside Thunder Bay, Ontario, I was between two transport trucks and all of us had to stop suddenly. The truck in front of me had black smoke and squealing tires; I had to stomp on my brakes too, and my years on my motorbike has given me a habit of always looking in my mirrors to see what's coming whenever I stop. Sure enough, another transport truck was bearing down on us, also with smoke pouring out of his locked up wheels. I had enough time to gun my truck's motor and pull alongside the truck in front of us. The second truck came to a complete stop about 4 feet off the bumper of the bigger truck -- we'd be sandwiched between them if not for this video rear camera.


Screen Shot 2021-08-03 at 11.35.16 AM.png


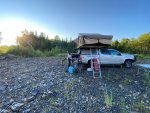
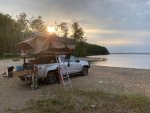
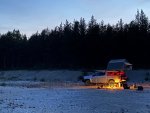
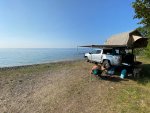
Okay -- enough of the technical stuff. I may edit this into a video, but the summary of the trip is that we spent 30 days travelling and clocked just over 9,000 kms. We travelled from Edmonton to Toronto and back, with a lot of stops in between. The truck performed flawlessly, more or less. Here's some "in action" photos of the rig:

IMG_0829.jpeg

IMG_0586.jpeg

64773255422__1C49444B-895D-4CC2-BC3A-22FB77329CF1.jpeg

IMG_0482.jpeg
 

ChasingOurTrunks

Well-known member
Sounds like a good long trip!

Where did you find the rear view mirror / dash cam?

I picked it up off Amazon on a Prime Day sale; it was something like $80. I had to spend another $20 on an extended camera cable, but it's worked flawlessly. The screen COULD be a little brighter, but overall I'm very happy with the unit for the price.

The one I have doesn't appear to be available anymore but it was the same as this ().
 

Forum statistics

Threads
188,019
Messages
2,901,233
Members
229,411
Latest member
IvaBru
Top