DCH109
Adventurer
While I thought you were a madman, now I am wondering.
After looking at small systems out there most are $$$, mounted to the roof (not ideal for clearance) or not great quality.
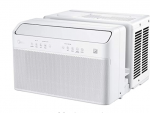
I happen to have a spare unit I bought and never used, I may have to copy you here as this would be perfect for my Camper build.
After looking at small systems out there most are $$$, mounted to the roof (not ideal for clearance) or not great quality.
I happen to have a spare unit I bought and never used, I may have to copy you here as this would be perfect for my Camper build.


 IMG_20200723_090701762
 IMG_20200723_101830785
 IMG_20200723_120255896
 IMG_20200723_130409828
 IMG_20200723_171018743_HDR


 IMG_20200728_092840720
 IMG_20200728_095406245
 IMG_20200728_121941134_HDR
 IMG_20200729_093904418_HDR
 IMG_20200728_124351312_HDR
 IMG_20200730_091044195
 IMG_20200730_093430890
 IMG_20200730_110459998
 IMG_20200730_104311004_HDR
 IMG_20200730_142026488
 IMG_20200730_142013766