building a new rack (again - 3rd time!)

bluejeep

just a guy
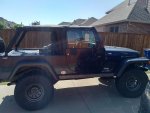
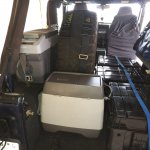
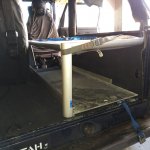
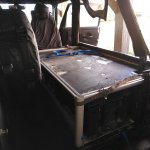
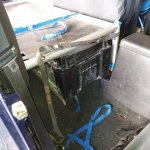
I am on the 3rd (or maybe 5th!) iteration of storage schemes, partly because of changing needs and/or vehicle, and partly because along the way I've learned more about what works for me, and what doesn't.

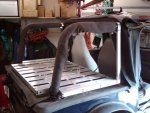
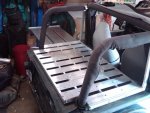
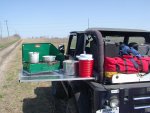
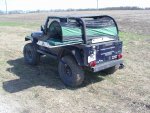
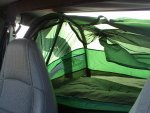
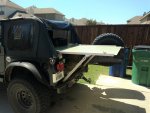
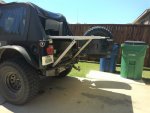
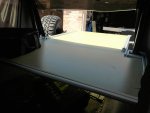
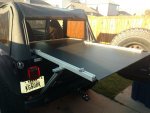
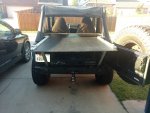
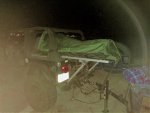
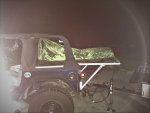
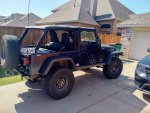
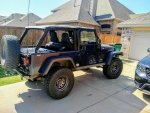
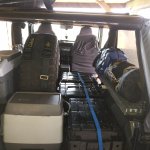
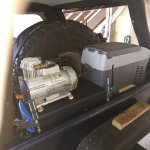
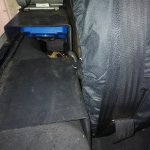
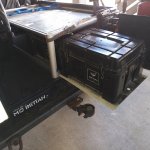
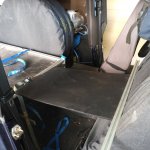
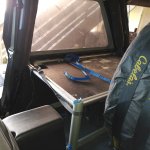
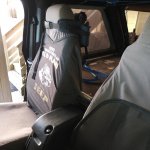
With my first rack (on a TJ), I desperately wanted to have a better scheme to carry 'stuff', rather than merely stacking it in the back after removing the rear seat. I also wanted to have a way to not sleep on the ground in a tent. So I built a rack, using aluminum, that had a pullout platform to one side upon which I placed my small bivy tent. It worked well enuf, but it rattled, didn't slide as easy as I would like, and if I was running with my full soft top, it required that I remove / replace the driver side window for each use. I thought I could do better.


to be continued.....
 

Attachments

  • IMG00008-20100305-0937.jpg
    IMG00008-20100305-0937.jpg
    48.3 KB · Views: 58
  • IMG00011-20100305-0938.jpg
    IMG00011-20100305-0938.jpg
    46.7 KB · Views: 58
  • IMG00051-20100329-1003.jpg
    IMG00051-20100329-1003.jpg
    63.3 KB · Views: 54
  • IMGP2542.JPG
    IMGP2542.JPG
    2.3 MB · Views: 57
  • IMGP2543.JPG
    IMGP2543.JPG
    2 MB · Views: 58
  • IMGP2555.JPG
    IMGP2555.JPG
    2.7 MB · Views: 55
  • IMGP2568.JPG
    IMGP2568.JPG
    526.1 KB · Views: 51
Last edited:

bluejeep

just a guy
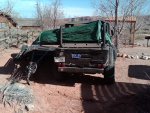
So on to the 2nd iteration. This time I devised a method to extend the rack to the back, for sleeping purposes. It too worked fairly well. However, during the 1st outing, I discovered I had become claustrophobic and could not sleep in the bivy tent any more!!! It was built using 8020 extruded aluminum and fiberglass reinforced panels.

Iteration 2A is also pictured here, where I added a raised hitch rack above the spare tire, by adding a 2" receiver to the RockHard rear roll bar.

again, to be continued.....
 

Attachments

  • IMG_20170406_140641406.jpg
    IMG_20170406_140641406.jpg
    1.5 MB · Views: 46
  • IMG_20170406_140646731.jpg
    IMG_20170406_140646731.jpg
    1.4 MB · Views: 45
  • IMG_20170406_140735029.jpg
    IMG_20170406_140735029.jpg
    1,006.9 KB · Views: 45
  • IMG_20170407_081451900.jpg
    IMG_20170407_081451900.jpg
    1,008.5 KB · Views: 46
  • IMG_20170407_081509398.jpg
    IMG_20170407_081509398.jpg
    1.1 MB · Views: 46
  • IMG_20170418_094241.jpg
    IMG_20170418_094241.jpg
    1.6 MB · Views: 47
  • IMG_20170519_170118.jpg
    IMG_20170519_170118.jpg
    1.2 MB · Views: 47
  • IMG_20161008_211532000.jpg
    IMG_20161008_211532000.jpg
    1.7 MB · Views: 46
  • Like
Reactions: WVI

bluejeep

just a guy
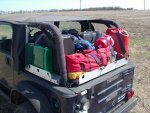
iteration 3 made use of the inside portion of iteration 2, but removed the raised hitch rack and the extended sleeping surface. In addition, using material I already had, I made the interior portion longer from front to back because I had sold the TJ and purchased an LJ! The pics don't show the lengthened inside portion, but it went nearly up to the front seat backs, with the rear seat removed.

This was the nicest so far, except it was painful to use, it was a reach to get anything below the rack except whatever was right next to the tailgate or right at the front.

to be continued.....
 

Attachments

  • IMG_20180517_1629249(1).jpg
    IMG_20180517_1629249(1).jpg
    1.7 MB · Views: 27
  • IMG_20180517_1629249.jpg
    IMG_20180517_1629249.jpg
    2.3 MB · Views: 28
  • IMG_20180517_1629325.jpg
    IMG_20180517_1629325.jpg
    648.9 KB · Views: 26

bluejeep

just a guy
Then I pulled all the rack material out, placed the spare tire inside, and changed over to Wolf boxes. By lining up 3 wolf boxes behind the folded forward passenger seat, and placing a few bags on the floor behind that seat so the surface was the same height as the wolf boxes, I could place an air mattress on top of the wolf boxes and stretch out for a nap at any wayside rest stop. I used to drive straight thru to my destination (black hills, moab, rubicon, etc) but sadly I aged and could no longer do that. So I would pull over into a wayside, nap for whatever time I needed, and continue. This method of storage supported a stealth mode for napping. And I had picked up a Tentrax trailer for the campsite.

So far, I had liked this the best. The wolf boxes are super. I even placed a few pieces of bent 1/4" plastic against the inner wheel wells to make the top of the wheel well flat, allowing better use of that space. But I felt something was missing, a true 2nd level, not just stacking on top of the Wolf boxes. If I wanted something in a wolf box, I had to unload anything that was on top of it, and I had no easy way to reach into the forward 2 wolf boxes.


so now we are up to today.. (see next post)
 

Attachments

  • IMG_20190301_1524149.jpg
    IMG_20190301_1524149.jpg
    1.2 MB · Views: 37
  • IMG_20190301_1526146.jpg
    IMG_20190301_1526146.jpg
    1.6 MB · Views: 40
  • IMG_20190715_1816138.jpg
    IMG_20190715_1816138.jpg
    1.8 MB · Views: 35
  • IMG_20190715_1816303.jpg
    IMG_20190715_1816303.jpg
    2.2 MB · Views: 35
  • IMG_20190301_1524222.jpg
    IMG_20190301_1524222.jpg
    1.1 MB · Views: 35

bluejeep

just a guy
This is my latest storage scheme, and is a work in progress. The straps you see in the pics are holding things together until a few special fasteners arrive from 8020.net.

I really like the wolf boxes, so they remain a part of this scheme, as does the inside storage of the spare tire. But I found that the inside rack used in my previous versions of racks, when turned 90 degrees, fit perfectly to form a 2nd level along the passenger side! What luck! So now I have 2 wolf boxes stowed on the lower level, on top of a piece of FRP that slides to the rear so I can get to either wolf box. The frp is strong enuf to support the wolf box as long as I don't pull it all the way out before I lift it off, or remove the cover to get what I'm after. I also have a 2nd level to stow things, complete with tiedown points that can be relocated to anywhere needed, and the 2nd level can also serve as my place to stealth nap at wayside rests (still have the Tentrax trailer for the campground). In one pic you see a mock up of what will be my head rest, with the forward edge supported by the passenger seat back folded forward. Excited to try this out, and to stop making new storage schemes!!!!
 

Attachments

  • IMG_20190727_1812090.jpg
    IMG_20190727_1812090.jpg
    1.1 MB · Views: 43
  • IMG_20190727_1813213.jpg
    IMG_20190727_1813213.jpg
    1.6 MB · Views: 42
  • IMG_20190727_1813452.jpg
    IMG_20190727_1813452.jpg
    1 MB · Views: 43
  • IMG_20190727_1814525.jpg
    IMG_20190727_1814525.jpg
    2.2 MB · Views: 45
  • IMG_20190727_1815285.jpg
    IMG_20190727_1815285.jpg
    1.8 MB · Views: 45
  • IMG_20190727_1818437.jpg
    IMG_20190727_1818437.jpg
    1.6 MB · Views: 46
  • IMG_20190727_1818512.jpg
    IMG_20190727_1818512.jpg
    2.1 MB · Views: 42
  • IMG_20190727_1820417.jpg
    IMG_20190727_1820417.jpg
    1.6 MB · Views: 40
  • IMG_20190727_1821432.jpg
    IMG_20190727_1821432.jpg
    1.9 MB · Views: 34

krick3tt

Adventurer
Your fab skills are incredible and you are quite inventive. Also I really like the t-shirt you are using for a seat back. As another old guy I applaud you.
 

Forum statistics

Threads
188,176
Messages
2,903,316
Members
229,665
Latest member
SANelson
Top